Nissan Pathfinder (2012 year). Instruction — part 27
AV-34
< REMOVAL AND INSTALLATION >
[BASE AUDIO]
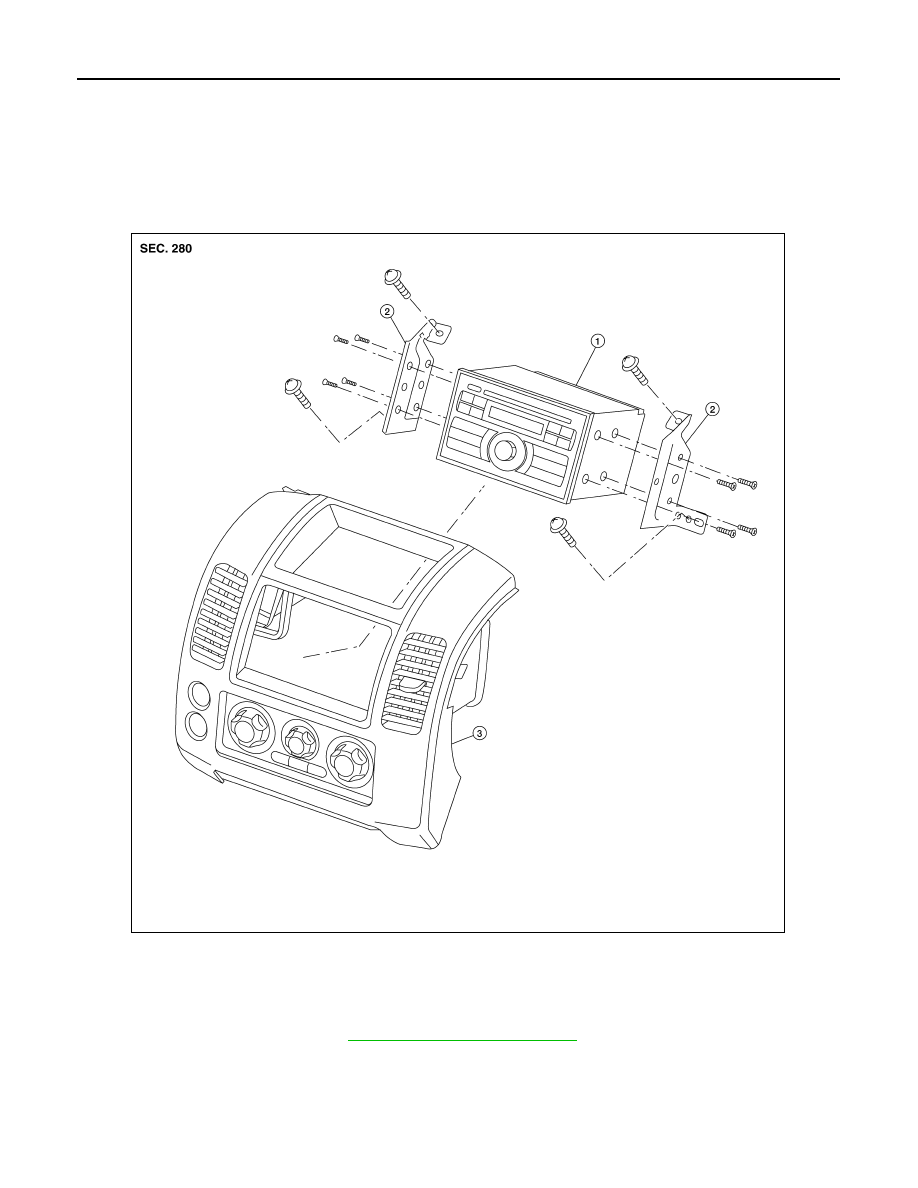
AUDIO UNIT
REMOVAL AND INSTALLATION
AUDIO UNIT
Removal and Installation
INFOID:0000000007347594
Removal and Installation
REMOVAL
1. Disconnect the battery negative terminal.
2. Remove the cluster lid C. Refer to
IP-16, "Removal and Installation"
.
3. Remove the audio unit screws, using power tool.
4. Remove the audio unit and disconnect audio unit connectors.
5. Remove the audio unit brackets screws and remove the audio unit brackets.
INSTALLATION
1.
Audio unit
2.
Audio unit brackets (LH) and (RH)
3.
Cluster lid C
ALNIA0341ZZ
August 2012
2012 Pathfinder
AV
AUDIO UNIT
AV-35
< REMOVAL AND INSTALLATION >
[BASE AUDIO]
C
D
E
F
G
H
I
J
K
L
M
B
A
O
P
Installation is in the reverse order of removal.
August 2012
2012 Pathfinder
AV-36
< REMOVAL AND INSTALLATION >
[BASE AUDIO]
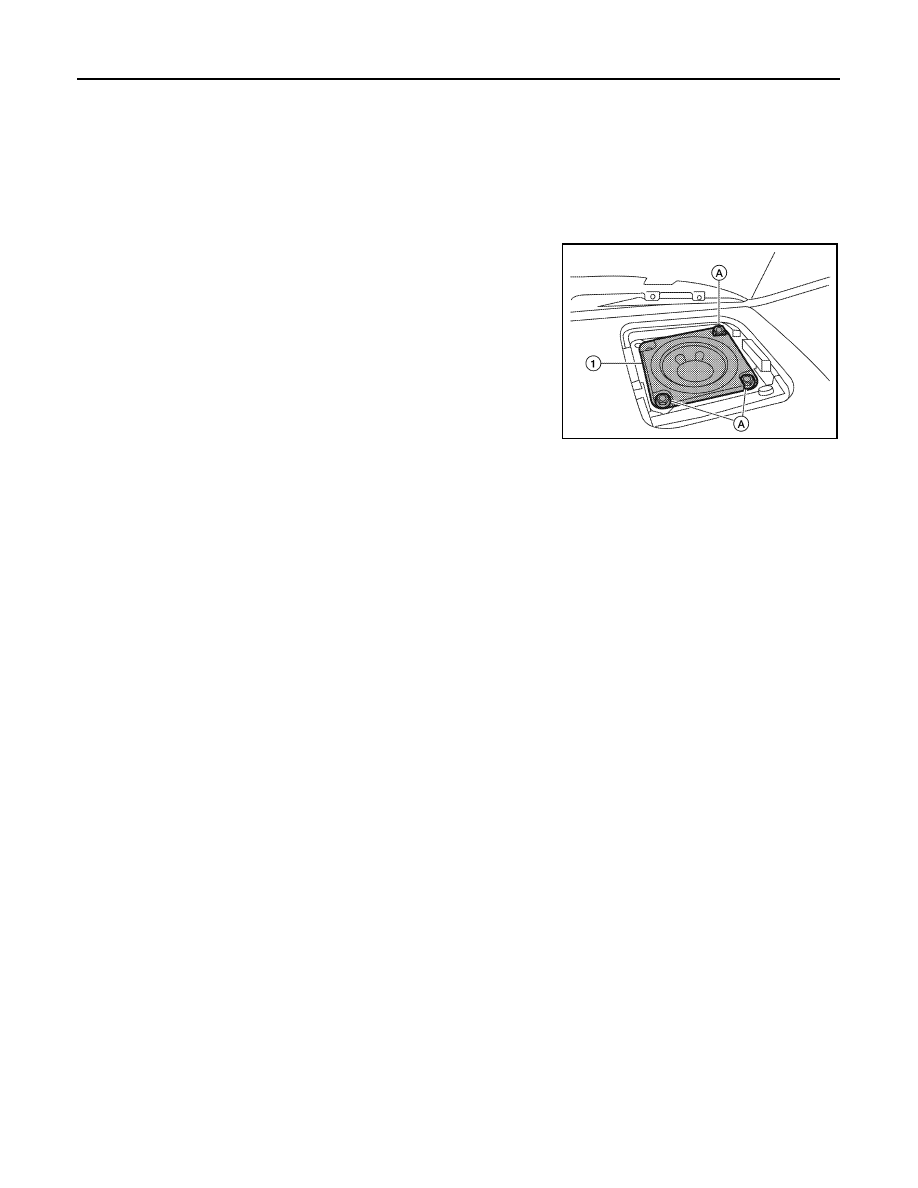
FRONT TWEETER
FRONT TWEETER
Removal and Installation
INFOID:0000000007347595
REMOVAL
CAUTION:
Use a suitable tool to prevent damage to the front tweeter speaker grille trim and the instrument panel.
1. Remove the front tweeter grille.
2. Remove the front tweeter screws (A).
3. Pull out the front tweeter speaker (1) and disconnect front
tweeter connector, then remove the front tweeter speaker (1).
INSTALLATION
Installation is in the reverse order of removal.
ALNIA0344ZZ
August 2012
2012 Pathfinder

AV
FRONT DOOR SPEAKER
AV-37
< REMOVAL AND INSTALLATION >
[BASE AUDIO]
C
D
E
F
G
H
I
J
K
L
M
B
A
O
P
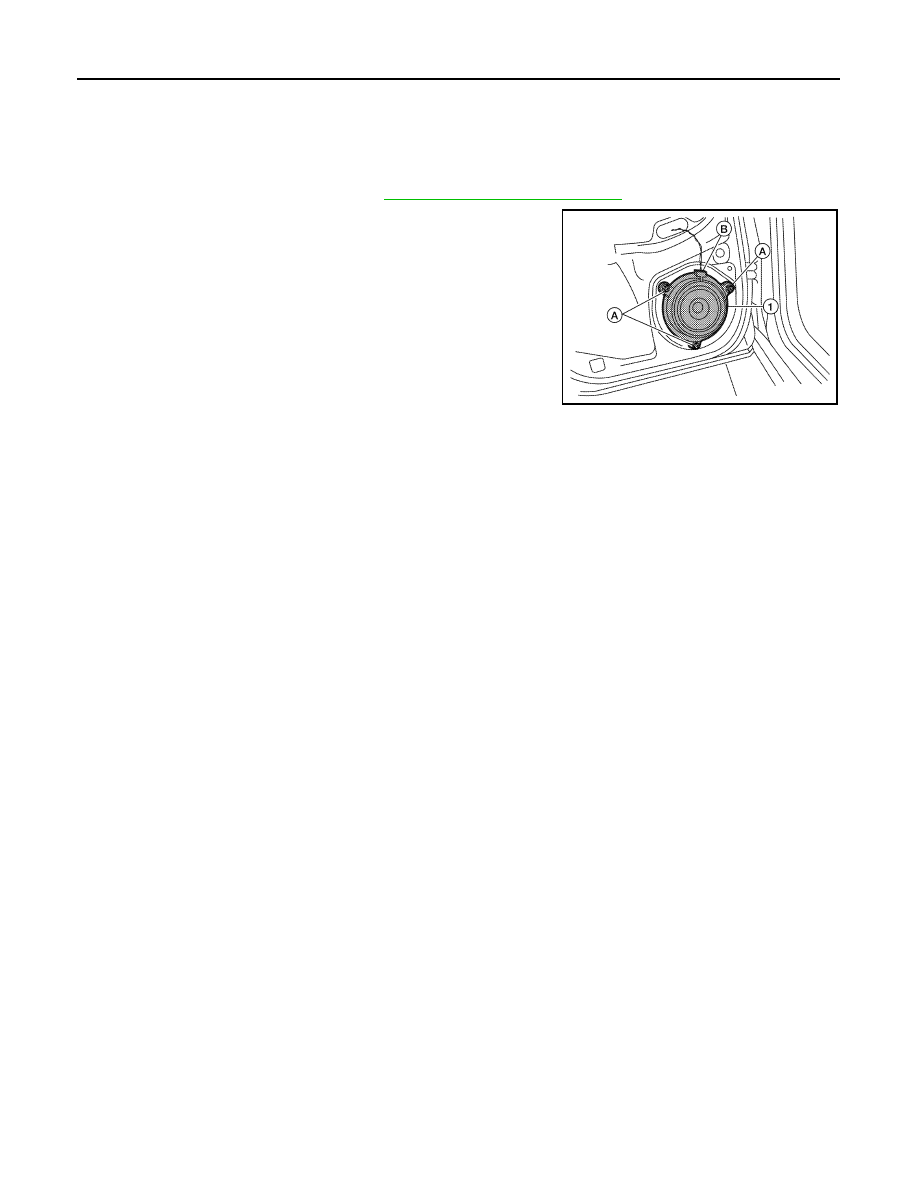
FRONT DOOR SPEAKER
Removal and Installation
INFOID:0000000007347596
REMOVAL
1. Remove the front door finisher. Refer to
INT-15, "Removal and Installation"
2. Remove the front door speaker screws (A).
3. Pull out the front door speaker (1), and disconnect the front door
speaker connector and remove the front door speaker (1).
INSTALLATION
Installation is in the reverse order of removal.
ALNIA0347ZZ
August 2012
2012 Pathfinder
AV-38
< REMOVAL AND INSTALLATION >
[BASE AUDIO]
REAR DOOR SPEAKER
REAR DOOR SPEAKER
Removal and Installation
INFOID:0000000007347597
REMOVAL
1. Remove the rear door finisher. Refer to
INT-15, "Removal and Installation"
.
2. Remove the rear door speaker screws (A).
3. Disconnect the rear door speaker connector (B) and remove
rear door speaker (1).
INSTALLATION
Installation is in the reverse order of removal.
ALNIA0348ZZ
August 2012
2012 Pathfinder
AV
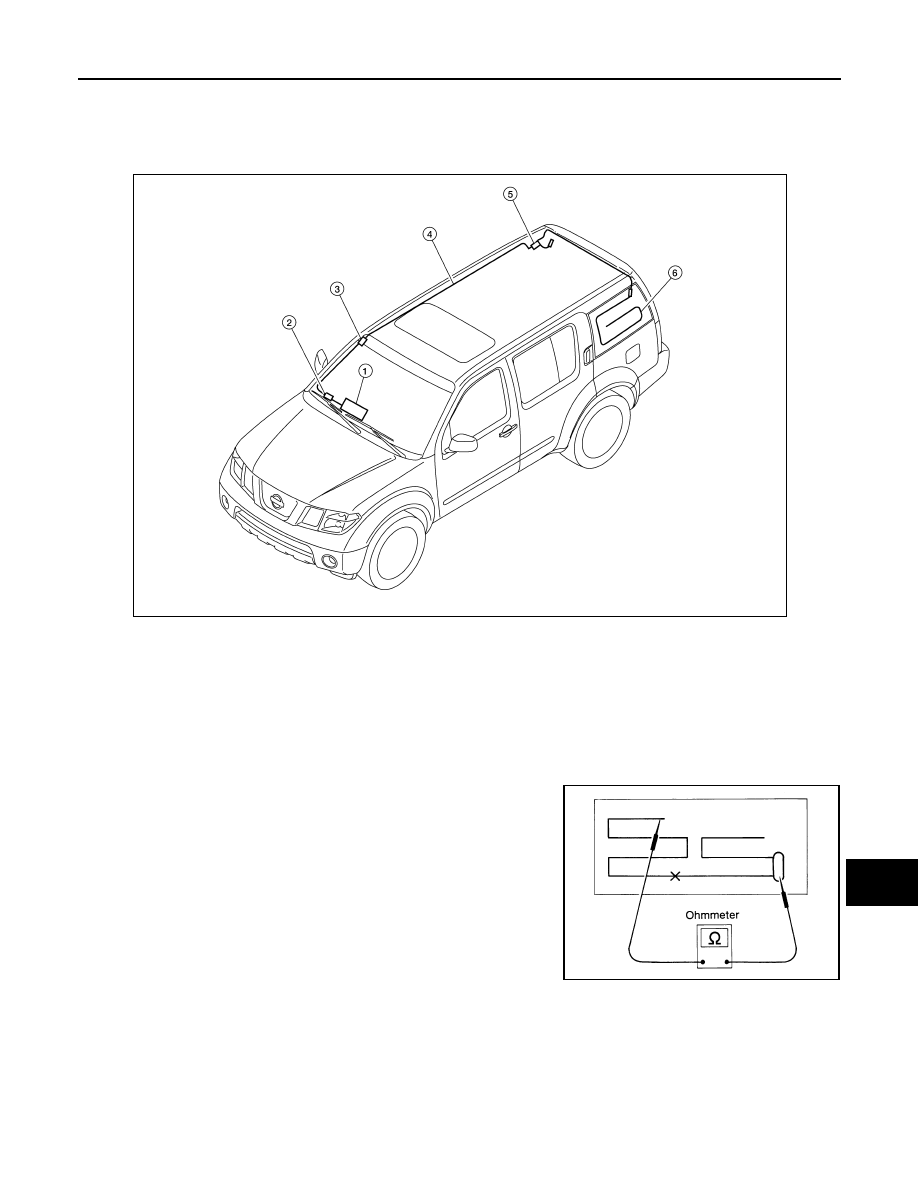
AUDIO ANTENNA
AV-39
< REMOVAL AND INSTALLATION >
[BASE AUDIO]
C
D
E
F
G
H
I
J
K
L
M
B
A
O
P
AUDIO ANTENNA
Location of Antenna
INFOID:0000000007347598
Window Antenna Repair
INFOID:0000000007347599
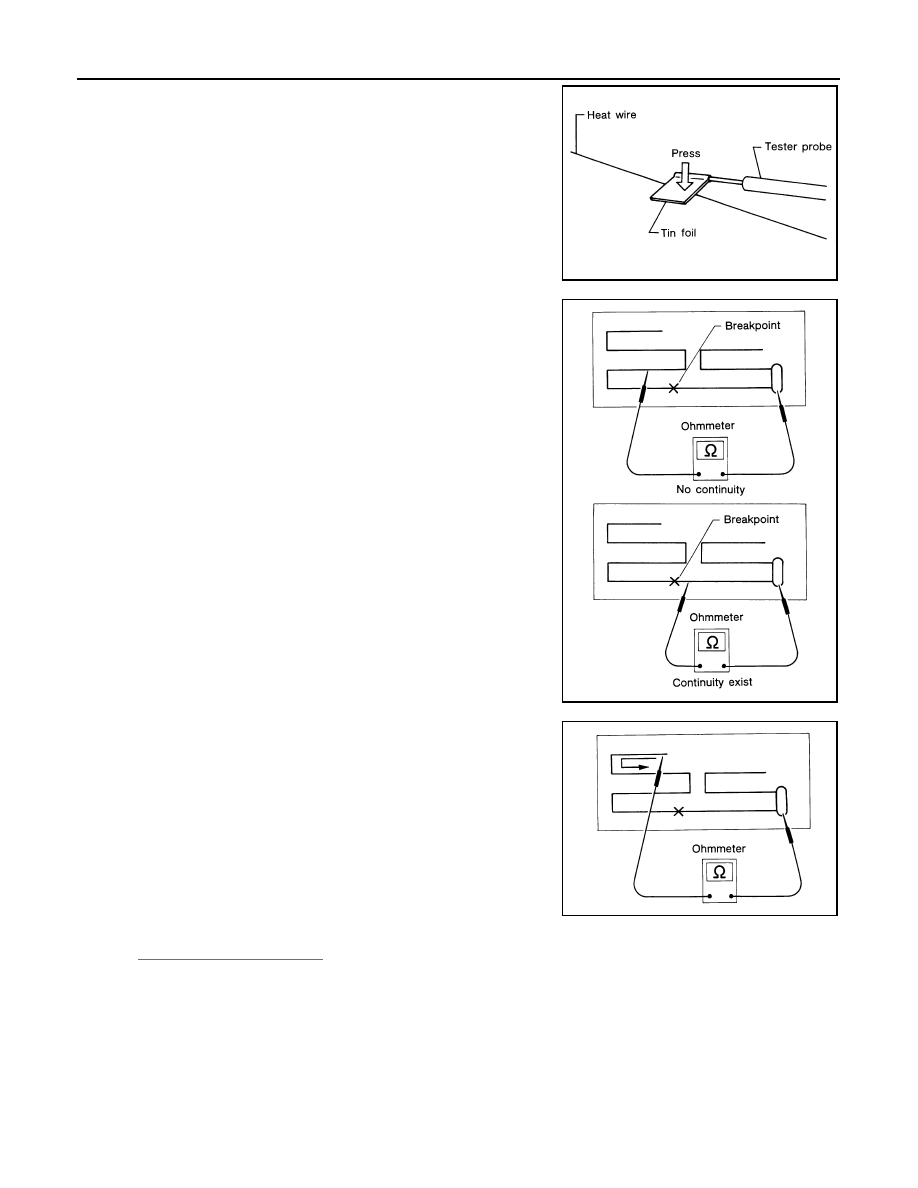
ELEMENT CHECK
1. Attach probe circuit tester (ohm setting) to antenna terminal on
each side.
1.
Audio unit M38, M60
2.
Harness connector
M78, M501
3.
Harness connector
M502, M601
4.
Antenna feeder
5.
Antenna amp.
M602
6.
Window antenna grid
AWNIA1775ZZ
SEL250I
August 2012
2012 Pathfinder
AV-40
< REMOVAL AND INSTALLATION >
[BASE AUDIO]
AUDIO ANTENNA
•
When measuring continuity, wrap tin foil around the top of
probe. Then, press the foil against the wire with your fin-
ger.
2. If an element is broken, no continuity will exist.
3. To locate a break, move probe along element. Tester indication
will change abruptly when probe passes the broken point.
ELEMENT REPAIR
.
SEL122R
SEL252I
SEL253I
August 2012
2012 Pathfinder
AV
ANTENNA AMP.
AV-41
< REMOVAL AND INSTALLATION >
[BASE AUDIO]
C
D
E
F
G
H
I
J
K
L
M
B
A
O
P
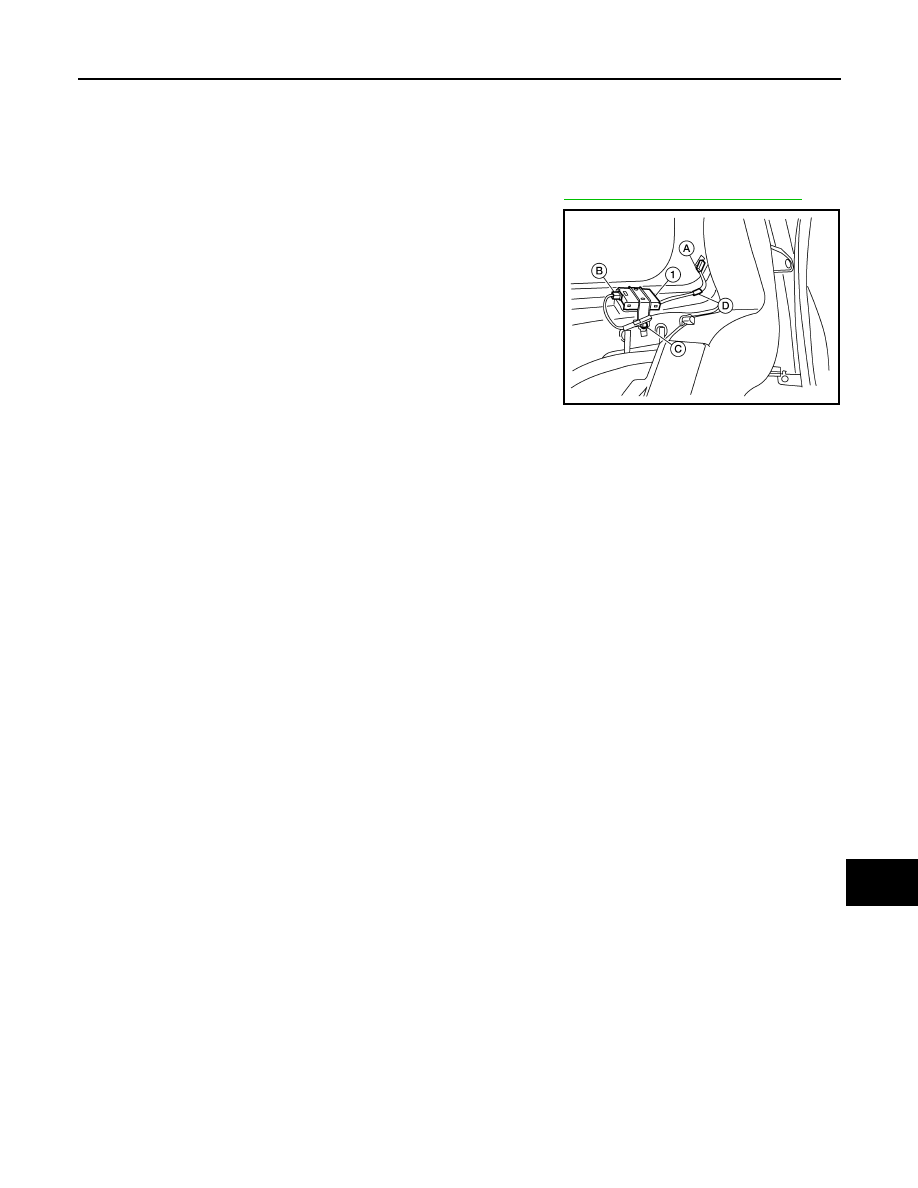
ANTENNA AMP.
Removal and Installation
INFOID:0000000007347600
REMOVAL
1. Remove the luggage side upper and lower RH finishers. Refer to
INT-25, "Removal and Installation"
.
2. Detach the antenna amp. harness clip (D), disconnect the
antenna amp. connector (A), harness connector (B), then
remove the antenna amp. screw (C) and remove the antenna
amp. (1).
INSTALLATION
Installation is in the reverse order of removal.
ALNIA1228ZZ
August 2012
2012 Pathfinder
Нет комментариевНе стесняйтесь поделиться с нами вашим ценным мнением.
Текст