Nissan Sentra. Instruction — part 35
AV-132
< REMOVAL AND INSTALLATION >
[DISPLAY AUDIO WITHOUT BOSE]
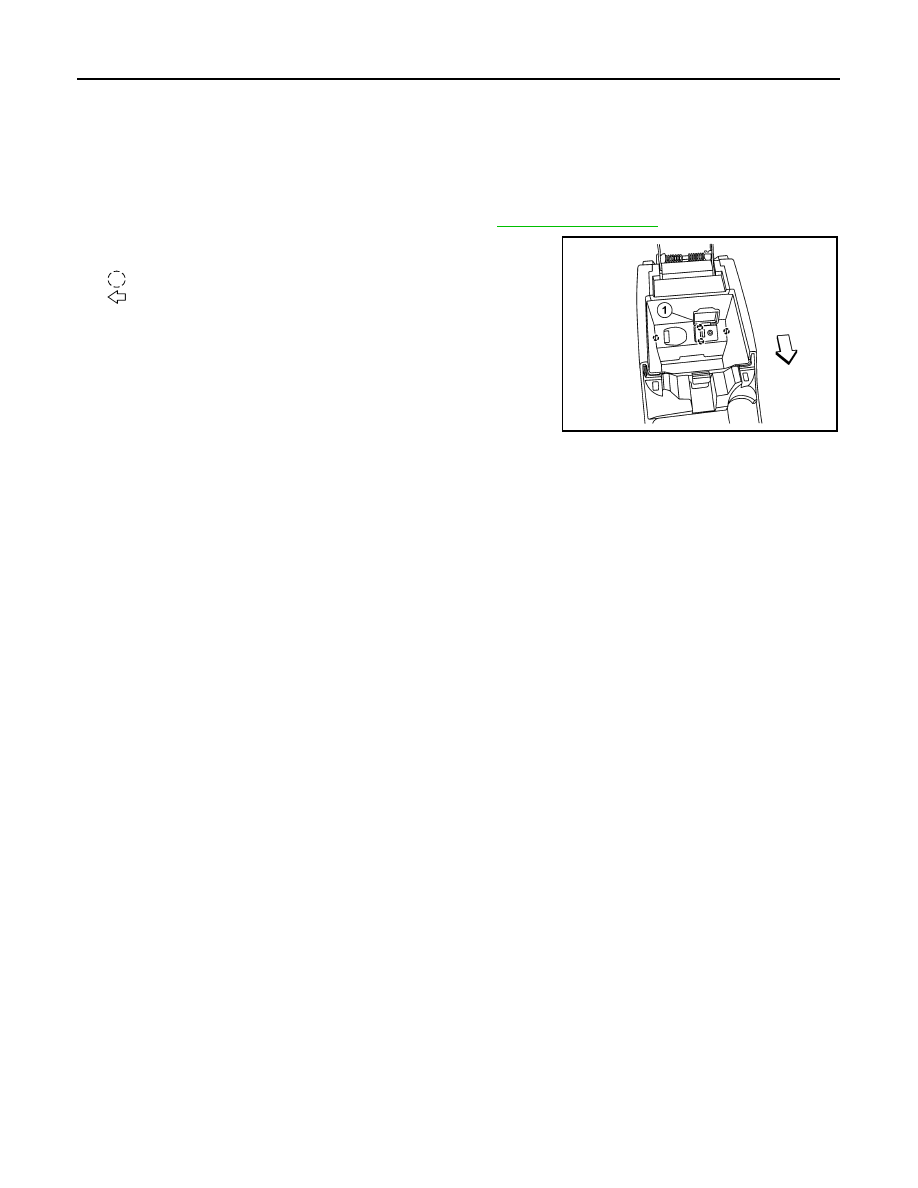
USB CONNECTOR
USB CONNECTOR
Removal and Installation
INFOID:0000000009758873
Removal
1. Remove the center console rear finisher cover. Refer to
.
2. Release the pawls and remove the USB connector (1) from the
center console rear finisher cover.
: Pawl
: Front
Installation
Installation is in the reverse order of removal.
ALNIA1411ZZ
AV
SATELLITE RADIO ANTENNA
AV-133
< REMOVAL AND INSTALLATION >
[DISPLAY AUDIO WITHOUT BOSE]
C
D
E
F
G
H
I
J
K
L
M
B
A
O
P
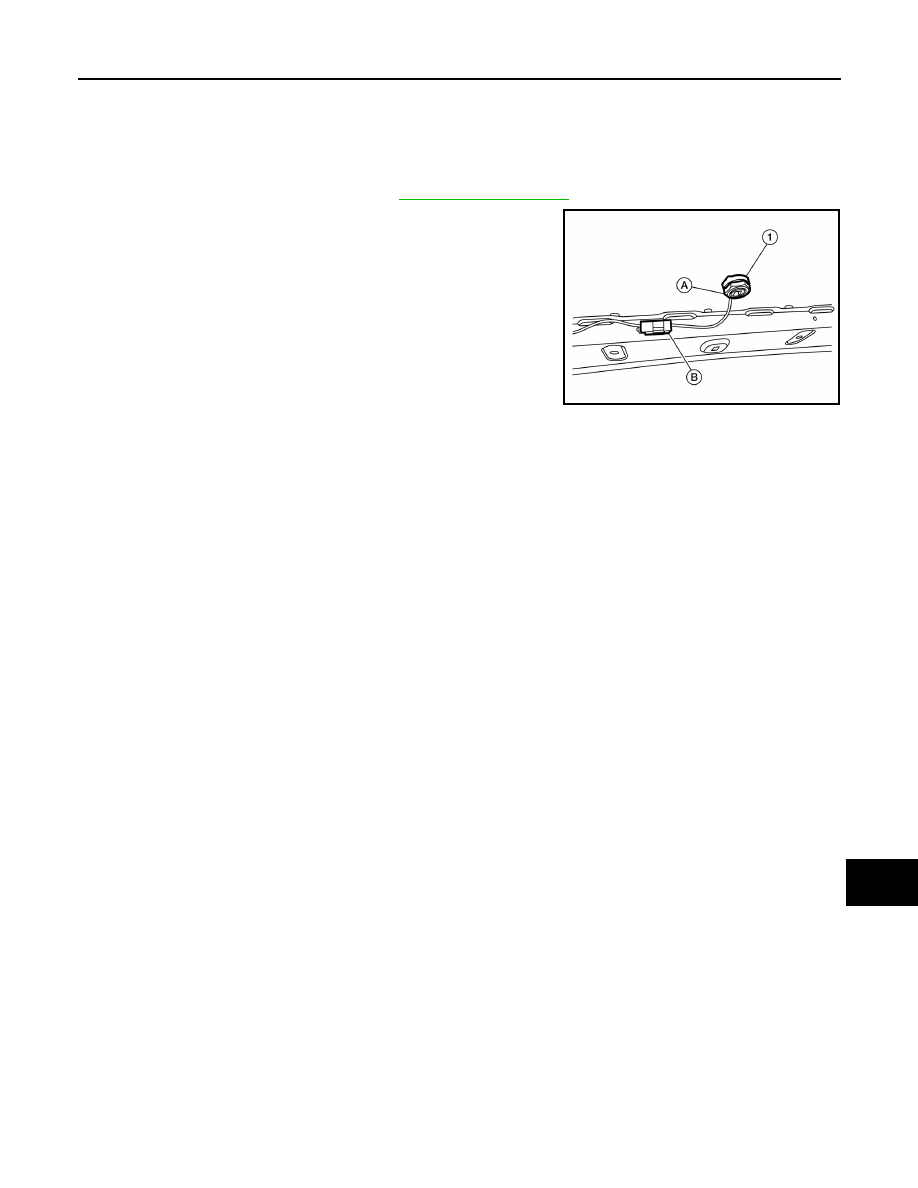
SATELLITE RADIO ANTENNA
Removal and Installation
INFOID:0000000009758874
REMOVAL
1. Lower the headlining at the rear. Refer to
.
2. Remove the satellite radio antenna nut (A).
3. Disconnect the harness connector (B) from the satellite radio
antenna (1) and remove.
INSTALLATION
Installation is in the reverse order of removal.
ALNIA1412ZZ
AV-134
< REMOVAL AND INSTALLATION >
[DISPLAY AUDIO WITHOUT BOSE]
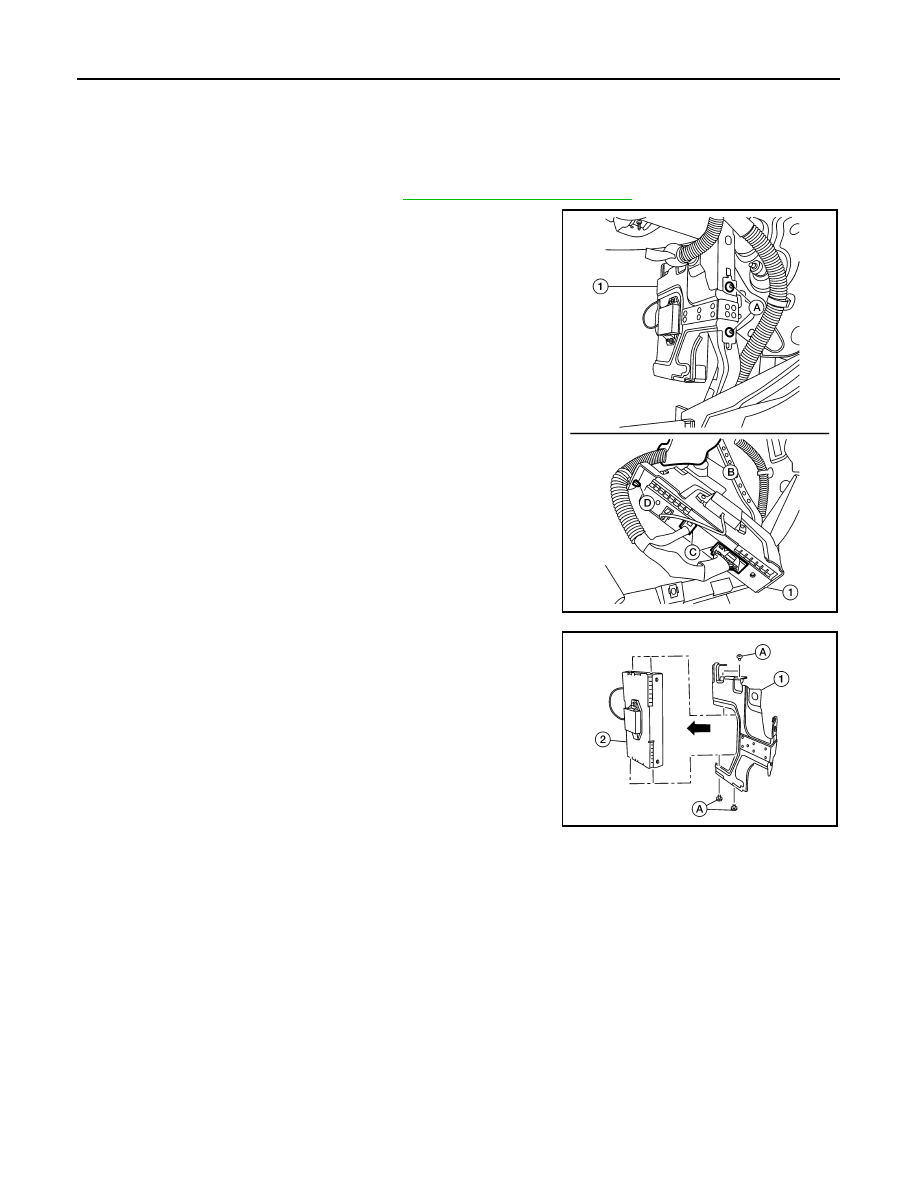
BLUETOOTH CONTROL UNIT
BLUETOOTH CONTROL UNIT
Removal and Installation
INFOID:0000000009758875
REMOVAL
1. Remove the glove box assembly. Refer to
IP-22, "Removal and Installation"
2. Remove the Bluetooth control unit screws (A) and position aside
the Bluetooth control unit assembly (1).
3. Disconnect the Bluetooth control unit connectors (C) and
release the harness retainer (B) from the Bluetooth control unit
bracket.
4. Release the harness clip (D) from the Bluetooth control unit
bracket and remove the Bluetooth control unit (1).
5. Remove the Bluetooth control unit bracket screws (A), then
remove the Bluetooth control unit (2) from the Bluetooth control
unit bracket (1).
INSTALLATION
Installation is in the reverse order of removal.
ALNIA1417ZZ
ALNIA1418ZZ
AV
MICROPHONE
AV-135
< REMOVAL AND INSTALLATION >
[DISPLAY AUDIO WITHOUT BOSE]
C
D
E
F
G
H
I
J
K
L
M
B
A
O
P
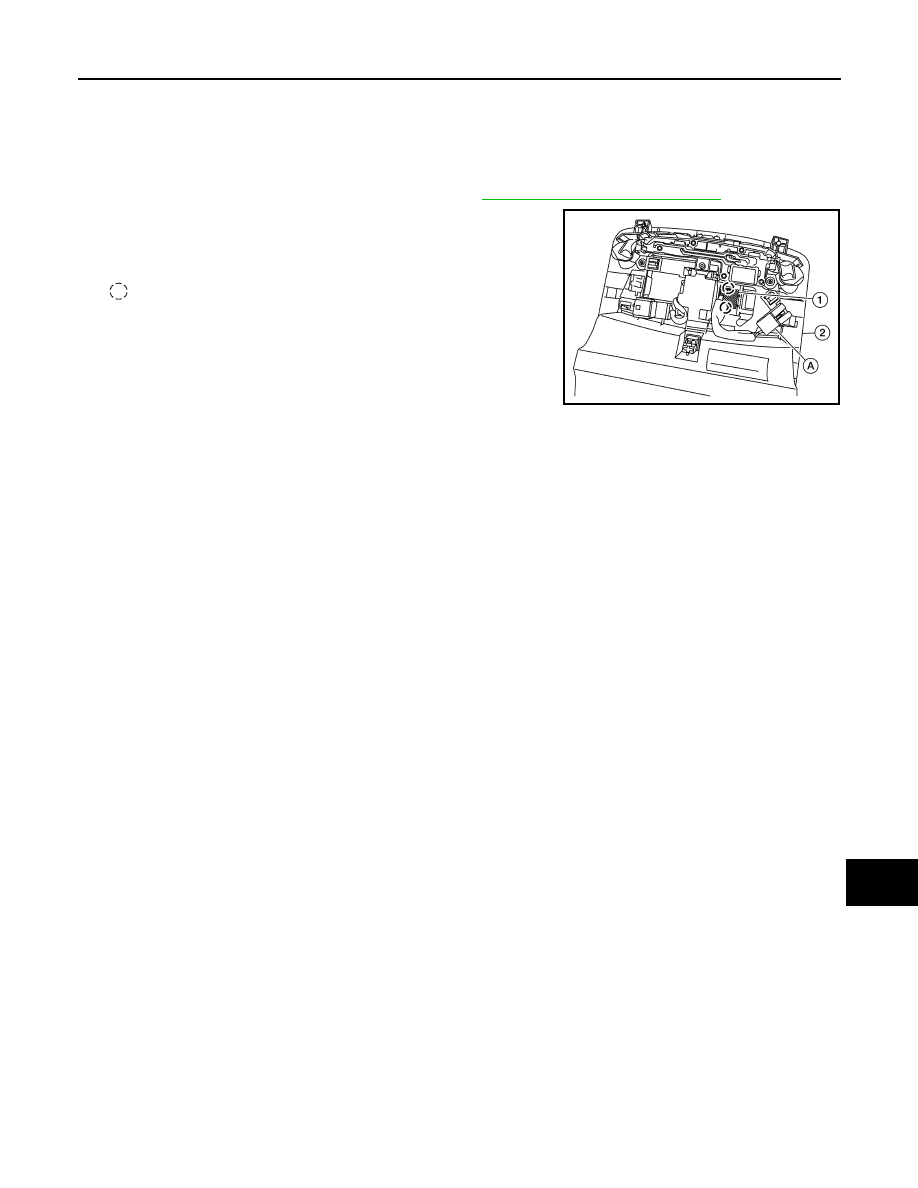
MICROPHONE
Removal and Installation
INFOID:0000000009758876
REMOVAL
1. Remove the front room/map lamp assembly. Refer to
INL-52, "Removal and Installation"
2. Disconnect the microphone connector (A) from the front room/
map lamp assembly (2).
3. Release the microphone pawls, then remove the microphone
(1).
: Pawl
INSTALLATION
Installation is in the reverse order of removal.
ALNIA1366ZZ
Нет комментариевНе стесняйтесь поделиться с нами вашим ценным мнением.
Текст