Nissan Sentra. Instruction — part 608
REAR DOOR FINISHER
INT-21
< REMOVAL AND INSTALLATION >
C
D
E
F
G
H
I
K
L
M
A
B
INT
N
O
P
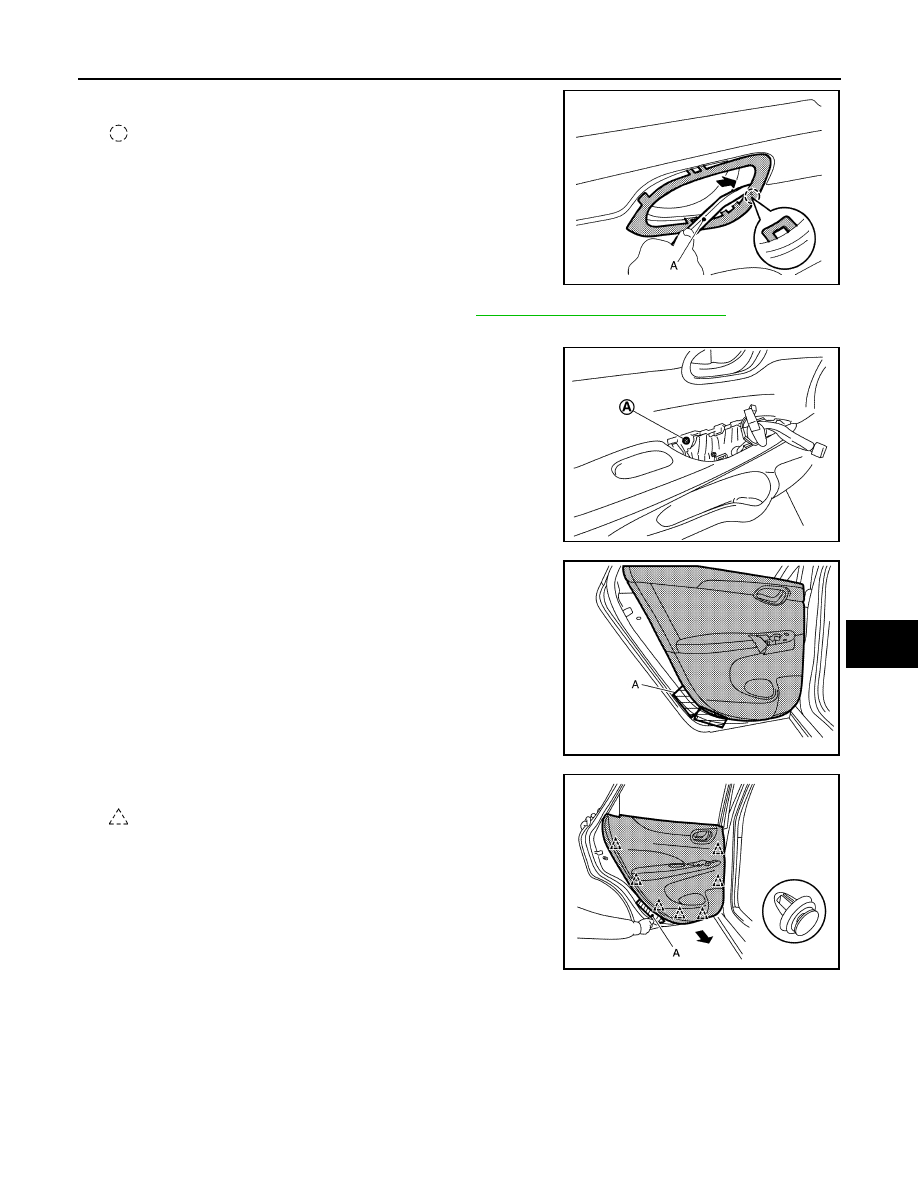
f.
Insert a suitable tool (A) as shown to release the remaining pawl
and remove.
: Pawl
2. Remove rear power window switch finisher. Refer to
PWC-72, "Removal and Installation"
.
3. Remove rear door finisher.
a. Remove rear door finisher screw (A).
b. Apply protective tape (A) to protect the component from damage
as shown.
c. Release rear door finisher clips using a suitable tool (A) as
shown.
: Clip
AWJIA0970ZZ
JMJIA6473ZZ
JMJIA7784ZZ
AWJIA0978ZZ
INT-22
< REMOVAL AND INSTALLATION >
REAR DOOR FINISHER
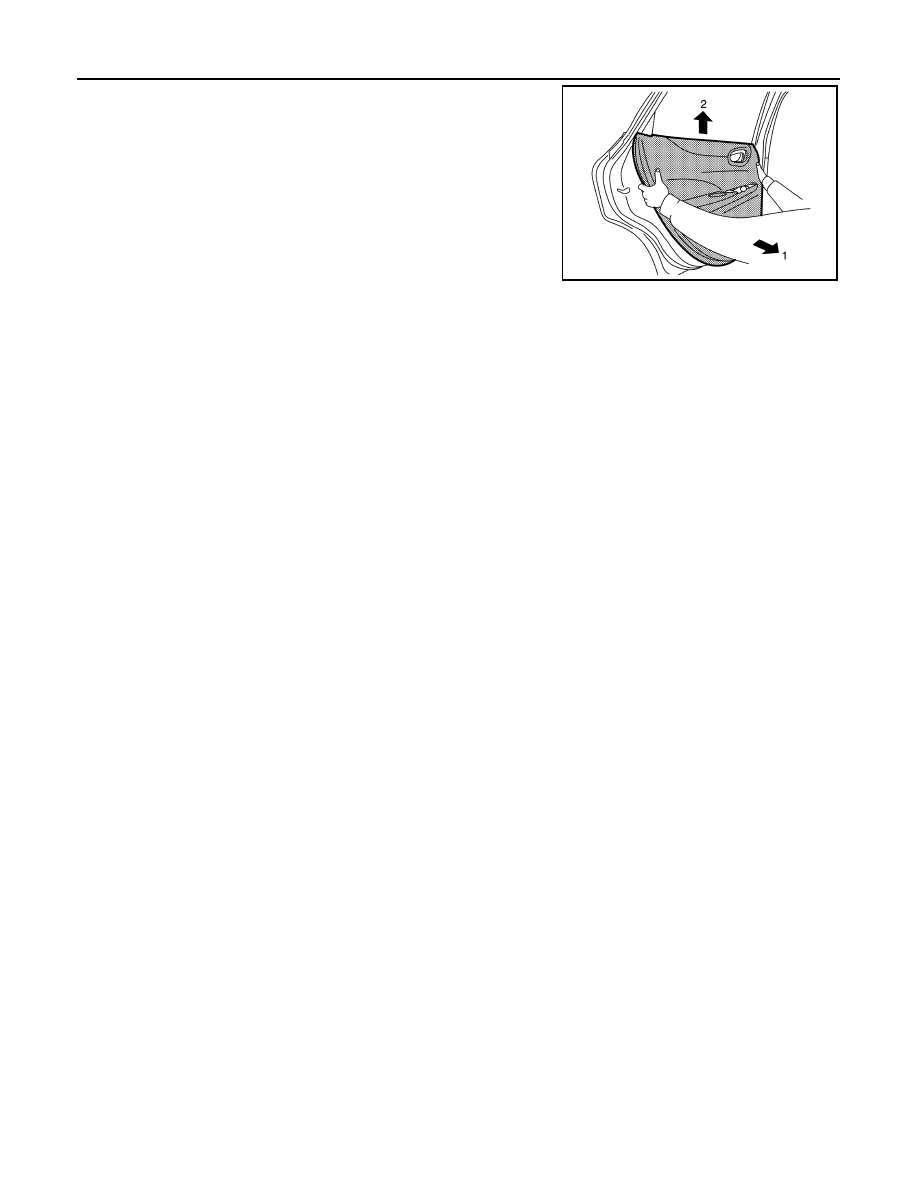
d. Remove rear door finisher as shown.
INSTALLATION
Installation is in the reverse order of removal.
CAUTION:
When installing, check that clips are accurately aligned with the holes on the door panel, then press in.
JMJIA6480ZZ
BODY SIDE TRIM
INT-23
< REMOVAL AND INSTALLATION >
C
D
E
F
G
H
I
K
L
M
A
B
INT
N
O
P
BODY SIDE TRIM
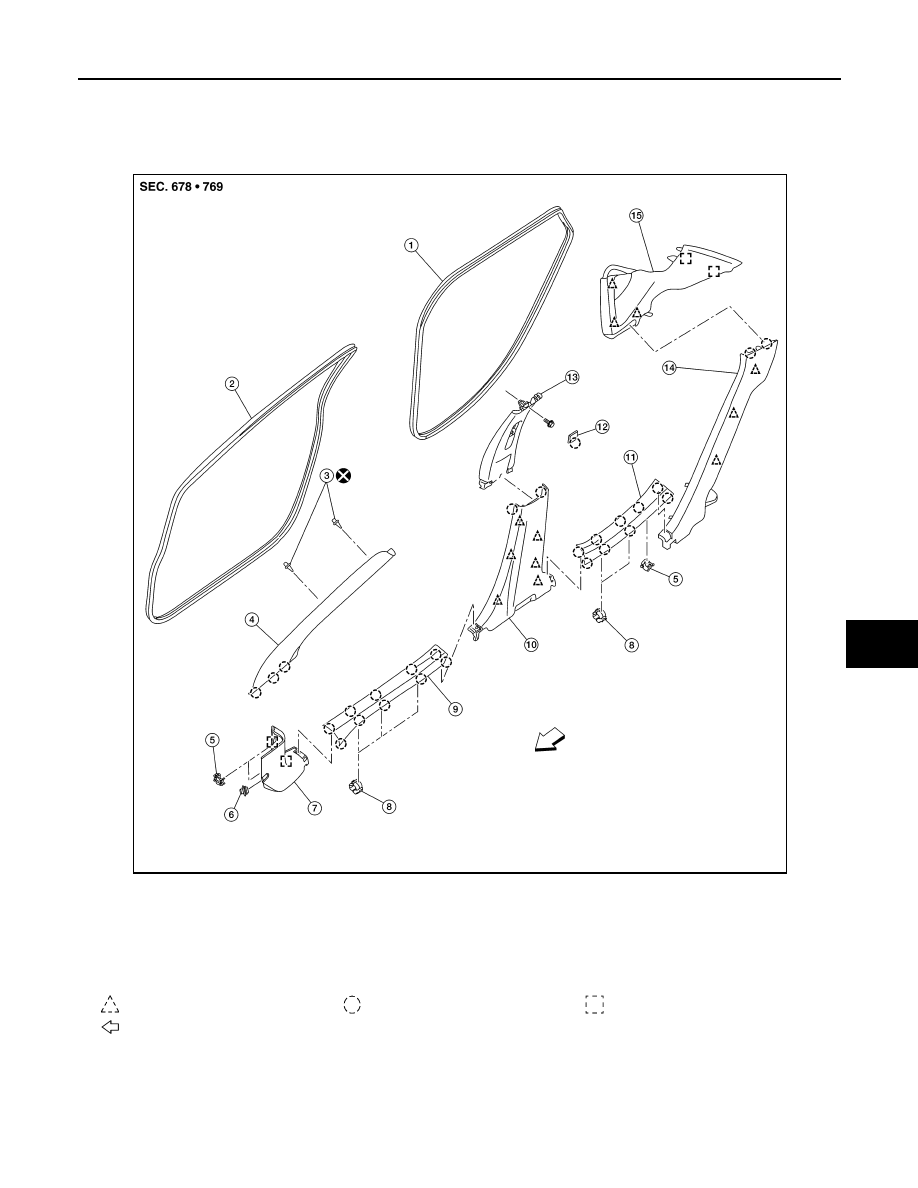
Exploded View
INFOID:0000000009756907
FRONT PILLAR FINISHER
1.
Rear body side welt
2.
Front body side welt
3.
Tether clip
4.
Front pillar finisher
5.
Metal clip
6.
Dash clip
7.
Dash side finisher
8.
Harness protector
9.
Front kicking plate inner
10. Center pillar lower finisher
11. Rear kicking plate inner
12. Cap
13. Center pillar upper finisher
14. Rear pillar lower finisher
15. Rear pillar finisher
Clip
Pawl
Metal clip
Front
ALJIA1129ZZ
INT-24
< REMOVAL AND INSTALLATION >
BODY SIDE TRIM
FRONT PILLAR FINISHER : Removal and Installation
INFOID:0000000009756908
REMOVAL
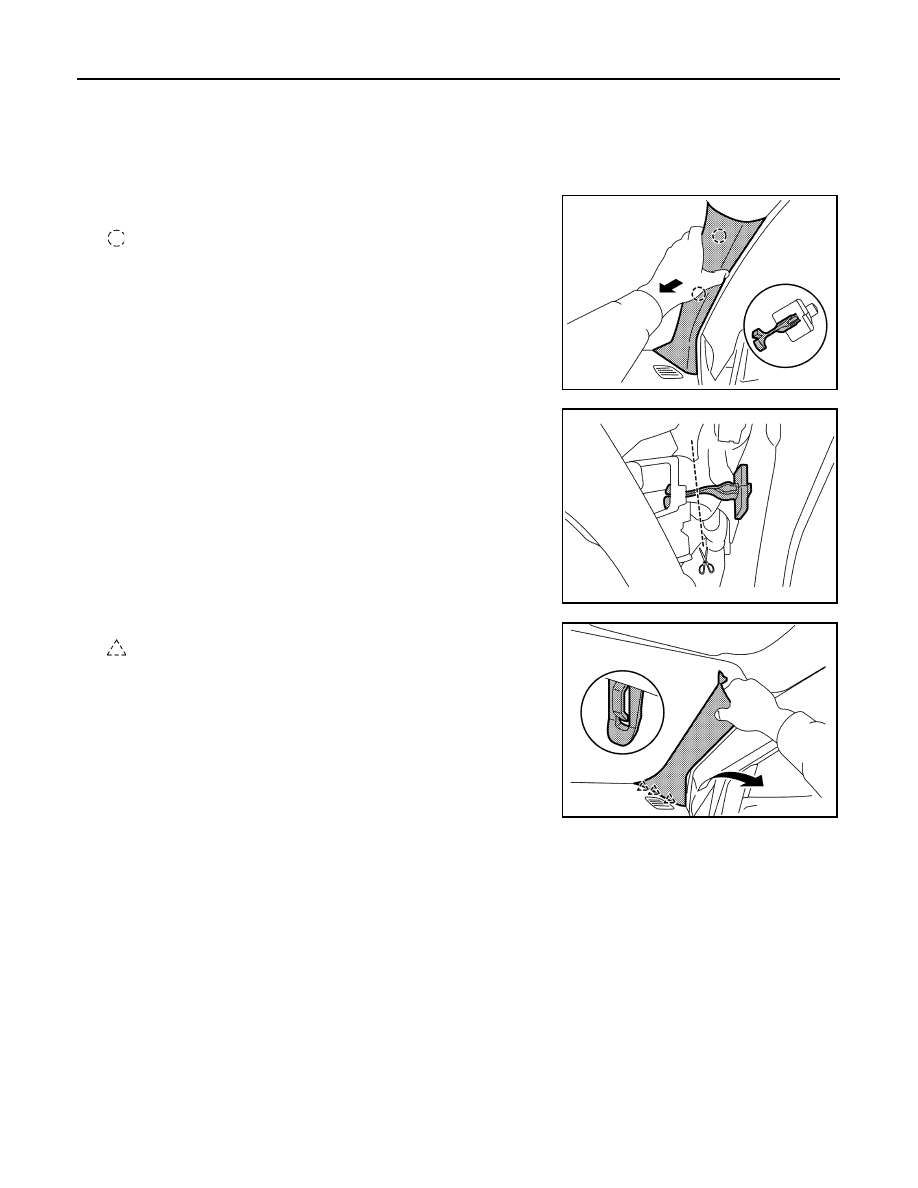
1. Partially remove the front body side welt along the front pillar finisher.
2. Remove front pillar finisher.
a. Pull front pillar finisher to gain access to the front pillar finisher
tether clips.
: Tether clip
b. Cut each tether clip to release front pillar finisher.
c.
Release pawls and remove front pillar finisher.
: Pawl
3. Remove front pillar finisher tether clips from body panel.
INSTALLATION
Installation is in the reverse order of removal.
CAUTION:
• Always replace tether clips with new ones after every removal.
• When installing, check that tether clips are accurately aligned with the holes on body panel, then
press in.
KICKING PLATE INNER
KICKING PLATE INNER : Removal and Installation
INFOID:0000000009756909
FRONT
Removal
JMJIA6482ZZ
JMJIA5130ZZ
JMJIA6484ZZ
Нет комментариевНе стесняйтесь поделиться с нами вашим ценным мнением.
Текст