Nissan Sentra. Instruction — part 260
DLK-156
< REMOVAL AND INSTALLATION >
[WITH INTELLIGENT KEY SYSTEM]
HOOD
6. Connect the hood lock release cable to the hood lock assembly.
7. Perform hood fitting adjustment. Refer to
DLK-150, "HOOD ASSEMBLY : Adjustment"
8. Perform the hood lock control inspection.
INSPECTION
NOTE:
If the hood lock release cable is bent or deformed, replace it.
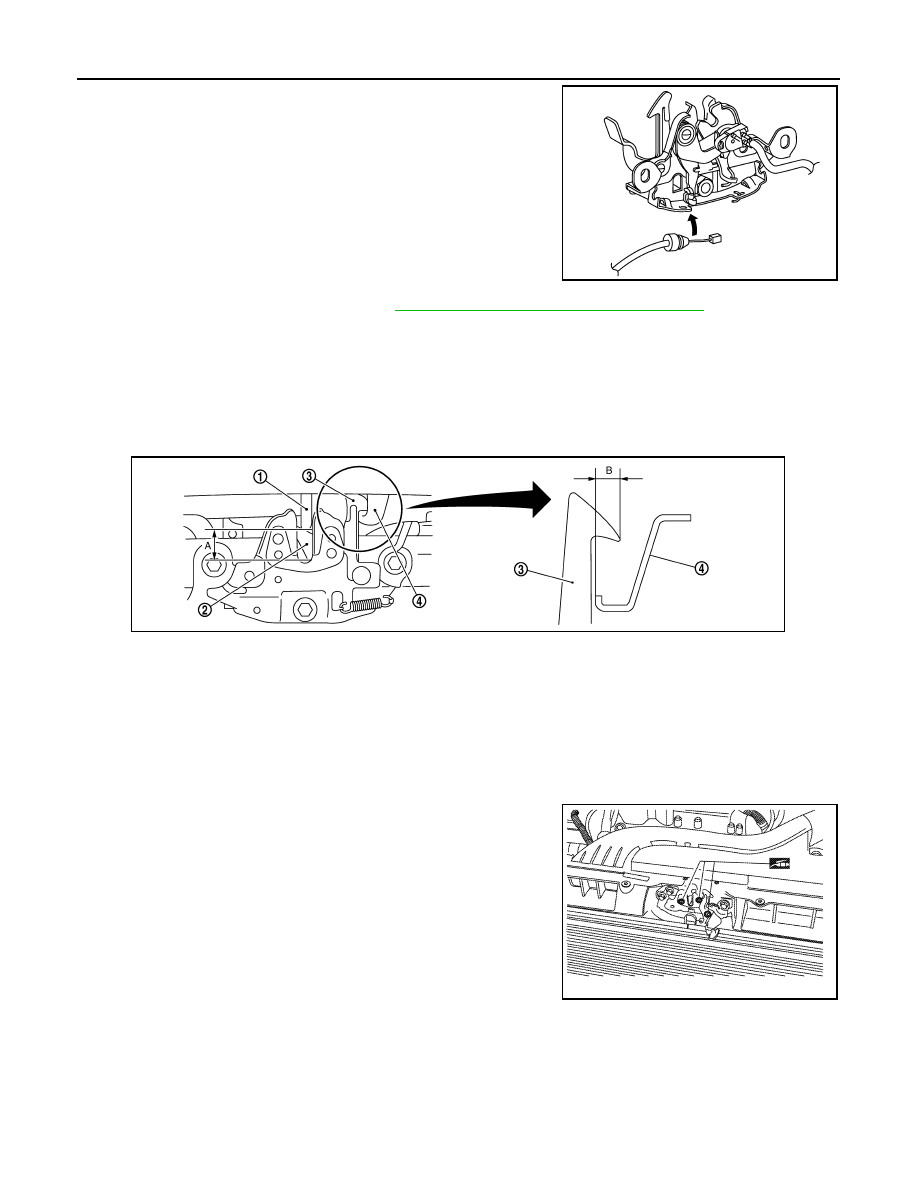
1. Check that the secondary latch is properly engaged with the secondary striker and meets specification
provided (B) with hood's own weight.
2. While operating the hood lock release handle, carefully check that the front end of the hood assembly is
raised and meets the specification provided (A). Also check that the hood lock release handle returns to
the original position.
3. Check that the hood lock release handle operating force is 49 N (5.0 kg, 11 lb) or less.
4. Install so the static closing force of the hood assembly is 49 – 490 N (5.0 – 50 kg-f, 36 - 110.2 lb-f).
5. Check the hood lock assembly lubrication condition. If neces-
sary, apply a suitable multi-purpose grease as shown.
PIIB5802E
1.
Hood striker
2.
Primary latch
3.
Secondary striker
4.
Secondary latch
A.
21
± 1mm (0.8 ±0.04 in)
B.
6.8 mm (0.27 in)
PIIB5794E
ALKIA0028GB
RADIATOR CORE SUPPORT
DLK-157
< REMOVAL AND INSTALLATION >
[WITH INTELLIGENT KEY SYSTEM]
C
D
E
F
G
H
I
J
L
M
A
B
DLK
N
O
P
RADIATOR CORE SUPPORT
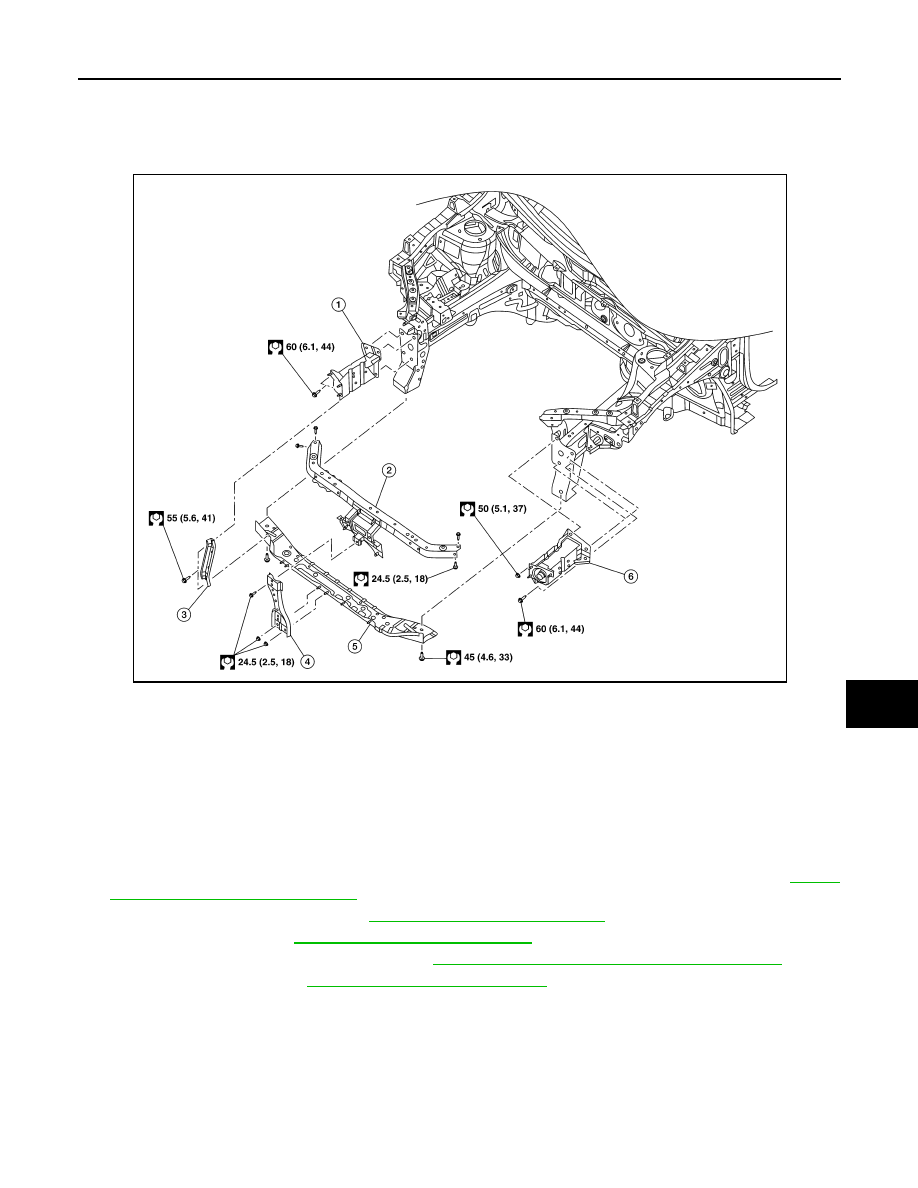
Exploded View
INFOID:0000000009756471
Removal and Installation
INFOID:0000000009756472
REMOVAL
CAUTION:
Before servicing, turn ignition switch OFF, disconnect both battery terminals and wait at least three
minutes.
1. Disconnect the battery negative and positive terminals then wait at least three minutes. Refer to
"Removal and Installation (Battery)"
.
2. Remove crash zone sensor. Refer to
SR-25, "Removal and Installation"
.
3. Remove radiator. Refer to
CO-15, "Removal and Installation"
4. Remove the condenser (if equipped). Refer to
HA-39, "CONDENSER : Removal and Installation"
.
5. Remove the horns. Refer to
HRN-6, "Removal and Installation"
6. Remove air guides (LH/RH).
7. Remove the hood lock support bolts and hood lock support.
8. Remove the core support lower stay bolts and core support lower stay.
9. Remove the core support lower bolts and core support lower.
10. Remove the core support side member nuts and bolts and remove the core support side member, if nec-
essary.
INSTALLATION
1. Core support side member (RH)
2.
Core support upper
3.
Core support lower stay
4. Hood lock support
5.
Core support lower
6.
Core support side member (LH)
ALKIA2894ZZ
DLK-158
< REMOVAL AND INSTALLATION >
[WITH INTELLIGENT KEY SYSTEM]
RADIATOR CORE SUPPORT
Installation is in the reverse order of removal.
Tighten bolts to specification. Refer to
CAUTION:
After installation, perform hood fitting adjustment. Refer to
DLK-150, "HOOD ASSEMBLY : Adjust-
.
FRONT FENDER
DLK-159
< REMOVAL AND INSTALLATION >
[WITH INTELLIGENT KEY SYSTEM]
C
D
E
F
G
H
I
J
L
M
A
B
DLK
N
O
P
FRONT FENDER
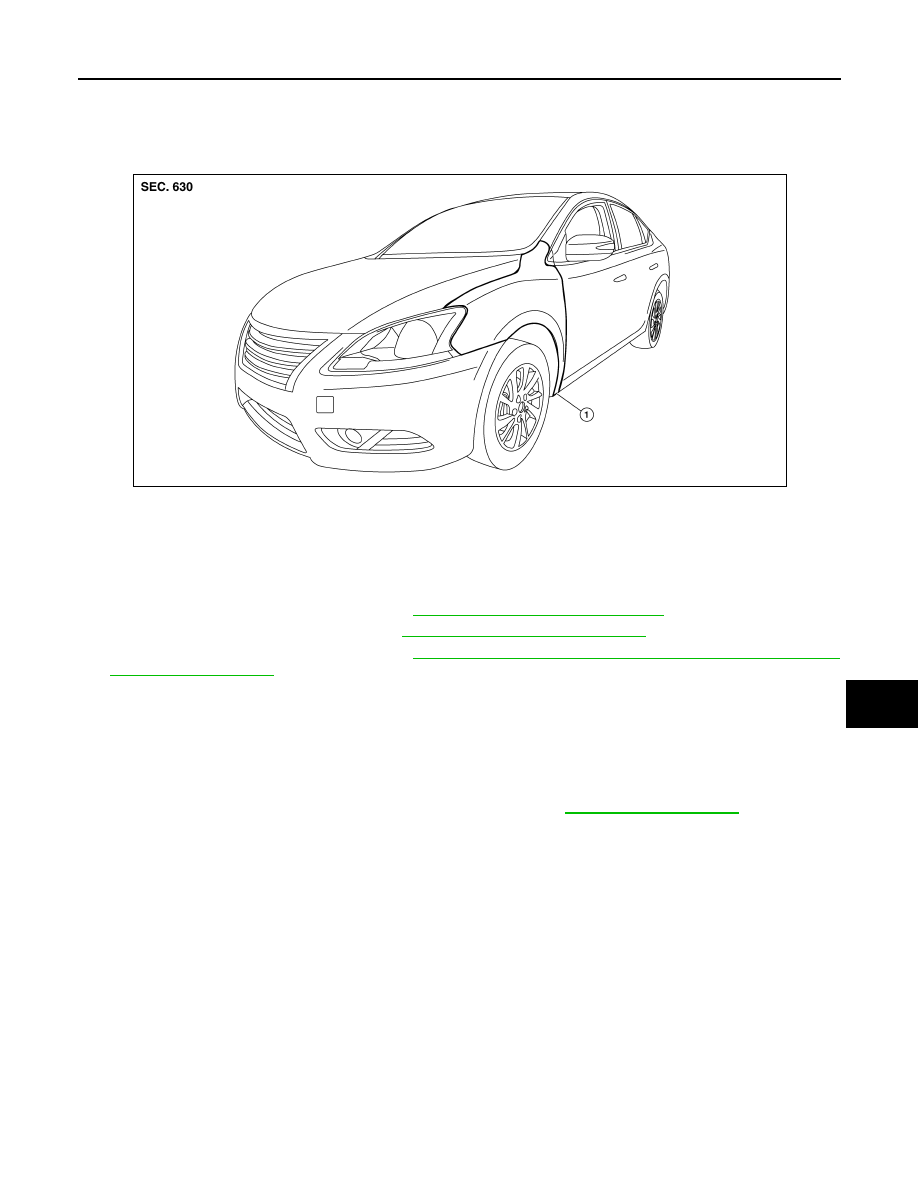
Exploded View
INFOID:0000000009756473
Removal and Installation
INFOID:0000000009756474
REMOVAL
1. Remove the front combination lamp. Ref to
EXL-119, "Removal and Installation"
.
2. Remove the front bumper fascia. Refer to
EXT-17, "Removal and Installation"
.
3. Remove the front fender protector. Refer to
EXT-28, "FENDER PROTECTOR : Removal and Installation -
.
4. Remove the front fender bolts and the front fender.
CAUTION:
Use shop cloths to protect the body from being damaged during removal and installation.
INSTALLATION
Installation is in the reverse order of removal.
CAUTION:
After installation, perform fender adjustment procedure. Refer to
1.
Front fender
ALKIA2918ZZ
Нет комментариевНе стесняйтесь поделиться с нами вашим ценным мнением.
Текст