Nissan Sentra. Instruction — part 564
HAC-104
< REMOVAL AND INSTALLATION >
[AUTOMATIC AIR CONDITIONER]
A/C SWITCH ASSEMBLY
REMOVAL AND INSTALLATION
A/C SWITCH ASSEMBLY
Removal and Installation
INFOID:0000000009757701
REMOVAL
1. Remove the CVT shift selector finisher (CVT: RE0F11A). Refer to
TM-253, "Removal and Installation"
.
2. Remove the MT shift selector finisher (6MT: RS6F94R). Refer to
TM-22, "Removal and Installation"
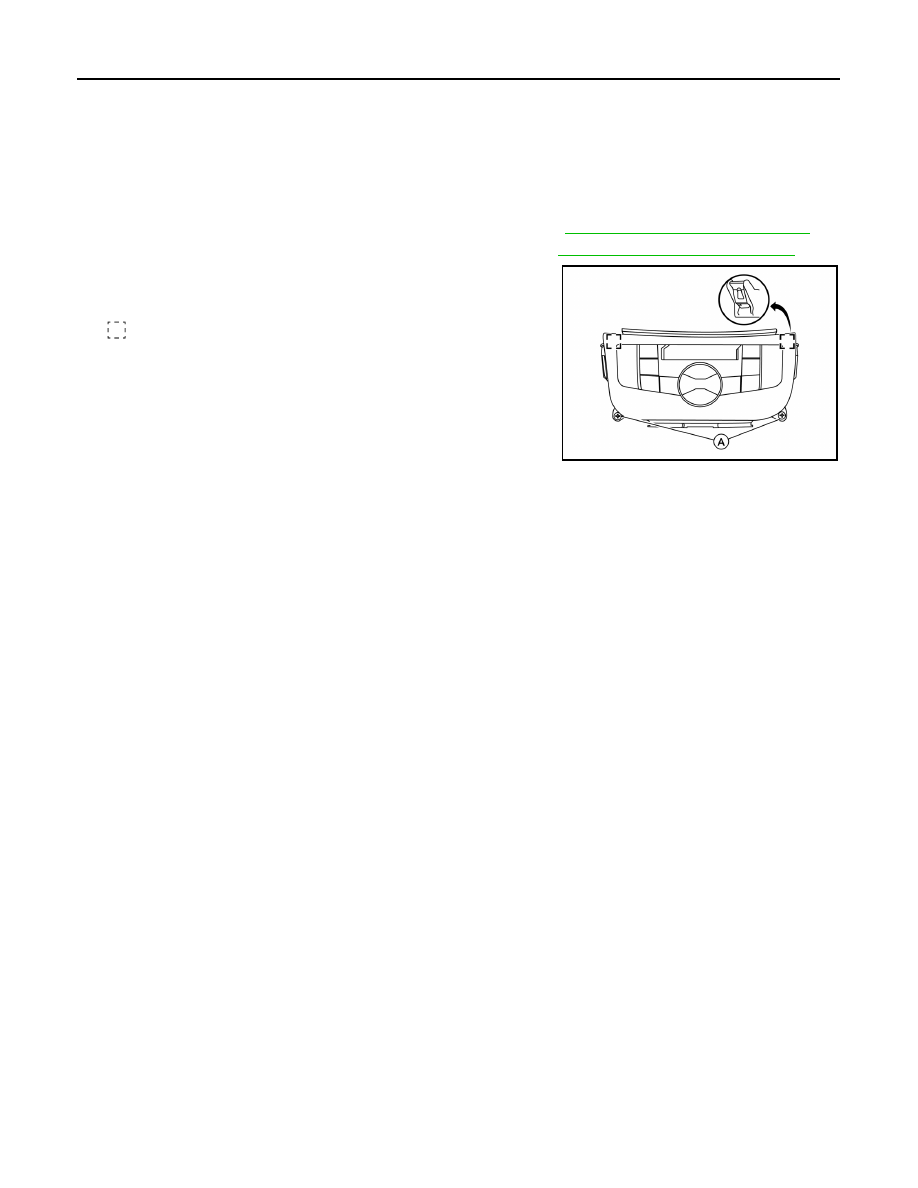
3. Remove the A/C switch assembly screws (A).
4. Release the A/C switch assembly metal clips using a suitable
tool.
: Metal clip
5. Disconnect the harness connectors from the A/C switch assembly and remove.
INSTALLATION
Installation is in the reverse order of removal.
ALIIA0664ZZ
A/C AUTO AMP.
HAC-105
< REMOVAL AND INSTALLATION >
[AUTOMATIC AIR CONDITIONER]
C
D
E
F
G
H
J
K
L
M
A
B
HAC
N
O
P
A/C AUTO AMP.
Exploded View
INFOID:0000000009757702
Removal and Installation
INFOID:0000000009757703
REMOVAL
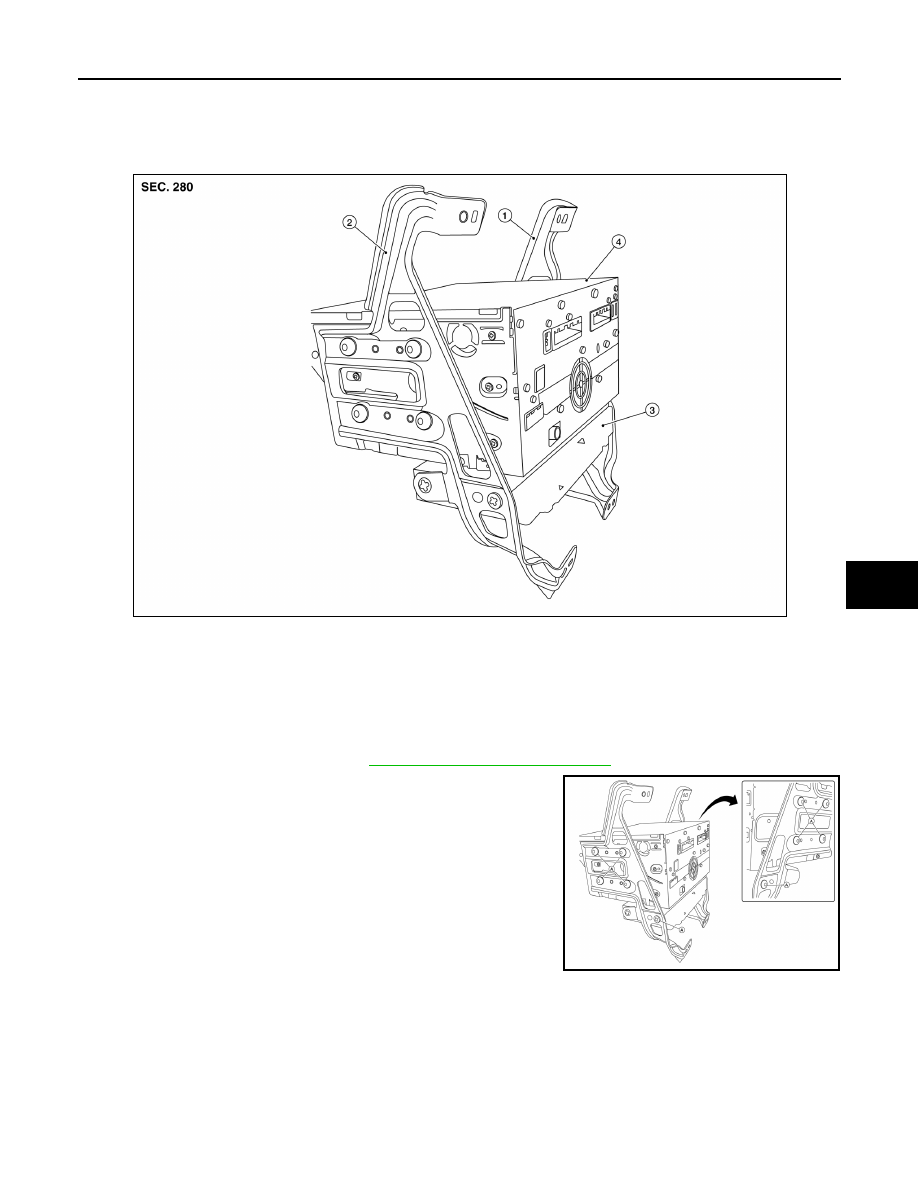
1. Remove the AV control unit. Refer to
AV-406, "Removal and Installation"
2. Remove the AV control unit bracket screws (A).
3. Remove the A/C auto amp.
INSTALLATION
Installation is in the reverse order of removal.
1.
AV control unit bracket (LH)
2.
AV control unit bracket (RH)
3.
A/C auto amp.
4.
AV control unit
ALIIA0666ZZ
ALIIA0667ZZ
HAC-106
< REMOVAL AND INSTALLATION >
[AUTOMATIC AIR CONDITIONER]
AMBIENT SENSOR
AMBIENT SENSOR
Removal and Installation
INFOID:0000000009757704
REMOVAL
1. Remove the front under cover. Refer to
EXT-30, "FRONT UNDER COVER : Removal and Installation"
.
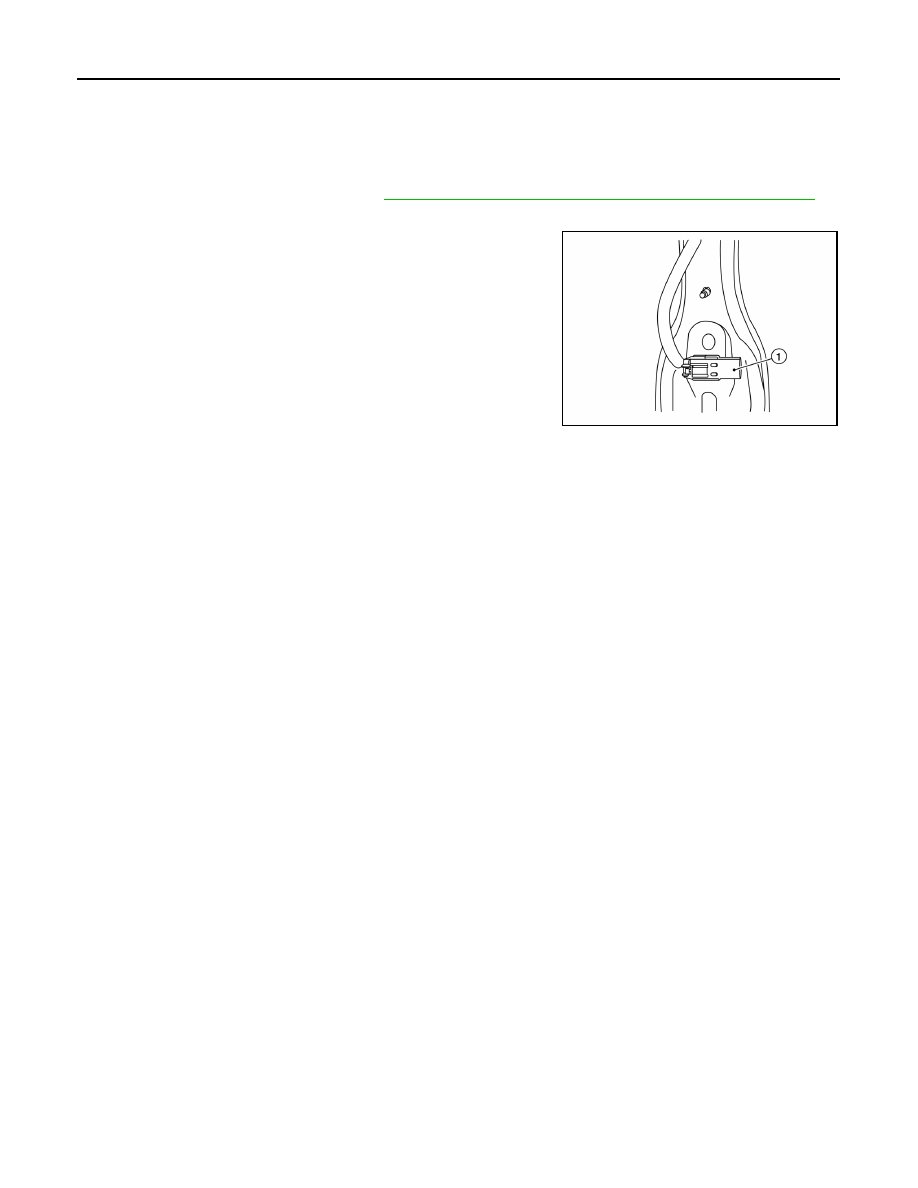
2. Disconnect the harness connector from the ambient sensor.
3. Release the ambient sensor clip, then remove the ambient sen-
sor (1).
INSTALLATION
Installation is in the reverse order of removal.
ALIIA0668ZZ
IN-VEHICLE SENSOR
HAC-107
< REMOVAL AND INSTALLATION >
[AUTOMATIC AIR CONDITIONER]
C
D
E
F
G
H
J
K
L
M
A
B
HAC
N
O
P
IN-VEHICLE SENSOR
Removal and Installation
INFOID:0000000009757705
REMOVAL
1. Remove the instrument lower panel LH. Refer to
IP-21, "Removal and Installation"
.
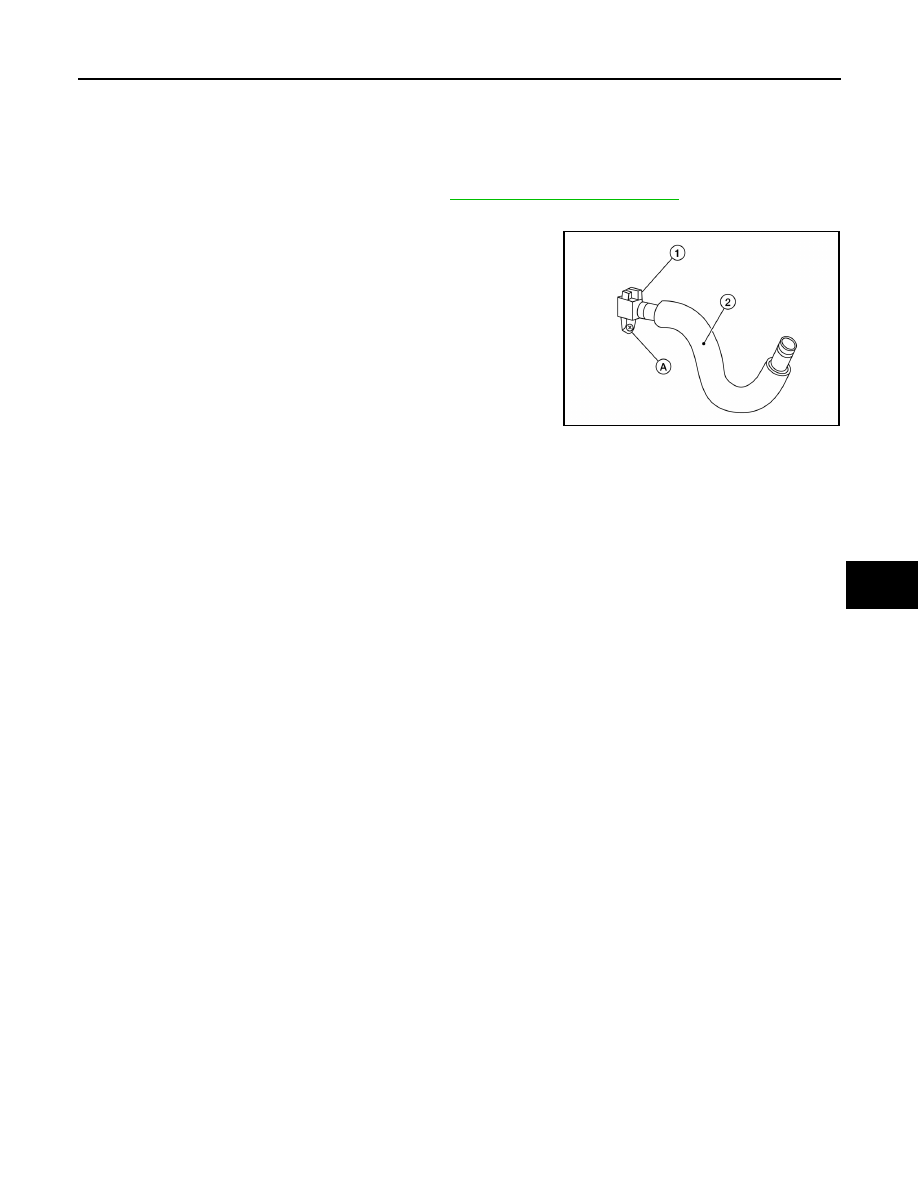
2. Disconnect the harness connector from the in-vehicle sensor.
3. Disconnect the aspirator hose (2) from the in-vehicle sensor.
4. Remove the in-vehicle sensor screw (A) and the in-vehicle sen-
sor (1).
INSTALLATION
Installation is in the reverse order of removal.
ALIIA0665ZZ
Нет комментариевНе стесняйтесь поделиться с нами вашим ценным мнением.
Текст