Nissan Sentra. Instruction — part 536
HA-38
< REMOVAL AND INSTALLATION >
COOLER PIPE AND HOSE
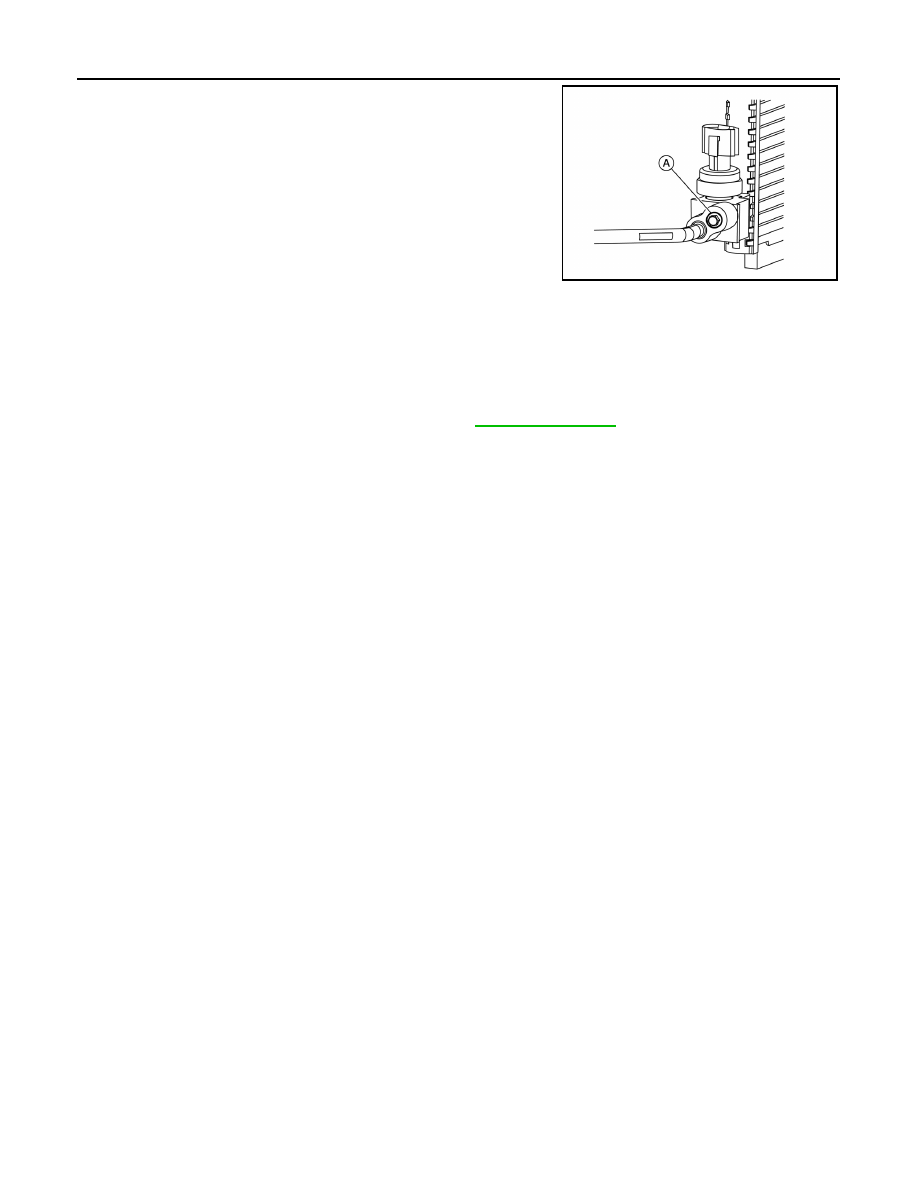
4. Remove the bolt (A) that retains the high-pressure pipe to the
condenser, then disconnect the high-pressure pipe from the
condenser and liquid tank assembly.
CAUTION:
Cap or wrap the joint of the pipe with a suitable material
such as vinyl tap to avoid the entry of air.
5. Remove the high-pressure pipe.
INSTALLATION
Installation is in the reverse order of removal.
CAUTION:
• Do not reuse O-rings.
• Apply A/C oil to new O-rings.
• After charging refrigerant, check for leaks. Refer to
ALIIA0655ZZ
CONDENSER
HA-39
< REMOVAL AND INSTALLATION >
C
D
E
F
G
H
J
K
L
M
A
B
HA
N
O
P
CONDENSER
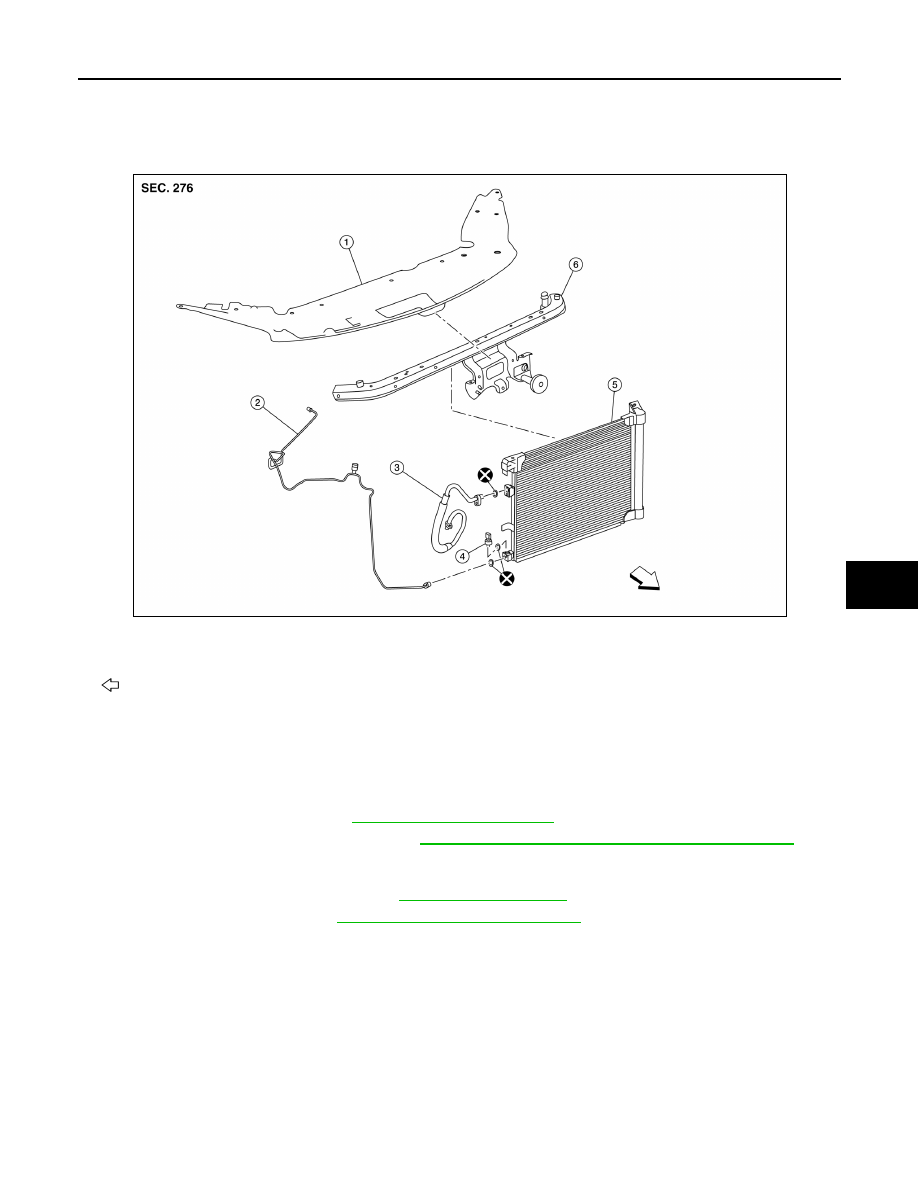
Exploded View
INFOID:0000000009756314
CONDENSER
CONDENSER : Removal and Installation
INFOID:0000000009756315
REMOVAL
1. Discharge the refrigerant. Refer to
2. Reposition the hood lock assembly. Refer to
DLK-154, "HOOD LOCK CONTROL : Exploded View"
.
NOTE:
Disconnection of the hood release cable is not necessary.
3. Remove the core support upper. Refer to
4. Remove the front grille. Refer to
EXT-23, "Removal and Installation"
5. Disconnect the harness connector from the refrigerant pressure sensor.
1.
Core support upper cover
2.
High-pressure pipe
3.
High-pressure flexible hose
4.
Refrigerant pressure sensor
5.
Condenser and liquid tank assembly 6.
Core support upper
Front
ALIIA0653ZZ
HA-40
< REMOVAL AND INSTALLATION >
CONDENSER
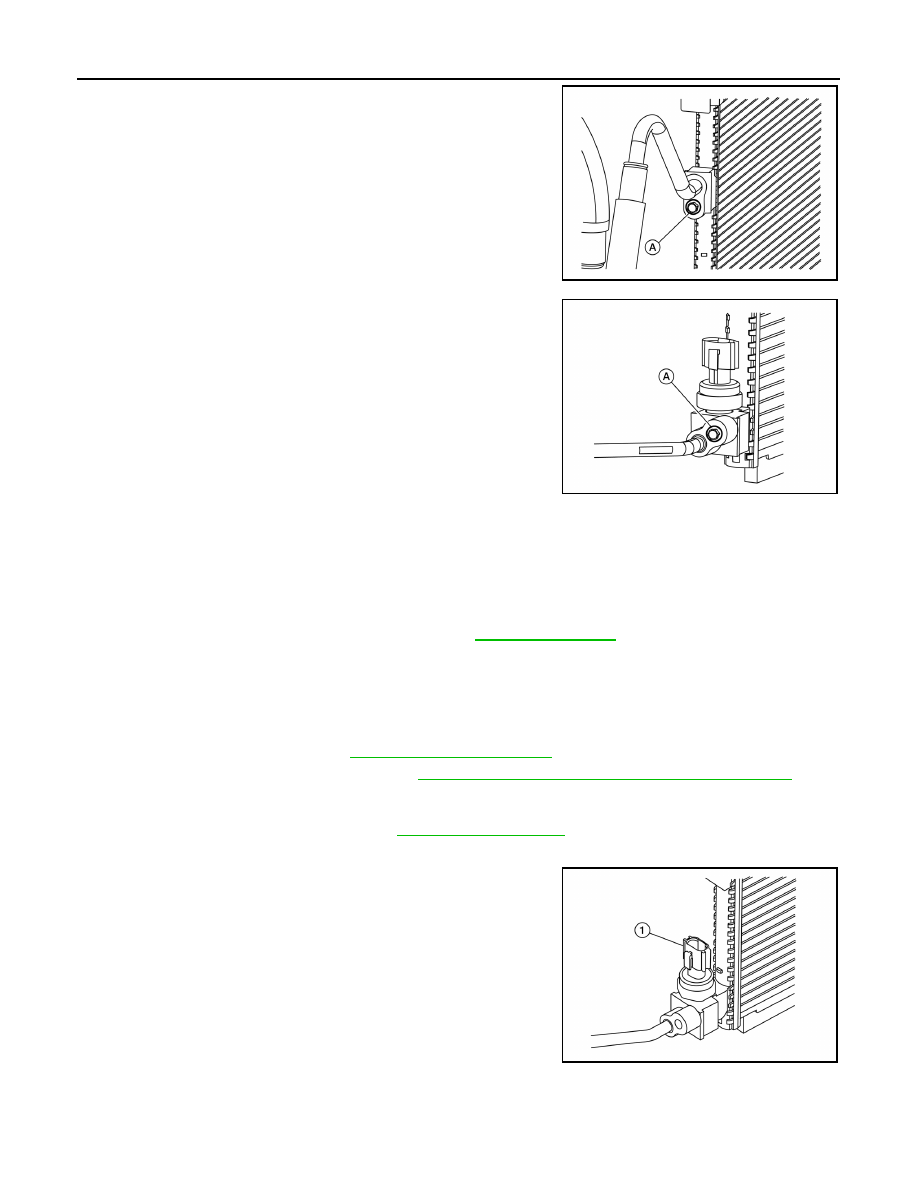
6. Remove the bolt (A) that retains the high-pressure flexible hose
to the condenser, then disconnect the high-pressure flexible
hose from the condenser and liquid tank assembly.
CAUTION:
Cap or wrap the joint of the hose with suitable material such
as vinyl tape to avoid the entry of air.
7. Remove the bolt (A) that retains the high-pressure pipe to the
condenser, then disconnect the high-pressure pipe from the
condenser and liquid tank assembly.
8. Remove the condenser and liquid tank assembly.
INSTALLATION
Installation is in the reverse order of removal.
CAUTION:
• Do not reuse O-rings.
• Apply A/C oil to the O-rings of the condenser for installation.
• After charging refrigerant, check for leaks. Refer to
REFRIGERANT PRESSURE SENSOR
REFRIGERANT PRESSURE SENSOR : Removal and Installation
INFOID:0000000009756316
REMOVAL
1. Discharge the refrigerant. Refer to
2. Reposition the hood lock assembly. Refer to
DLK-154, "HOOD LOCK CONTROL : Exploded View"
.
NOTE:
Disconnection of the hood release cable is not necessary.
3. Remove the core support upper. Refer to
4. Disconnect the harness connector from the refrigerant pressure sensor.
5. Remove the refrigerant pressure sensor (1) from the liquid tank
on the condenser.
CAUTION:
Do not damage the condenser fins.
INSTALLATION
Installation is in the reverse order of removal.
CAUTION:
ALIIA0652ZZ
ALIIA0655ZZ
ALIIA0656ZZ
CONDENSER
HA-41
< REMOVAL AND INSTALLATION >
C
D
E
F
G
H
J
K
L
M
A
B
HA
N
O
P
• Do not reuse the O-ring.
• Apply A/C compressor oil to the new O-ring for installation.
• After charging refrigerant, check for leaks. Refer to
.
Нет комментариевНе стесняйтесь поделиться с нами вашим ценным мнением.
Текст