Nissan Sentra. Instruction — part 264

DLK-172
< REMOVAL AND INSTALLATION >
[WITH INTELLIGENT KEY SYSTEM]
REAR DOOR
1. Fully close the rear door glass.
2. Remove rear door speaker (if equipped). Refer to
AV-61, "Removal and Installation"
(BASE AUDIO),
206, "Removal and Installation"
(DISPLAY AUDIO WITH BOSE),
AV-125, "Removal and Installation"
(DISPLAY AUDIO WITHOUT BOSE)
AV-409, "Removal and Installation"
(NAVIGATION WITH BOSE) and
AV-301, "Removal and Installation"
(NAVIGATION WITHOUT BOSE).
3. Remove door check link bolt from body.
4. Remove door check link bolts on door panel.
5. Remove door check link (1) through the hole in door panel (2).
INSTALLATION
Installation is in the reverse order of removal.
CAUTION:
• After installation, check rear door open/close, lock/unlock operation.
• Check rear door check link rotating point for poor lubrication.
If necessary, apply a suitable multi-purpose grease.
JMKIA8073ZZ
JMKIA8074ZZ
DOOR HANDLE
DLK-173
< REMOVAL AND INSTALLATION >
[WITH INTELLIGENT KEY SYSTEM]
C
D
E
F
G
H
I
J
L
M
A
B
DLK
N
O
P
DOOR HANDLE
FRONT DOOR HANDLE
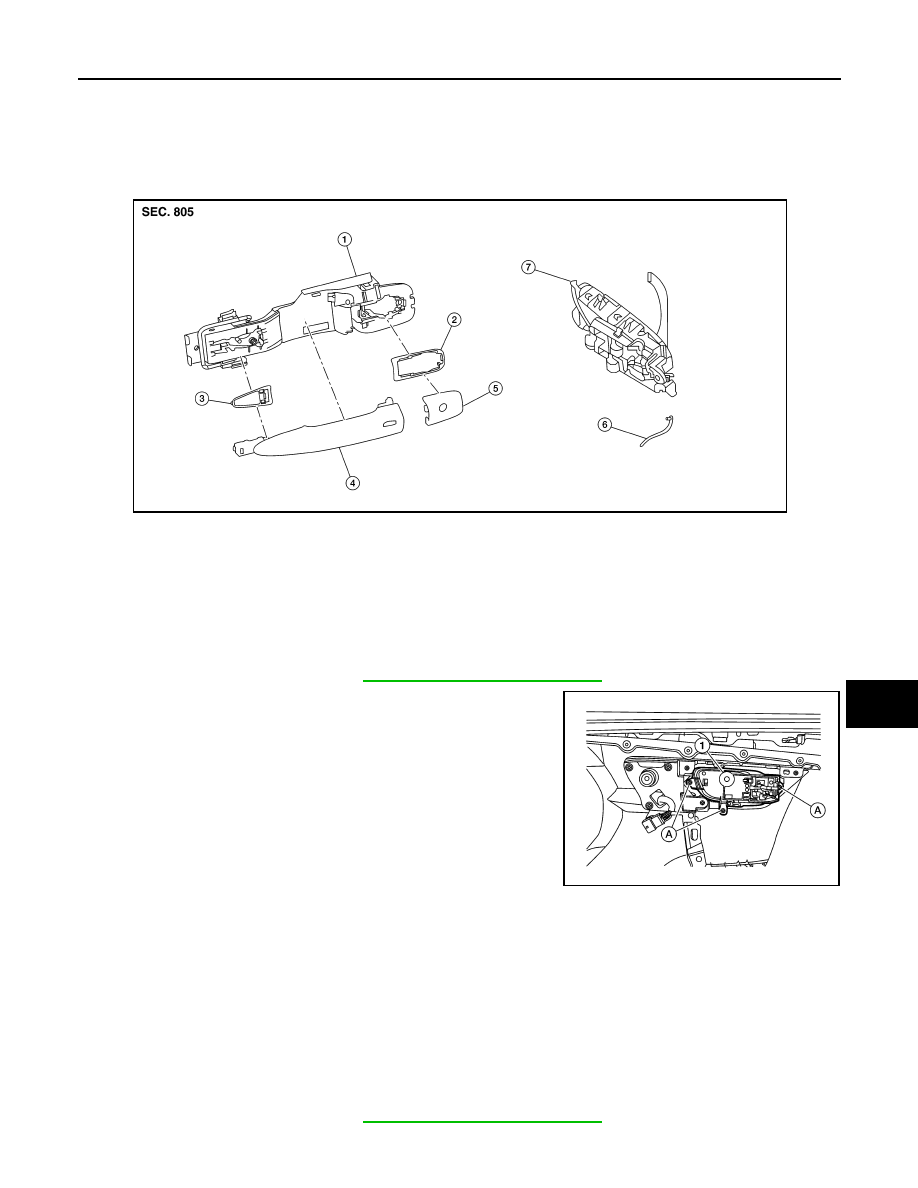
FRONT DOOR HANDLE : Exploded View
INFOID:0000000009756484
FRONT DOOR HANDLE : Removal and Installation - Inside Handle
INFOID:0000000009756485
REMOVAL
1. Remove front door finisher. Refer to
INT-15, "Removal and Installation"
2. Remove screws (A) and inside handle assembly (1).
INSTALLATION
Installation is in the reverse order of removal.
CAUTION:
• Check front door lock cables are properly engaged to inside handle.
• After installation, check front door open/close, lock/unlock operation.
FRONT DOOR HANDLE : Removal and Installation - Outside Handle
INFOID:0000000009756486
REMOVAL
1. Fully close front door glass.
2. Remove front door finisher. Refer to
INT-15, "Removal and Installation"
3. Remove front door vapor barrier.
1.
Outside handle bracket
2.
Front gasket
3.
Outside handle
4.
Intelligent key button
5.
Door key cylinder rod
6.
Inside handle assembly
7.
Rear gasket
AWKIA2888ZZ
ALKIA2715ZZ
DLK-174
< REMOVAL AND INSTALLATION >
[WITH INTELLIGENT KEY SYSTEM]
DOOR HANDLE
4. Remove front door glass channel rear.
5. Disconnect the harness connectors from the door antenna and door request switch and then remove har-
ness clamp on outside handle bracket.
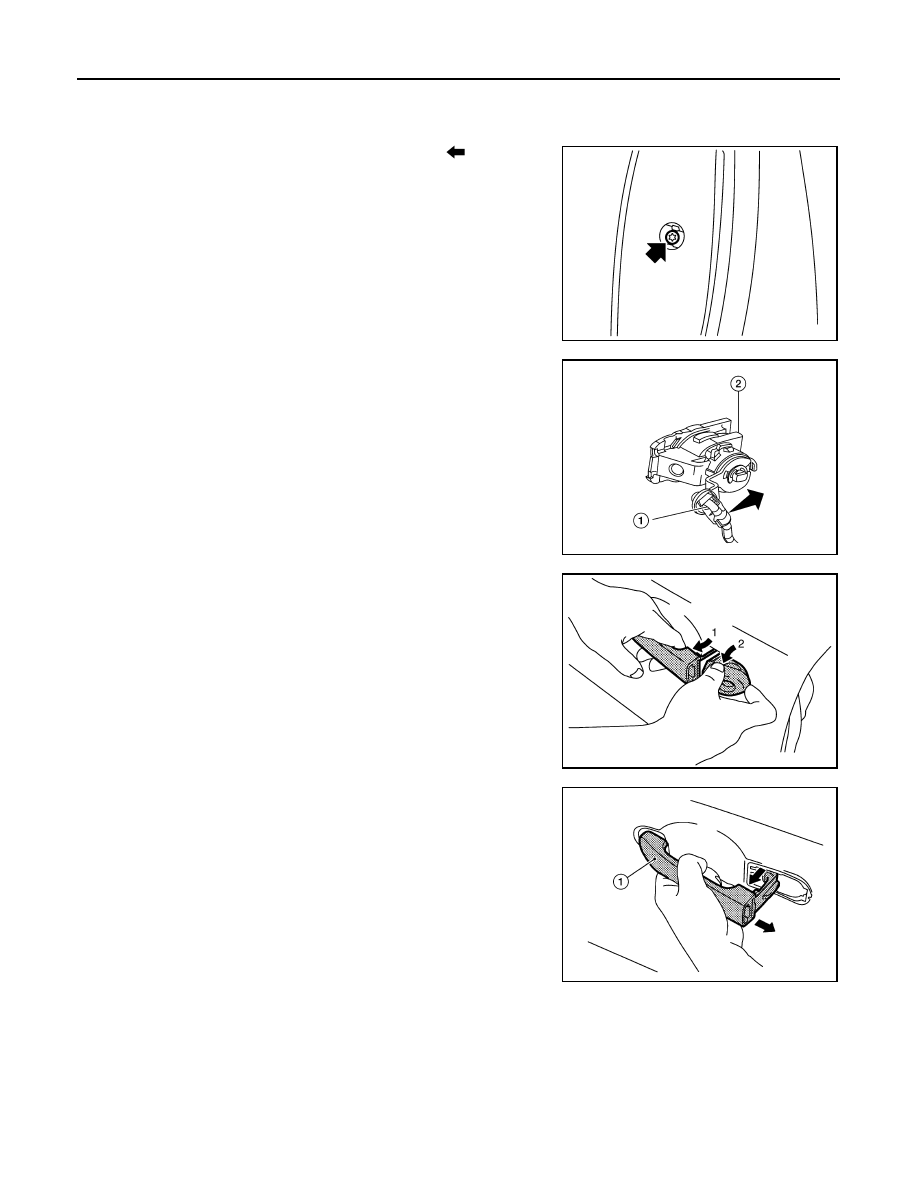
6. Remove door side grommet, and loosen screw (
) that retains
the front door outside handle bracket.
7. Reach in to separate door key cylinder rod (LH side) (1) from
door key cylinder assembly (LH side) (2).
8. While pulling (1) outside handle, remove (2) door key cylinder
assembly (LH side) or outside handle escutcheon (RH side).
9. While pulling outside handle (1), slide toward rear of vehicle to
remove outside handle.
JMKIA0025ZZ
ALKIA2487ZZ
JMKIA0560ZZ
AWKIA1997ZZ
DOOR HANDLE
DLK-175
< REMOVAL AND INSTALLATION >
[WITH INTELLIGENT KEY SYSTEM]
C
D
E
F
G
H
I
J
L
M
A
B
DLK
N
O
P
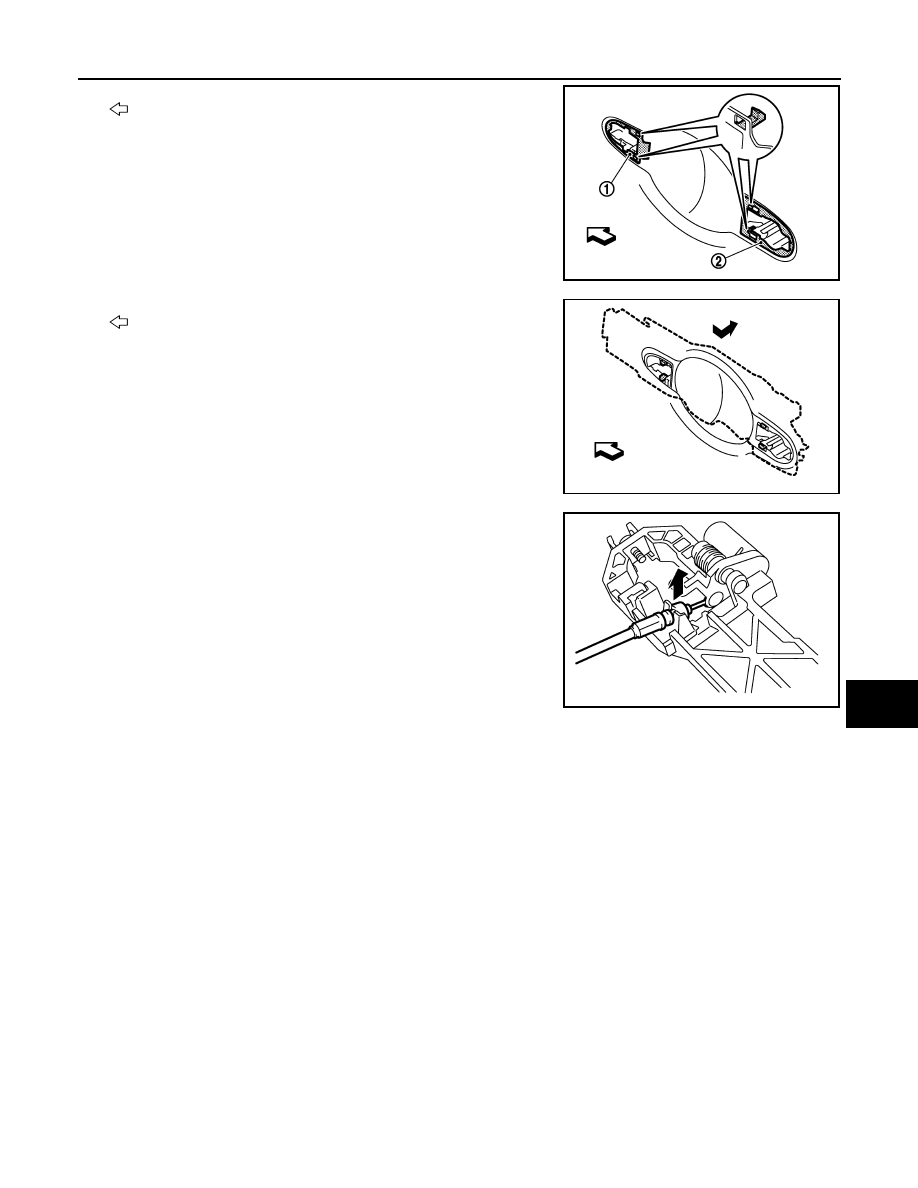
10. Remove front gasket (1) and rear gasket (2).
: Front
11. Slide outside handle bracket toward rear of vehicle to remove.
: Front
12. Disconnect the outside handle cable from the outside handle
bracket connection.
INSTALLATION
Installation is in the reverse order of removal.
CAUTION:
• When installing door key cylinder rod on the (LH) front door, be sure to rotate door key cylinder rod
holder until a click is felt.
• Check front door lock cable is properly engaged to outside handle bracket.
• After installation, check front door open/close, lock/unlock operation.
REAR DOOR HANDLE
JMKIA5889ZZ
JMKIA5890ZZ
PIIB5815E
Нет комментариевНе стесняйтесь поделиться с нами вашим ценным мнением.
Текст