Nissan Qashqai (2007-2010). Manual — part 1452
WASHER TANK
WW-99
< ON-VEHICLE REPAIR >
C
D
E
F
G
H
I
J
K
M
A
B
WW
N
O
P
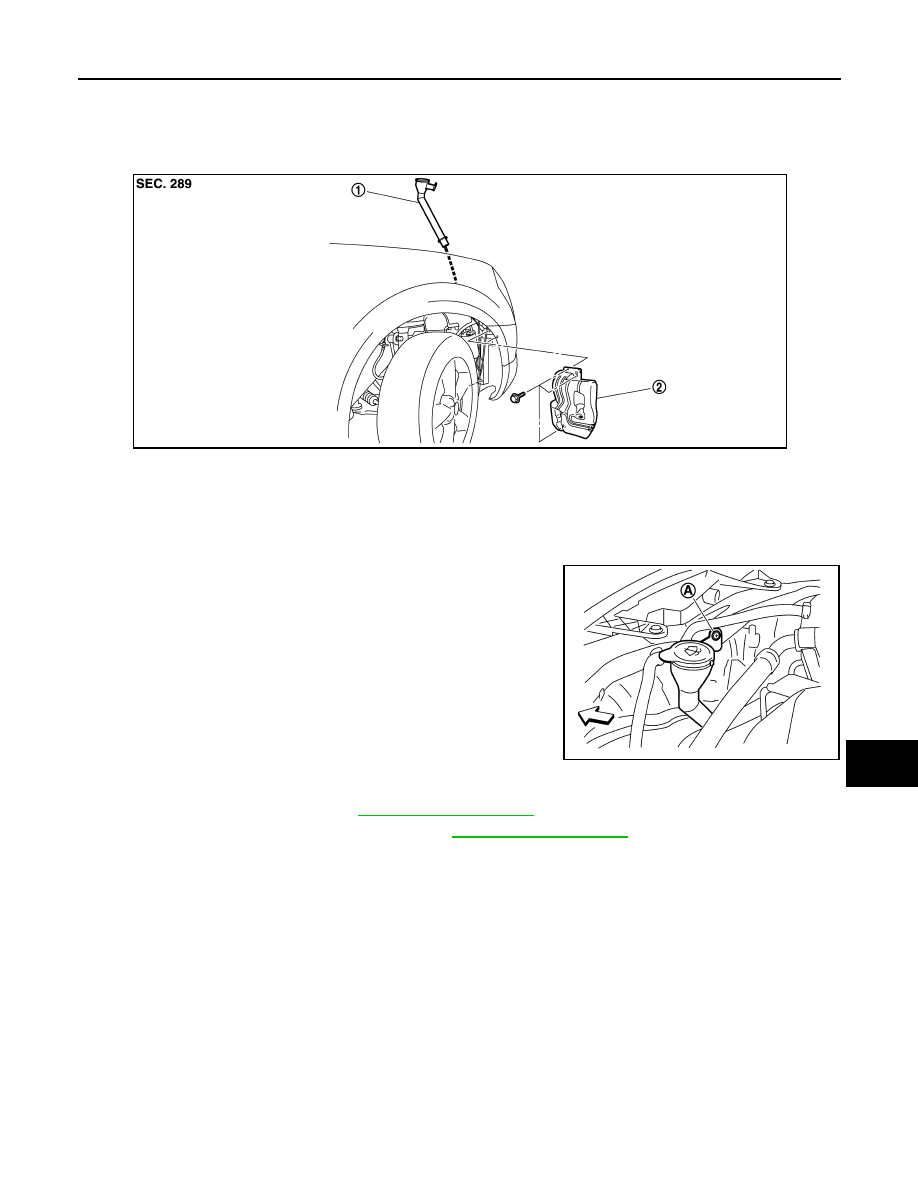
WASHER TANK
Exploded View
INFOID:0000000000896788
Removal and Installation
INFOID:0000000000896789
REMOVAL
1.
Remove the clip (A).
2.
Pull out the washer tank inlet from the washer tank.
3.
Remove the splash guard. Refer to
4.
Remove the fender protector RH (front). Refer to
5.
Disconnect washer pump connector.
6.
Disconnect headlamp washer pump connector.
7.
Remove all washer tubes.
8.
Remove washer tank mounting bolts.
9.
Remove the washer tank from the vehicle.
INSTALLATION
Install in the reverse order of removal.
CAUTION:
Add water up to the top of the washer tank inlet after installing. Check that there is no leakage.
1.
Washer tank inlet
2.
Washer tank
JPLIA0270ZZ
: Vehicle front
JPLIA0271ZZ
WW-100
< ON-VEHICLE REPAIR >
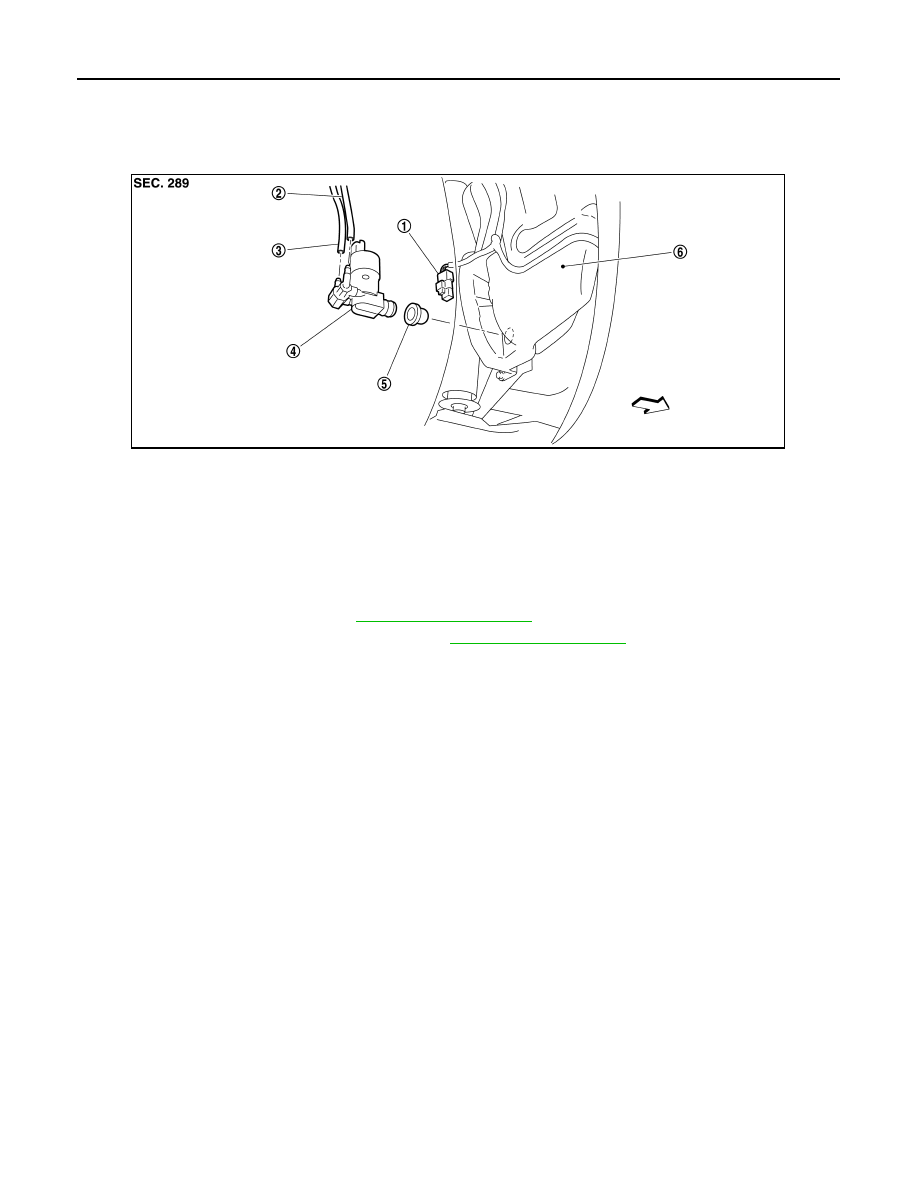
WASHER PUMP
WASHER PUMP
Exploded View
INFOID:0000000000896790
Removal and Installation
INFOID:0000000000896791
REMOVAL
1.
Remove the splash guard. Refer to
2.
Remove the fender protector RH (front). Refer to
3.
Disconnect washer pump connector.
4.
Remove front washer tube and rear washer tube.
5.
Remove washer pump from the washer tank.
6.
Remove the packing from the washer tank.
INSTALLATION
Install in the reverse order of removal.
CAUTION:
Never twist the packing when installing the washer pump.
1.
Washer pump connector
2.
Front washer tube
3.
Rear washer tube
4.
Washer pump
5.
Packing
6.
Washer tank
: Vehicle front
JPLIA0272ZZ
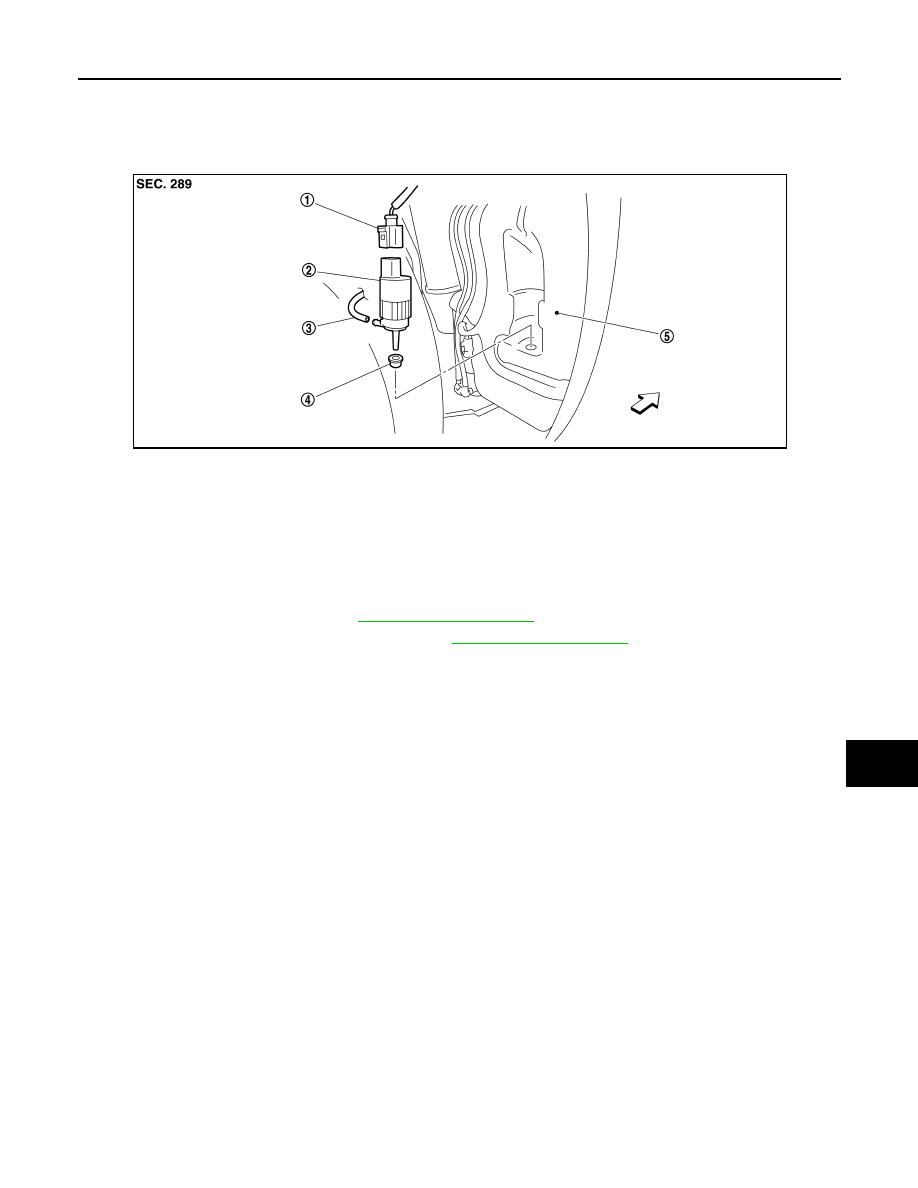
HEADLAMP WASHER PUMP
WW-101
< ON-VEHICLE REPAIR >
C
D
E
F
G
H
I
J
K
M
A
B
WW
N
O
P
HEADLAMP WASHER PUMP
Exploded View
INFOID:0000000000936071
Removal and Installation
INFOID:0000000000936072
REMOVAL
1.
Remove the splash guard. Refer to
2.
Remove the fender protector RH (front). Refer to
3.
Disconnect the headlamp washer pump connector.
4.
Remove headlamp washer tube.
5.
Remove headlamp washer pump from the washer tank.
6.
Remove the packing from the washer tank.
INSTALLATION
Install in the reverse order of removal.
CAUTION:
Never twist the packing when installing the washer pump.
1.
Headlamp washer pump connector
2.
Headlamp washer pump
3.
Headlamp washer tube
4.
Packing
5.
Washer tank
: Vehicle front
JPLIA0291ZZ
WW-102
< ON-VEHICLE REPAIR >
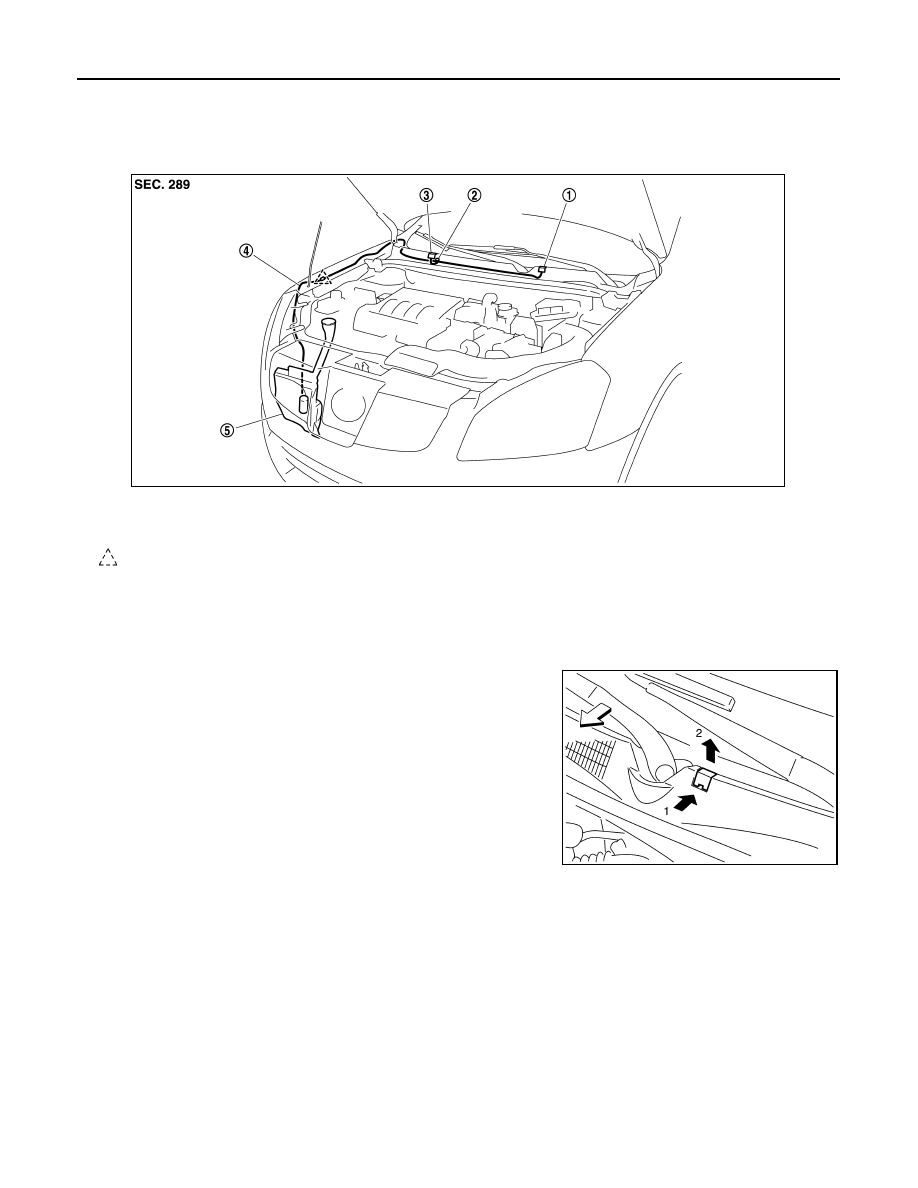
FRONT WASHER NOZZLE AND TUBE
FRONT WASHER NOZZLE AND TUBE
Hydraulic Layout
INFOID:0000000000896792
Removal and Installation
INFOID:0000000000896793
REMOVAL
1.
Open the hood.
2.
Remove front washer nozzle in numerical order shown in the fig-
ure.
3.
Remove the front washer tube from the front washer nozzle.
INSTALLATION
Install in the reverse order of removal.
CAUTION:
The spray positions differ, check that left and right nozzles are installed correctly.
Inspection and Adjustment
INFOID:0000000000926151
INSPECTION
Washer Nozzle Inspection
1.
Front washer nozzle (LH)
2.
Check valve
3.
Front washer nozzle (RH)
4.
Front washer tube
5.
Washer tank
: Clip
JPLIA0273ZZ
: Vehicle front
JPLIA0274ZZ
Нет комментариевНе стесняйтесь поделиться с нами вашим ценным мнением.
Текст