Nissan Qashqai (2007-2010). Manual — part 1037
HOOD
DLK-227
< ON-VEHICLE REPAIR >
[WITH I-KEY, WITHOUT SUPER LOCK]
C
D
E
F
G
H
I
J
L
M
A
B
DLK
N
O
P
HOOD SUPPORT ROD : Removal and Installation
INFOID:0000000001091264
REMOVAL
1.
Support the hood lock assembly with the proper material to prevent it from falling.
WARNING:
Bodily injury may occur if no supporting rod is holding the hood open when removing the hood
stay.
2.
Remove the hood support rod from the grommet.
INSTALLATION
Install in the reverse order of removal.
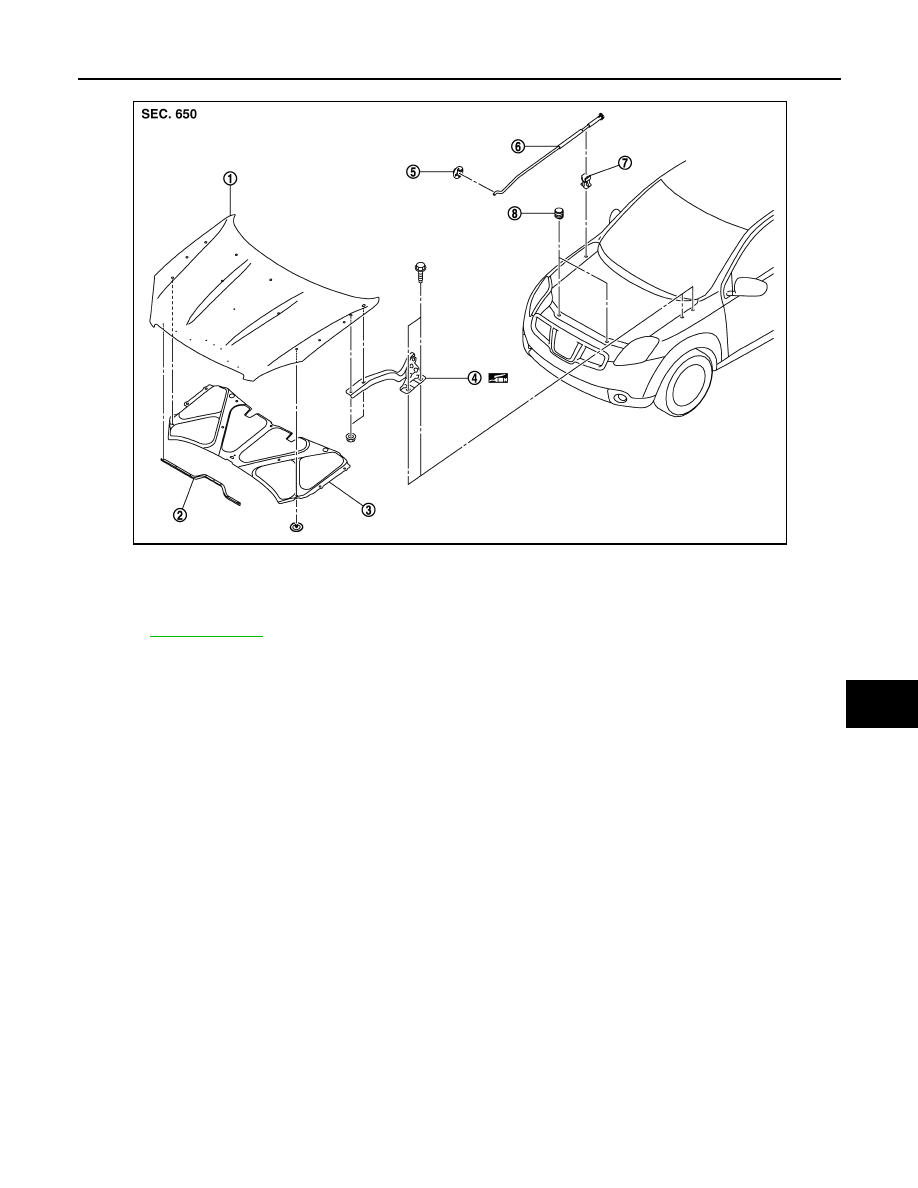
HOOD LOCK CONTROL
HOOD LOCK CONTROL : Exploded View
INFOID:0000000000939211
1.
Hood assembly
2.
Hood sealing rubber
3.
Hood insulator
4.
Hood hinge
5.
Grommet
6.
Hood support rod
7.
Clamp
8.
Hood bumper rubber
Refer to
JMKIA0175ZZ
DLK-228
< ON-VEHICLE REPAIR >
[WITH I-KEY, WITHOUT SUPER LOCK]
HOOD
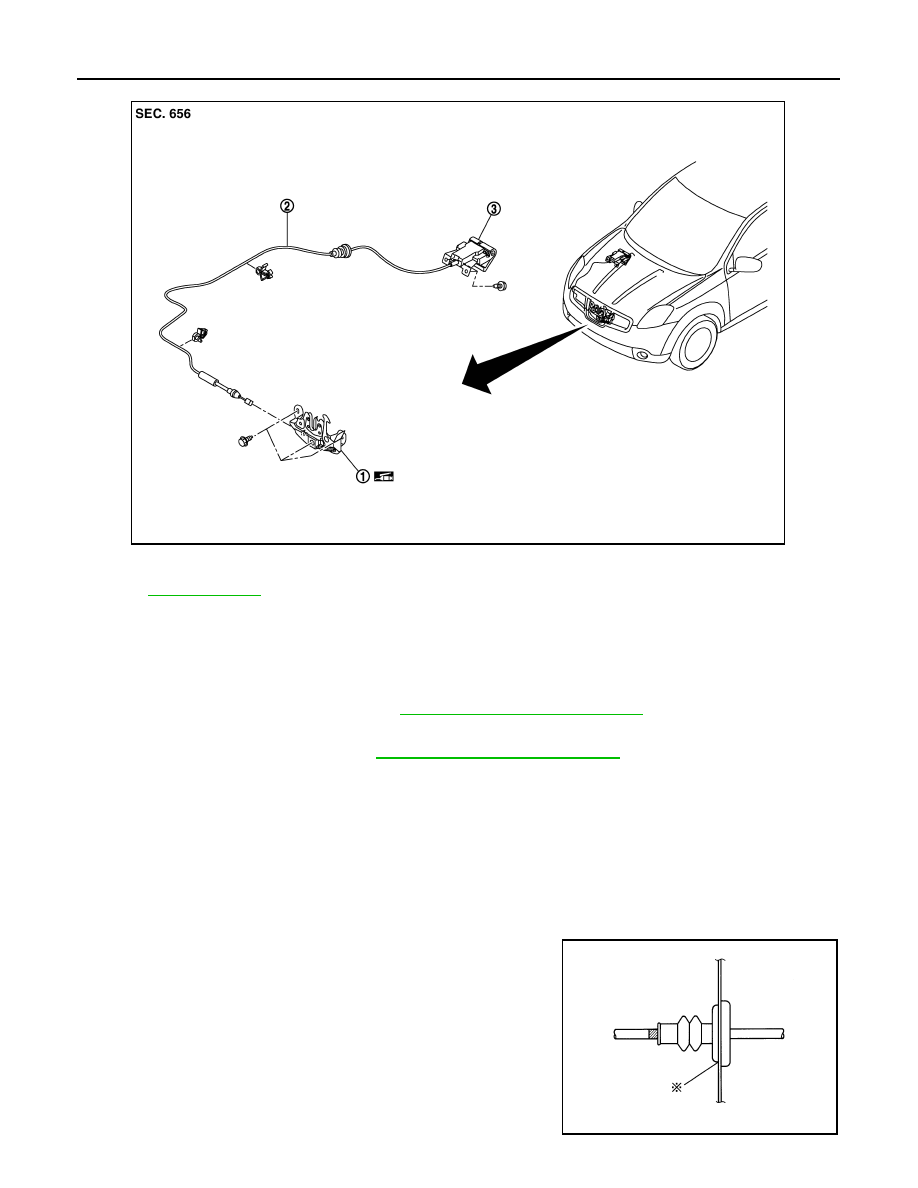
HOOD LOCK CONTROL : Removal and Installation
INFOID:0000000000939212
REMOVAL
1.
Remove the hood lock opener mounting bolts, and then remove the hood lock opener.
2.
Remove the front bumper fascia. Refer to
EXT-11, "Removal and Installation"
.
3.
Remove the hood lock mounting bolts, and then remove the hood lock.
4.
Remove the fender protector. Refer to
EXT-22, "Removal and Installation"
5.
Disconnect the hood lock cable from hood lock, and clip it from the hoodledge.
6.
Remove the grommet on the dash lower panel, and pull the hood lock control cable toward the passenger
compartment.
CAUTION:
While pulling, do not to damage (peeling) the outside of the hood lock control cable.
INSTALLATION
Install in the reverse order of removal.
CAUTION:
• Do not to bend the cable too much, keeping the radius 100 mm (3.94 in) or more.
• Check that the cable is not offset from the positioning grom-
met, and apply the sealant to the grommet (at *mark) properly.
1.
Hood lock assembly
2.
Hood lock control cable
3.
Hood lock opener
Refer to
for symbols in the figure.
JMKIA0176ZZ
PIIB5801E

HOOD
DLK-229
< ON-VEHICLE REPAIR >
[WITH I-KEY, WITHOUT SUPER LOCK]
C
D
E
F
G
H
I
J
L
M
A
B
DLK
N
O
P
• Check that the hood lock control cable is properly engaged with the hood lock.
• After installation, perform hood fitting adjustment. Refer to
DLK-225, "HOOD ASSEMBLY : Adjust-
• After installation, perform the hood lock control inspection. Refer to
HOOD LOCK CONTROL : Inspection
INFOID:0000000000939213
NOTE:
If the hood lock cable is bent or deformed, replace it.
1.
Check that the secondary latch is properly engaged with the secondary striker [6.8 mm (0.268 in) shown
in the figure] by hood weight.
2.
While operating the hood opener, carefully check that the front end of the hood is raised by approximately
20.0 mm (0.787 in). Also check that the hood opener returns to the original position.
3.
Check that the hood opener operating is condition 49 N (5.0 kg) or below.
4.
Install so that static closing face of hood is 94 – 490 N·m (9.6 – 50.0 kg-m).
NOTE:
• Exert vertical force on right side and left side of hood lock.
• Do not press simultaneously both sides.
5.
Check the hood lock lubrication condition. If necessary, apply body grease to the hood lock.
DLK-230
< ON-VEHICLE REPAIR >
[WITH I-KEY, WITHOUT SUPER LOCK]
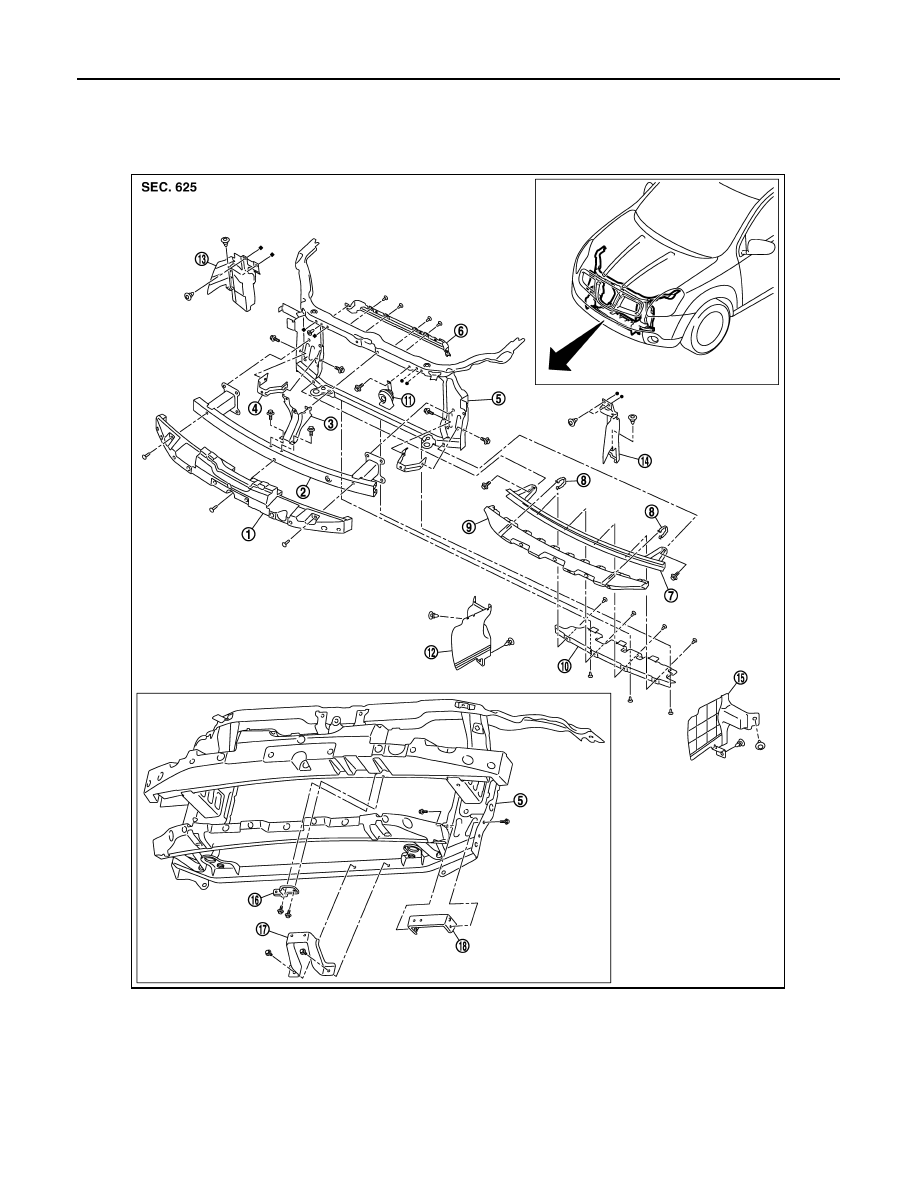
RADIATOR CORE SUPPORT
RADIATOR CORE SUPPORT
Exploded View
INFOID:0000000000939214
1.
Energy absorber
2.
Bumper reinforcement
3.
Hood lock support stay
4.
Intercooler bracket
(with K9K engine models)
5.
Radiator core support assembly
6.
Upper air dam
7.
Apron bracket assembly
8.
Fastener
9.
Energy absorber lower
10. Front air guide lower
11.
Horn assembly
12. Front air guide side lower RH
13. Front air guide side RH
14. Front air guide side LH
15. Front air guide side lower LH
16. Oil cooler bracket upper
17. Oil cooler bracket lower
18. Oil cooler bracket side
JMKIA0172ZZ
Нет комментариевНе стесняйтесь поделиться с нами вашим ценным мнением.
Текст