Nissan Qashqai (2007-2010). Manual — part 1156
REAR DOOR LOCK
DLK-703
< ON-VEHICLE REPAIR >
[WITHOUT I-KEY & SUPER LOCK]
C
D
E
F
G
H
I
J
L
M
A
B
DLK
N
O
P
3.
Remove the inside handle mounting bolt, and then disconnect the inside handle knob cable and the lock
knob cable.
4.
Remove the inside handle.
INSTALLATION
Install in the reverse order of removal.
CAUTION:
• Check the door lock/unlock operation after installation.
• Check the door open/close operation after installation.
OUTSIDE HANDLE
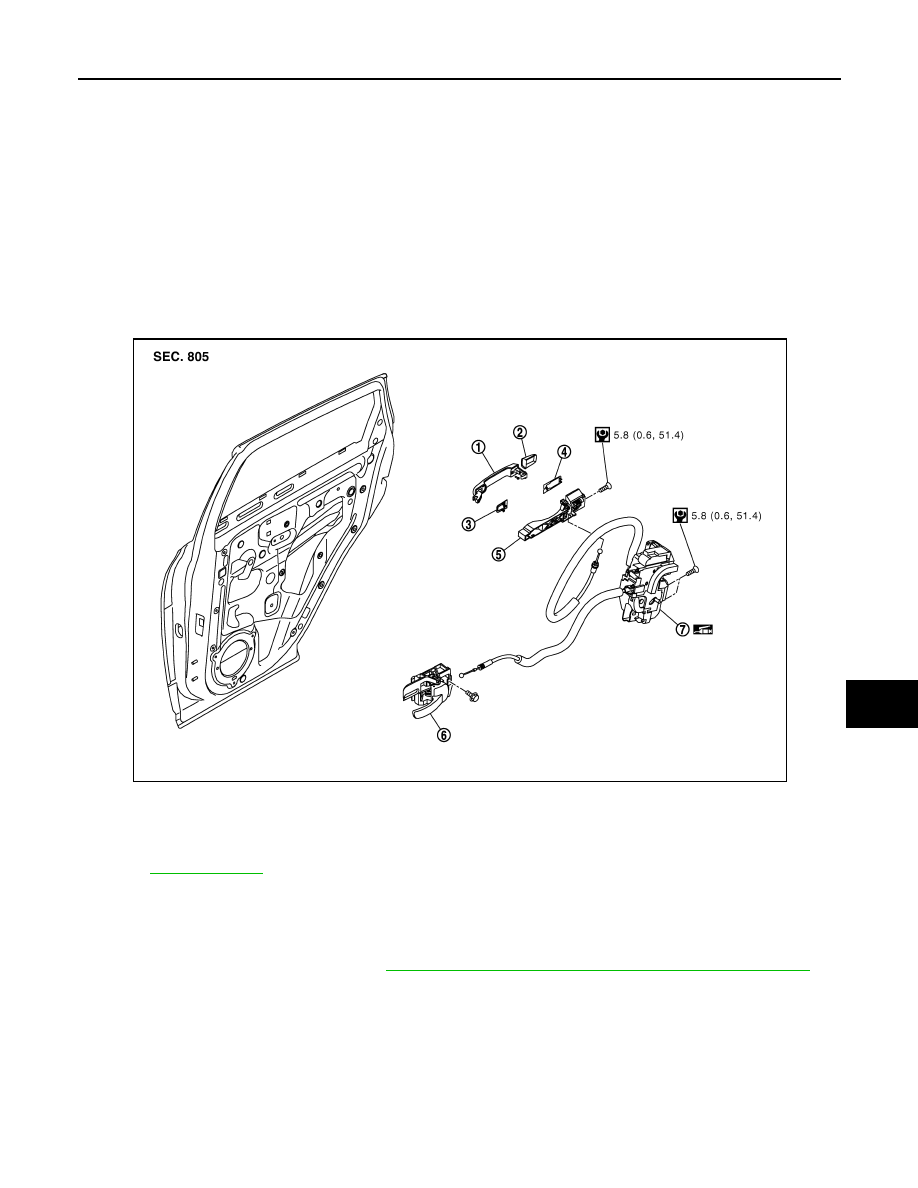
OUTSIDE HANDLE : Exploded View
INFOID:0000000001098678
OUTSIDE HANDLE : Removal and Installation
INFOID:0000000001098679
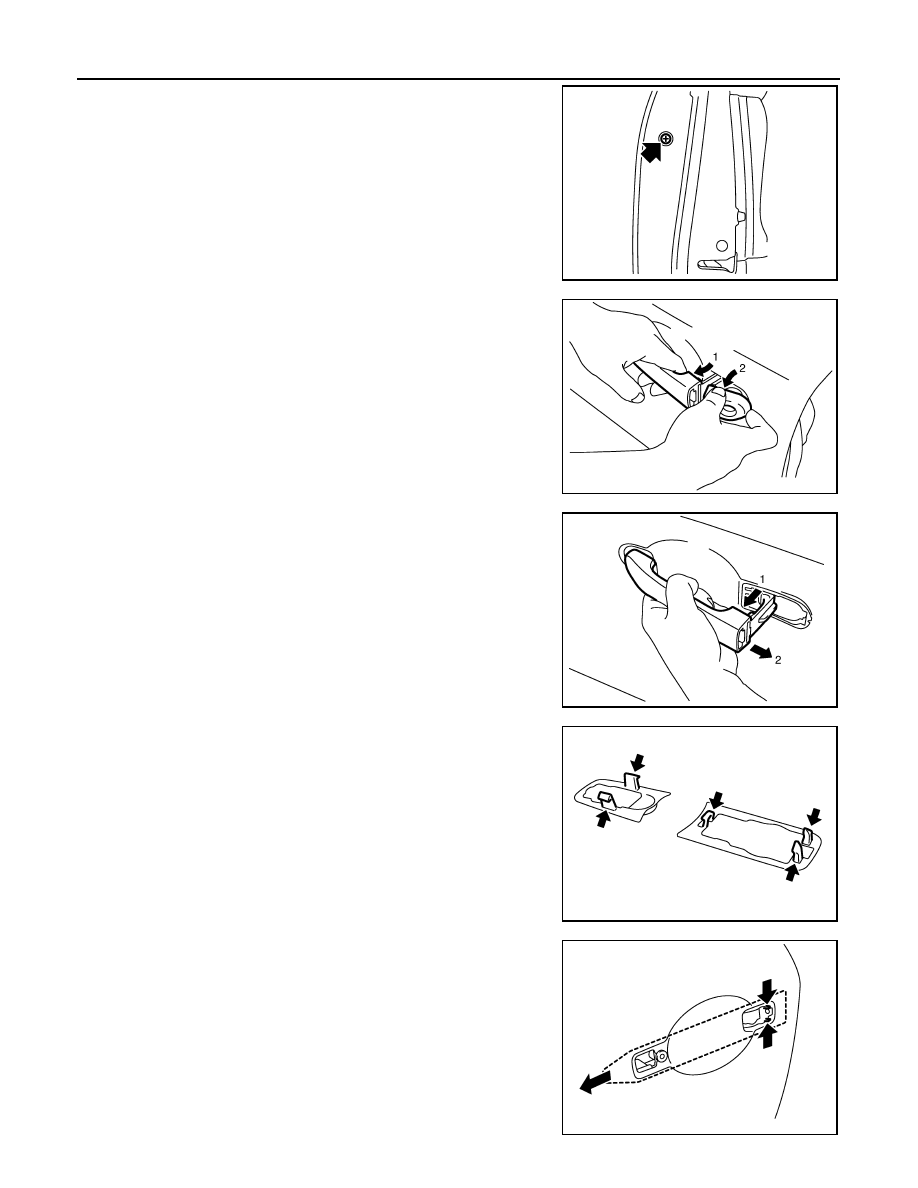
REMOVAL
1.
Remove the rear door finisher. Refer to
INT-13, "REAR DOOR FINISHER : Removal and Installation"
.
2.
Fully close the front door window.
3.
Remove the door sealing screen.
4.
Remove the inside handle mounting bolt, disconnect the inside handle knob cable and the lock knob
cable.
1.
Outside handle
2.
Outside handle escutcheon
3.
Front gasket
4.
Rear gasket
5.
Outside handle bracket
6.
Inside handle
7.
Door lock assembly
Refer to
JMKIA0189GB
DLK-704
< ON-VEHICLE REPAIR >
[WITHOUT I-KEY & SUPER LOCK]
REAR DOOR LOCK
5.
Remove the door side grommet, and remove the door key cylin-
der assembly (driver side) and the outside handle escutcheon
(passenger side) mounting bolts from the grommet hole.
CAUTION:
Do not forcibly remove the bolts (TORX: T10).
6.
While pulling the outside handle, and then remove the door key
cylinder assembly.
7.
While pulling the outside handle, slide toward rear of vehicle to
remove the outside handle.
8.
Remove the front gasket and the rear gasket.
9.
While pulling the outside handle bracket, slide toward rear of
vehicle to remove the outside handle bracket.
JMKIA0020ZZ
PIIB5809E
PIIB5810E
PIIB5811E
PIIB5814E
REAR DOOR LOCK
DLK-705
< ON-VEHICLE REPAIR >
[WITHOUT I-KEY & SUPER LOCK]
C
D
E
F
G
H
I
J
L
M
A
B
DLK
N
O
P
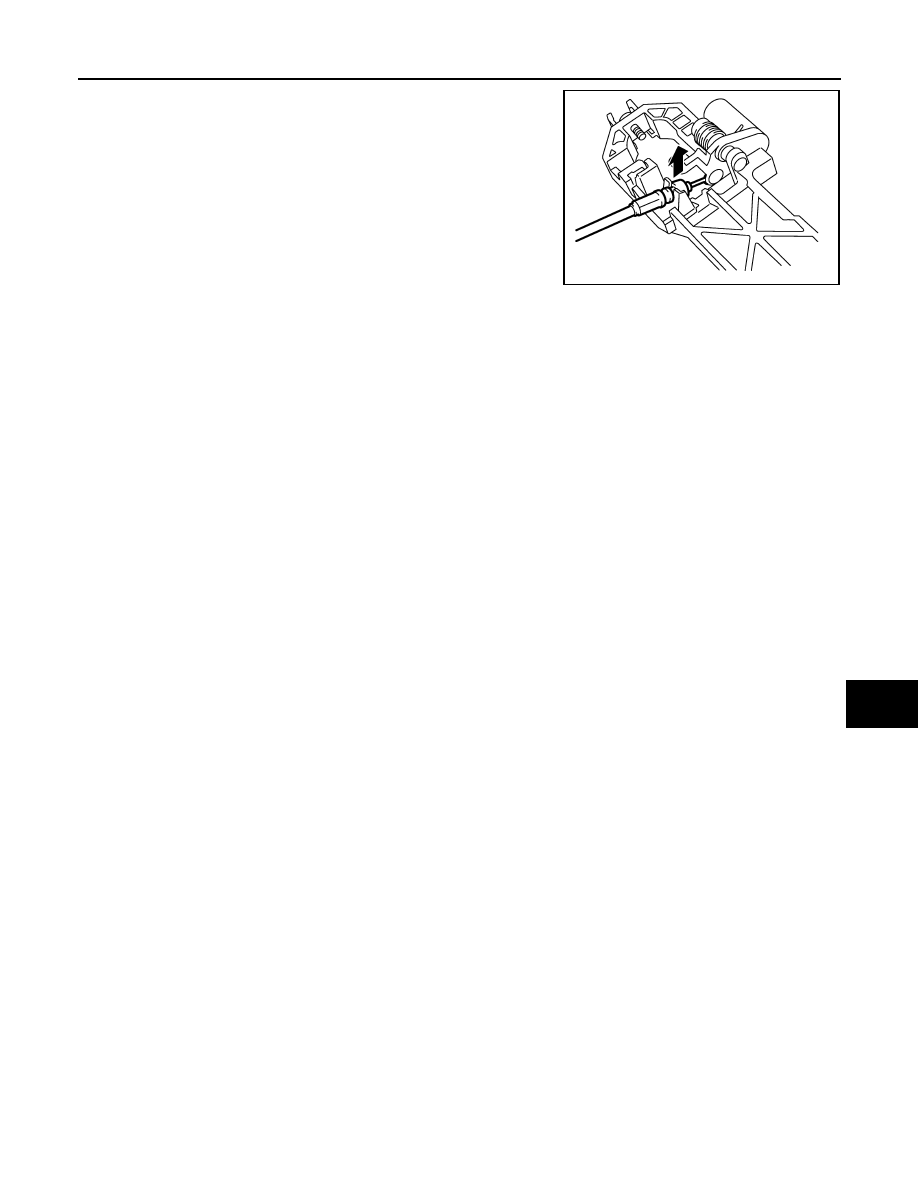
10. Reach in to separate the outside handle cable connection.
INSTALLATION
Install in the reverse order of removal.
CAUTION:
• Check the door lock/unlock operation after installation.
• Check the door open/close operation after installation.
PIIB5815E
DLK-706
< ON-VEHICLE REPAIR >
[WITHOUT I-KEY & SUPER LOCK]
BACK DOOR LOCK
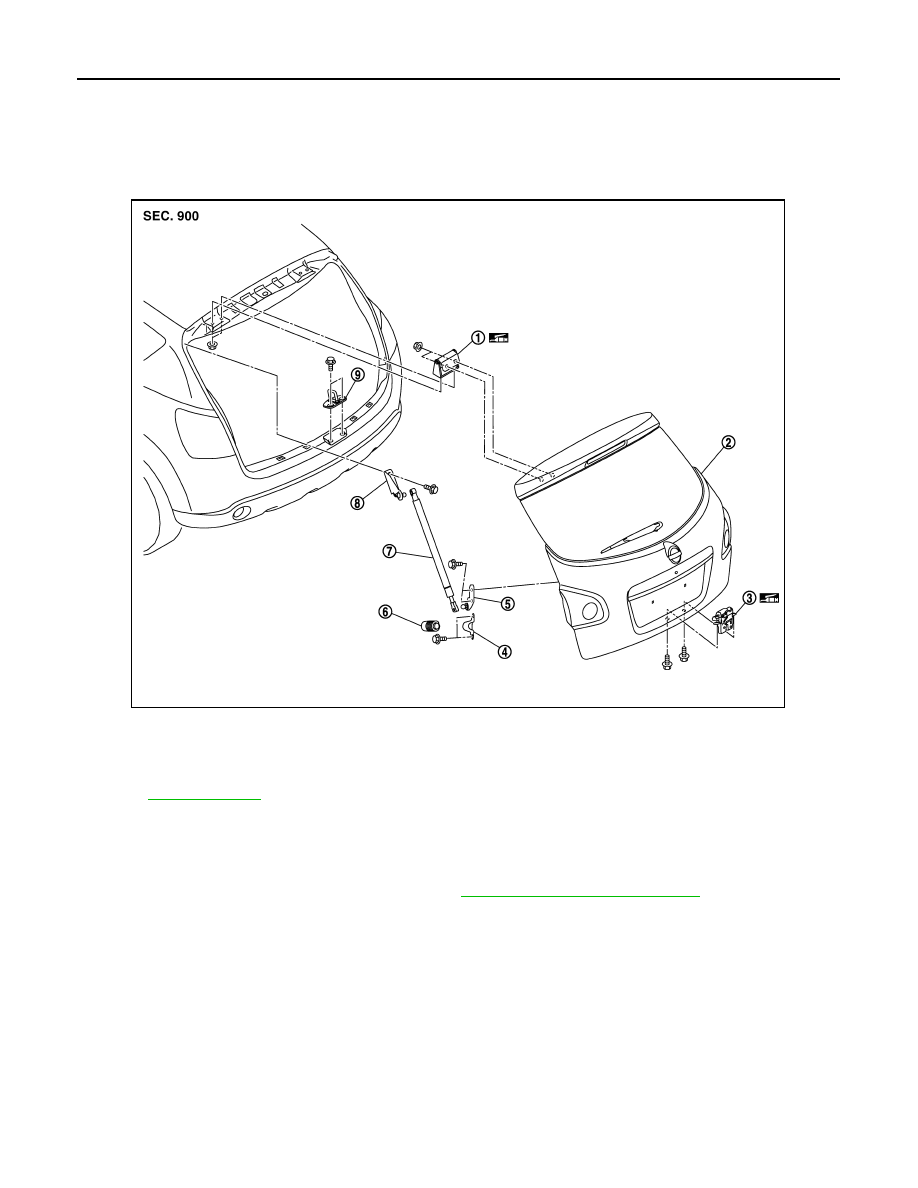
BACK DOOR LOCK
DOOR LOCK
DOOR LOCK : Exploded View
INFOID:0000000001098684
DOOR LOCK : Removal and Installation
INFOID:0000000001098685
REMOVAL
1.
Remove the back door trim finisher lower. Refer to
INT-26, "Removal and Installation"
.
2.
Disconnect the back door lock assembly and back door opener switch connectors.
3.
Remove the back door lock mounting bolts, and then remove the back door lock and actuator.
INSTALLTION
Install in the reverse order of removal.
CAUTION:
Check the back door lock/unlock operation after installation.
1.
Back door hinge
2.
Back door assembly
3.
Back door lock assembly
4.
Bumper rubber bracket
5.
Back door stay bracket (lower)
6.
Bumper rubber
7.
Back door stay
8.
Back door stay bracket (upper)
9.
Back door striker
Refer to
for symbols in the figure.
JMKIA0186ZZ
Нет комментариевНе стесняйтесь поделиться с нами вашим ценным мнением.
Текст