Nissan Qashqai (2007-2010). Manual — part 969
PRECAUTIONS
IP-9
< PRECAUTION >
C
D
E
F
G
H
I
K
L
M
A
B
IP
N
O
P
• Be careful not to scratch pad and other parts.
• When removing or disassembling any part, be careful not to damage or deform it. Protect parts, which may
get in the way with cloth.
• When removing parts with a screwdriver or other tool, protect parts by wrapping them with vinyl or tape.
• Keep removed parts protected with cloth.
• If a clip is deformed or damaged, replace it.
• If an unreusable part is removed, replace it with a new one.
• Tighten bolts and nuts firmly to the specified torque.
• After re-assembly has been completed, make sure each part functions correctly.
• Remove stains in the following way.
Water-soluble stains:
Dip a soft cloth in warm water, and then squeeze it tightly. After wiping the stain, wipe with a soft dry cloth.
Oil stain:
Dissolve a synthetic detergent in warm water (density of 2 to 3% or less), dip the cloth, then clean off the stain
with the cloth. Next, dip the cloth in fresh water and squeeze it tightly. Then clean off the detergent completely.
Then wipe the area with a soft dry cloth.
• Do not use any organic solvent, such as thinner or benzine.
IP-10
< PREPARATION >
PREPARATION
PREPARATION
PREPARATION
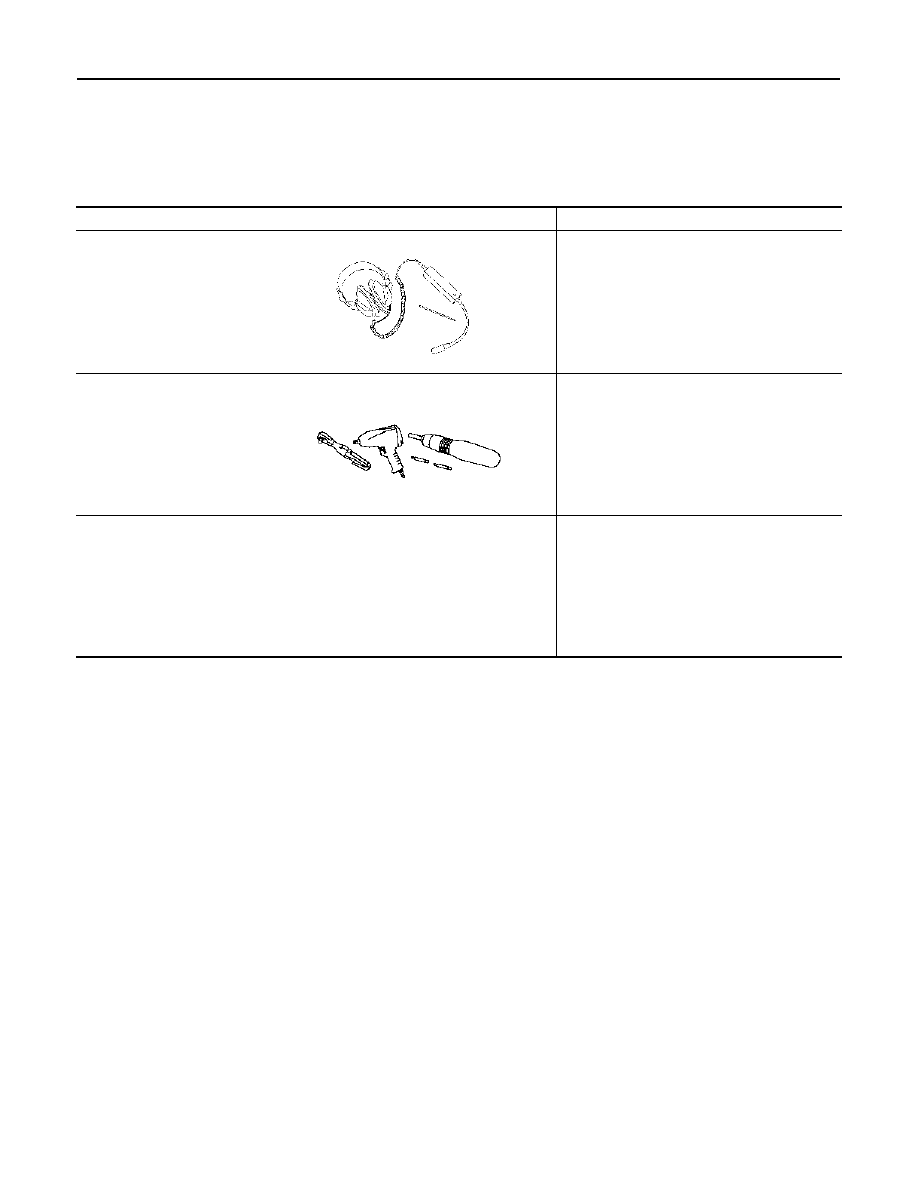
Commercial Service Tools
INFOID:0000000001093677
Tool name
Description
Engine ear
Locating the noise
Power tool
Clip remover
Removing clips
SIIA0995E
PIIB1407E
E1KIA0055GB
INSTRUMENT PANEL ASSEMBLY
IP-11
< ON-VEHICLE REPAIR >
C
D
E
F
G
H
I
K
L
M
A
B
IP
N
O
P
ON-VEHICLE REPAIR
INSTRUMENT PANEL ASSEMBLY
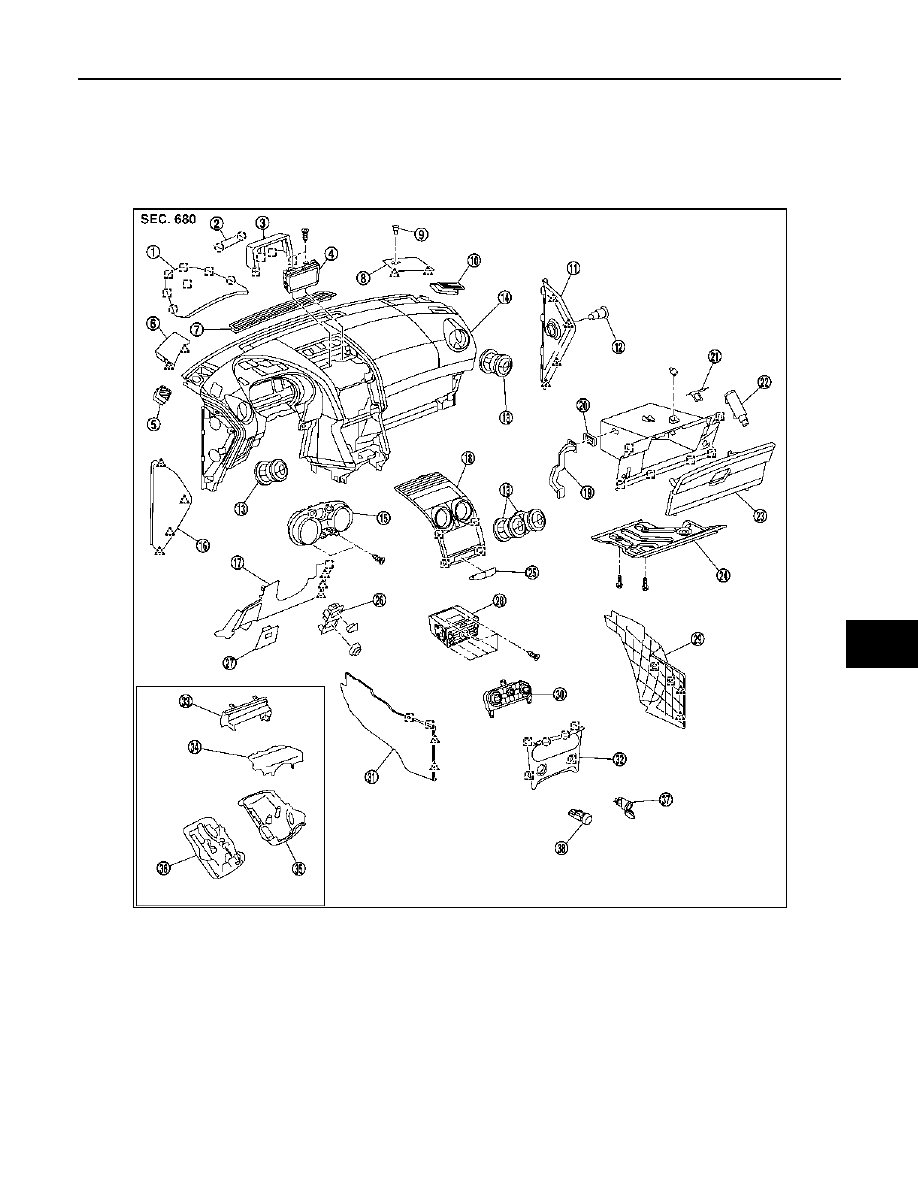
Exploded View
INFOID:0000000001093678
1.
Cluster lid A
2.
Display unit cover finisher
3.
Display unit cover
4.
Display unit
5.
Defroster grille (LH)
6.
Tweeter grille (LH)
7.
Front defroster grille, center
8.
Tweeter grille (RH)
9.
Sunload sensor (if equipped)
10. Defroster grille (RH)
11.
Instrument side finisher, passenger
side
12. Passenger airbag cut-off switch as-
sembly
13. Ventilation grille
14. Instrument panel assembly
15. Combimeter assembly
16. Instrument side finisher, driver side
17. Lower instrument panel, driver side
18. Cluster lid C
19. Glove box air duct
20. Glove box air duct opener
21. Glove box latch
22. Glove box door damper
23. Glove box door
24. Lower instrument panel, passenger
side
25. SRS information display
26. Mirror/ESP switch holder
27. Fuse box lid
E1JIA0001ZZ
IP-12
< ON-VEHICLE REPAIR >
INSTRUMENT PANEL ASSEMBLY
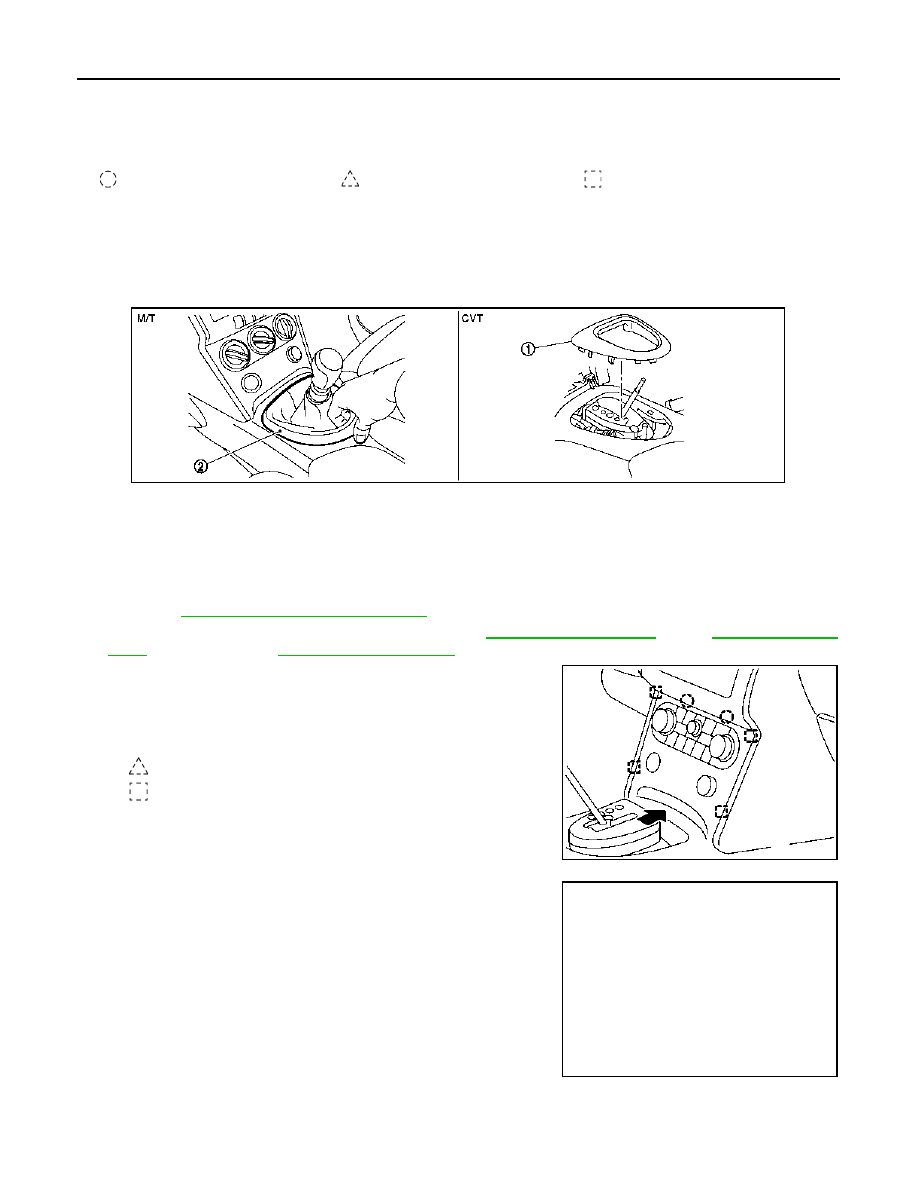
Removal and Installation
INFOID:0000000001093679
REMOVAL
1.
Put selector lever in drive position. (CVT Models only)
2.
Remove front console finisher.
• Remove clips from rear of console finisher, and then remove pawl of front. Pull front console finisher
upward to disengage from center console.
• Disconnect harness connectors.
3.
Remove selector lever knob. (CVT Models only)
• Refer to
TM-326, "Removal and Installation"
4.
Remove shift lever knob. (M/T Models only). Refer to
(6MT: RS6F94R),
(6MT: RS6F52A).
5.
Remove Cluster lid D.
• Using clip remover or other suitable tool, release cluster lid
metal clips, from lower to upper, from Instrument Panel.
• Release harness connector.
6.
Remove screws (B) of center console front side with screw
driver (A).
28. AV/navigation unit assembly
29. Lower instrument cover, RH
30. Air conditioner controller
31. Lower instrument cover, LH
32. Cluster lid D
33. Steering column upper soft cover
34. Steering column upper cover
35. Steering column lower cover
36. Steering column protector
37. Power socket
38. Ventilation button
Clip
Pawl
Metal clip
1.
Front console finisher (CVT models) 2.
Front console finisher (MT models)
: Pawl
: Metal clip
E1JIA0010GB
E1JIA0003ZZ
E1JIA0002ZZ
Нет комментариевНе стесняйтесь поделиться с нами вашим ценным мнением.
Текст