Nissan Qashqai (2007-2010). Manual — part 845
DUCTS AND GRILLES
VTL-45
< ON-VEHICLE REPAIR >
[AUTOMATIC AIR CONDITIONER]
C
D
E
F
G
H
J
K
L
M
A
B
VTL
N
O
P
REMOVAL
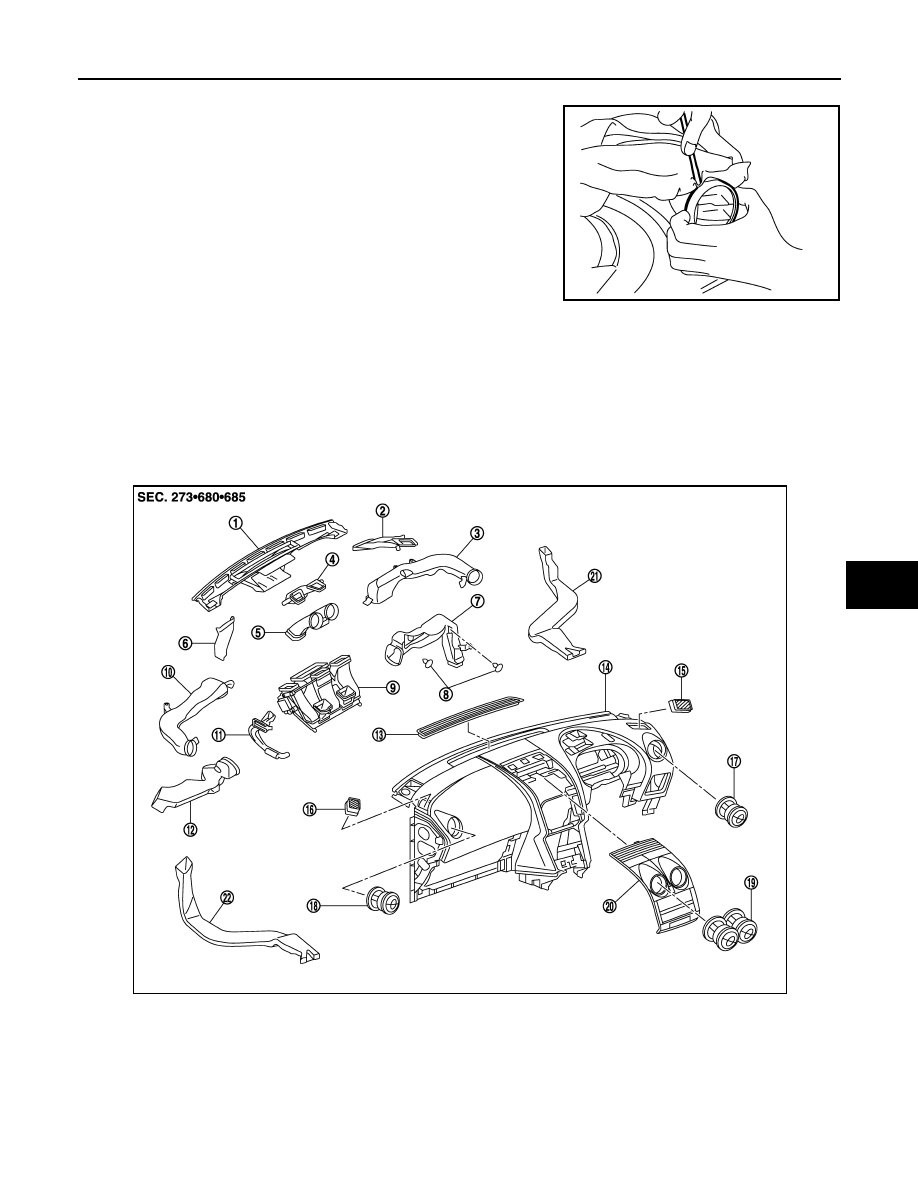
Remove side ventilator grilles as shown.
CAUTION:
Use shop cloth and all other protection necessaries to avoid
damage.
INSTALLATION
Installation is basically the reverse order of removal.
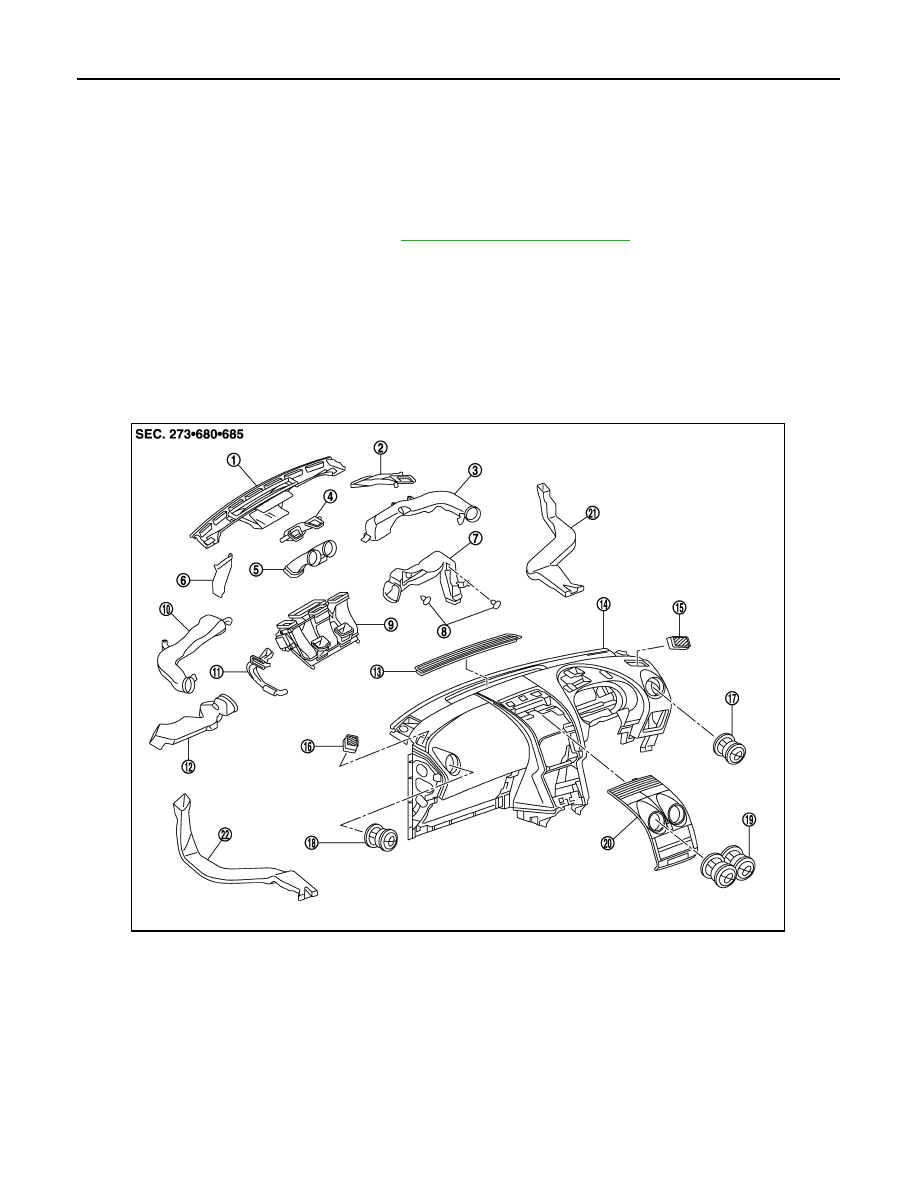
FRONT DEFROSTER NOZZLE, SIDE DEFROSTER NOZZLES AND VENTILA-
TOR DUCT
FRONT DEFROSTER NOZZLE, SIDE DEFROSTER NOZZLES AND VENTILATOR
DUCT : Exploded View
INFOID:0000000001093732
E1IIA0026ZZ
1.
Center defroster duct
2.
Defroster duct - RH
3.
Side ventilator duct - RH
4.
Front upper ventilator duct
5.
Front ventilator duct
6.
Defroster duct - LH
7.
Side foot duct - RH
8.
Clip
9.
Air mix duct
10. Side ventilator duct - LH
11. Glove box duct
12. Side foot duct - LH
13. Front defroster grille - center
14. Instrument panel
15. Side defroster grille - RH
16. Side defroster grille - LH
17. Side ventilation grille - RH
18. Side ventilation grille - LH
E1IIA0023ZZ
VTL-46
< ON-VEHICLE REPAIR >
[AUTOMATIC AIR CONDITIONER]
DUCTS AND GRILLES
FRONT DEFROSTER NOZZLE, SIDE DEFROSTER NOZZLES AND VENTILATOR
DUCT : Removal and Installation
INFOID:0000000001093733
REMOVAL
1.
Remove instrument panel & pad. Refer to
IP-12, "Removal and Installation"
2.
Remove mounting screws.
3.
Remove clips, and then remove defroster nozzle, side defroster nozzle and ventilator duct.
INSTALLATION
Installation is basically the reverse order of removal.
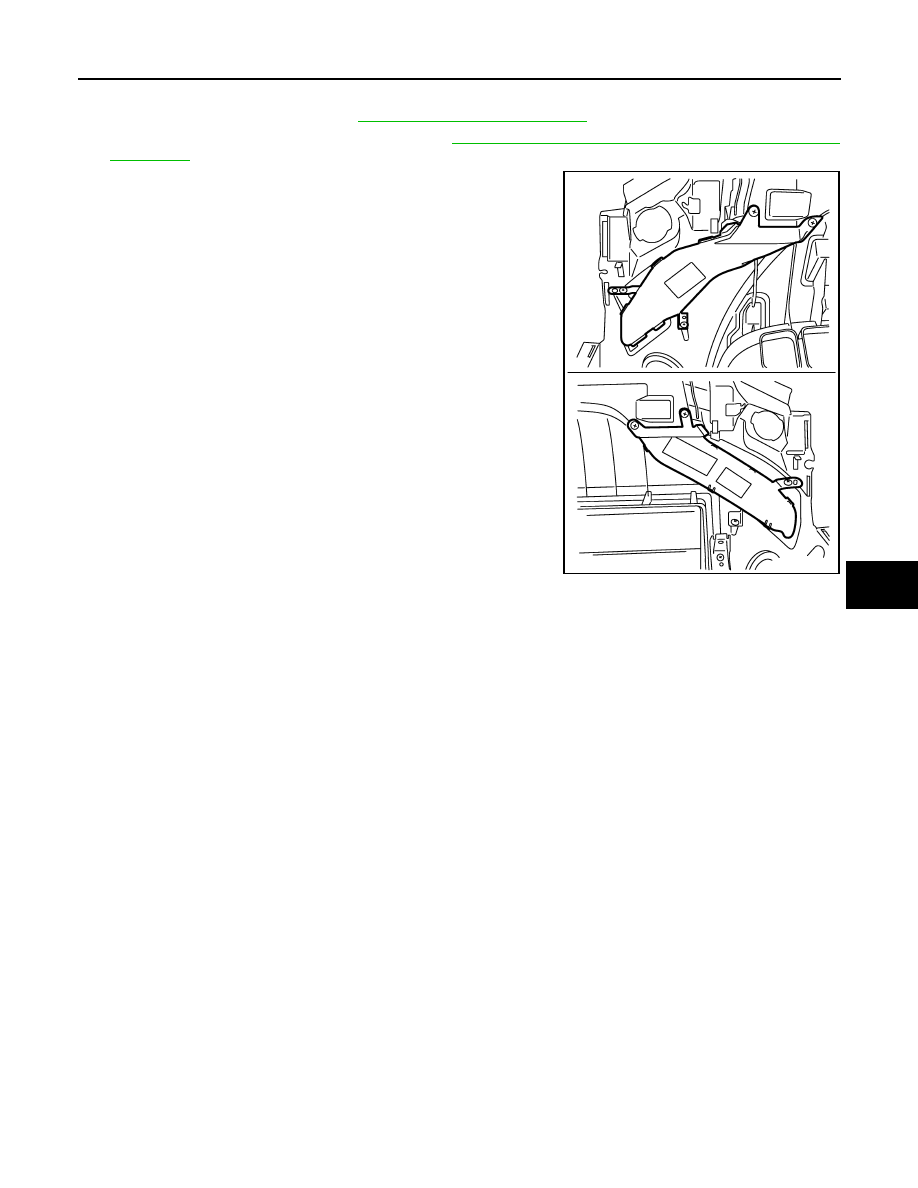
SIDE DEFROSTER DUCTS
SIDE DEFROSTER DUCTS : Exploded View
INFOID:0000000001093734
SIDE DEFROSTER DUCTS : Removal and Installation
INFOID:0000000001093735
19. Center ventilation grille
20. Cluster lid C
21. Floor duct - RH
22. Floor duct - LH
1.
Center defroster duct
2.
Defroster duct - RH
3.
Side ventilator duct - RH
4.
Front upper ventilator duct
5.
Front ventilator duct
6.
Defroster duct - LH
7.
Side foot duct - RH
8.
Clip
9.
Air mix duct
10. Side ventilator duct - LH
11. Glove box duct
12. Side foot duct - LH
13. Front defroster grille - center
14. Instrument panel
15. Side defroster grille - RH
16. Side defroster grille - LH
17. Side ventilation grille - RH
18. Side ventilation grille - LH
19. Center ventilation grille
20. Cluster lid C
21. Floor duct - RH
22. Floor duct - LH
E1IIA0023ZZ
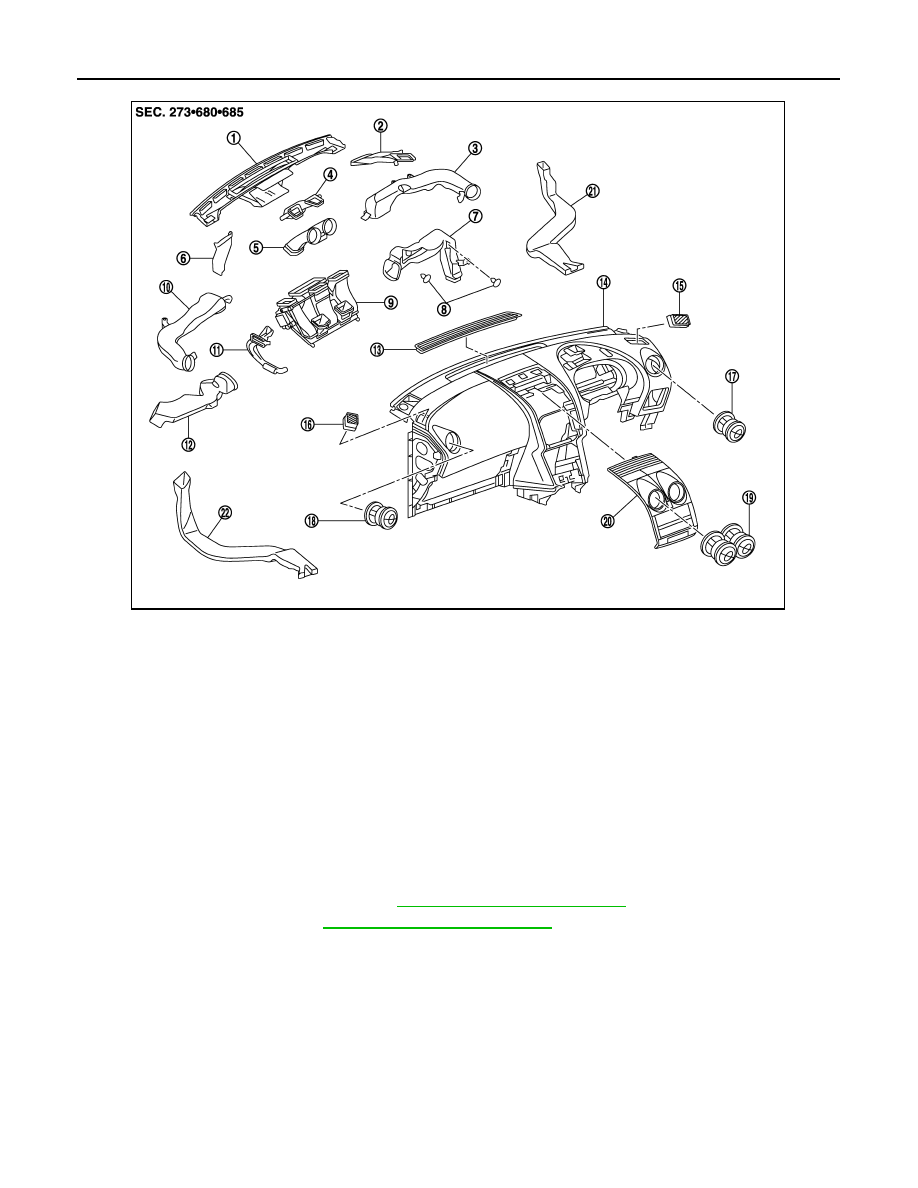
DUCTS AND GRILLES
VTL-47
< ON-VEHICLE REPAIR >
[AUTOMATIC AIR CONDITIONER]
C
D
E
F
G
H
J
K
L
M
A
B
VTL
N
O
P
REMOVAL
1.
Remove instrument panel. Refer to
IP-12, "Removal and Installation"
2.
Remove side ventilator ducts (RH/LH). Refer to
VTL-44, "SIDE VENTILATOR GRILLES : Removal and
.
3.
Remove side defroster ducts (RH/LH) fixing screws.
4.
Pull to release from center defroster duct.
5.
Remove side defroster ducts.
INSTALLATION
Installation is basically the reverse order of removal.
FOOT DUCTS
FOOT DUCTS : Exploded View
INFOID:0000000001093742
E1IIA0028ZZ
VTL-48
< ON-VEHICLE REPAIR >
[AUTOMATIC AIR CONDITIONER]
DUCTS AND GRILLES
FOOT DUCTS : Removal and Installation
INFOID:0000000001093743
REMOVAL
Driver Side
1.
Remove driver side lower panel. Refer to
IP-12, "Removal and Installation"
2.
Remove side finisher. Refer to
IP-12, "Removal and Installation"
3.
Remove duct fixing bolt from lid and hood opener bracket.
1.
Center defroster duct
2.
Defroster duct - RH
3.
Side ventilator duct - RH
4.
Front upper ventilator duct
5.
Front ventilator duct
6.
Defroster duct - LH
7.
Side foot duct - RH
8.
Clip
9.
Air mix duct
10. Side ventilator duct - LH
11.
Glove box duct
12.
Side foot duct - LH
13. Front defroster grille - center
14.
Instrument panel
15.
Side defroster grille - RH
16. Side defroster grille - LH
17.
Side ventilation grille - RH
18.
Side ventilation grille - LH
19. Center ventilation grille
20.
Cluster lid C
21.
Floor duct - RH
22. Floor duct - LH
E1IIA0023ZZ
Нет комментариевНе стесняйтесь поделиться с нами вашим ценным мнением.
Текст