Nissan Qashqai (2007-2010). Manual — part 594

PRECAUTIONS
TM-311
< PRECAUTION >
[CVT: RE0F10A]
C
E
F
G
H
I
J
K
L
M
A
B
TM
N
O
P
For details of OBD, refer to
EC-706, "Diagnosis Description"
(WITHOUT EURO-OBD).
• Certain systems and components, especially those related to OBD, may use the new style slide-lock-
ing type harness connector. For description and how to disconnect, refer to
ATFTEMP COUNT Conversion Table
INFOID:0000000001095943
ATFTEMP COUNT
Temperature
°
C (
°
F)
ATFTEMP COUNT
Temperature
°
C (
°
F)
4
–30 (–22)
177
90 (194)
8
–20 (–4)
183
95 (203)
13
–10 (14)
190
100 (212)
17
–5 (23)
196
105 (221)
21
0 (32)
201
110 (230)
27
5 (41)
206
115 (239)
32
10 (50)
210
120 (248)
39
15 (59)
214
125 (257)
47
20 (68)
218
130 (266)
55
25 (77)
221
135 (275)
64
30 (86)
224
140 (284)
73
35 (95)
227
145 (293)
83
40 (104)
229
150 (302)
93
45 (113)
231
155 (311)
104
50 (122)
233
160 (320)
114
55 (131)
235
165 (329)
124
60 (140)
236
170 (338)
134
65 (149)
238
175 (347)
143
70 (158)
239
180 (356)
152
75 (167)
241
190 (374)
161
80 (176)
243
200 (392)
169
85 (185)
—
—
TM-312
< PREPARATION >
[CVT: RE0F10A]
PREPARATION
PREPARATION
PREPARATION
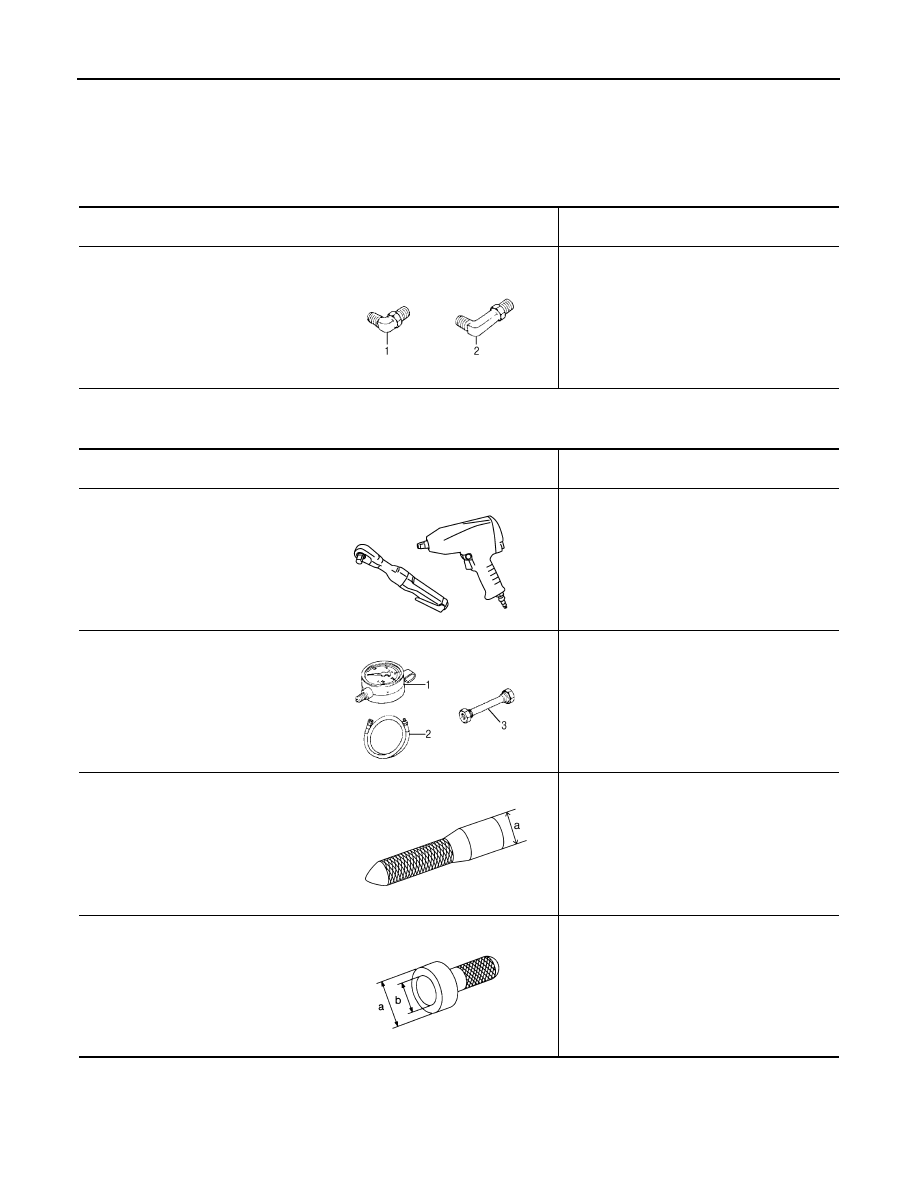
Special Service Tool
INFOID:0000000001136882
Commercial Service Tool
INFOID:0000000000914697
Tool number
Tool name
Description
1. ST25054000
Adapter
2. ST25055000
Adapter
Measuring line pressure
SCIA8372J
Tool number
Tool name
Description
Power tool
Loosening nuts and bolts
Oil pressure gauge set
1. Oil pressure gauge
2. Hose
3. Joint pipe
Measuring line pressure
31197CA000
Drive plate location guide
a: Ø 14 mm (0.55 in)
Installing transaxle assembly
Drift
a: 54 mm (2.13 in) dia.
b: 47 mm (1.85 in) dia.
Installing differential side oil seal
PBIC0190E
SCIA8373J
SCIA2013E
NT115
PREPARATION
TM-313
< PREPARATION >
[CVT: RE0F10A]
C
E
F
G
H
I
J
K
L
M
A
B
TM
N
O
P
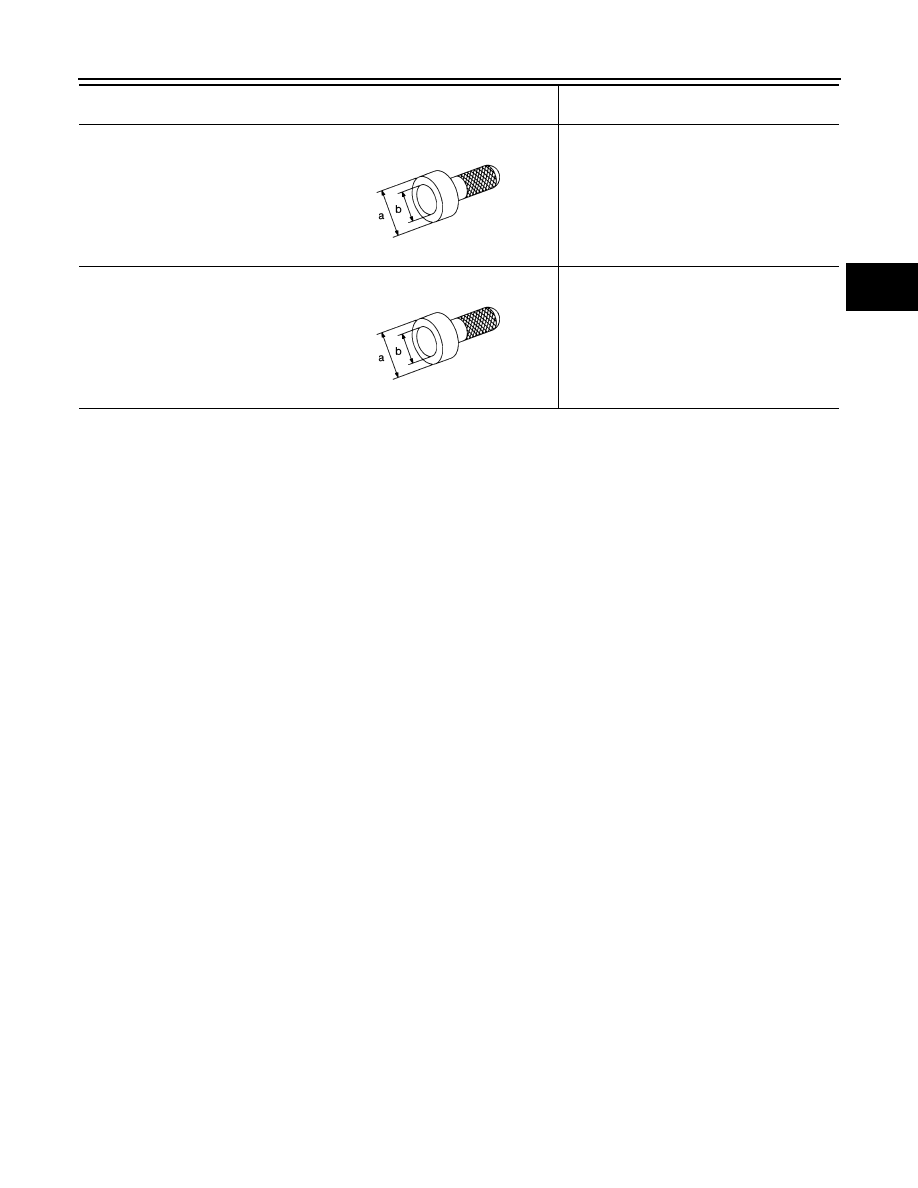
Drift
a: 70 mm (2.76 in) dia.
b: 56 mm (2.20 in) dia.
Installing side oil seal (transfer joint)
Drift
a: 65 mm (2.56 in) dia.
b: 60 mm (2.36 in) dia.
Installing converter housing oil seal
Tool number
Tool name
Description
NT115
NT115
TM-314
< ON-VEHICLE MAINTENANCE >
[CVT: RE0F10A]
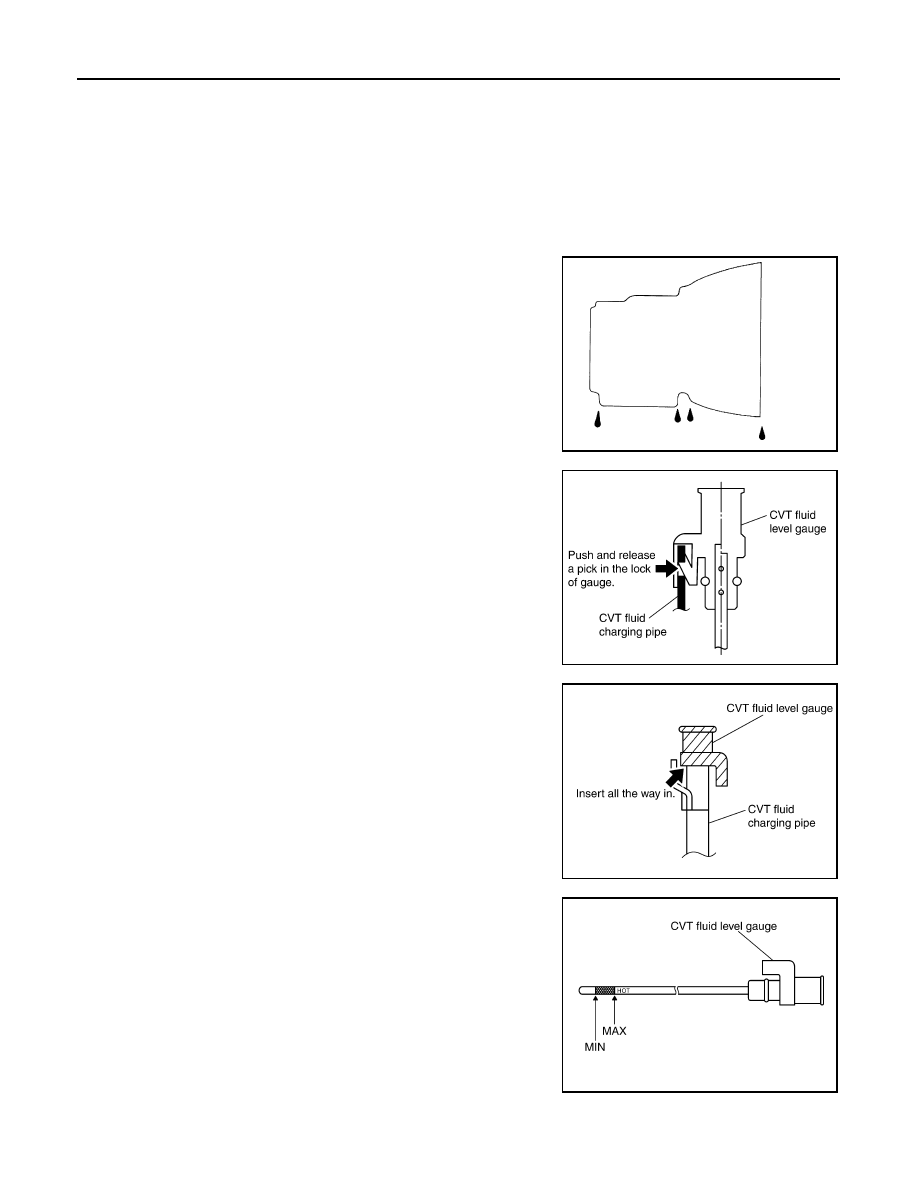
CVT FLUID
ON-VEHICLE MAINTENANCE
CVT FLUID
Inspection
INFOID:0000000000988983
CHECKING CVT FLUID
Fluid level should be checked with the fluid warmed up to 50 to 80
°
C (122 to 176
°
F). The fluid level check pro-
cedure is as follows:
1.
Check for fluid leakage.
2.
With the engine warmed up, drive the vehicle in an urban area.
When ambient temperature is 20
°
C (68
°
F), it takes about 10
minutes for the CVT fluid to warm up to 50 to 80
°
C (122 to
176
°
F).
3.
Park the vehicle on a level surface.
4.
Apply parking brake firmly.
5.
With engine at idle, while depressing brake pedal, move shift
selector throughout the entire shift range.
6.
Pull out the CVT fluid level gauge from the CVT fluid charging
pipe after pressing the tab on the CVT fluid level gauge to
release the lock.
7.
Wipe fluid off the CVT fluid level gauge. Insert the CVT fluid
level gauge rotating 180
°
from the originally installed position,
then securely push the CVT fluid level gauge until it meets the
top end of the CVT fluid charging pipe.
CAUTION:
When wiping away the CVT fluid level gauge, always use
lint-free paper, not a cloth rag.
8.
Place the selector lever in “P” or “N” and make sure the fluid
level is within the specified range.
CAUTION:
When reinstalling CVT fluid level gauge, insert it into the
CVT fluid charging pipe and rotate it to the original installa-
tion position until securely locked.
CVT FLUID CONDITION
SMA146B
SCIA1933E
SCIA1931E
SCIA1932E
Нет комментариевНе стесняйтесь поделиться с нами вашим ценным мнением.
Текст