Nissan Qashqai (2007-2010). Manual — part 109
THERMOSTAT
CO-19
< ON-VEHICLE REPAIR >
[HR16DE]
C
D
E
F
G
H
I
J
K
L
M
A
CO
N
P
O
THERMOSTAT
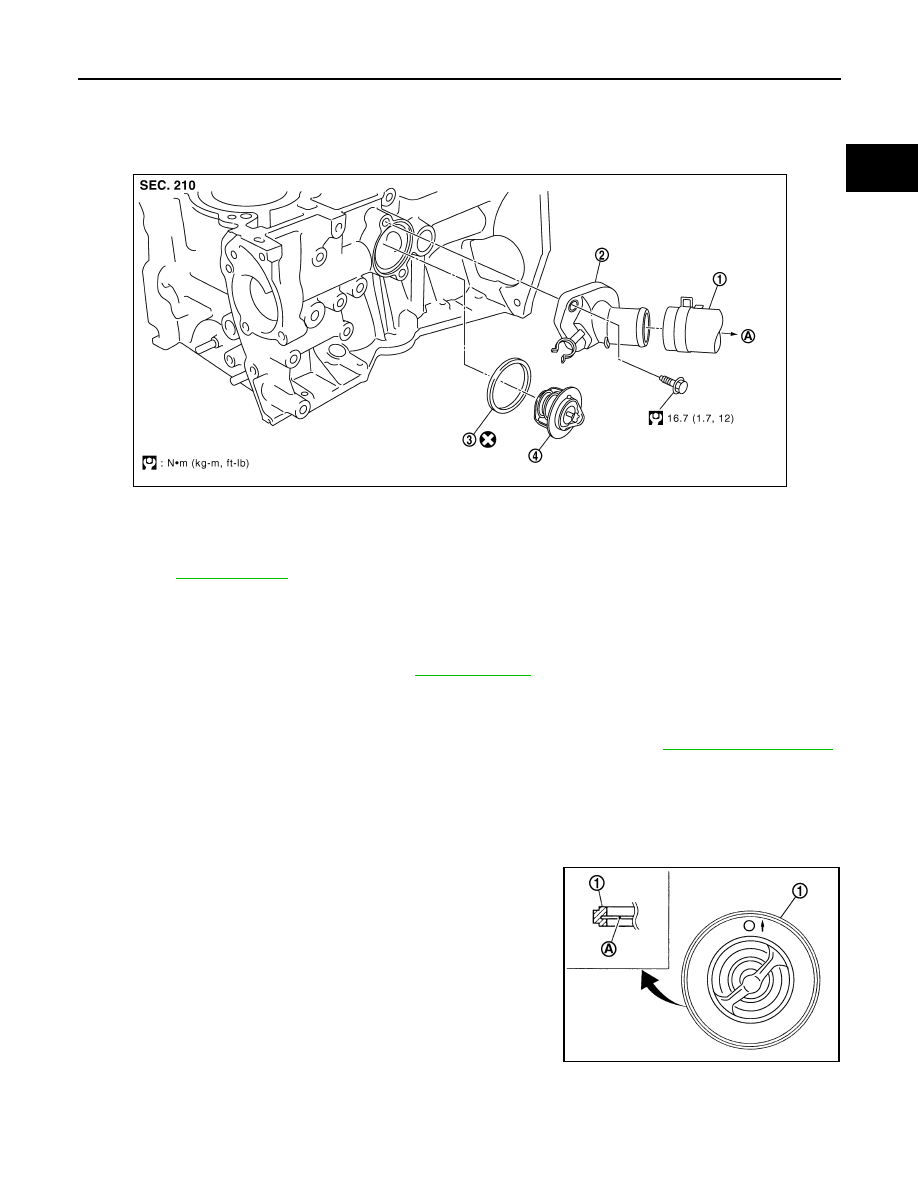
Exploded View
INFOID:0000000000903749
Removal and Installation
INFOID:0000000000903750
REMOVAL
1.
Drain engine coolant from radiator. Refer to
.
CAUTION:
• Perform this step when engine is cold.
• Never spill engine coolant on drive belt.
2.
Add paint mark, then disconnect radiator hose (lower) from water inlet. Refer to
3.
Remove water inlet and thermostat.
• Engine coolant will leak from cylinder block, so have a receptacle ready below.
INSTALLATION
Note the following, and install in the reverse order of removal.
Thermostat
• Install thermostat with making rubber ring (1) groove fit to thermo-
stat flange (A) with the whole circumference.
1.
Radiator hose (lower)
2.
Water inlet
3.
Rubber ring
4.
Thermostat
A.
To radiator
Refer to
for symbols in the figure.
PBIC3810E
PBIC3811E
CO-20
< ON-VEHICLE REPAIR >
[HR16DE]
THERMOSTAT
• Install thermostat (2) with jiggle valve (A) facing upwards.
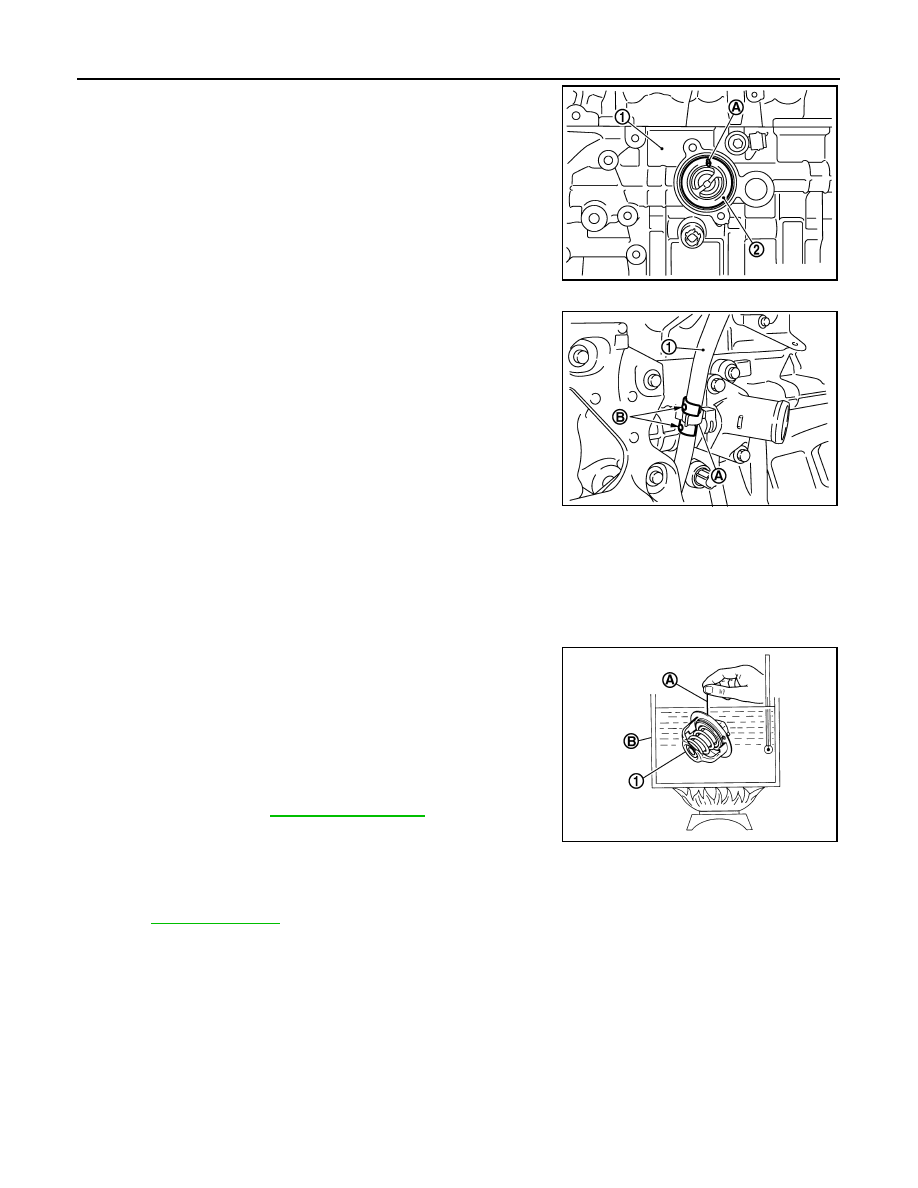
Water Inlet
After installation, fix water inlet clip (A) on the oil level gauge guide
(1) as shown in the figure.
Inspection
INFOID:0000000000903751
INSPECTION AFTER REMOVAL
WARNING:
Use a protector to prevent a burn during the work.
Thermostat
• Place a thread (A) so that it is caught in the valves of thermostat
(1). Immerse fully in a container (B) filled with water. Heat while
stirring.
• The valve opening temperature is the temperature at which the
valve opens and falls from the thread.
• Continue heating. Check the full open valve lift amount.
• After checking the maximum valve lift amount, lower the water
temperature and check the valve closing temperature.
• If out of the standard, replace thermostat.
INSPECTION AFTER INSTALLATION
• Check that the reservoir tank cap is tightened.
• Check for leaks of engine coolant using the adapter and the reservoir tank cap tester [SST: — (M.S. 554-07).
.
• Start and warm up the engine. Visually make sure that there is no leaks of engine coolant.
1 : Cylinder block
PBIC3812E
B : Positioning
PBIC3755E
.
PBIC3314J
WATER OUTLET
CO-21
< ON-VEHICLE REPAIR >
[HR16DE]
C
D
E
F
G
H
I
J
K
L
M
A
CO
N
P
O
WATER OUTLET
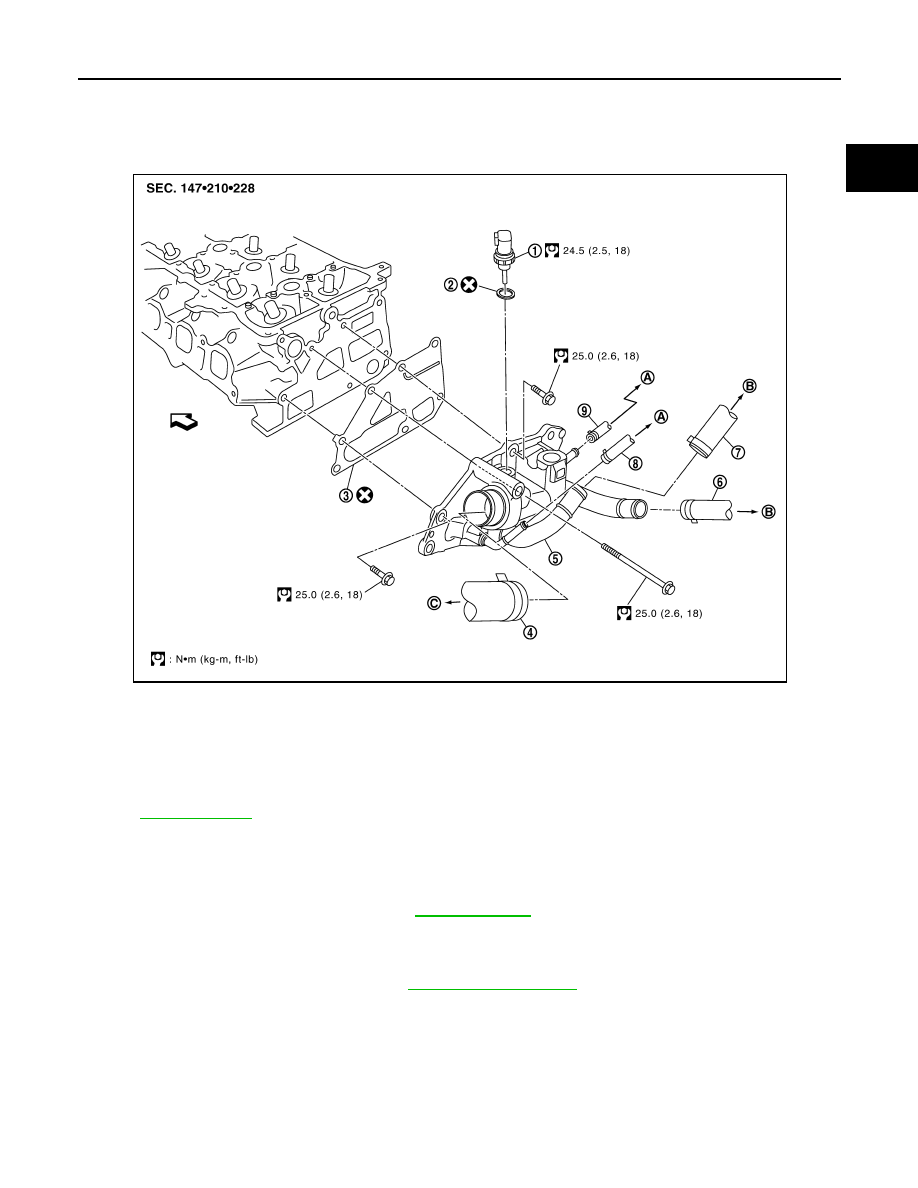
Exploded View
INFOID:0000000000903752
Removal and Installation
INFOID:0000000000903753
REMOVAL
1.
Drain engine coolant from radiator. Refer to
.
CAUTION:
• Perform this step when engine is cold.
• Never spill engine coolant on drive belt.
2.
Disconnect radiator hose (upper). Refer to
.
3.
Disconnect harness connector from engine coolant temperature sensor.
4.
Remove water hoses (Northern Europe models).
5.
Remove heater hoses.
6.
Remove water outlet.
7.
Remove engine coolant temperature sensor from water outlet, if necessary.
INSTALLATION
1.
Engine coolant temperature sensor
2.
Washer
3.
Gasket
4.
Radiator hose (upper)
5.
Water outlet
6.
Heater hose
7.
Heater hose
8.
Water hose (Northern Europe models) 9.
Water hose (Northern Europe models)
A.
To electric throttle control actuator
B.
To heater core
C.
To radiator
: Engine front
Refer to
for symbols in the figure.
PBIC3816E
CO-22
< ON-VEHICLE REPAIR >
[HR16DE]
WATER OUTLET
Installation is the reverse order of removal.
Inspection
INFOID:0000000000903754
INSPECTION AFTER INSTALLATION
• Check that the reservoir tank cap is tightened.
• Check for leaks of engine coolant using the adapter and the reservoir tank cap tester [SST: — (M.S. 554-07).
.
• Start and warm up the engine. Visually make sure that there is no leaks of engine coolant.
Нет комментариевНе стесняйтесь поделиться с нами вашим ценным мнением.
Текст