Nissan Qashqai (2007-2010). Manual — part 905
HA-190
< ON-VEHICLE REPAIR >
[MANUAL AIR CONDITIONER (K9K)]
REFRIGERATION SYSTEM
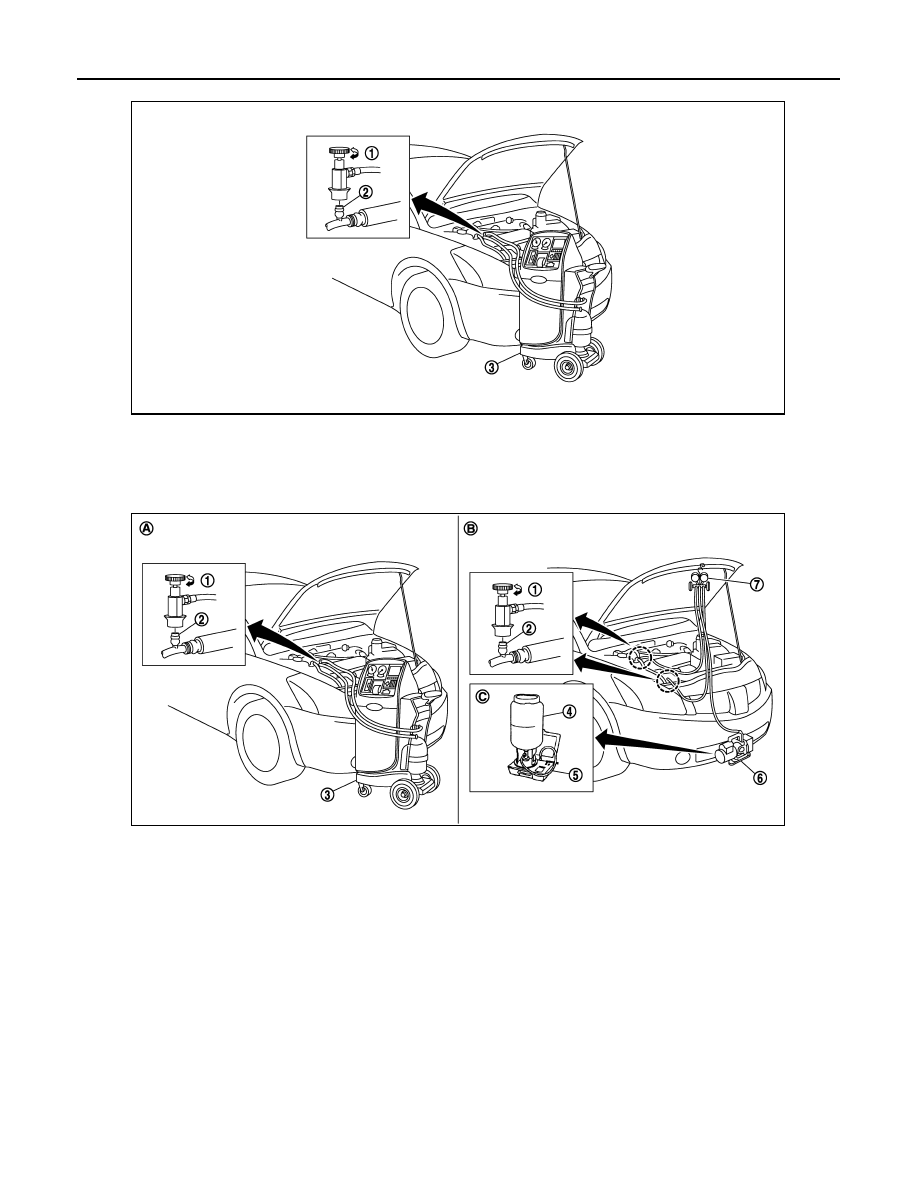
Evacuating System and Charging Refrigerant
1.
Shut-off valve
2.
A/C service valve
3.
Recovery/Recycling/Recharging
equipment
JSIIA0238ZZ
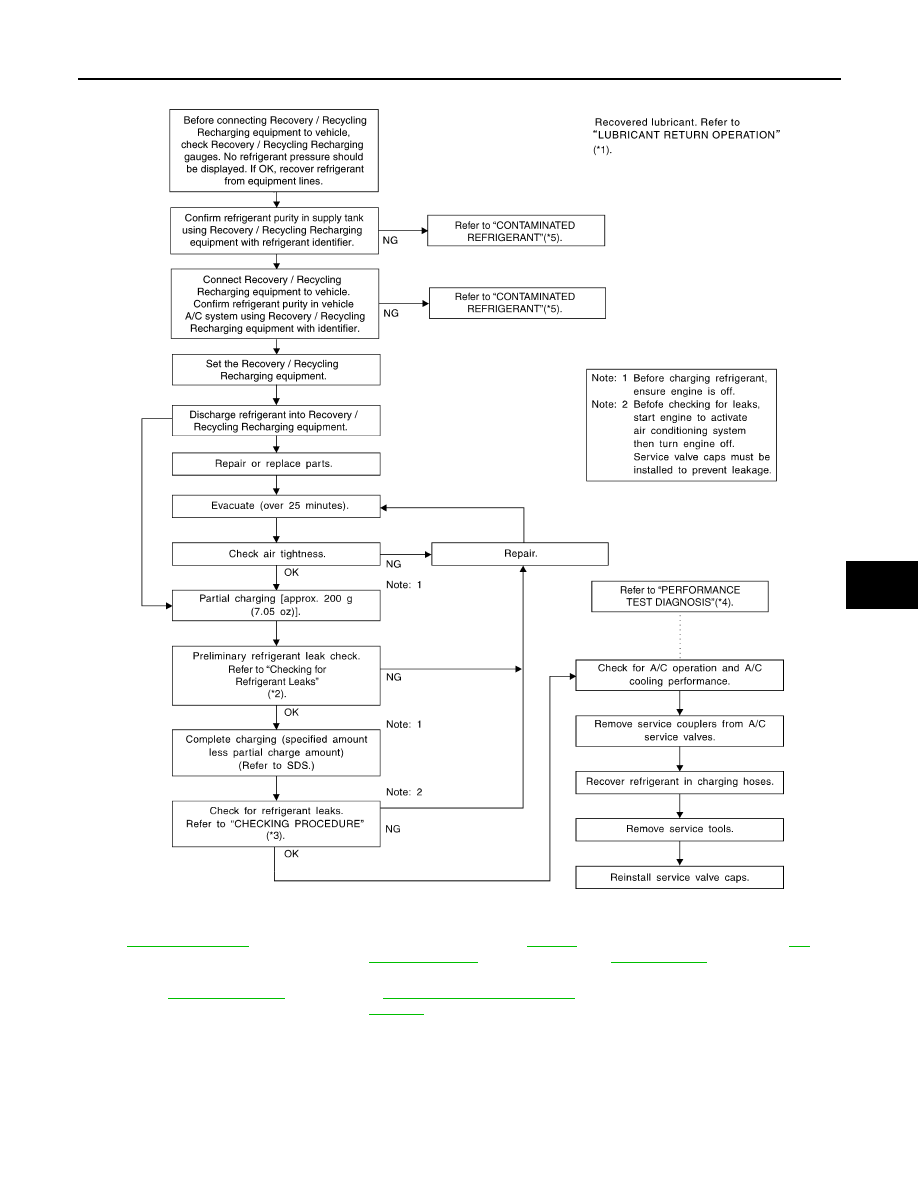
1.
Shut-off valve
2.
A/C service valve
3.
Recovery/Recycling/Recharging
equipment
4.
Refrigerant container (HFC-134a)
5.
Weight scale (J-39650)
6.
Vacuum pump (J-39649)
7.
Manifold gauge set (J-39183)
A.
Preferred (best) method
B.
Alternative method
C.
For charging
JSIIA0239ZZ
REFRIGERATION SYSTEM
HA-191
< ON-VEHICLE REPAIR >
[MANUAL AIR CONDITIONER (K9K)]
C
D
E
F
G
H
J
K
L
M
A
B
HA
N
O
P
*1
*2
.
*3
“CHECKING PROCEDURE” in
*4
“PERFORMANCE TEST DIAGNO-
SIS” in
.
*5
“CONTAMINATED REFRIGERANT”
in
HA-170, "Working with HFC-134a
SJIA1275E
HA-192
< ON-VEHICLE REPAIR >
[MANUAL AIR CONDITIONER (K9K)]
COMPRESSOR
COMPRESSOR
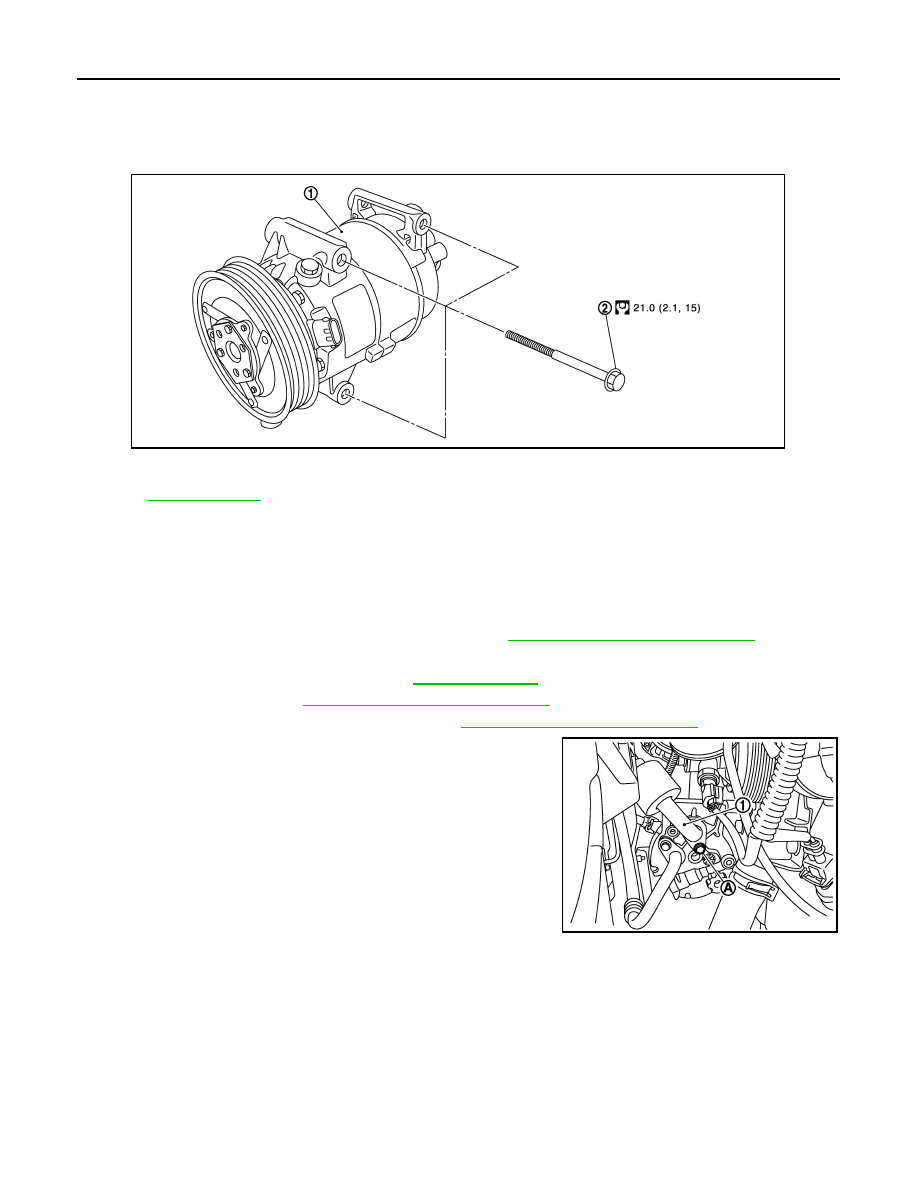
Exploded View
INFOID:0000000001098289
Removal and Installation
INFOID:0000000001098290
REMOVAL
1.
Use a refrigerant collecting equipment (for HFC-134a) to discharge the refrigerant.
2.
Remove engine cover ornament.
3.
Remove air intake hoses (RH) and air duct (LH). Refer to
EM-265, "Removal and Installation"
4.
Remove engine undercover, using power tools.
5.
Drain engine coolant from radiator. Refer to
.
6.
Remove drive belt. Refer to
EM-259, "Removal and Installation"
7.
Remove lower radiator hose from engine. Refer to
CO-56, "Removal and Installation"
.
8.
Remove fixing bolts (A) and (B) from low-pressure flexible hose
(1) and high-pressure flexible hose (2).
9.
Remove low-pressure flexible hose and high-pressure flexible
hose from compressor.
CAUTION:
Cap or wrap the joint of compressor, low-pressure flexible
hose and high-pressure flexible hose with suitable material
such as vinyl tape to avoid the entry of air.
10. Disconnect harness connector from compressor.
1.
Compressor
2.
Compressor fixing bolt
Refer to
for symbols in the figure.
E1KIA0035GB
E1KIA0036GB
COMPRESSOR
HA-193
< ON-VEHICLE REPAIR >
[MANUAL AIR CONDITIONER (K9K)]
C
D
E
F
G
H
J
K
L
M
A
B
HA
N
O
P
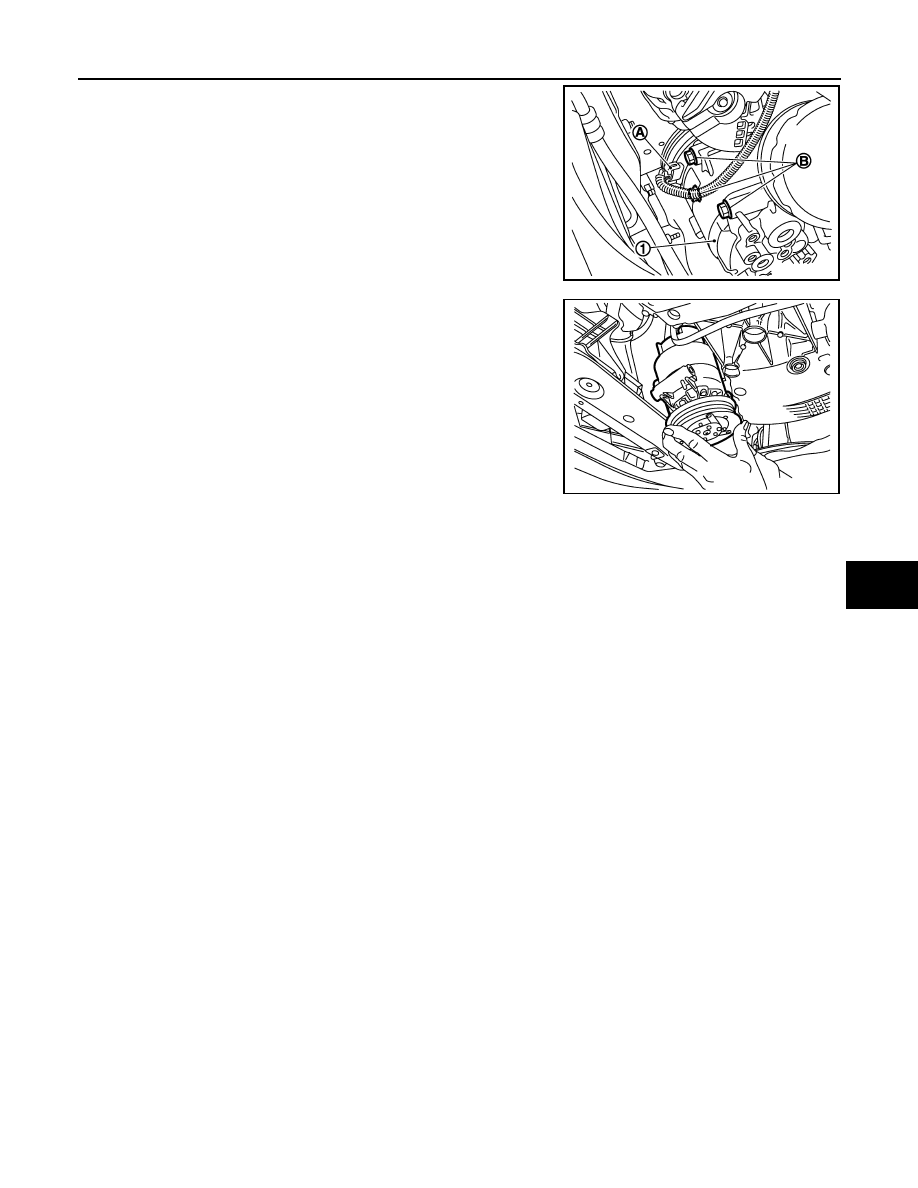
11. Remove compressor harness connector (A), then remove
mounting bolts (B) from compressor (1), using power tools.
12. Remove the compressor from the vehicle.
INSTALLATION
Installation is basically the reverse order of removal.
CAUTION:
• Replace O-rings of low-pressure flexible hose and high-pressure flexible hose with new ones, and
then apply compressor oil to it when installing it.
• When recharging refrigerant, check for leaks.
E1KIA0038ZZ
Compressor fixing bolt to engine
: 21 N·m (2.2 kg-m, 15.5 ft-lb)
E1KIA0039ZZ
Нет комментариевНе стесняйтесь поделиться с нами вашим ценным мнением.
Текст