KIA Optima (2018 year). Manual — part 9
4 53
Features of your vehicle
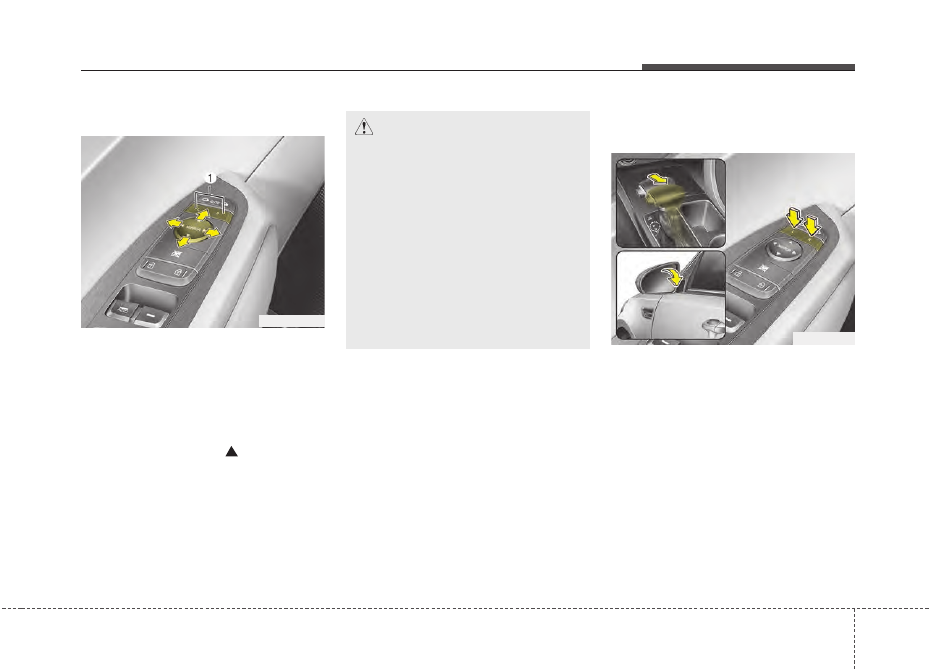
Adjusting outside rearview mirror
The electric remote control mirror
switch allows you to adjust the posi-
tion of the left and right outside
rearview mirrors. To adjust the posi-
tion of either mirror, press the R or L
button (1) to select the right side mir-
ror or the left side mirror, then press a
corresponding point (
) on the mir-
ror adjustment control to position the
selected mirror up, down, left or right.
After adjustment, press the R or L
button again to prevent the inadver-
tent adjustment.
Reverse parking aid function
(if equipped)
While the vehicle is moving in
reverse, the outside rearview mir-
ror(s) will move downward to aid
reverse parking. According to the
position of the outside rearview mir-
ror switch (1), the outside rearview
mirror(s) will operate as follows:
OJF045033L
CAUTION -
Outside mirror
• The mirrors stop moving when
they reach the maximum
adjusting angles,
but the
motor continues to operate
while the switch is pressed.
Do not press the switch longer
than necessary, the motor
may be damaged.
• Do not attempt to adjust the
outside rearview mirror by
hand. Doing so may damage
the parts.
OJFA045110
Features of your vehicle
54
4
L/R : When the remote control outside
rearview mirror switch (1) is
selected to the L (left) or R (right)
position, both outside rearview
mirrors will move downward.
Neutral : When the remote control
outside rearview mirror
switch is placed in the mid-
dle, the outside rearview
mirrors will not operate
while the vehicle is moving
rearward.
The outside rearview mirrors will auto-
matically revert to their original posi-
tions under the following conditions:
1. The ignition switch is in the OFF
position.
2. Shift lever is moved to any position
except R (Reverse).
3. Remote control outside rearview
mirror switch is placed in the middle.
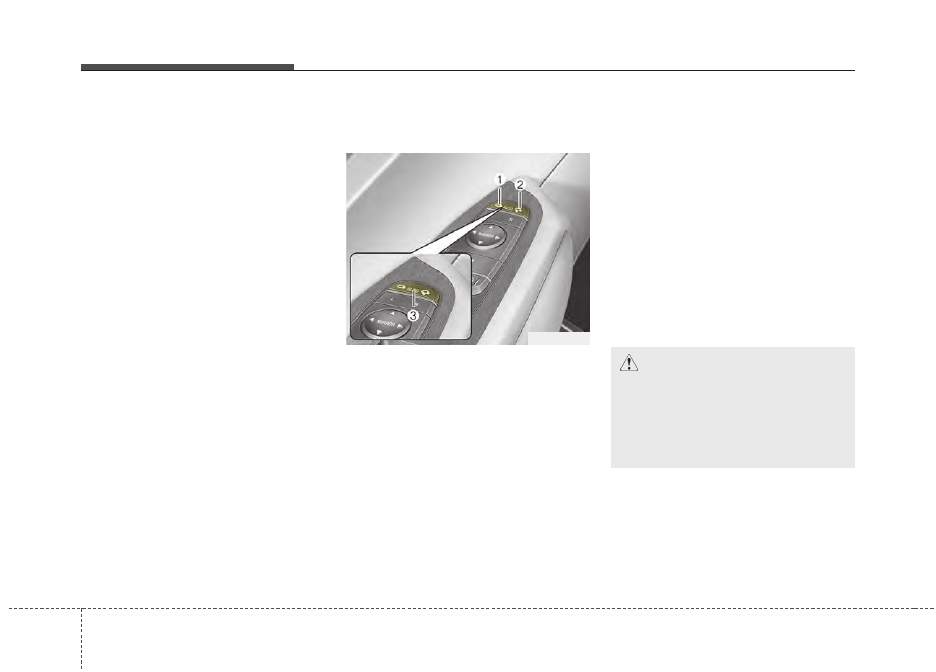
Folding the outside rearview mirror
(if equipped)
Electric type
The outside rearview mirror can be
folded or unfolded by pressing the
switch when the ignition switch is
ACC or ON position as below.
Left (1) : The mirror will unfold.
Right (2) : The mirror will fold.
Center (AUTO, 3) :
The mirror will fold or unfold automat-
ically as follows:
• The mirror will fold or unfold when
the door is locked or unlocked by
the folding key or smart key.
• The mirror will fold or unfold when
the door is locked or unlocked by the
button on the outside door handle.
• The mirror will unfold when you
approach the vehicle (all doors
closed and locked) with a smart
key in possession. (if equipped)
OJF045035L
CAUTION -
Electric type
outside rearview mirror
Do no fold an electric type out-
side rearview mirror by hand.
Doing so could cause motor
failure.
4 55
Features of your vehicle
✽
✽
NOTICE -
Electric type out-
side rearview mirror
The electric type outside rearview
mirror operates even though the
engine start/stop button is in the
OFF position. However, to prevent
unnecessary battery discharge, do
not adjust the mirrors longer than
necessary while the engine is not
running. In case it is an electric type
outside rearview mirror, don’t fold
it by hand. It could cause motor fail-
ure.
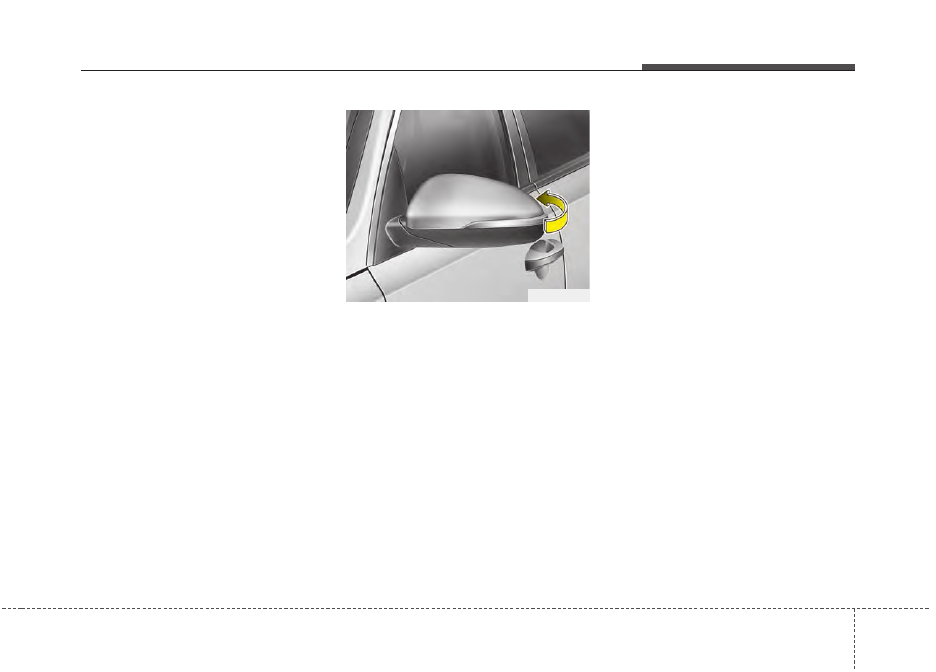
Manual type
To fold the outside rearview mirror,
grasp the housing of the mirror and
then fold it toward the rear of the
vehicle.
OJF045034
Features of your vehicle
56
4
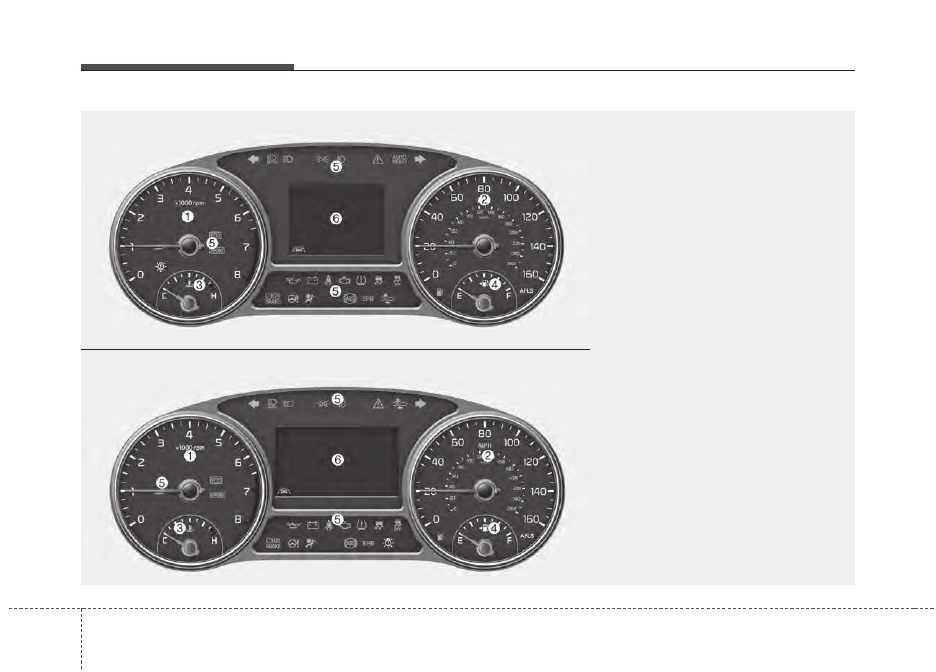
INSTRUMENT CLUSTER
1. Tachometer
2. Speedometer
3. Engine coolant temperature gauge
4. Fuel gauge
5. Warning and indicator lights
6. LCD display
OJFA048100N/OJFA048101N
■
■
Type A
❈
The actual cluster in the vehicle may differ
from the illustration.
For more details, refer to the "Gauges" in
this chapter.
■
■
Type B
4 57
Features of your vehicle
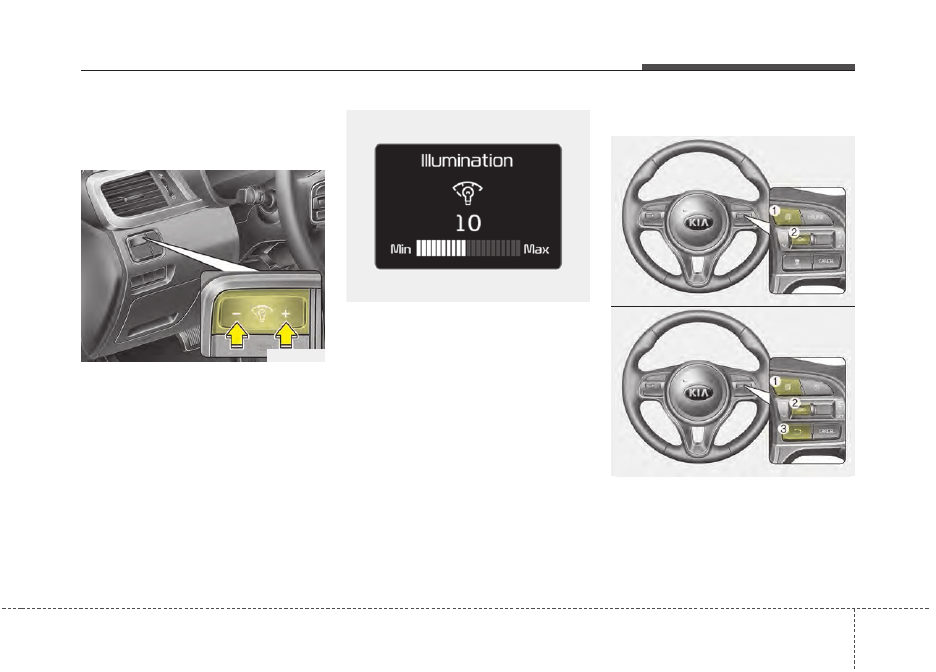
Instrument Cluster Control
Adjusting Instrument Cluster
Illumination
The brightness of the instrument
panel illumination is changed by
pressing the illumination control button
("+" or "-") when the ignition switch or
Engine Start/Stop button is ON, or the
taillights are turned on.
• If you hold the illumination control
button ("+" or "-"), the brightness
will be changed continuously.
• If the brightness reaches to the
maximum or minimum level, an
alarm will sound.
LCD Display Control
The LCD display modes can be
changed by using the control buttons
on the steering wheel.
OJF045036
OJF045131L
OJF045037L
OJF045038L
■
Type A
■
Type B
Features of your vehicle
58
4
[Type A]
(1)
: MODE button for changing
modes
(2)
/
/OK : SELECT scroll switch
for setting the select-
ed item and RESET
scroll switch for reset-
ting items
[Type B]
(1)
: MODE button for changing
modes
(2)
/
/OK : SELECT scroll switch
for setting the
selected item and
RESET scroll switch
for resetting items
(3)
: RETURN button for moving
the previous mode or item
(if equipped)
❈
For the LCD modes, refer to “LCD
Display” in this chapter.
Gauges
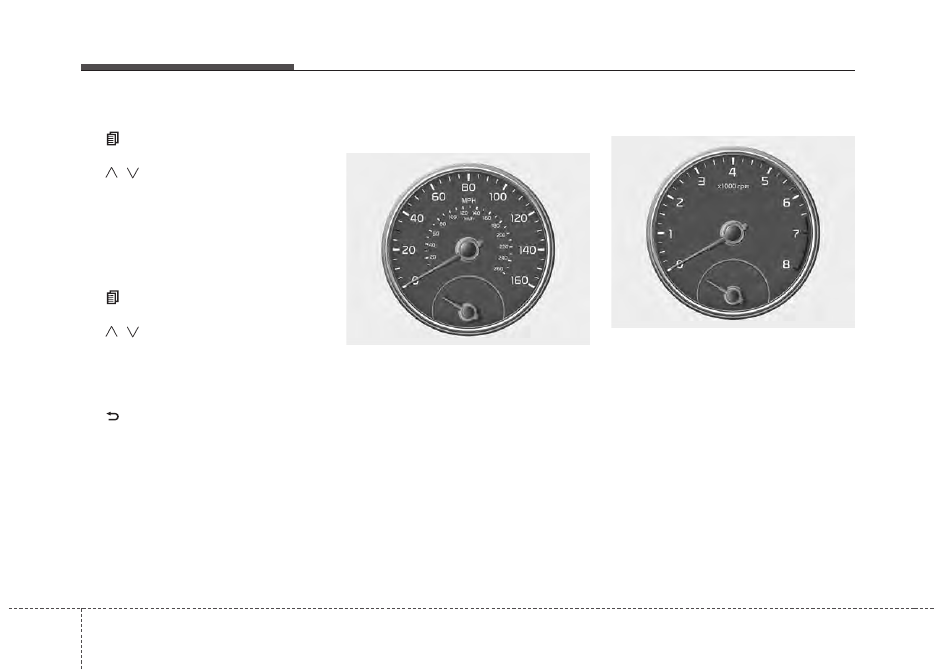
Speedometer
The speedometer indicates the
speed of the vehicle and is calibrated
in miles per hour (mph) and/or kilo-
meters per hour (km/h).
Tachometer
The tachometer indicates the
approximate number of engine revo-
lutions per minute (rpm).
Use the tachometer to select the cor-
rect shift points and to prevent lug-
ging and/or over-revving the engine.
OJFA045102
OJF045103
4 59
Features of your vehicle
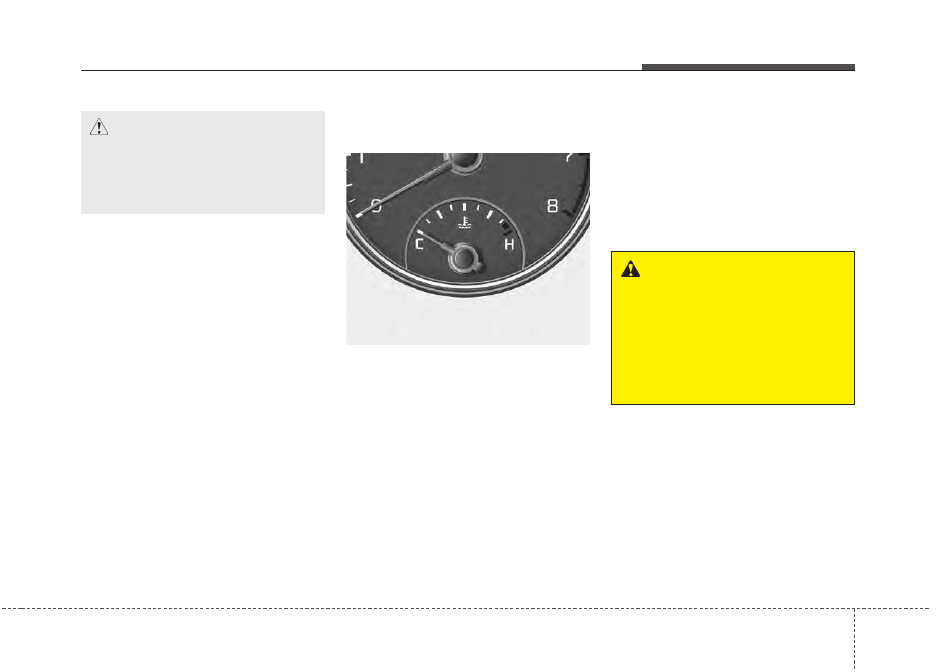
Engine Coolant Temperature
Gauge
This gauge indicates the tempera-
ture of the engine coolant when the
ignition switch or Engine Start/Stop
button is ON.
If the gauge pointer moves beyond
the normal range area toward the "H"
position, it indicates overheating that
may damage the engine.
Do not continue driving with an over-
heated engine. If your vehicle over-
heats, refer to "If the Engine
Overheats" in chapter 7.
CAUTION -
Red zone
Do not operate the engine with-
in the tachometer's RED ZONE.
This may cause severe engine
damage.
OJF045104
WARNING -
Hot radiator
Never remove the radiator cap
when the engine is hot. The
engine coolant is under pres-
sure and could cause severe
burns. Wait until the engine is
cool before adding coolant to
the reservoir.

Features of your vehicle
60
4
Fuel Gauge
This gauge indicates the approxi-
mate amount of fuel remaining in the
fuel tank.
✽
✽
NOTICE
• The fuel tank capacity is given in
chapter 9.
• The fuel gauge is supplemented by
a low fuel warning light which will
illuminate when the fuel tank is
nearly empty.
• On inclines or curves, the fuel
gauge pointer may fluctuate or the
low fuel warning light may come
on earlier than usual due to the
movement of fuel in the tank.
✽
✽
NOTICE -
Fuel gauge
Running out of fuel can expose vehi-
cle occupants to danger. You must
top and obtain additional fuel as
soon as possible after the warning
light comes on or when the gauge
indicator comes close to the “E
(Empty)” level.
✽
✽
NOTICE
Fuel display may not be accurate if
you are filling in sloping places.
Odometer
The odometer Indicates the total dis-
tance that the vehicle has been driv-
en and should be used to determine
when periodic maintenance should
be performed.
- Odometer range : 0 ~ 999999 miles
or kilometers.
OJF045105
CAUTION
- Low fuel
Avoid driving with an extremely
low fuel level. Running out of
fuel could cause the engine to
misfire damaging the catalytic
converter.
OJFA045133
4 61
Features of your vehicle
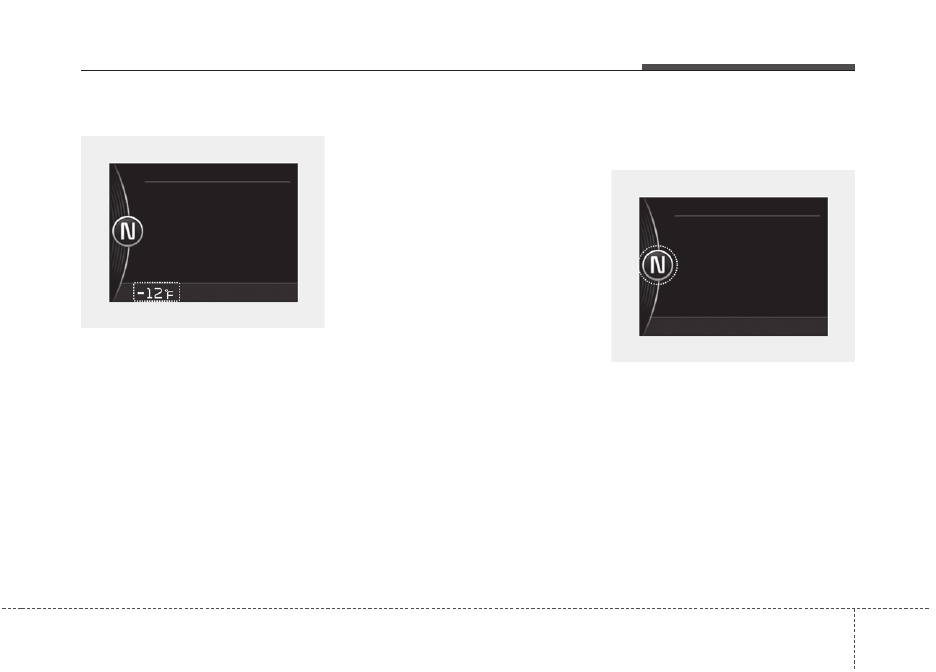
Outside Temperature Gauge
This gauge indicates the current out-
side air temperatures by 1°F (1°C).
- Temperature range : -40°F ~ 140°F
(-40°C ~ 60°C)
The outside temperature on the dis-
play may not change immediately
like a general thermometer to pre-
vent the driver from being distracted.
To change the temperature unit (from
°C to °F or from °F to °C)
The temperature unit can be
changed by using the "User
Settings" mode of the LCD display.
❈
For more details, refer to “LCD
Display” in this chapter.
Transaxle Shift Indicator
Automatic Transaxle Shift
Indicator (if equipped)
This indicator displays which auto-
matic transaxle shift lever is selected.
• Park : P
• Reverse : R
• Neutral : N
• Drive : D
• Sports Mode : 1, 2, 3, 4, 5, 6
OJFA045135
OJF045138
Features of your vehicle
62
4
Dual clutch transmission shift
indicator (if equipped)
This indicator displays which shift
lever is selected.
• Park : P
• Reverse : R
• Neutral : N
• Drive : D
• Sports Mode : D1, D2, D3, D4, D5,
D6, D7
OJF045330L
4 63
Features of your vehicle
LCD DISPLAY
❈
For controlling the LCD modes, refer to "LCD Display Control" in this chapter.
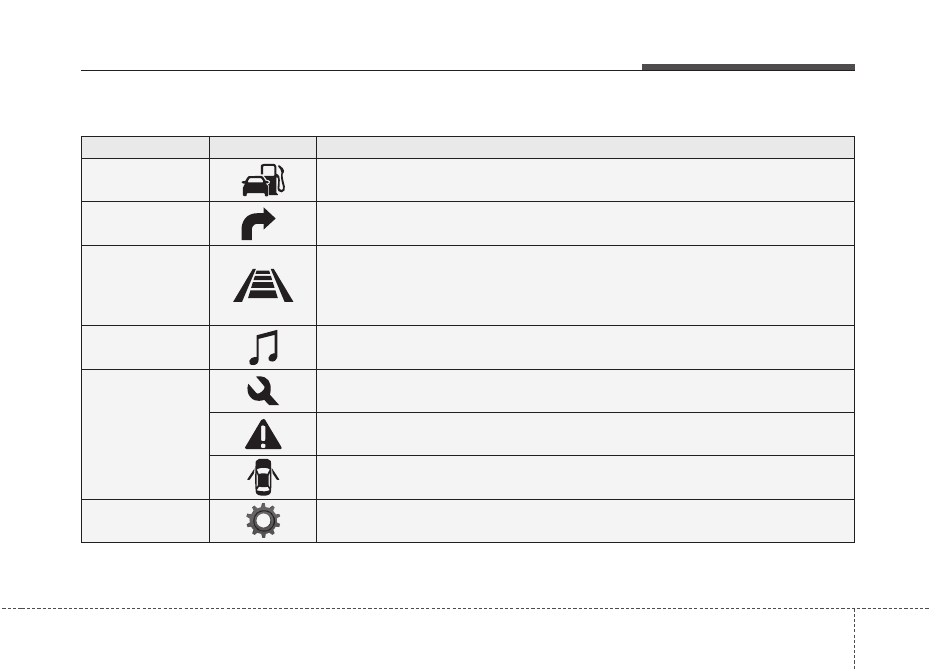
LCD Modes
Modes
Symbol
Explanation
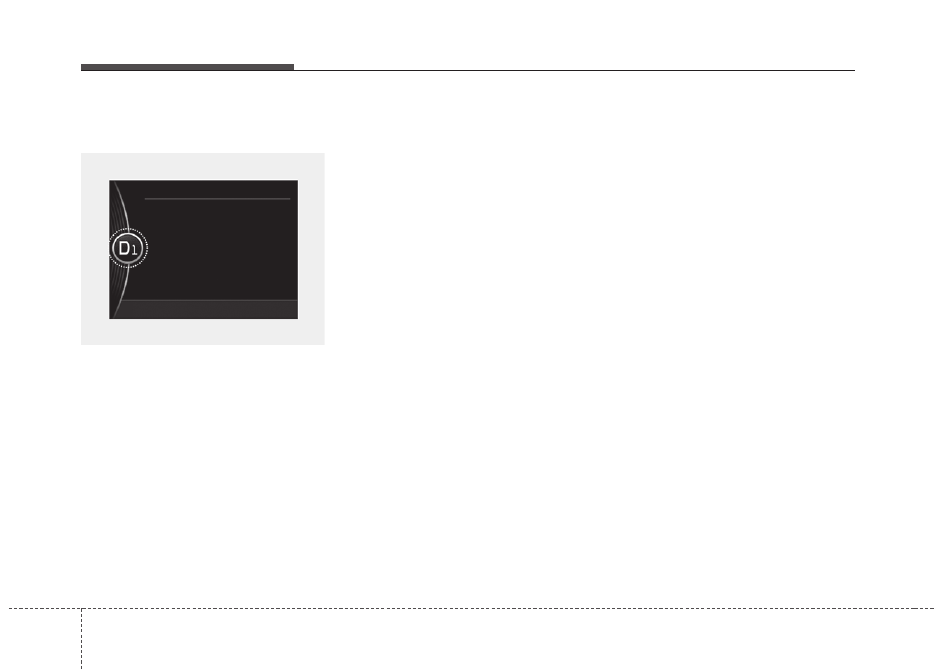
Trip Computer
This mode displays driving information like the tripmeter, fuel economy, and so on.
For more details, refer to "Trip Computer" in this chapter.
Turn By Turn
(if equipped)
This mode displays the state of the navigation.
ASCC/LDWS
(if equipped)
This mode displays the state of the Advanced Smart Cruise Control (ASCC) and
Lane Departure Warning System (LDWS).
For more details, refer to "Advanced Smart Cruise Control (ASCC)" or
"Lane Departure Warning System (LDWS)" in chapter 6.
A/V
(if equipped)
This mode displays the state of the A/V system.
Service
This mode informs of service interval (mileage or days) and pressure status of each tire.
This mode informs of warning messages related to Low tire pressure or malfunction of
Blind Spot Detection system (BSD) and so on.
When any door is not closed securely, this symbol illuminated.
User Settings
On this mode, you can change settings of the doors, lamps, etc.
Features of your vehicle
64
4
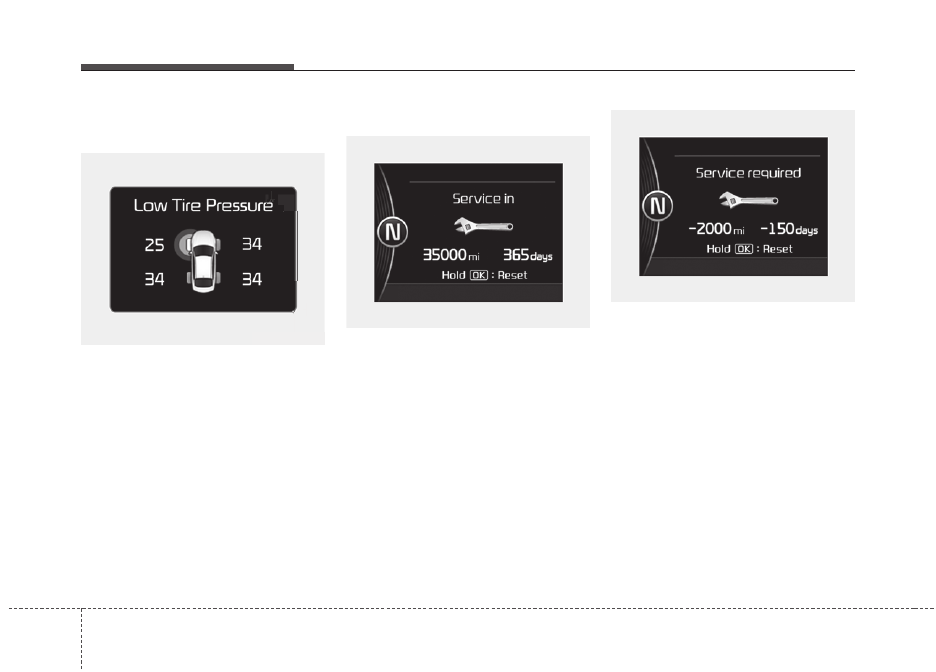
Service Mode
Tire Pressure
This mode displays the pressure sta-
tus of each tire.
You can change the tire pressure unit
in "User settings" mode.
❈
For more information, refer to "Tire
Pressure Monitoring System
(TPMS)" in chapter 7.
Service Interval
Service interval
It calculates and displays when you
need a scheduled maintenance
service (mileage or days).
If the remaining mileage or time reach-
es 900 mi. (1,500 km) or 30 days.
Service interval message is dis-
played for several seconds each time
you set the ignition switch or Engine
Start/Stop Button to the ON position.
Service required
If you do not have your vehicle serv-
iced according to the already inputted
service interval, the "Service
required" message will appear.
The "Service required" message is
displayed for several seconds each
time you set the ignition switch or
Engine Start/Stop Button to the ON
position.
To reset the service interval to the
mileage and days you input before:
Press the OK button (reset) for more
than 1 second.
OJFA045144
OJFA045294
OJF067027L
4 65
Features of your vehicle
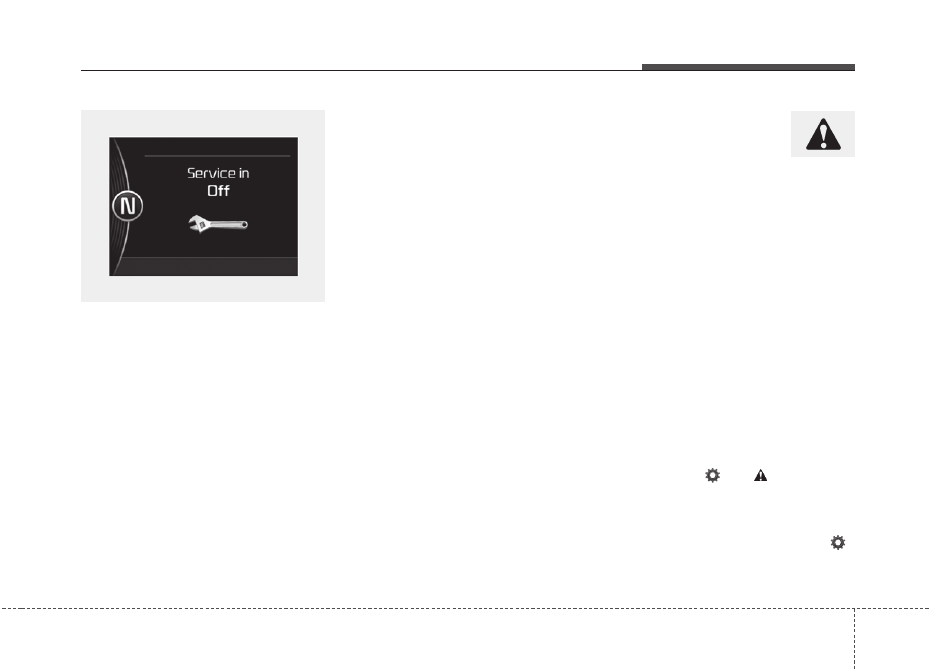
Service in OFF
If the service interval is not set
"Service in OFF” message is dis-
played on the LCD display.
If you want to activate Service inter-
val function, set the service interval
in the User setting mode.
For more details, refer to “User set-
ting mode" in this chapter.
✽
✽
NOTICE
If any of the following conditions
occurs, the mileage and days may be
incorrect.
- The battery cable is disconnected.
- The fuse switch is turned off.
- The battery is discharged.
Master Warning Mode
• This warning light informs the driv-
er the following situations
- Blind Spot Detection (BSD) mal-
function (if equipped)
- Advanced Smart Cruise Control
(ASCC) malfunction (if equipped)
- Tire Pressure Monitoring System
(TPMS) malfunction (if equipped)
- Autonomous Emergency Braking
(AEB) malfunction (if equipped)
- High Beam Assist (HBA) mal-
function (if equipped)
- Lamp malfunction and so on.
The Master Warning Light illumi-
nates when more than one of the
above warning situations occur. At
this time, the LCD Modes Icon will
change from (
) to (
).
If the warning situation is solved, the
master warning light will be turned off
and the LCD Modes Icon will be
changed back to its previous icon (
).
OJF045295L
Features of your vehicle
66
4
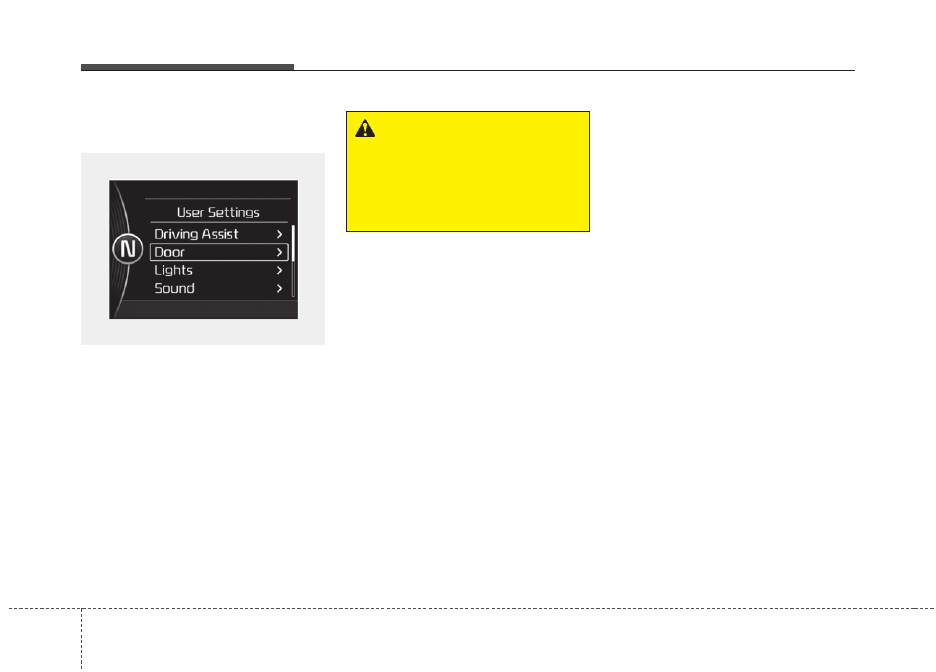
User Settings Mode
Description
In this mode, you can change setting
of the doors, lights, etc.
OJF045148L
WARNING
Do not adjust the User Settings
while driving. You may lose your
steering control and cause
severe personal injury or acci-
dents.
4 67
Features of your vehicle
Items
Explanation
Smart Cruise Control
Response (if equipped)
Choose the sensitivity of the smart cruise control.
For more details, refer to "Advanced Smart Cruise Control System" in chapter 6.
Rear Cross Traffic Alert
(if equipped)
If this item is checked, the rear cross traffic alert function will be activated.
For more details, refer to "Blind Spot Detection System" in chapter 6.
AEB (Autonomous
Emergency Braking)
(if equipped)
To activate or deactivate the AEB system.
For more details, refer to "Autonomous Emergency Braking (AEB)" in chapter 6.
FCW
(Forward Collision Warning)
(if equipped)
Choose the sensitivity of the FCW.
For more details, refer to "Autonomous Emergency Braking(AEB)" in chapter 6.
Driving Assist (if equipped)
Features of your vehicle
68
4
Items
Explanation
Automatically Lock
• Off : The auto door lock operation will be deactivated.
• Enable on Speed: All doors will be automatically locked when the vehicle speed exceeds
9.3mph (15km/h).
• Enable on Shift: All doors will be automatically locked if the automatic transaxle/dual clutch trans-
mission shift lever is shifted from the P (Park) position to the R (Reverse), N
(Neutral), or D (Drive) position.
Automatically Unlock
• Disable : The auto door unlock operation will be canceled.
• Vehicle Off : All doors will be automatically unlocked when the ignition key is removed from the
ignition switch or the Engine Star/Stop button is set to the OFF position.
• On Shift to P: All doors will be automatically unlocked if the automatic transaxle/dual clutch
transmission shift lever is shifted to the P (Park) position.
Smart Trunk
(if equipped)
To activate or deactivate the Smart Trunk system.
For more details, refer to "Smart Trunk" in this chapter.
Two Press Unlock
If this item is checked, the two press unlock will be activated.
Horn Feed Back
If this item is checked, the horn feed back will be activated.
Door / Trunk
Нет комментариевНе стесняйтесь поделиться с нами вашим ценным мнением.
Текст