KIA Soul (2018 year). Manual — part 33
Maintenance
50
8
CLIMATE CONTROL AIR FILTER (IF EQUIPPED)
Filter inspection
The climate control air filter should
be replaced according to the mainte-
nance schedule. If the vehicle is
operated in severely air-polluted
cities or on dusty rough roads for a
long period, it should be inspected
more frequently and replaced earlier.
When you replace the climate control
air filter, replace it performing the fol-
lowing procedure, and be careful to
avoid damaging other components.
Filter replacement
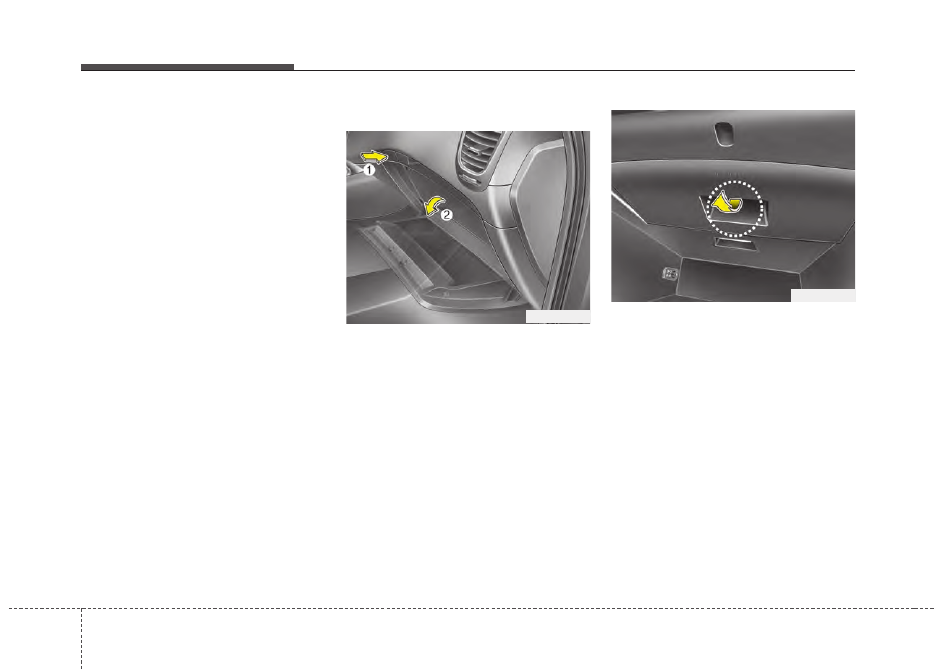
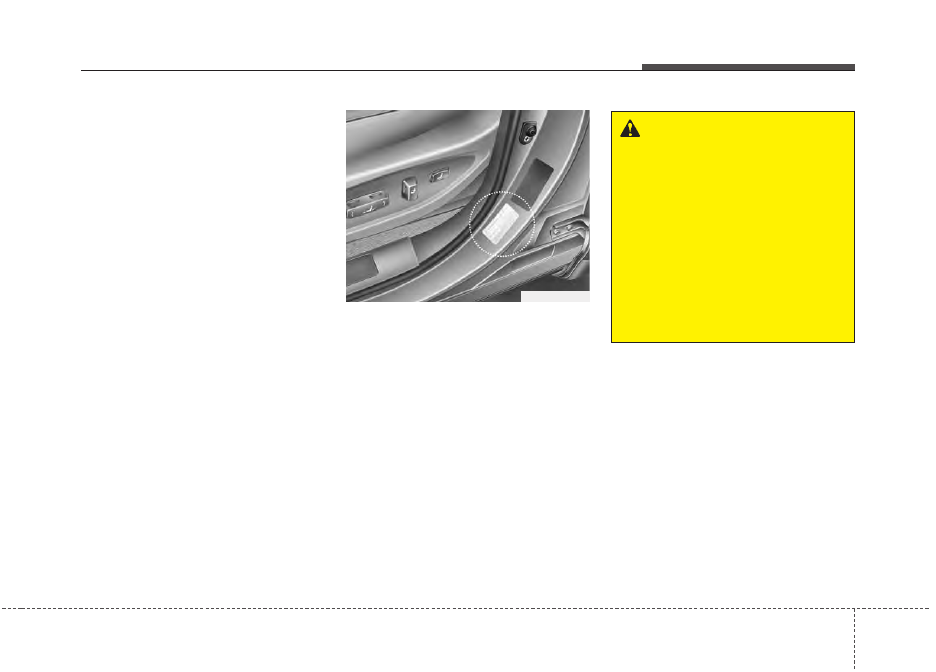
1. Open the glove box.
2. With the glove box open, remove
the Air filter cover.
OPS073009
OPS073008
8 51
Maintenance
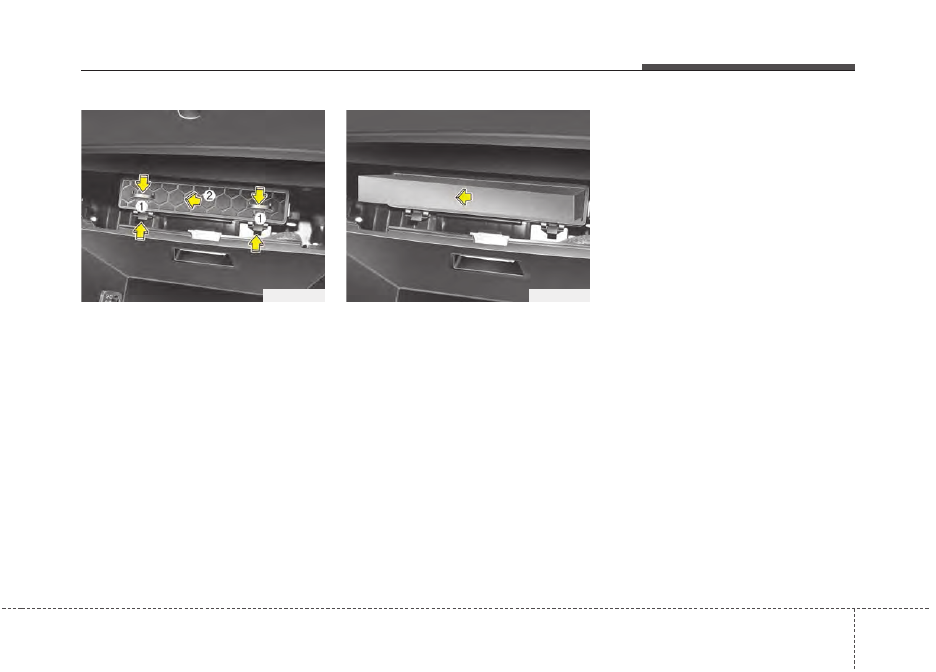
3. Remove the climate control air fil-
ter case by pulling out both sides
of the cover.
4. Replace the climate control air filter.
5. Reassemble in the reverse order
of disassembly.
When replacing the climate control
air filter install it properly. Otherwise,
the system may produce noise and
the effectiveness of the filter may be
reduced.
OPS073010
OPS073011
Maintenance
52
8
WIPER BLADES
Blade inspection
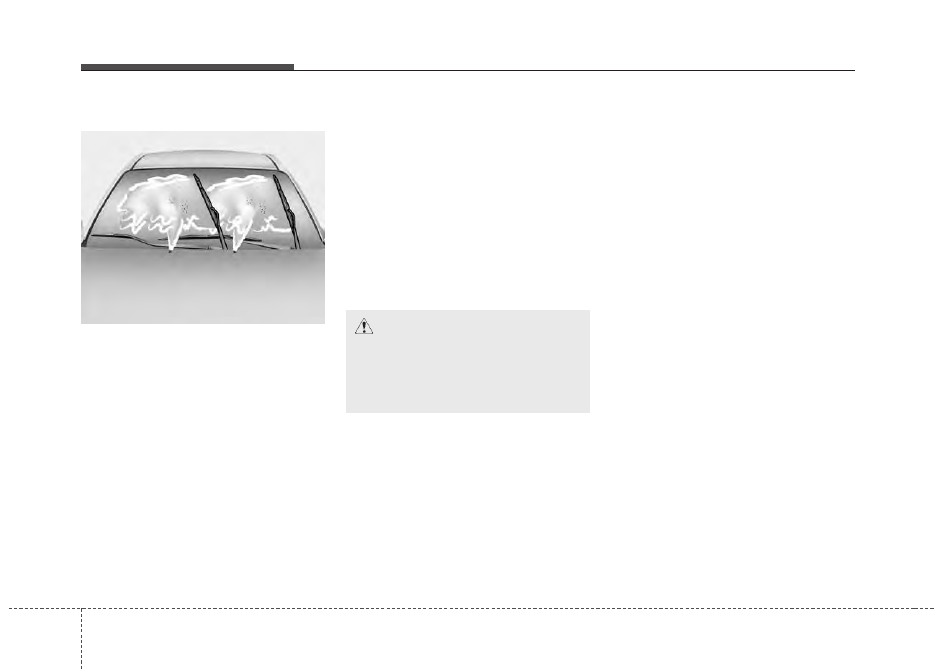
Commercial hot waxes applied by
automatic vehicle washes have been
known to make the windshield diffi-
cult to clean.
Contamination of either the wind-
shield or the wiper blades with for-
eign matter can reduce the effective-
ness of the windshield wipers.
Common sources of contamination
are insects, tree sap, and hot wax
treatments used by some commer-
cial vehicle washes. If the blades are
not wiping properly, clean both the
window and the blades with a good
cleaner or mild detergent, and rinse
thoroughly with clean water.
Blade replacement
When the wipers no longer clean
adequately, the blades may be worn
or cracked, and require replacement.
To prevent damage to the wiper arms
or other components, do not attempt
to move the wipers manually.
The use of a non-specified wiper
blade could result in wiper malfunc-
tion and failure.
1JBA5122
CAUTION
- Wiper blades
To prevent damage to the wiper
blades, do not use gasoline,
kerosene, paint thinner, or other
solvents on or near them.
8 53
Maintenance
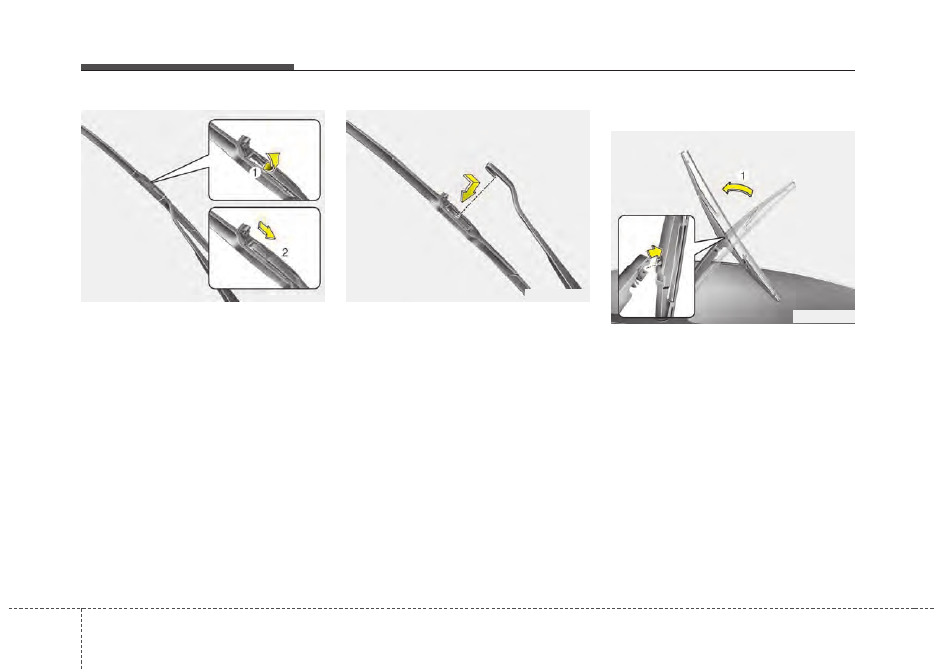
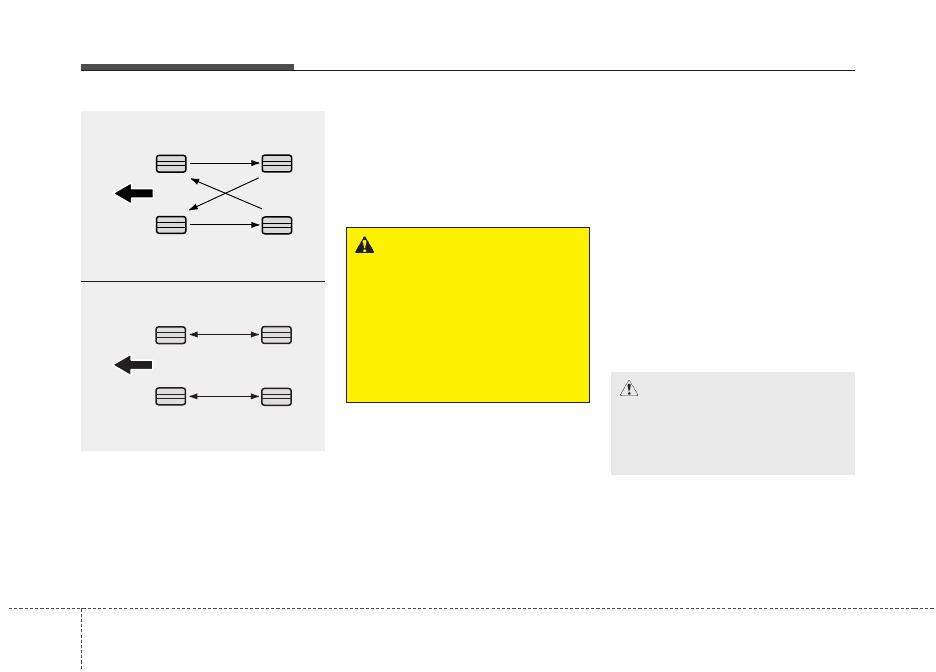
Front windshield wiper blade
Type A
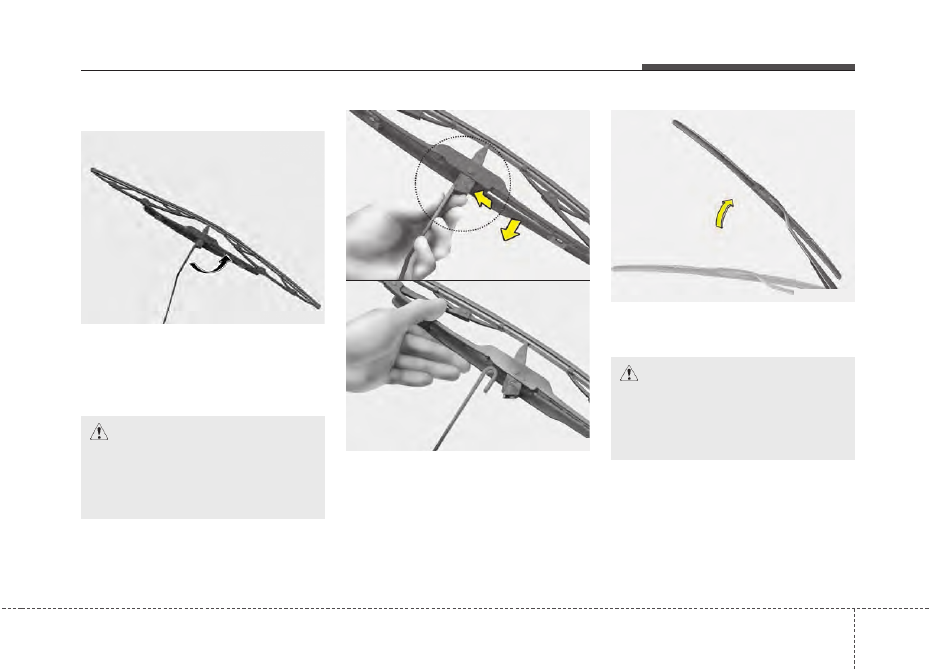
1. Raise the wiper arm and turn the
wiper blade assembly to expose
the plastic locking clip.
2. Compress the clip and slide the
blade assembly downward.
3. Lift it off the arm.
4. Install the blade assembly in the
reverse order of removal.
Type B
1. Raise the wiper arm.
1LDA5023
CAUTION
- Wiper arms
Do not allow the wiper arm to
fall against the windshield,
since it may chip or crack the
windshield.
CAUTION
- Wiper arms
Do not allow the wiper arm to
fall against the windshield,
since it may chip or crack the
windshield.
1JBA7037
1JBA7038
OHM078059
Maintenance
54
8
2. Lift up the wiper blade clip. Then
pull down the blade assembly and
remove it.
3. Install the new blade assembly in
the reverse order of removal.
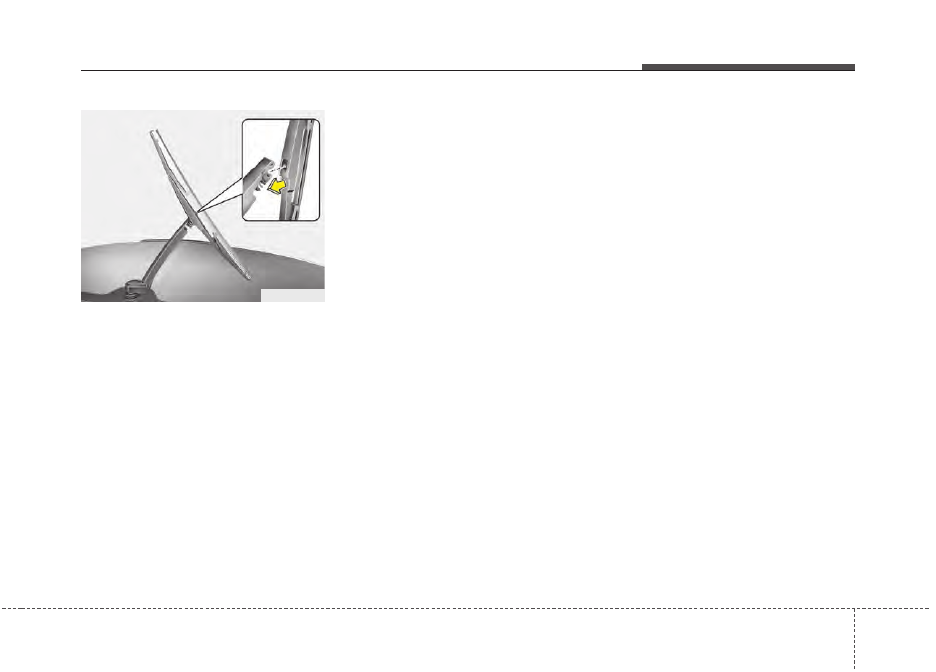
Rear window wiper blade
1. Raise the wiper arm and pull out
the wiper blade assembly.
OHM078060
OHM078062
OHM078061
8 55
Maintenance
2. Install the new blade assembly by
inserting the center part into the
slot in the wiper arm until it clicks
into place.
3. Make sure the blade assembly is
installed firmly by trying to pull it
slightly.
To prevent damage to the wiper arms
or other components, have an
authorized Kia dealer replace the
wiper blade.
OHM078063
Maintenance
56
8
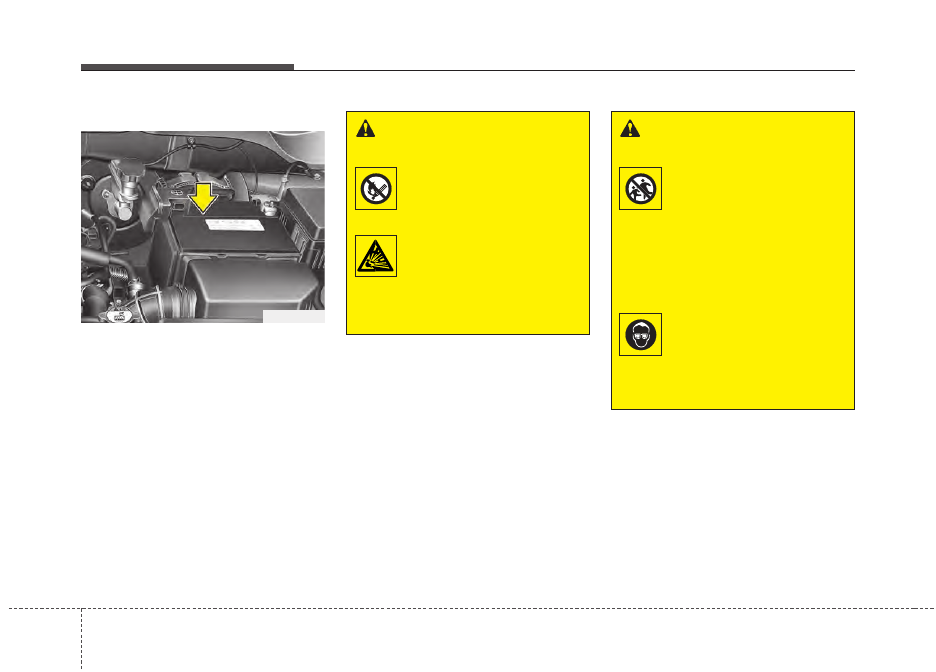
BATTERY
For best battery service
• Keep the battery securely mount-
ed.
• Keep the battery top clean and dry.
• Keep the terminals and connec-
tions clean, tight, and coated with
petroleum jelly or terminal grease.
• Rinse any spilled electrolyte from
the battery immediately with a
solution of water and baking soda.
• If the vehicle is not going to be
used for an extended time, discon-
nect the battery cables.
OPS076122
WARNING
- Risk of
explosion
Keep lit cigarettes and
all other flames or
sparks away from the
battery.
The battery contains
hydrogen -- a highly
combustible gas which
will explode if it comes
in contact with a flame or
spark.
WARNING
- Sulfuric acid
in batteries
Keep batteries out of the
reach of children
because batteries con-
tain highly corrosive
SULFURIC ACID and
electrolytes.
Do not
allow battery acid to
contact your skin, eyes,
clothing or paint finish.
Wear eye protection
when charging or work-
ing near a battery.
Always provide ventila-
tion when working in an
enclosed space.
8 57
Maintenance
Always read the following
instructions carefully when
handling a battery.
If any electrolyte gets into
your eyes, flush your eyes
with clean water for at least
15 minutes and get immedi-
ate medical attention.
If electrolyte gets on your
skin, thoroughly wash the
contacted area. If you feel
pain or burning sensation,
get medical attention imme-
diately.
An inappropriately disposed
battery can be harmful to the
environment and human
health. Dispose the battery
according to your local law(s)
or regulation.
Never attempt to recharge the bat-
tery when the battery cables are con-
nected.
✽
✽
NOTICE
If you connect unauthorized elec-
tronic devices to the battery, the bat-
tery may be discharged. Never use
unauthorized devices.
Battery recharging
Your vehicle has a maintenance-free,
calcium-based battery.
• If the battery becomes discharged
in a short time (because, for exam-
ple, the headlights or interior lights
were left on while the vehicle was
not in use), recharge it by slow
charging (trickle) for 10 hours.
• If the battery gradually discharges
because of high electric load while
the vehicle is being used, recharge
it at 20-30A for two hours.
CALIFORNIA PROPO-
SITION 65 WARNING
Battery posts, terminals, and
related accessories contain
lead and lead compounds,
chemicals known to the State of
California to cause cancer, birth
defects and reproductive harm.
Batteries also contain other
chemicals known to the State of
California to cause cancer.
Wash hands after handling.
WARNING
- Risk of elec-
trocution
Never touch the electrical igni-
tion system while the vehicle is
running. This system works
with high voltage which can
"zap" you.
WARNING
- Recharging
battery
Never attempt to recharge the
battery when the battery cables
are connected.
Maintenance
58
8
When recharging the battery,
observe the following precautions:
• The battery must be removed from
the vehicle and placed in an area
with good ventilation.
• Do not allow cigarettes, sparks, or
flame near the battery.
• Watch the battery during charging,
and stop or reduce the charging
rate if the battery cells begin
gassing (boiling) violently or if the
temperature of the electrolyte of
any cell exceeds 120°F (49°C).
• Wear eye protection when check-
ing the battery during charging.
• Disconnect the battery charger in
the following order.
1.Turn off the battery charger main
switch.
2.Unhook the negative clamp from
the negative battery terminal.
3.Unhook the positive clamp from
the positive battery terminal.
• Before performing maintenance or
recharging the battery, turn off all
accessories and stop the engine.
• The negative battery cable must be
removed first and installed last
when the battery is disconnected.
Reset items
Items should be reset after the bat-
tery has been discharged or the bat-
tery has been disconnected.
• Auto up/down window
(See chapter 4)
• Sunroof (See chapter 4)
• Trip computer (See chapter 4)
• Climate control system
(See chapter 4)
• Clock (See chapter 4)
• Audio (See chapter 5)
8 59
Maintenance
TIRES AND WHEELS
Tire care
For proper maintenance, safety, and
maximum fuel economy, you must
always maintain recommended tire
inflation pressures and stay within
the load limits and weight distribution
recommended for your vehicle.
Recommended cold tire infla-
tion pressures
All tire pressures (including the
spare) should be checked when the
tires are cold. “Cold Tires” means the
vehicle has not been driven for at
least three hours or driven less than
one mile (1.6 km).
Recommended pressures must be
maintained for the best ride, vehicle
handling, and minimum tire wear.
For recommended inflation pressure,
refer to “Tire and wheels” in chapter
9.
All specifications (sizes and pres-
sures) can be found on a label
attached to the driver’s side center
pillar.
OXM079101L
WARNING
- Tire under
inflation
Inflate your tire consistent with
the instructions provided in this
manual. Severe under inflation
can lead to severe heat build-
up, causing blowouts, tread
separation and other tire fail-
ures that can result in the loss
of vehicle control. This risk is
much higher on hot days and
when driving for long periods at
high speeds.
Maintenance
60
8
• Underinflation also results in
excessive wear, poor handling and
reduced fuel economy. Wheel
deformation also is possible. Keep
your tire pressures at the proper
levels. If a tire frequently needs
refilling, have it checked by an
authorized Kia dealer.
• Overinflation produces a harsh
ride, excessive wear at the center
of the tire tread, and a greater pos-
sibility of damage from road haz-
ards.
• Warm tires normally exceed rec-
ommended cold tire pressures by 4
to 6 psi (28 to 41 kPa). Do not
release air from warm tires to
adjust the pressure or the tires will
be underinflated.
• Be sure to reinstall the tire inflation
valve caps. Without the valve cap,
dirt or moisture could get into the
valve core and cause air leakage. If
a valve cap is missing, install a
new one as soon as possible.
Always observe the following:
• Check tire pressure when the tires
are cold. (After vehicle has been
parked for at least three hours or
hasn't been driven more than one
mile (1.6 km) since startup.)
• Check the pressure of your spare
tire each time you check the pres-
sure of other tires.
• Never overload your vehicle.
Be
careful not to overload a vehicle
luggage rack if your vehicle is
equipped with one.
Checking tire inflation pressure
Check your tires once a month or
more.
Also, check the tire pressure of the
spare tire.
How to check
Use a good quality gauge to check
tire pressure. You cannot tell if your
tires are properly inflated simply by
looking at them. Radial tires may
look properly inflated even when
they're underinflated.
Check the tire's inflation pressure
when the tires are cold. - "Cold"
means your vehicle has been sitting
for at least three hours or driven no
more than 1 mile (1.6 km).
WARNING
- Tire inflation
Overinflation or underinflation
can reduce tire life, adversely
affect vehicle handling, and
lead to sudden tire failure. This
could result in loss of vehicle
control and potential injury.
8 61
Maintenance
Remove the valve cap from the tire
valve stem. Press the tire gauge firm-
ly onto the valve to get a pressure
measurement. If the cold tire inflation
pressure matches the recommended
pressure on the tire and loading
information label, no further adjust-
ment is necessary. If the pressure is
low, add air until you reach the rec-
ommended amount.
If you overfill the tire, release air by
pushing on the metal stem in the
center of the tire valve. Recheck the
tire pressure with the tire gauge. Be
sure to put the valve caps back on
the valve stems. They help prevent
leaks by keeping out dirt and mois-
ture.
• Inspect your tires frequently for
proper inflation as well as wear and
damage. Always use a tire pres-
sure gauge.
• Tires with too much or too little
pressure wear unevenly causing
poor handling, loss of vehicle con-
trol, and sudden tire failure leading
to accidents, injuries, and even
death. The recommended cold tire
pressure for your vehicle can be
found in this manual and on the tire
label located on the driver's side
center pillar.
• Remember to check the pressure
of your spare tire. Kia recommends
that you check the spare every
time you check the pressure of the
other tires on your vehicle.
Tire rotation
To equalize tread wear, it is recom-
mended that the tires be rotated every
7,500 miles (12,000 km) or sooner if
irregular wear develops.
During rotation, check the tires for cor-
rect balance.
When rotating tires, check for uneven
wear and damage. Abnormal wear is
usually caused by incorrect tire pres-
sure, improper wheel alignment, out-
of-balance wheels, severe braking or
severe cornering. Look for bumps or
bulges in the tread or side of tire.
Replace the tire if you find either of
these conditions. Replace the tire if
fabric or cord is visible. After rotation,
be sure to bring the front and rear tire
pressures to specification and check
lug nut tightness.
Refer to “Tire and wheels” in chapter 9.
Maintenance
62
8
Disc brake pads should be inspected
for wear whenever tires are rotated.
Rotate radial tires that have an
asymmetric tread pattern only from
front to rear and not from right to left.
Wheel alignment and tire bal-
ance
The wheels on your vehicle were
aligned and balanced carefully at the
factory to give you the longest tire life
and best overall performance.
In most cases, you will not need to
have your wheels aligned again.
However, if you notice unusual tire
wear or your vehicle pulling one way
or the other, the alignment may need
to be reset.
If you notice your vehicle vibrating
when driving on a smooth road, your
wheels may need to be rebalanced.
S2BLA790A
CBGQ0707A
Without a spare tire
Directional tires (if equipped)
CAUTION
- Wheel weight
Improper wheel weights can
damage your vehicle's alu-
minum wheels.
Use only
approved wheel weights.
WARNING -
Mixing tires
• Do not use the compact spare
tire (if equipped) for tire rota-
tion.
• Do not mix bias ply and radial
ply tires under any circum-
stances.
This may cause
unusual handling characteris-
tics.
8 63
Maintenance
Tire replacement
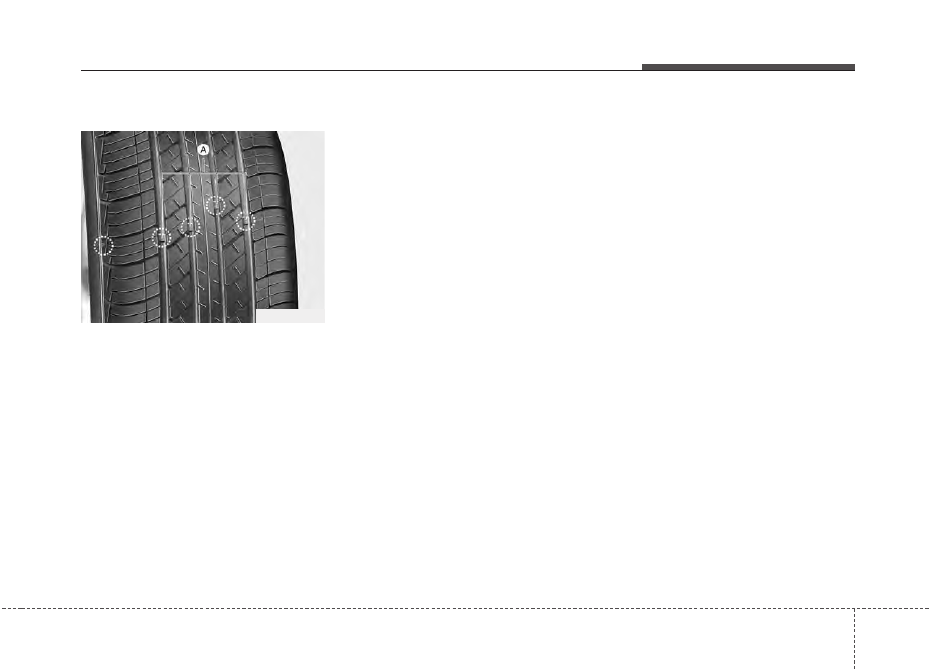
If the tire is worn evenly, a tread wear
indicator (A) will appear as a solid
band across the tread. This shows
there is less than 1/16 inch (1.6 mm)
of tread left on the tire. Replace the
tire when this happens.
Do not wait for the band to appear
across the entire tread before replac-
ing the tire.
The ABS works by comparing the
speed of the wheels. The tire size
affects wheel speed. When replacing
tires, all 4 tires must use the same
size originally supplied with the vehi-
cle. Using tires of a different size can
cause the ABS (Anti-lock Brake
System) and ESC (Electronic
Stability Control) to work irregularly.
✽
✽
NOTICE
We recommend that when replacing
tires, use the same originally sup-
plied with the vehicles. If not, that
affects driving performance.
Compact spare tire replacement
A compact spare tire has a shorter
tread life than a regular size tire.
Replace it when you can see the
tread wear indicator bars on the tire.
The replacement compact spare tire
should be the same size and design
tire as the one provided with your
new vehicle and should be mounted
on the same compact spare tire
wheel. The compact spare tire is not
designed to be mounted on a regular
size wheel, and the compact spare
tire wheel is not designed for mount-
ing a regular size tire.
OUM076204L
Maintenance
64
8
Wheel replacement
When replacing the metal wheels for
any reason, make sure the new
wheels are equivalent to the original
factory units in diameter, rim width
and offset.
A wheel that is not the correct size
may adversely affect wheel and
bearing life, braking and stopping
abilities, handling characteristics,
ground clearance, body-to-tire clear-
ance, snow chain clearance,
speedometer and odometer calibra-
tion, headlight aim and bumper
height.
Tire traction
Tire traction can be reduced if you
drive on worn tires, tires that are
improperly inflated or on slippery
road surfaces. Tires should be
replaced when tread wear indicators
appear. Slow down whenever there
is rain, snow or ice on the road to
reduce the possibility of losing con-
trol of the vehicle.
Tire maintenance
In addition to proper inflation, correct
wheel alignment helps to decrease
tire wear. If you find a tire is worn
unevenly, have your dealer check the
wheel alignment.
When you have new tires installed,
make sure they are balanced. This
will increase vehicle ride comfort and
tire life. Additionally, a tire should
always be rebalanced if it is removed
from the wheel.
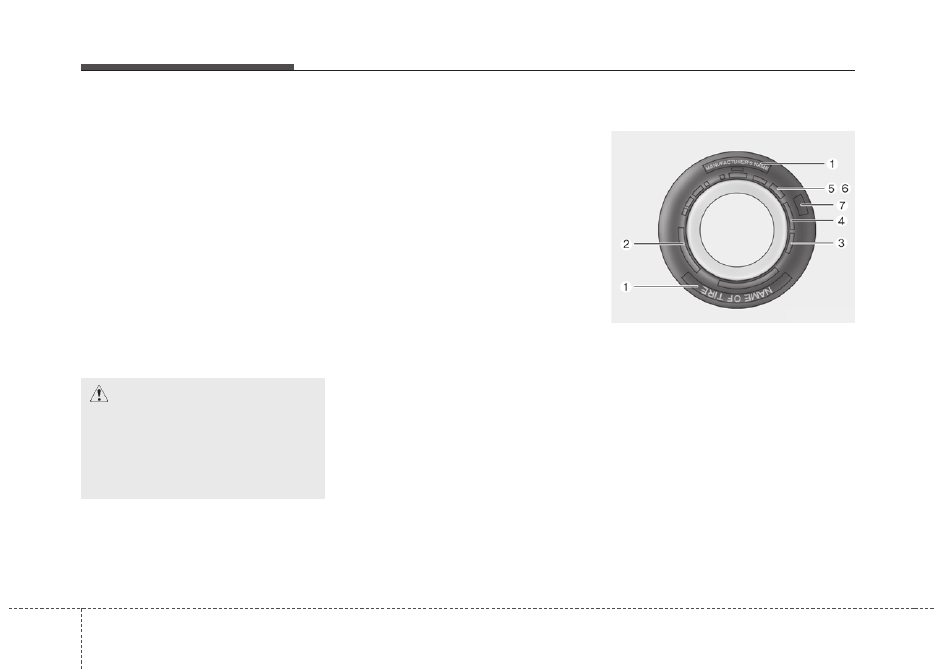
Tire sidewall labeling
This information identifies and
describes the fundamental charac-
teristics of the tire and also provides
the tire identification number (TIN)
for safety standard certification. The
TIN can be used to identify the tire in
case of a recall.
1. Manufacturer or brand name
Manufacturer or Brand name is
shown.
CAUTION
- Wheels
Wheels that do not meet Kia
specifications may fit poorly
and result in damage to the
vehicle or unusual handling and
poor vehicle control.
OJF085008L
8 65
Maintenance
2. Tire size designation
A tire’s sidewall is marked with a tire
size designation. You will need this
information when selecting replace-
ment tires for your vehicle. The fol-
lowing explains what the letters and
numbers in the tire size designation
mean.
Example tire size designation:
(These numbers are provided as an
example only; your tire size designa-
tor could vary depending on your
vehicle.)
P235/65R17 108T
P - Applicable vehicle type (tires
marked with the prefix “P’’ are
intended for use on passenger
vehicles or light trucks; however,
not all tires have this marking).
235 - Tire width in millimeters.
65 - Aspect ratio. The tire’s section
height as a percentage of its
width.
R - Tire construction code (Radial).
17 - Rim diameter in inches.
108 - Load Index, a numerical code
associated with the maximum
load the tire can carry.
T - Speed Rating Symbol. See the
speed rating chart in this section
for additional information.
Wheel size designation
Wheels are also marked with impor-
tant information that you need if you
ever have to replace one. The follow-
ing explains what the letters and
numbers in the wheel size designa-
tion mean.
Example wheel size designation:
7.0JX17
7.0 - Rim width in inches.
J - Rim contour designation.
17 - Rim diameter in inches.
Нет комментариевНе стесняйтесь поделиться с нами вашим ценным мнением.
Текст