Subaru Baja (2006 year). Instruction — part 24
11-19
Maintenance and service
– CONTINUED –
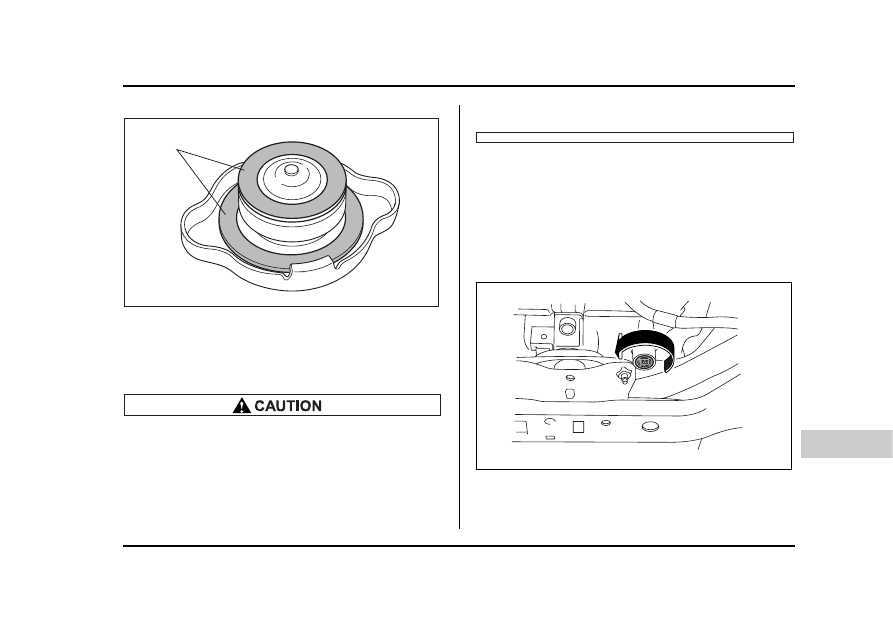
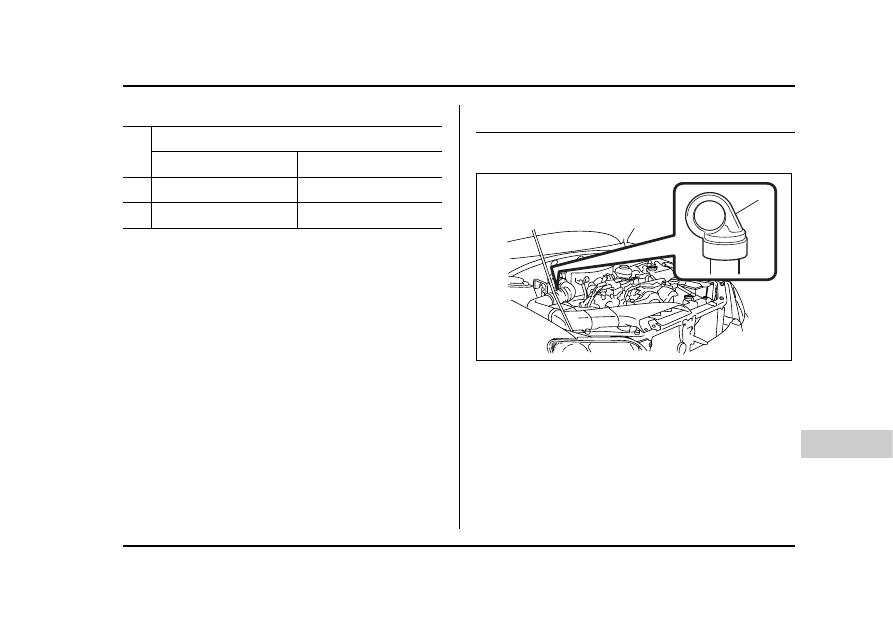
1) Rubber gaskets
3. After refilling the reserve tank and the radiator, re-
install the caps and check that the rubber gaskets in-
side the radiator cap are in the proper position.
y Be careful not to spill engine coolant when
adding it. If coolant touches the exhaust pipe, it
may cause a bad smell, smoke, and/or a fire. If
engine coolant gets on the exhaust pipe, be
sure to wipe it off.
y Do not splash the engine coolant over paint-
ed parts. The alcohol contained in the engine
coolant may damage the paint surface.
T Changing the coolant
Always add genuine SUBARU cooling system condi-
tioner whenever the coolant is replaced.
Change the engine coolant and add genuine SUBARU
cooling system conditioner using the following proce-
dures according to the maintenance schedule in the
“Warranty and Maintenance Booklet”.
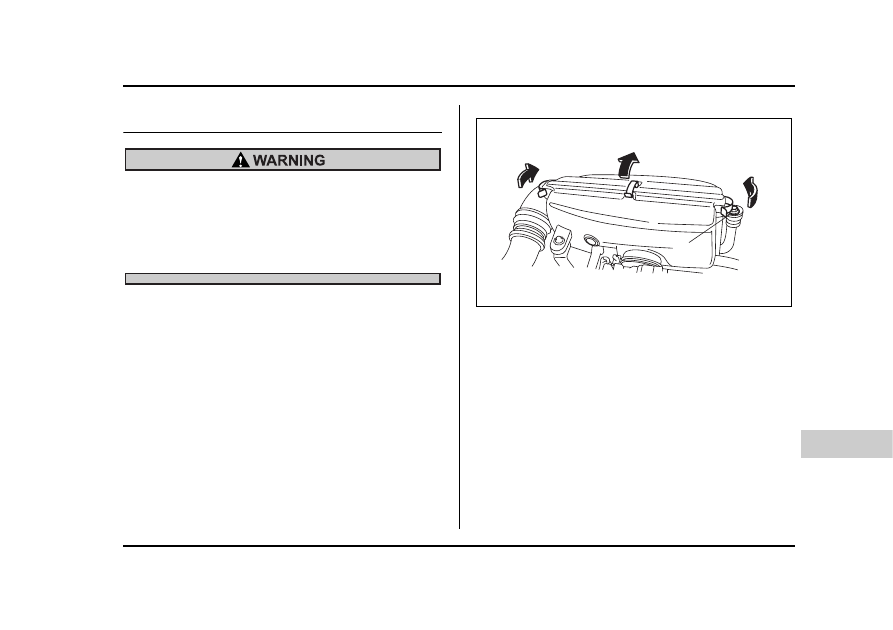
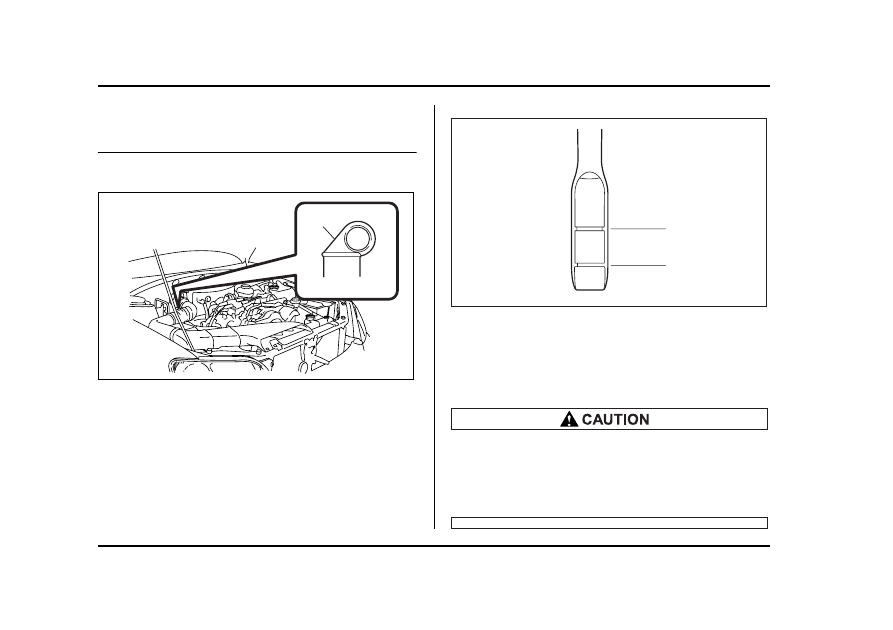
1. Remove the under cover.
Non-turbo models
1
HSB026BB
UBB006CA
11-20
Maintenance and service
Turbo models
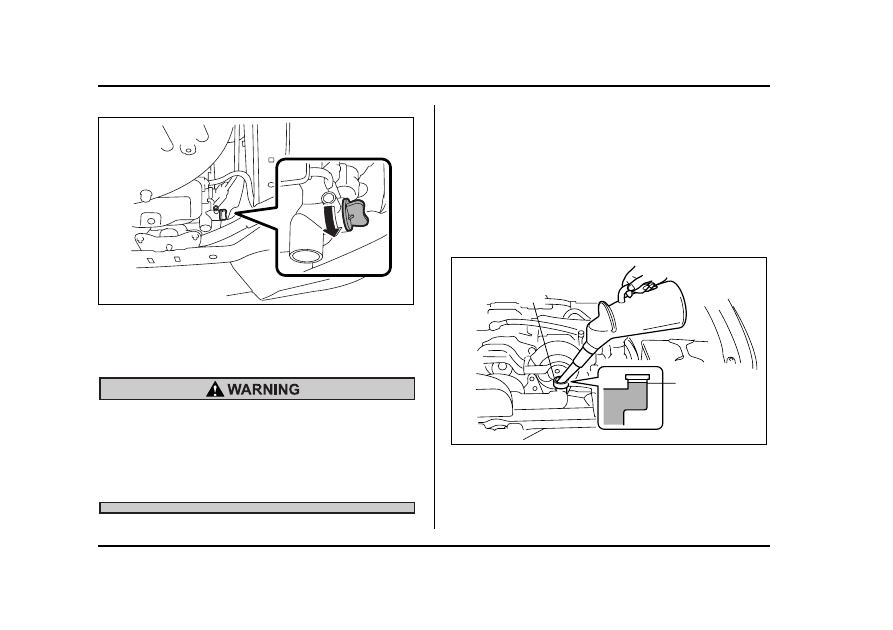
2. Place a proper container under the drain plug and
loosen the drain plug.
Never attempt to remove the radiator cap until
the engine has been shut off and has cooled
down completely. Since the coolant is under
pressure, you may suffer serious burns from a
spray of boiling hot coolant when the cap is re-
moved.
3. Loosen the radiator cap to drain the coolant from
the radiator. Then drain the coolant from the reserve
tank. Tighten the drain plug securely.
NOTE (Turbo models)
The cap (without tabs) on top of the radiator does
not need to be removed. To add coolant, remove
the cap (with tabs) on the coolant tank on top of
the engine.
Non-turbo models
1) Filler neck
2) Fill up to here
UBB104BA
1
2
UBB007CB
11-21
Maintenance and service
– CONTINUED –
Turbo models
1) Filler neck
2) Fill up to here
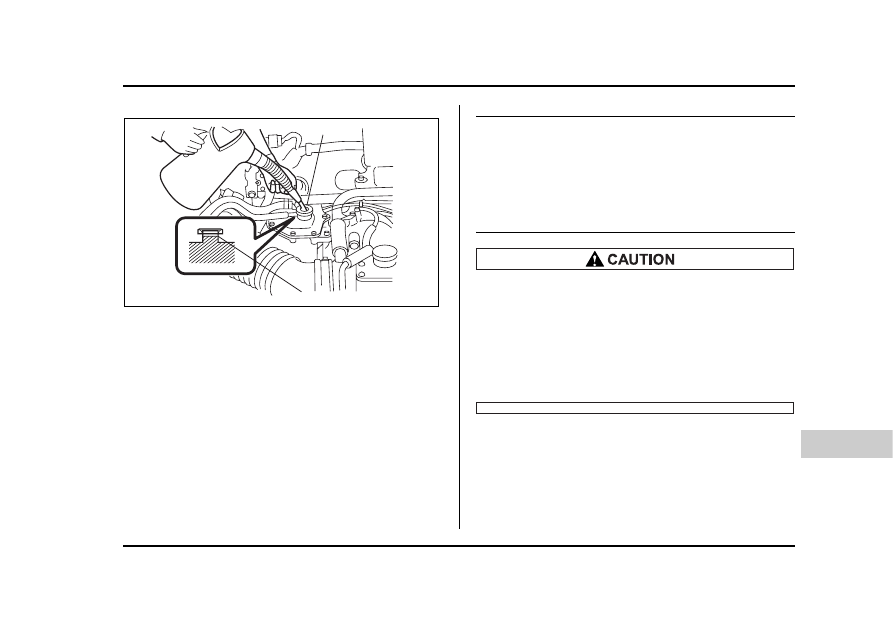
4. Slowly pour the coolant and fill up to just below the
filler neck, allowing enough room to add genuine
SUBARU cooling system conditioner in the radiator.
Add genuine SUBARU cooling system conditioner un-
til the coolant level reaches the filler neck. Do not pour
the coolant too quickly, as this may lead to insufficient
air bleeding and trapped air in the system.
Coolant capacity (Guideline):
Non-turbo models:
MT. 7.2 US qt (6.8 liters, 6.0 Imp qt)
AT. 7.1 US qt (6.7 liters, 5.9 Imp qt)
Turbo models:
MT. 8.1 US qt (7.7 liters, 6.8 Imp qt)
AT. 8.0 US qt (7.6 liters, 6.7 Imp qt)
y Be careful not to spill engine coolant when
adding it. If coolant touches the exhaust pipe, it
may cause a bad smell, smoke, and/or a fire. If
engine coolant gets on the exhaust pipe, be
sure to wipe it off.
y Do not splash the engine coolant over paint-
ed parts. The alcohol contained in the engine
coolant may damage the paint surface.
1
2
USB518BB
11-22
Maintenance and service
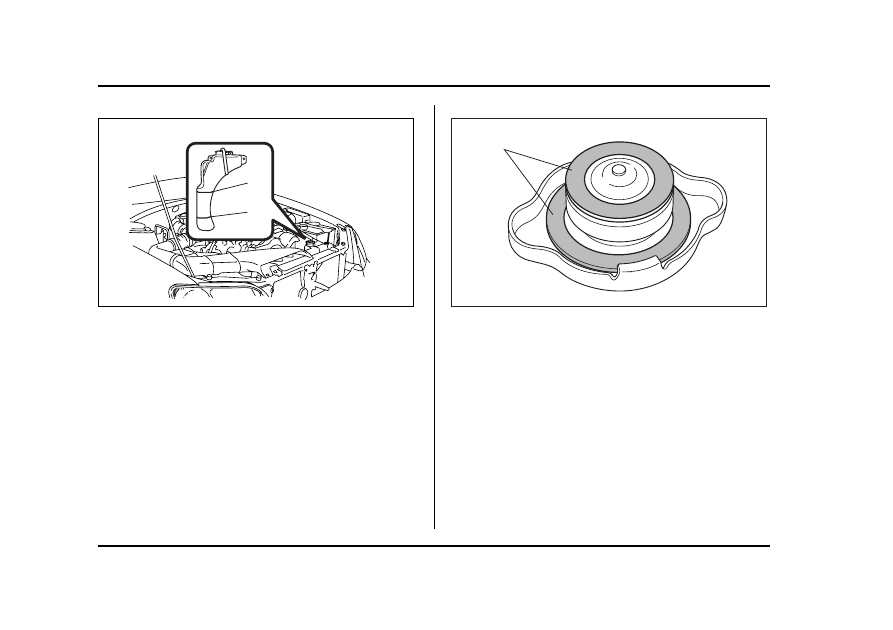
1) “FULL” level mark
2) “LOW” level mark
5. Pour the coolant and fill to the reservoir tank’s
“FULL” level mark.
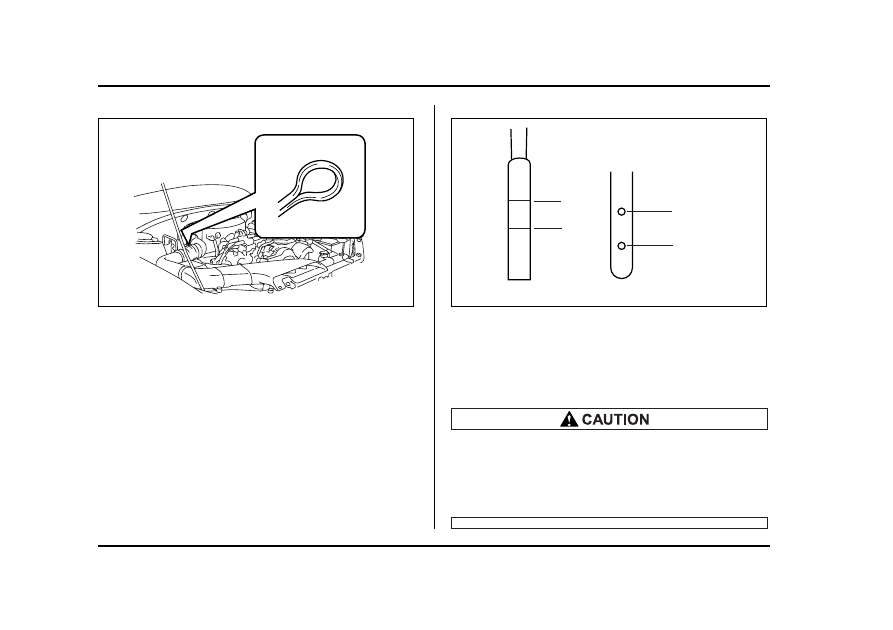
1) Rubber gaskets
6. Put the radiator cap back on and tighten firmly. At
this time, make sure that the rubber gasket in the radi-
ator cap is correctly in place.
7. Start and run the engine for more than five minutes
at 2,000 to 3,000 rpm.
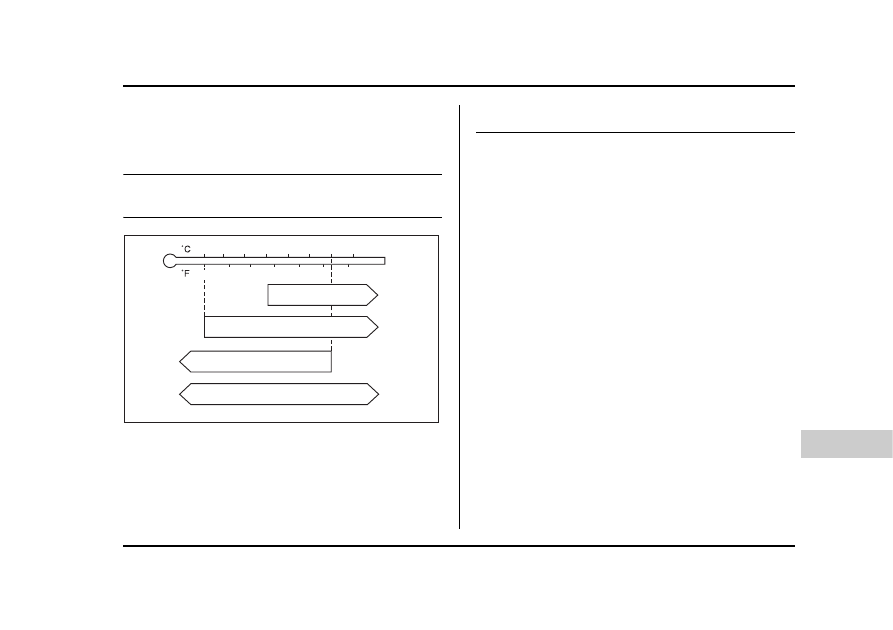
8. Stop the engine and wait until the coolant cools
down (122 to 140°F [50 to 60°C]). If there is any loss
of coolant, add coolant to the radiator’s filler neck and
to the reserve tank’s “FULL” level.
9. Put the radiator cap and reservoir cap back on and
tighten firmly.
FULL
LOW
1
2
UBB004FB
1
HSB026BB
11-23
Maintenance and service
– CONTINUED –
Air cleaner element
Air cleaner element
Do not operate the engine with the air cleaner
element removed. The air cleaner element not
only filters intake air but also stops flames if the
engine backfires. If the air cleaner element is
not installed when the engine backfires, you
could be burned.
The air cleaner element functions as a filter screen.
When the element is perforated or removed, engine
wear will be excessive and engine life shortened.
The air cleaner element is a viscous type. It is unnec-
essary to clean or wash the element.
Replacing the air cleaner element
Replacing
Air cleaner element
T Non-turbo models
Replace the air cleaner element according to the
maintenance schedule in the “Warranty and Mainte-
nance Booklet”. Under extremely dusty conditions, re-
place it more frequently. It is recommended that you
always use genuine SUBARU parts.
0
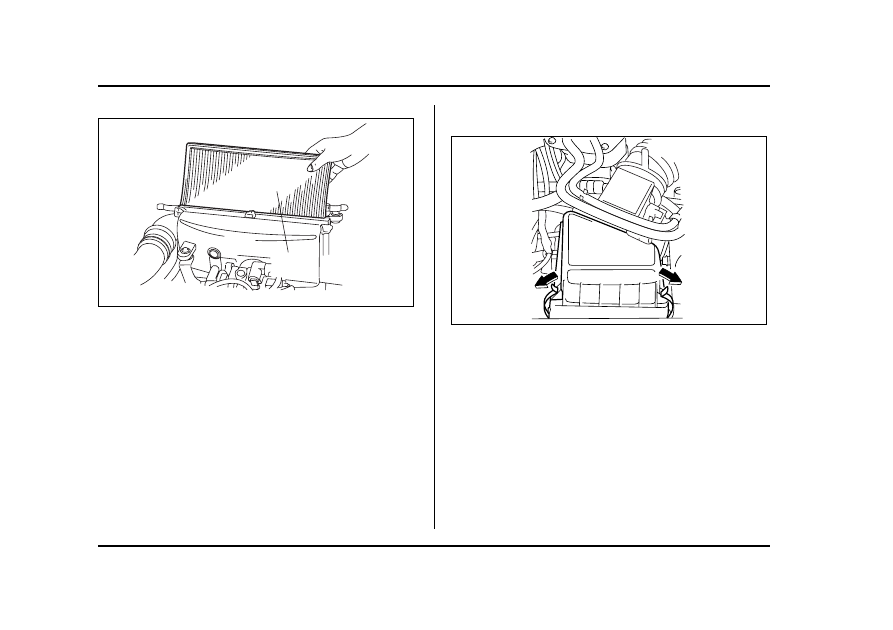
1) Bolt
1. Remove the bolt securing the rear air cleaner ele-
ment case.
2. Unsnap the three clamps holding the rear air clean-
er element case.
1
UBB063BB
11-24
Maintenance and service
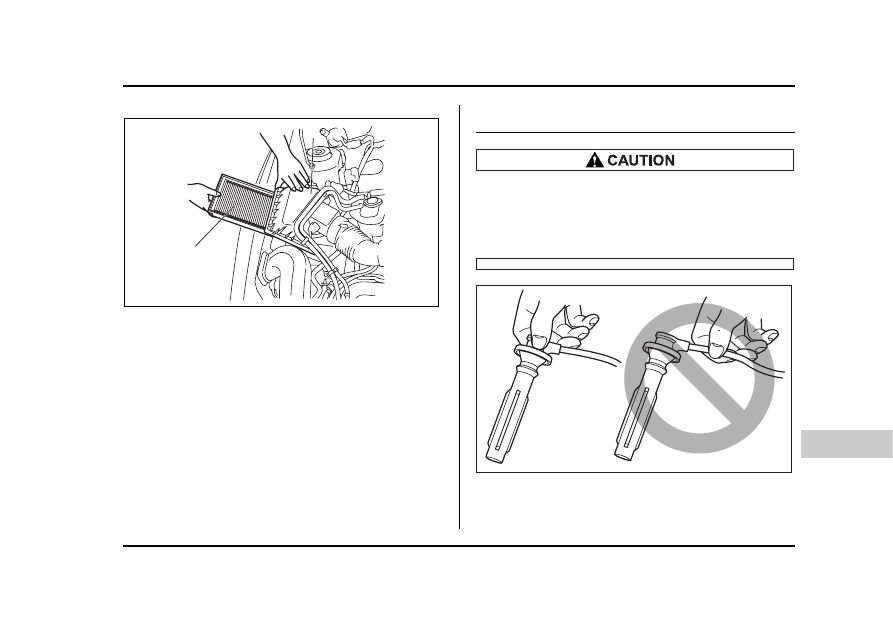
1) Air cleaner element
3. Separate the rear air cleaner element case from
the front air cleaner element case and remove the air
cleaner element.
4. Clean the inside of the front and rear air cleaner el-
ement cases with a damp cloth and install a new air
cleaner element.
5. Insert the four projections on the rear air cleaner el-
ement case into the slits on the front air cleaner ele-
ment case and snap the three clamps on the rear air
cleaner element case and then tighten the bolt.
T Turbo models
1. Unsnap the two clamps holding the air cleaner
case cover.
1
UBB064BB
USB521BA
11-25
Maintenance and service
– CONTINUED –
1) Air cleaner case cover
2) Air cleaner element
2. Open the air cleaner case cover and remove the air
cleaner element.
3. Clean the inside of the air cleaner cover and case
with a damp cloth and install a new air cleaner ele-
ment.
To install the air cleaner case cover, insert two projec-
tions on the air cleaner case into the slits on the air
cleaner case cover and then snap the two clamps on
the air cleaner case cover.
Spark plugs
Spark plugs
y When disconnecting the spark plug cables,
always grasp the spark plug cap, not the ca-
bles.
y Make sure the cables are replaced in the cor-
rect order.
It may be difficult to replace the spark plugs. It is rec-
ommended that you have the spark plugs replaced by
your SUBARU dealer.
2
1
USB522BB
HSB032BA
11-26
Maintenance and service
The spark plugs should be replaced according to the
maintenance schedule in the “Warranty and Mainte-
nance Booklet”.
Recommended spark plugs
Recommended
Spark plugs
Non-turbo models:
RC10YC4 (Champion)
BKR6E-11 (NGK)
BKR5E-11 (NGK)
Turbo models:
ILFR6B (NGK)
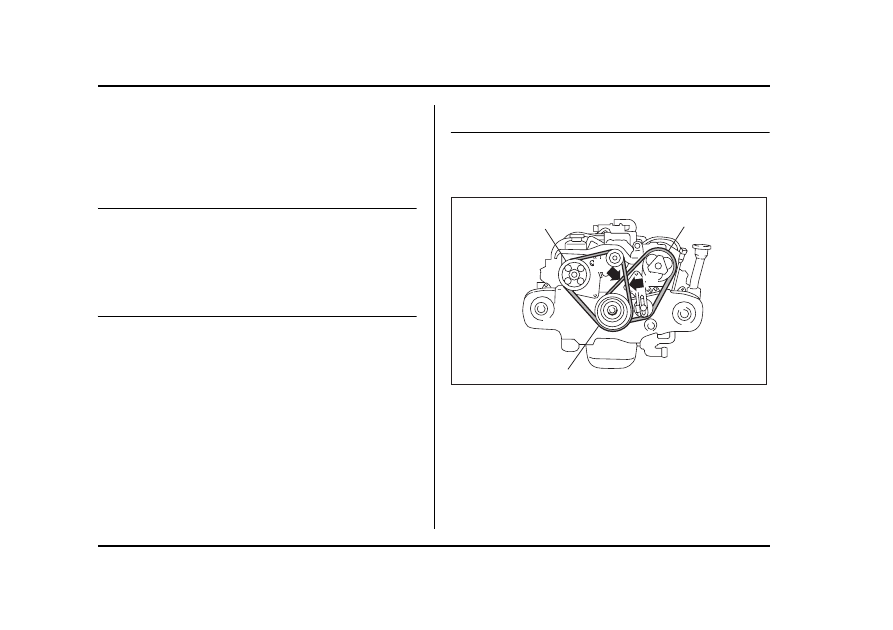
Drive belts
Drive belts
The alternator, power steering pump, and air condi-
tioner compressor depend on drive belts. Satisfactory
performance requires that belt tension be correct.
1) Power steering pump pulley
2) Air conditioner compressor pulley
3) Crank pulley
2
3
A
B
1
HSB033BB
11-27
Maintenance and service
– CONTINUED –
in (mm)
To check belt tension, place a straightedge (ruler)
across two adjacent pulleys and apply a force of 22 lbs
(98 N, 10 kg) midway between the pulleys by using a
spring scale. Belt deflection should be the amount
specified.
Instruction transmission oil
Instruction transmission oil
Oil level
Instruction transmission
Checking the oil level
0
Non-turbo models
1) Yellow handle
Deflection
New belt
Used belt
A
0.28 – 0.35 (7.0 – 9.0)
0.35 – 0.43 (9.0 – 11.0)
B
0.30 – 0.33 (7.5 – 8.5)
0.35 – 0.40 (9.0 – 10.0)
1
UBB004DB
11-28
Maintenance and service
Turbo models
1. Park the vehicle on a level surface and stop the en-
gine.
2. Pull out the dipstick, wipe it clean, and insert it
again.
1) Upper level
2) Lower level
3. Pull out the dipstick again and check the oil level on
it. If it is below the lower level, add oil through the dip-
stick hole to bring the level up to the upper level.
Be careful not to spill instruction transmission oil
when adding it. If oil touches the exhaust pipe,
it may cause a bad smell, smoke, and/or a fire.
If oil gets on the exhaust pipe, be sure to wipe
it off.
UGB001JA
L
F
F
L
1
2
1
2
USB526BB
11-29
Maintenance and service
– CONTINUED –
Recommended grade and viscosity
Recommended
Oil grade and viscosity
Each oil manufacturer has its own base oils and addi-
tives. Never use different brands together.
Oil grade:
API classification GL-5
SAE viscosity No. and applicable temperature
Automatic transmission fluid
Automatic transmission
Fluid
Fluid level
Automatic transmission
Checking the fluid level
Checking
Fluid level
The automatic transmission fluid expands largely as
its temperature rises; the fluid level differs according to
fluid temperature. Therefore, there are two different
scales for checking the level of hot fluid and cold fluid
on the dipstick.
Though the fluid level can be checked without warm-
ing up the fluid on the “COLD” range, we recommend
checking the fluid level when the fluid is at operating
temperature.
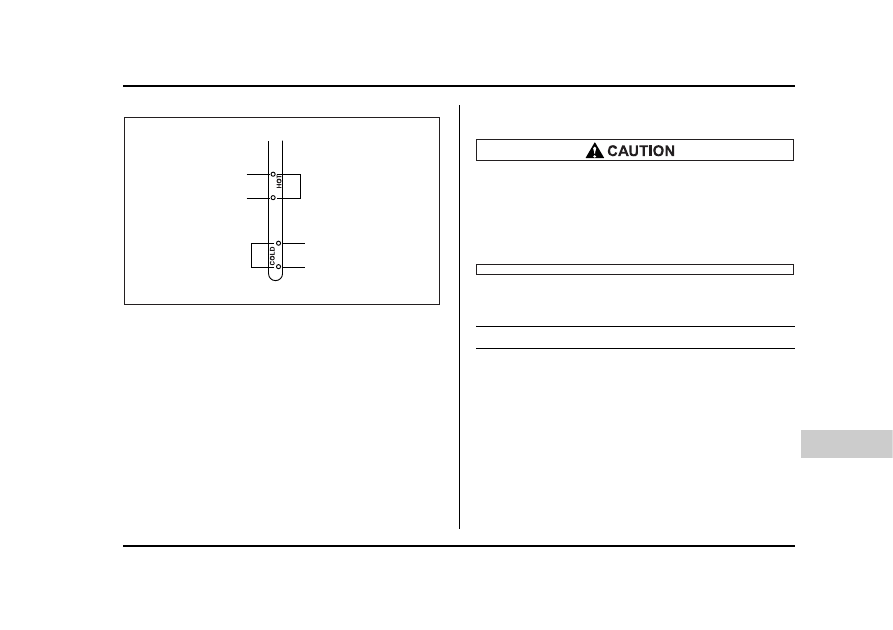
T Checking the fluid level when the fluid is hot
Check the fluid level monthly.
1. Drive the vehicle several miles to raise the temper-
ature of the transmission fluid up to normal operating
temperature; 158 to 176°F (70 to 80°C) is normal.
2. Park the vehicle on a level surface and set the park-
ing brake.
3. First shift the selector lever in each position. Then
shift it in the “P” position, and run the engine at idling
speed.
-30 -20
-10
0
10
20
30
40
-20
0
60
20
80W
75W/90
80
100
40
85W
90
HSB036BA
11-30
Maintenance and service
1) Yellow handle
1) Yellow handle
1
UBB004KB
HSB018MB
1
11-31
Maintenance and service
– CONTINUED –
A) HOT range
B) COLD range
1) Upper level
2) Lower level
4. Pull out the dipstick and check the fluid level on the
gauge. If it is below the lower level on the “HOT”
range, add the recommended automatic transmission
fluid up to the upper level.
T Checking the fluid level when the fluid is cold
When the fluid level has to be checked without time to
warm up the automatic transmission, check to see that
the fluid level is between the lower level and upper lev-
el on the “COLD” range. If it is below that range, add
fluid up to the upper level. Be careful not to overfill.
Be careful not to spill automatic transmission
fluid when adding it. If automatic transmission
fluid touches the exhaust pipe, it may cause a
bad smell, smoke, and/or a fire. If automatic
transmission fluid gets on the exhaust pipe, be
sure to wipe it off.
Recommended fluid
Recommended
Automatic transmission fluid
“Dexron III” Type Automatic Transmission Fluid
LF
LF
1
2
1
2
B
A
HGB061BB
11-32
Maintenance and service
Front differential gear oil (AT vehi-
cles)
Differential gear oil
Front
Front
Differential gear oil
Oil level
Front differential (AT vehicles)
Checking the oil level
Checking
Gear oil level
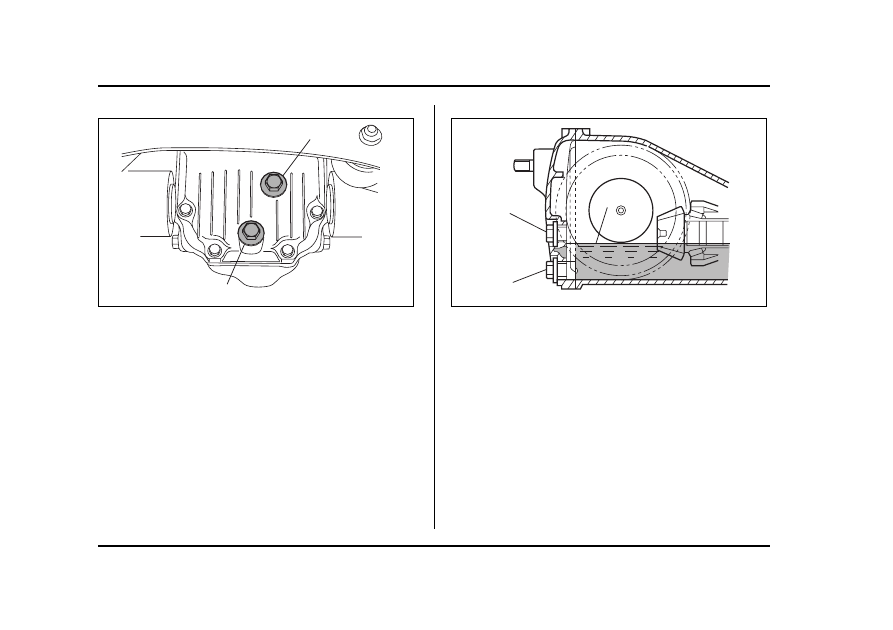
1) Yellow
1. Park the vehicle on a level surface and stop the en-
gine.
2. Pull out the dipstick, wipe it clean, and insert it
again.
1) Upper level
2) Lower level
3. Pull out the dipstick again and check the oil level on
it. If it is below the lower level, add oil to bring the level
up to the upper level.
Be careful not to spill front differential gear oil
when adding it. If oil touches the exhaust pipe,
it may cause a bad smell, smoke, and/or a fire.
If oil gets on the exhaust pipe, be sure to wipe
it off.
1
UBB004EB
L
F
1
2
HSB040BB
11-33
Maintenance and service
– CONTINUED –
Recommended grade and viscosity
Recommended
Oil grade and viscosity
Each oil manufacturer has its own base oils and addi-
tives. Never use different brands together.
Oil grade:
API classification GL-5
SAE viscosity No. and applicable temperature
Rear differential gear oil
Rear
Differential gear oil
Differential gear oil
Rear
Oil level
Rear differential
Checking the gear oil level
Checking
Gear oil level
y Be careful not to spill rear differential gear oil
when adding it. If rear differential gear oil
touches the exhaust pipe, it may cause a bad
smell, smoke, and/or a fire. If rear differential
gear oil gets on the exhaust pipe, be sure to
wipe it off.
y If the vehicle requires frequent refilling, there
may be an oil leak. If you suspect a problem,
have the vehicle checked at your SUBARU deal-
er.
Your vehicle may be equipped with a rear differential
protector. The differential protector provides protec-
tion to the rear differential assembly during off-road
use. Removal of the rear differential protector is not re-
quired when checking the oil level.
-30 -20
-10
0
10
20
30
40
-20
0
60
20
80W
75W/90
80
100
40
85W
90
HSB036BA
11-34
Maintenance and service
Non-turbo AT
1) Filler plug
2) Drain plug
1) Filler hole
2) Drain hole
3) Oil level
1
2
OM-U0213
1
2
3
OM-U0214
Нет комментариевНе стесняйтесь поделиться с нами вашим ценным мнением.
Текст