Subaru Impreza 3 / Impreza WRX / Impreza WRX STI. Service manual — part 19
PM-14
Fuel Line
PERIODIC MAINTENANCE SERVICES
8. Fuel Line
A: INSPECTION
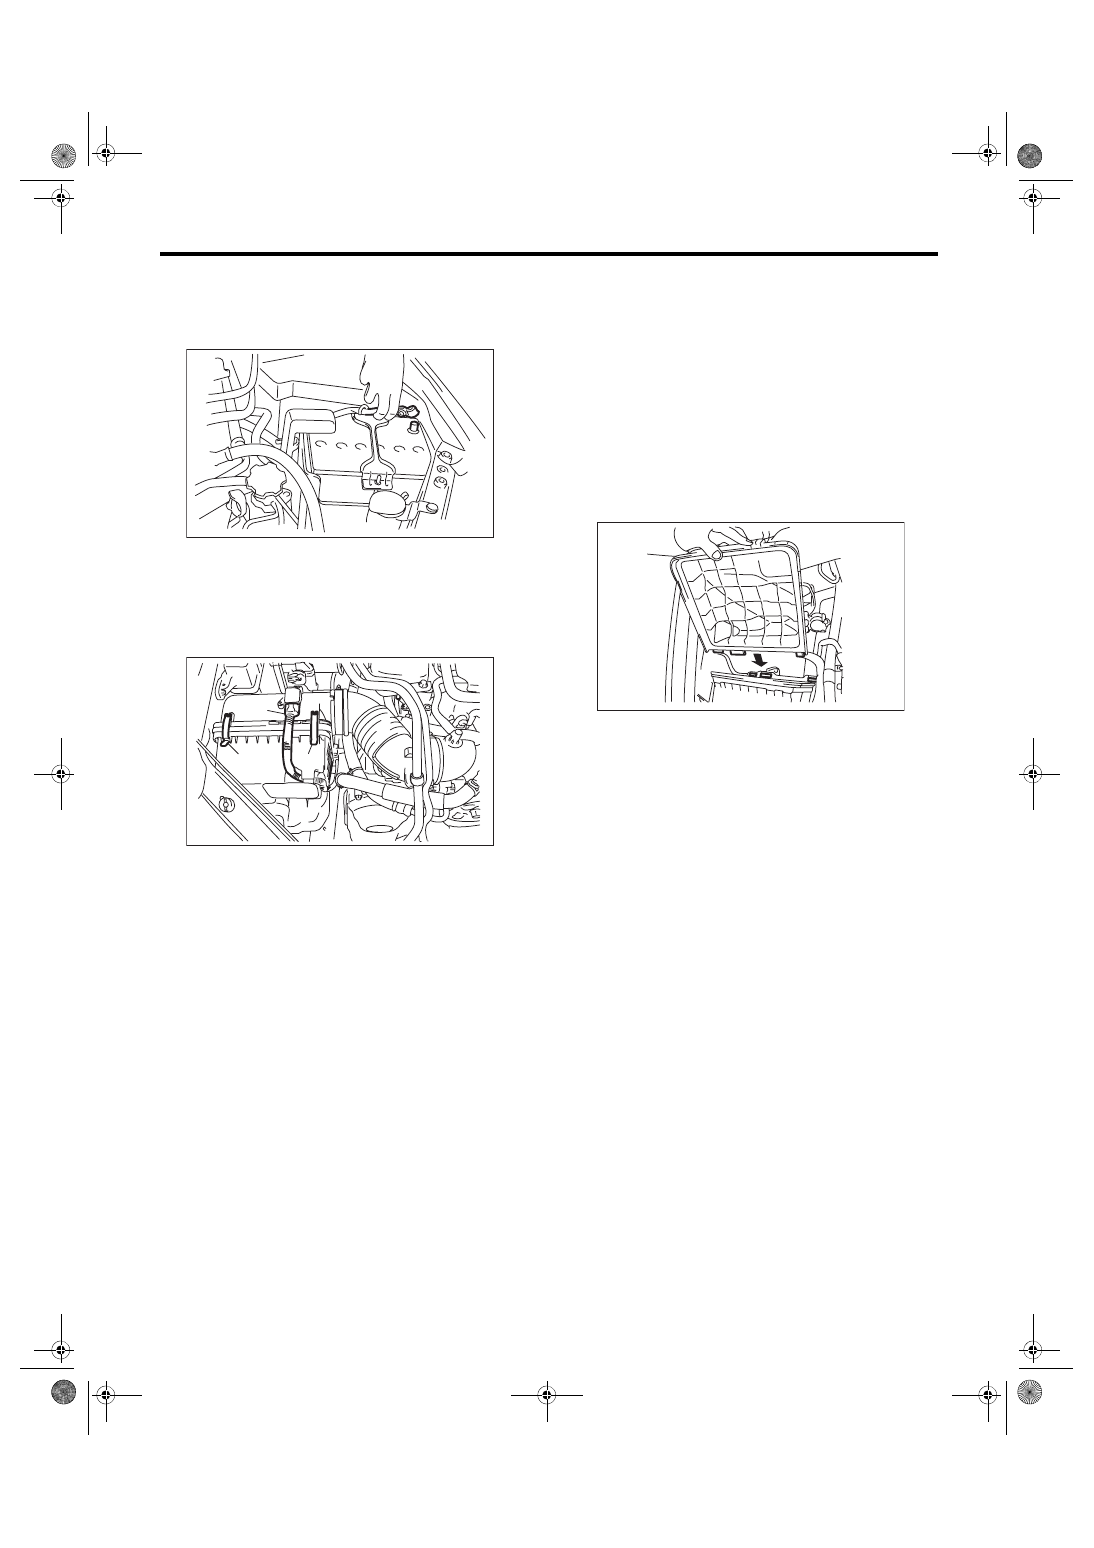
For fuel line, check pipes, areas near pipes, and
engine compartment piping for rust, hose damage,
loose band, etc. If faulty parts are found, repair or
replace them. <Ref. to FU(STI)-93, Fuel Delivery,
Return and Evaporation Lines.> <Ref. to FU(w/o
STI)-89, Fuel Delivery, Return and Evaporation
gi14usena07.fm 14 ページ 2013年9月10日 火曜日 午後3時59分
PM-15
Fuel Filter
PERIODIC MAINTENANCE SERVICES
9. Fuel Filter
A: REPLACEMENT
For fuel filter replacement procedure, refer to FU
section. <Ref. to FU(STI)-85, Fuel Filter.>
gi14usena07.fm 15 ページ 2013年9月10日 火曜日 午後3時59分
PM-16
Air Cleaner Element
PERIODIC MAINTENANCE SERVICES
10.Air Cleaner Element
A: REPLACEMENT
1) Disconnect the ground cable from battery.
2) Remove the air intake duct. <Ref. to IN(STI)-10,
REMOVAL, Air Intake Duct.> <Ref. to IN(w/o STI)-
10, REMOVAL, Air Intake Duct.>
3) Disconnect the connector (A) from mass air flow
and intake air temperature sensor.
4) Remove the clip (B) from the air cleaner case.
5) Open the air cleaner case, and remove the air
cleaner element.
6) Install in the reverse order of removal.
CAUTION:
Be sure to use SUBARU genuine air cleaner el-
ement depending on the engine type when re-
placing the air cleaner elements. Using other air
cleaner element may affect the engine perfor-
mance.
NOTE:
• Check that there are no foreign objects in the air
cleaner case.
• When installing the air cleaner case (rear), align
the protrusion of the air cleaner case (rear) to the
hole on the air cleaner case (front) to install.
IN-00203
IN-02335
(A)
(B)
(B)
IN-02438
gi14usena07.fm 16 ページ 2013年9月10日 火曜日 午後3時59分
PM-17
Cooling System
PERIODIC MAINTENANCE SERVICES
11.Cooling System
A: INSPECTION
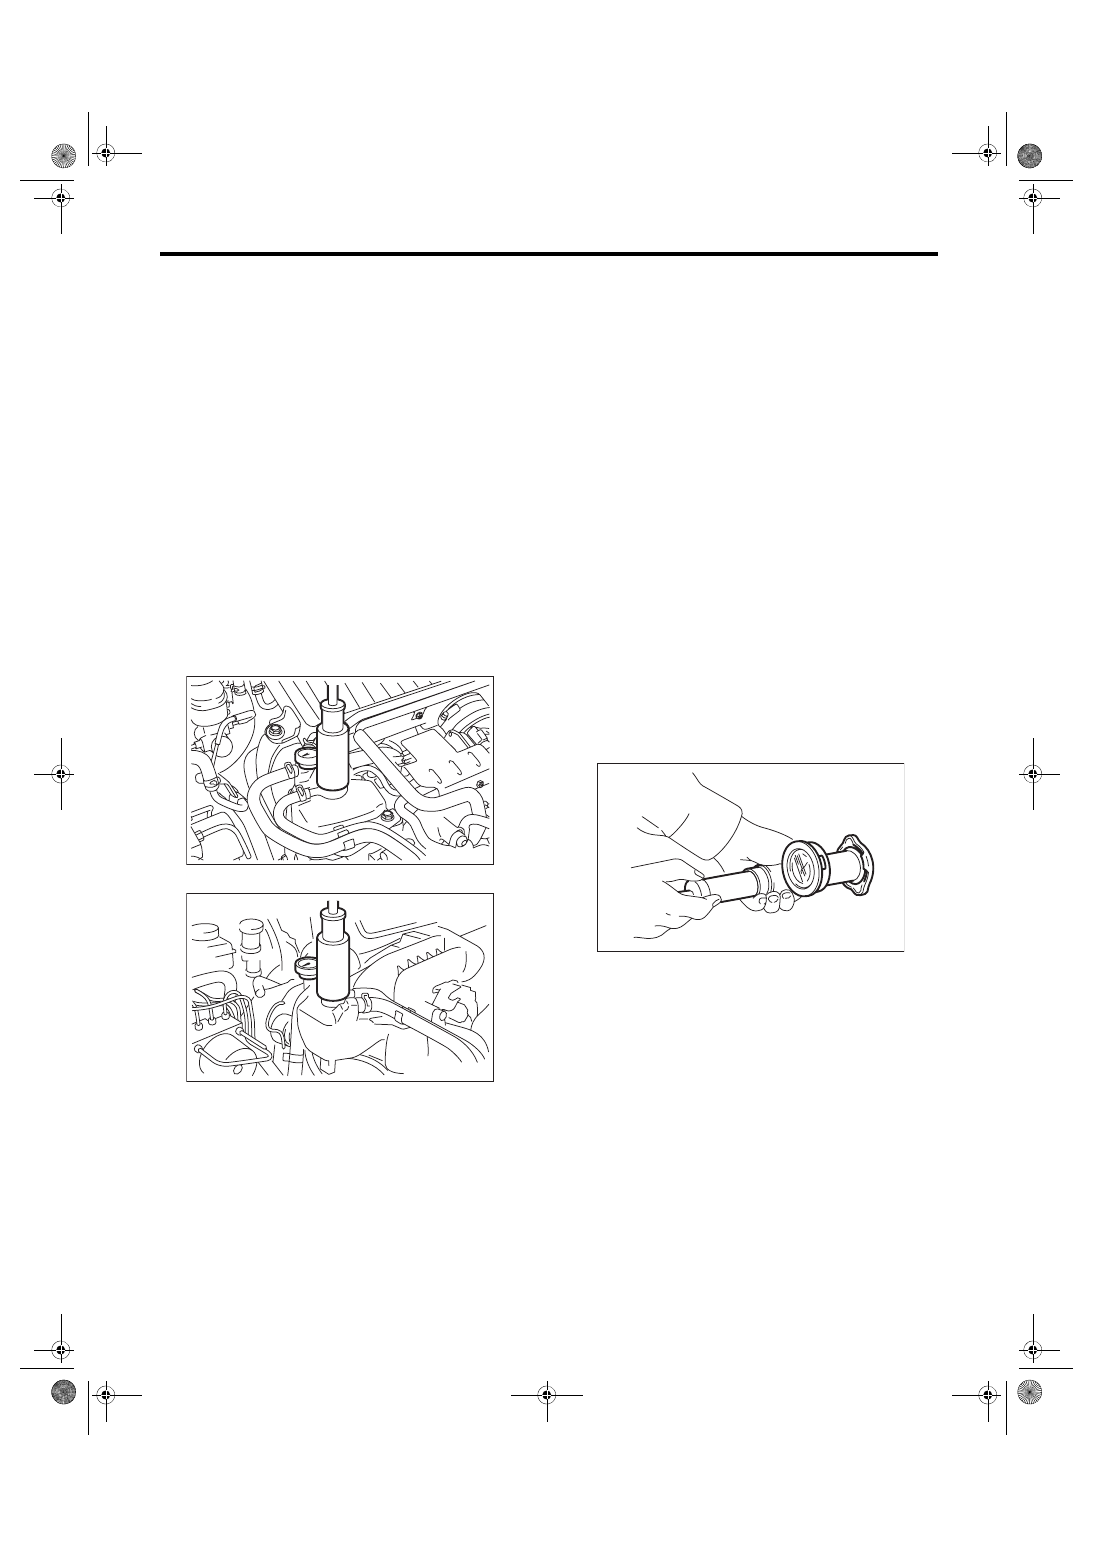
1) To check the radiator for leakage, fill it with en-
gine coolant, and attach the radiator cap tester to
the filler neck, and apply pressure. Check the fol-
lowing points:
Pressure:
122 kPa (1.2 kgf/cm
2
, 18 psi)
• Each portion of radiator for leakage
• Hose joints and other connections for leakage
CAUTION:
• If any engine coolant is spilled on the exhaust
pipe or under cover, wipe off completely to pre-
vent fires or emission of smoke.
• Be careful not to deform the filler neck of filler
tank when installing and removing the tester,
and while operating the tester.
NOTE:
• Be sure to install the tester to filler tank side.
• STI model
• Except for STI model
• When performing this check, be sure to keep the
engine stationary and fill radiator with coolant.
• Wipe off check points before applying pressure.
• Use care not to spill coolant when detaching
tester from filler tank.
• Do not remove the radiator side cap.
2) Check the radiator cap valve open pressure us-
ing radiator cap tester.
NOTE:
Rust or dirt on the cap may prevent valve from func-
tioning normally. be sure to clean the cap before
testing.
Raise the pressure until the needle of gauge stops
and see if the pressure can be retained for five to
six seconds. The radiator cap is normal if a pres-
sure above the limit value has been maintained for
this period. Replace the radiator cap if the pressure
is below the limit.
Radiator cap valve open pressure
Filler tank side
Specification:
93 — 123 kPa (0.95 — 1.25 kgf/cm
2
, 14 — 18
psi)
Service limit:
83 kPa (0.85 kgf/cm
2
, 12 psi)
Radiator side
Specification:
122 — 152 kPa (1.24 — 1.55 kgf/cm
2
, 18 —
22 psi)
Service limit:
112 kPa (1.14 kgf/cm
2
, 16 psi)
3) Start the engine, and then inspect that it does
not overheat or it is not cooled excessively. If it
overheats or it is cooled excessively, check the
cooling system.
<Ref. to CO(STI)-15, Water Pump.> <Ref. to
CO(STI)-17, Thermostat.> <Ref. to CO(STI)-19,
Radiator.> <Ref. to CO(STI)-22, Radiator Cap.>
<Ref. to CO(w/o STI)-15, Water Pump.> <Ref. to
CO(w/o STI)-17, Thermostat.> <Ref. to CO(w/o
CO-02408
CO-02244
PM-00023
gi14usena07.fm 17 ページ 2013年9月10日 火曜日 午後3時59分
Нет комментариевНе стесняйтесь поделиться с нами вашим ценным мнением.
Текст