Subaru Impreza 3 / Impreza WRX / Impreza WRX STI. Service manual — part 192
IG(w/o STI)-3
General Description
IGNITION
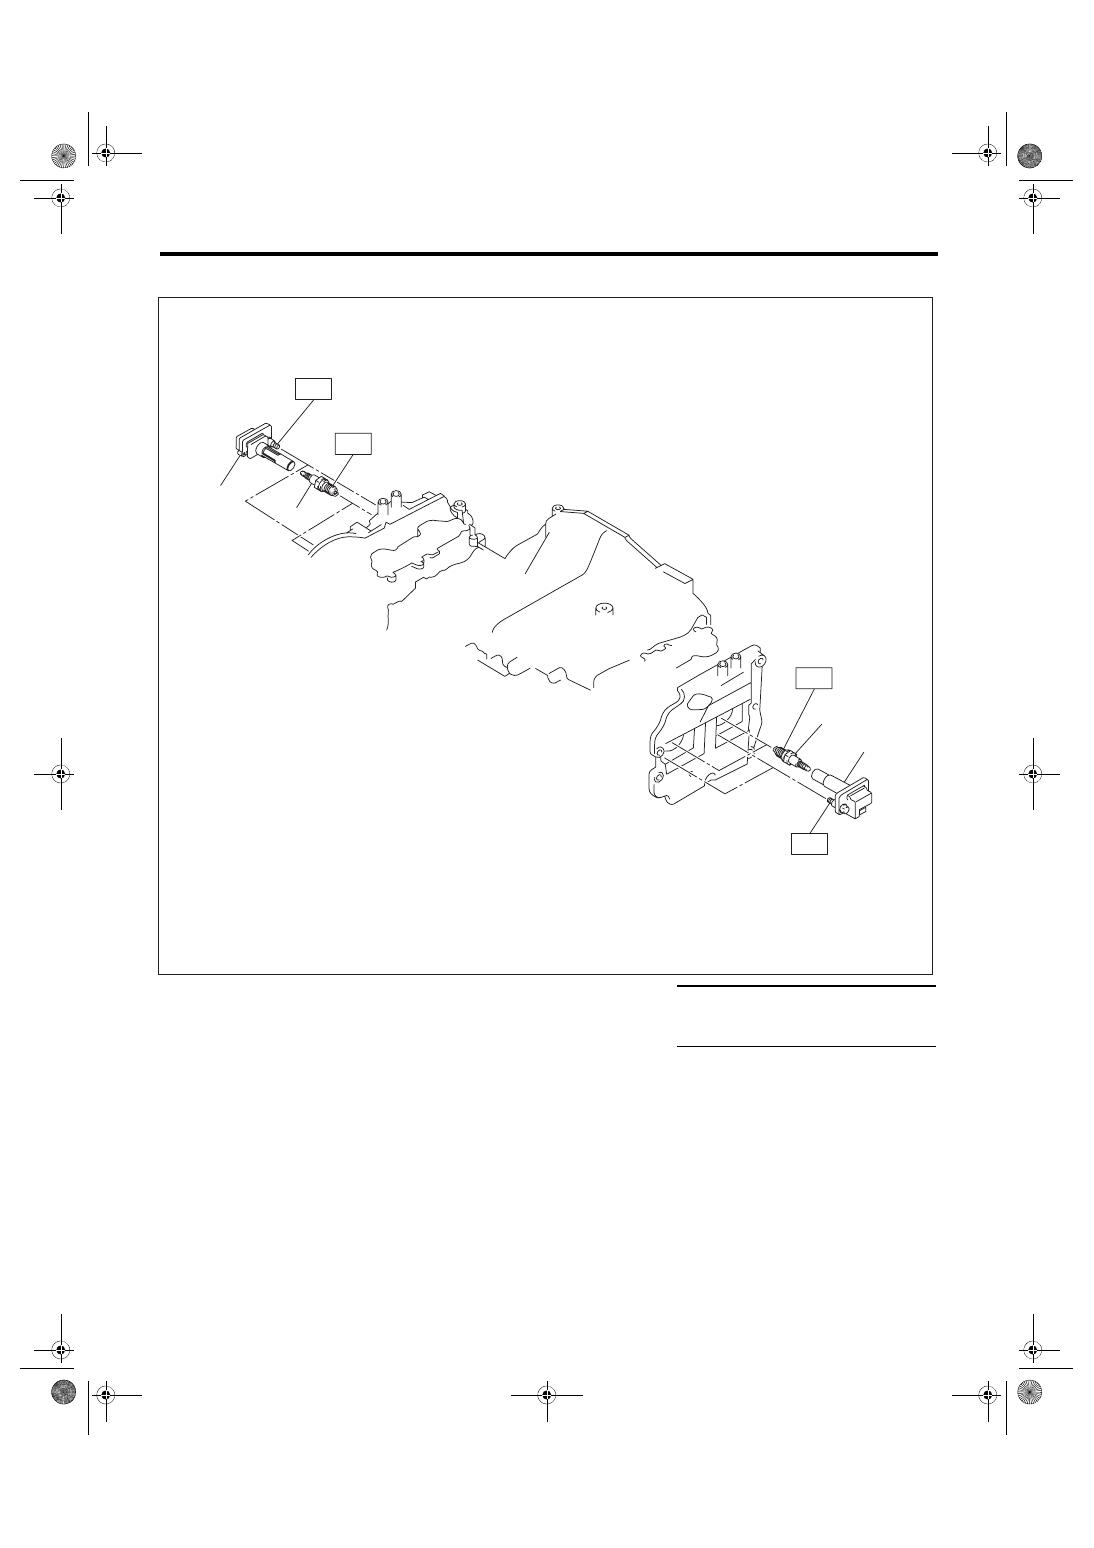
B: COMPONENT
(1)
Spark plug
(2)
Ignition coil
Tightening torque: N·m (kgf-m, ft-lb)
T1: 16 (1.6, 11.8)
T2: 21 (2.1, 15.5)
IG-02119
(1)
T2
T1
T2
(1)
(2)
(2)
T1
IG(w/o STI)-4
General Description
IGNITION
C: CAUTION
• Prior to starting work, pay special attention to the following:
1. Always wear work clothes, a work cap, and protective shoes. Additionally, wear a helmet, protective
goggles, etc. if necessary.
2. Protect the vehicle using a seat cover, fender cover, etc.
3. Prepare the service tools, clean cloth, containers to catch grease and oil, etc.
• Vehicle components are extremely hot immediately after driving. Be wary of receiving burns from heated
parts.
• When performing a repair, identify the cause of trouble and avoid unnecessary removal, disassembly and
replacement.
• Before disconnecting connectors of sensors or units, be sure to disconnect the ground cable from battery.
• Always use the jack-up point when the shop jacks or rigid racks are used to support the vehicle.
• Remove contamination including dirt and corrosion before removal, installation, disassembly or assembly.
• Keep the removed parts in order and protect them from dust and dirt.
• All removed parts, if to be reused, should be reinstalled in the original positions with attention to the correct
directions, etc.
• Bolts, nuts and washers should be replaced with new parts as required.
• Be sure to tighten the fasteners including bolts and nuts to the specified torque.
IG(w/o STI)-5
Spark Plug
IGNITION
2. Spark Plug
A: REMOVAL
Spark plug:
Refer to “SPECIFICATION” for spark plug.
<Ref. to IG(w/o STI)-2, SPECIFICATION, Gen-
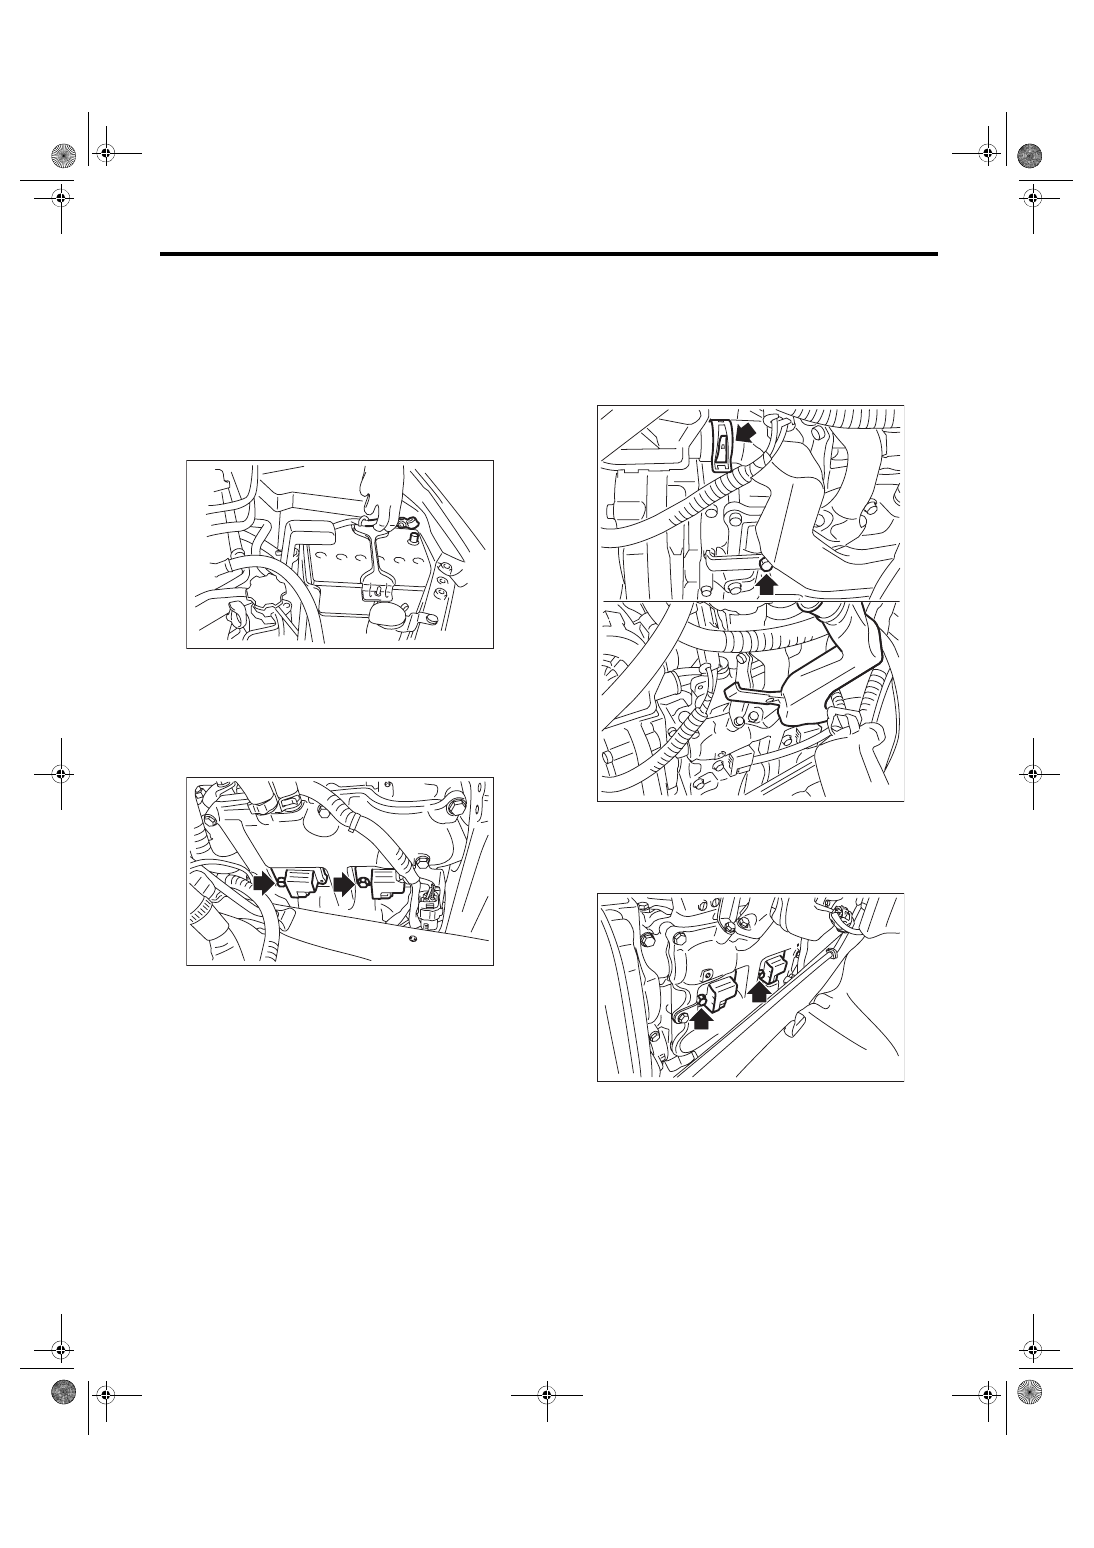
1. RH SIDE
1) Disconnect the ground cable from battery.
2) Remove the air cleaner case. <Ref. to IN(w/o
STI)-8, REMOVAL, Air Cleaner Case.>
3) Disconnect the connector from ignition coil.
4) Remove the ignition coil.
NOTE:
Turn #3 ignition coil by 180° to remove it.
5) Remove the spark plug with a spark plug socket.
2. LH SIDE
1) Remove the battery. <Ref. to SC(STI)-27, RE-
2) Disconnect the air duct from the secondary air
pump.
3) Remove the bolts that secure the air duct to the
rocker cover LH, and lift the air duct.
4) Disconnect the connector from ignition coil.
5) Remove the ignition coil.
NOTE:
Turn #4 ignition coil by 180° to remove it.
6) Remove the spark plug with a spark plug socket.
IN-00203
IG-02150
IG-02151
IG-02123
IG(w/o STI)-6
Spark Plug
IGNITION
B: INSTALLATION
1. RH SIDE
Install in the reverse order of removal.
Tightening torque (Spark plug):
21 N·m (2.1 kgf-m, 15.5 ft-lb)
Tightening torque (Ignition coil):
16 N·m (1.6 kgf-m, 11.8 ft-lb)
2. LH SIDE
Install in the reverse order of removal.
Tightening torque (Spark plug):
21 N·m (2.1 kgf-m, 15.5 ft-lb)
Tightening torque (Ignition coil):
16 N·m (1.6 kgf-m, 11.8 ft-lb)
Tightening torque (Air duct):
6.4 N·m (0.7 kgf-m, 4.7 ft-lb)
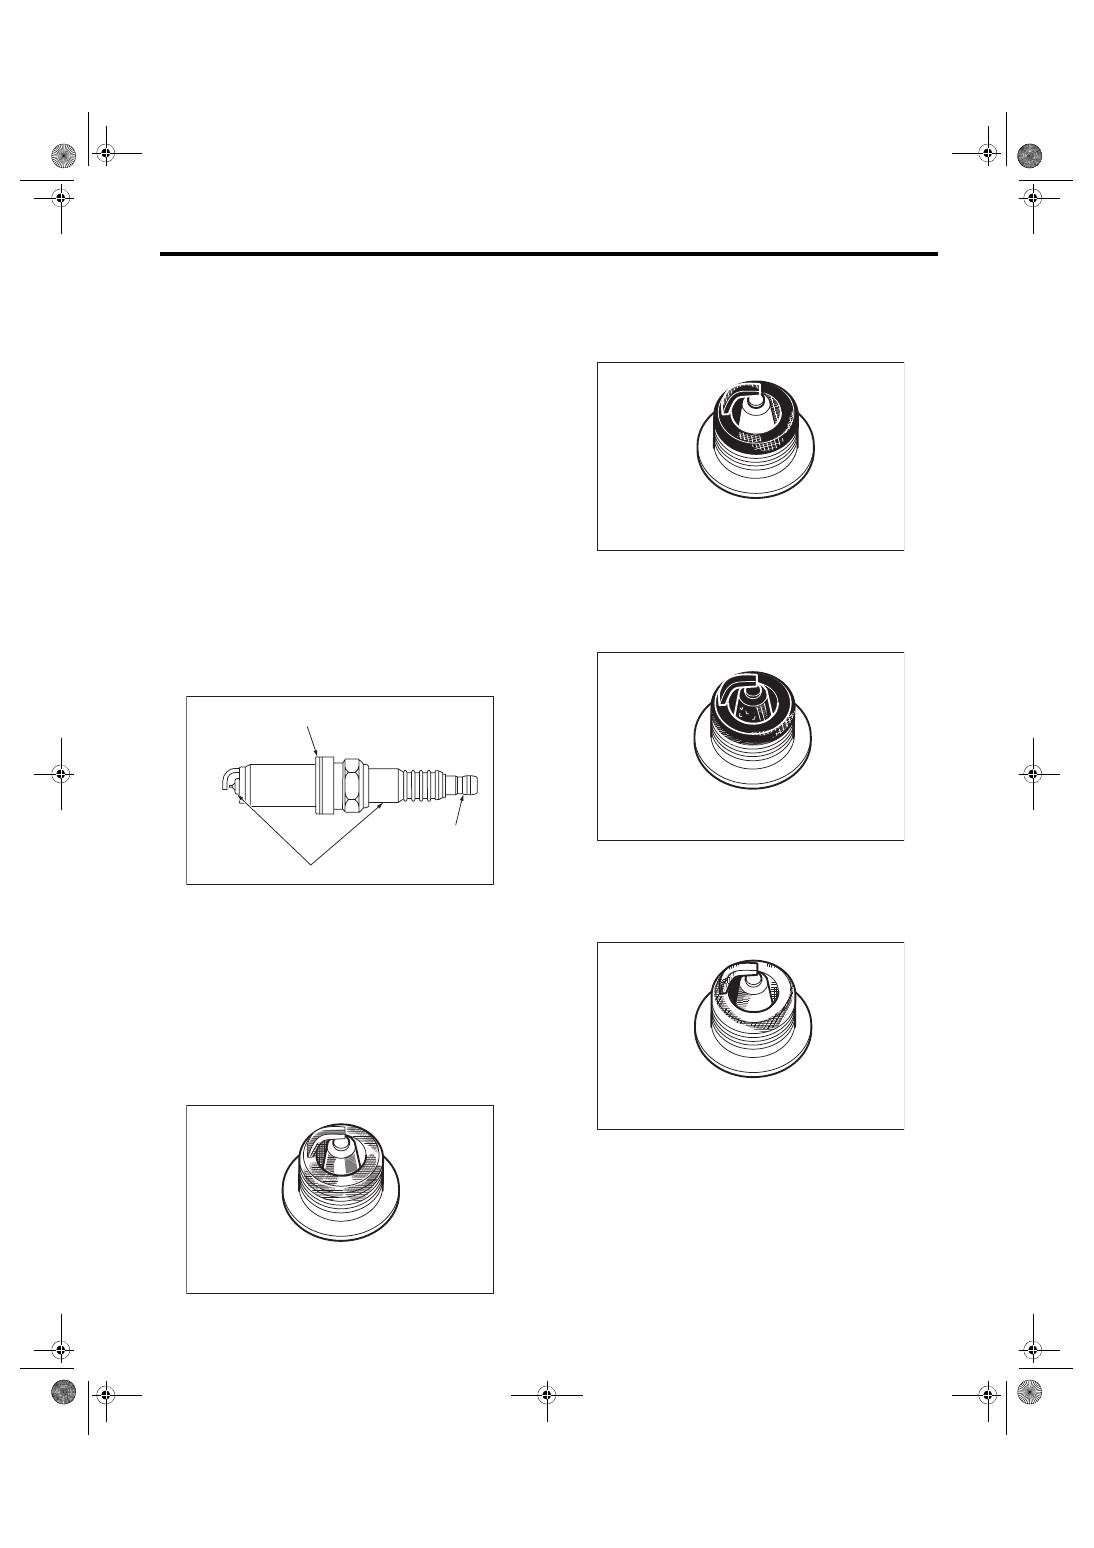
C: INSPECTION
1) Check the spark plug for abnormalities. If defec-
tive, replace the spark plug.
2) Check the spark plug electrode and condition of
the insulator. If abnormal, check and repair the
cause and replace the spark plug.
(1) Normal:
Brown to grayish-tan deposits and slight elec-
trode wear indicate correct spark plug heat
range.
(2) Carbon fouled:
Dry fluffy carbon deposits on insulator and elec-
trode are mostly caused by slow speed driving
in the city, weak ignition, too rich fuel mixture,
etc.
(3) Oil fouled:
Wet black deposits show oil entrance into com-
bustion chamber through worn piston rings or
increased clearance between valve guides and
valve stems.
(4) Overheating:
A white or light gray insulator with black or
brown spots and bluish burnt electrodes indi-
cate engine overheating, wrong selection of fu-
el, or loose spark plugs.
(A) Terminal damage
(B) Crack or damage in insulator
(C) Damaged gasket
IG-02094
(C)
(A)
(B)
IG-00011
IG-00012
IG-00013
IG-00014
Нет комментариевНе стесняйтесь поделиться с нами вашим ценным мнением.
Текст