Subaru Impreza 3 / Impreza WRX / Impreza WRX STI. Service manual — part 188

CO(w/o STI)-21
Radiator
COOLING
10) Connect the connector (A) to the main fan mo-
tor and the connector (B) to the sub fan motor.
11) Install the under cover. <Ref. to EI-28, INSTAL-
12) Lower the vehicle.
13) Connect the battery ground terminal.
14) Fill engine coolant. <Ref. to CO(w/o STI)-13,
FILLING OF ENGINE COOLANT, REPLACE-
C: INSPECTION
1) Check that the radiator does not have deforma-
tion, cracks or damage.
2) Check that the hose has no cracks, damage or
loose part.
3) Remove the coolant filler tank cap, fill the cool-
ant filler tank with engine coolant, then install the
radiator cap tester to the filler neck of coolant filler
tank.
4) Apply a pressure of 122 kPa (1.2 kg/cm
2
, 18 psi)
to the radiator and check the following points:
• Leakage from the radiator or its vicinity
• Leakage from the hose or its connections
CAUTION:
• Inspection must be carried out at the side of
coolant filler tank, not at the side of radiator.
• Engine should be turned off.
• Wipe engine coolant from check points in ad-
vance.
• Be careful not to deform the filler neck of the
coolant filler tank when installing and removing
the radiator cap tester.
• Be careful of engine coolant from spurting
out when removing the radiator cap tester.
(A)
CO-02727
(B)
CO-02728
IN-00203
CO-02244
CO(w/o STI)-22
Radiator Cap
COOLING
7. Radiator Cap
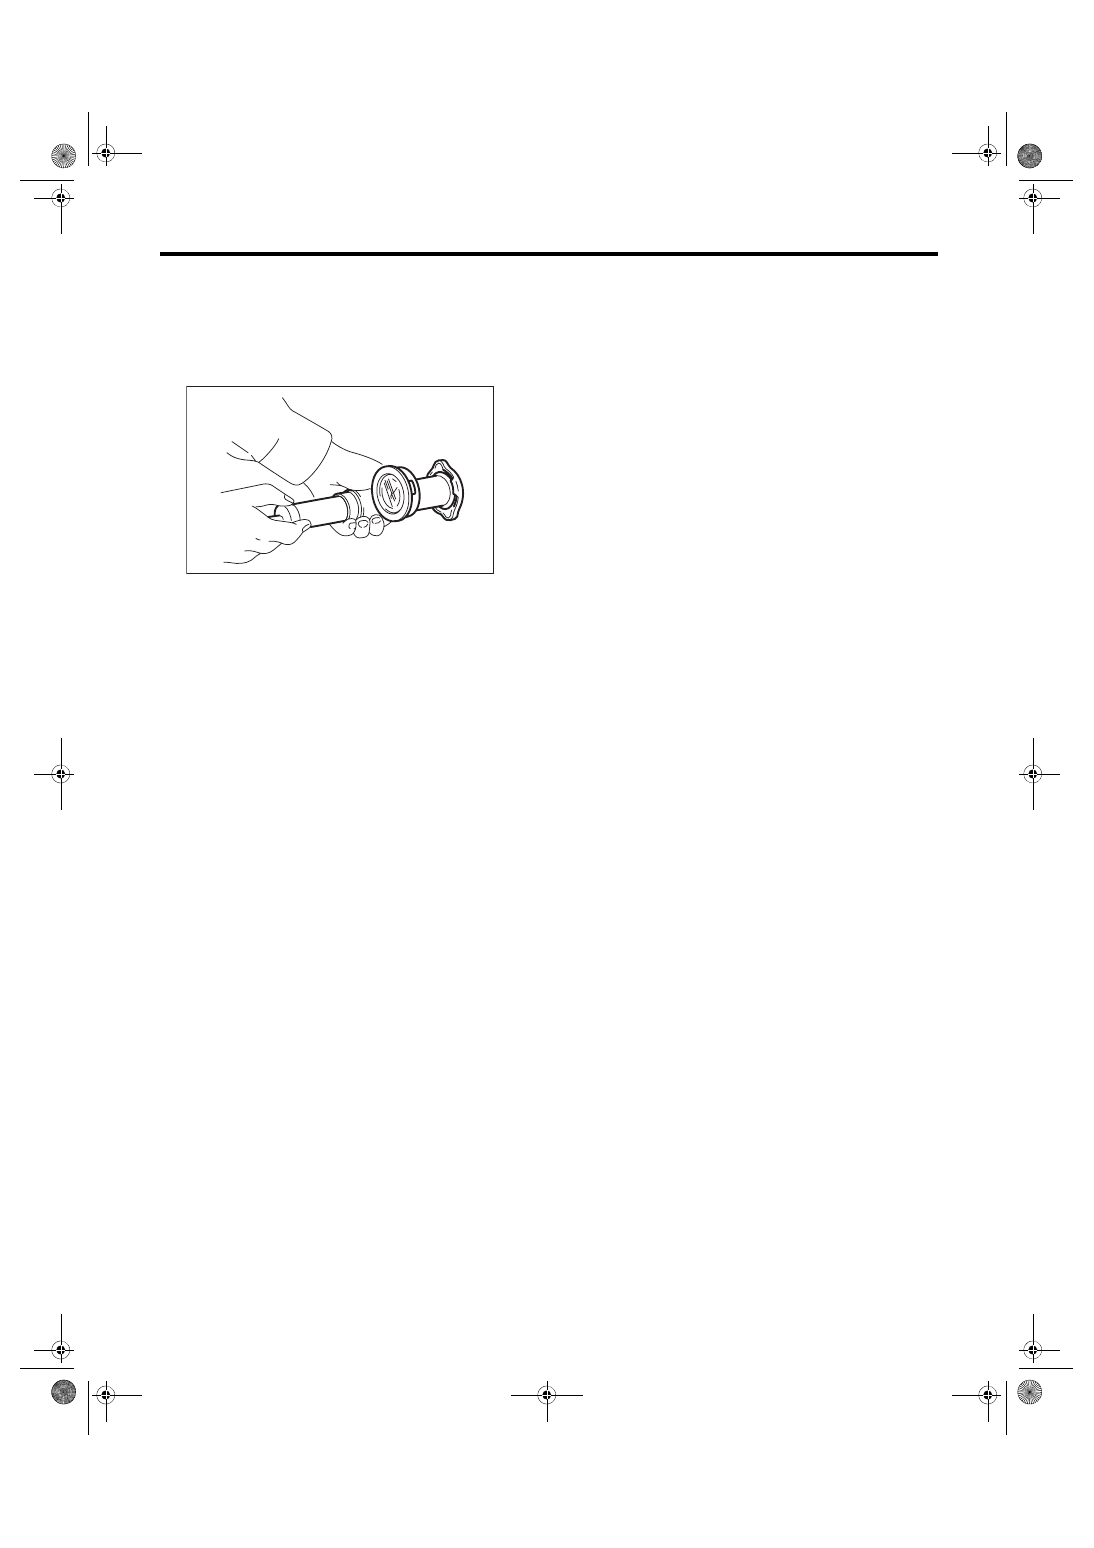
A: INSPECTION
1) Check that the radiator cap does not have defor-
mation, cracks or damage.
2) Attach the radiator cap tester to radiator cap.
3) Increase pressure until the radiator cap tester
gauge needle stops. Radiator cap is functioning
properly if it holds the service limit pressure for 5 —
6 seconds. Replace the radiator cap if its valve
opens at less than the service limit.
Coolant filler tank side:
Standard
93 — 123 kPa (0.95 — 1.25 kg/cm
2
, 14 — 18
psi)
Limit
83 kPa (0.85 kg/cm
2
, 12 psi)
Radiator side:
Standard
122 — 152 kPa (1.24 — 1.55 kg/cm
2
, 18 —
22 psi)
Limit
112 kPa (1.14 kg/cm
2
, 16 psi)
CAUTION:
• Be sure to remove foreign matter and rust
from the cap in advance. Otherwise, results of
pressure test will be incorrect.
• Do not confuse the cap of coolant filler tank
and cap of radiator.
CO-00044
CO(w/o STI)-23
Radiator Main Fan and Fan Motor
COOLING
8. Radiator Main Fan and Fan
Motor
A: REMOVAL
1) Disconnect the ground cable from battery.
2) Lift up the vehicle.
3) Remove the under cover. <Ref. to EI-28, RE-
4) Disconnect the connector from the main fan mo-
tor.
5) Lower the vehicle.
6) Remove the air intake duct. <Ref. to IN(w/o STI)-
10, REMOVAL, Air Intake Duct.>
7) Remove the reservoir tank. <Ref. to CO(w/o
STI)-27, REMOVAL, Reservoir Tank.>
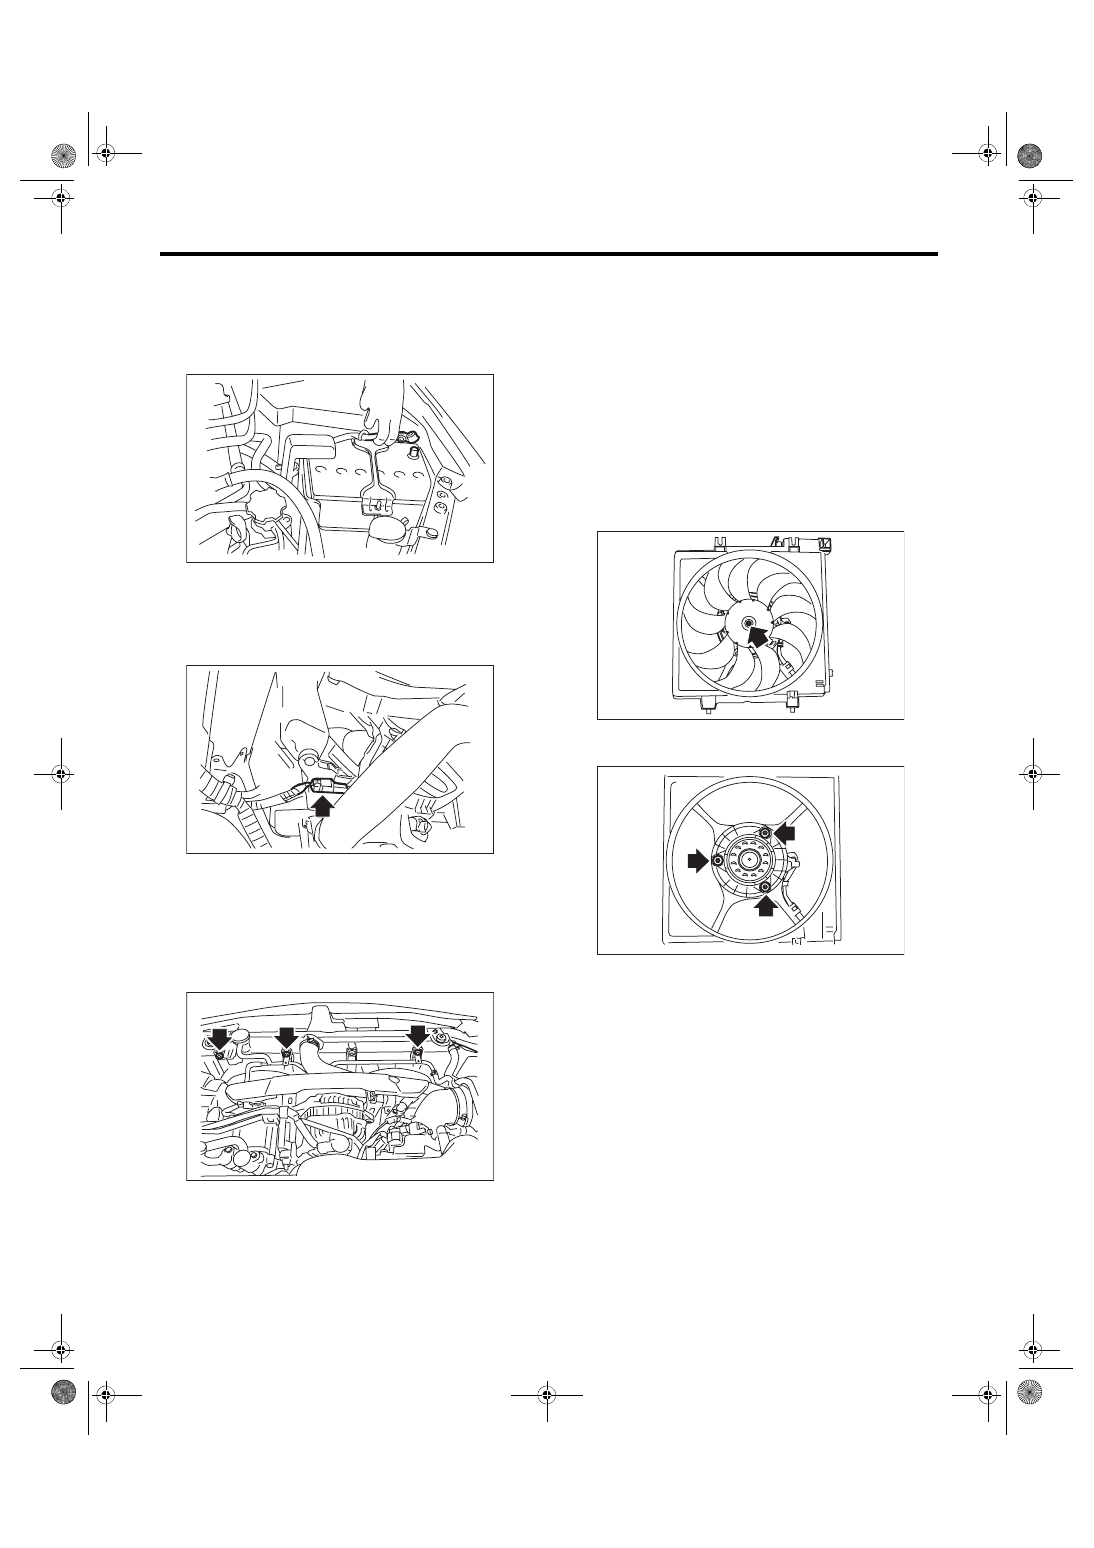
8) Remove the bolts which secure the radiator
main fan motor assembly and the over flow pipe.
9) Remove the radiator main fan motor assembly
from the upper side of the vehicle.
B: INSTALLATION
Install in the reverse order of removal.
CAUTION:
Check if the radiator hose and the over flow
hose are properly connected.
Tightening torque:
7.5 N·m (0.8 kgf-m, 5.5 ft-lb)
C: DISASSEMBLY
1) Remove the clip which holds the main fan motor
connector onto the radiator main fan shroud.
2) Disconnect the radiator main fan from the main
fan motor.
3) Disconnect the main fan motor from the radiator
main fan shroud.
IN-00203
CO-02776
CO-02511
CO-02372
CO-02373
CO(w/o STI)-24
Radiator Main Fan and Fan Motor
COOLING
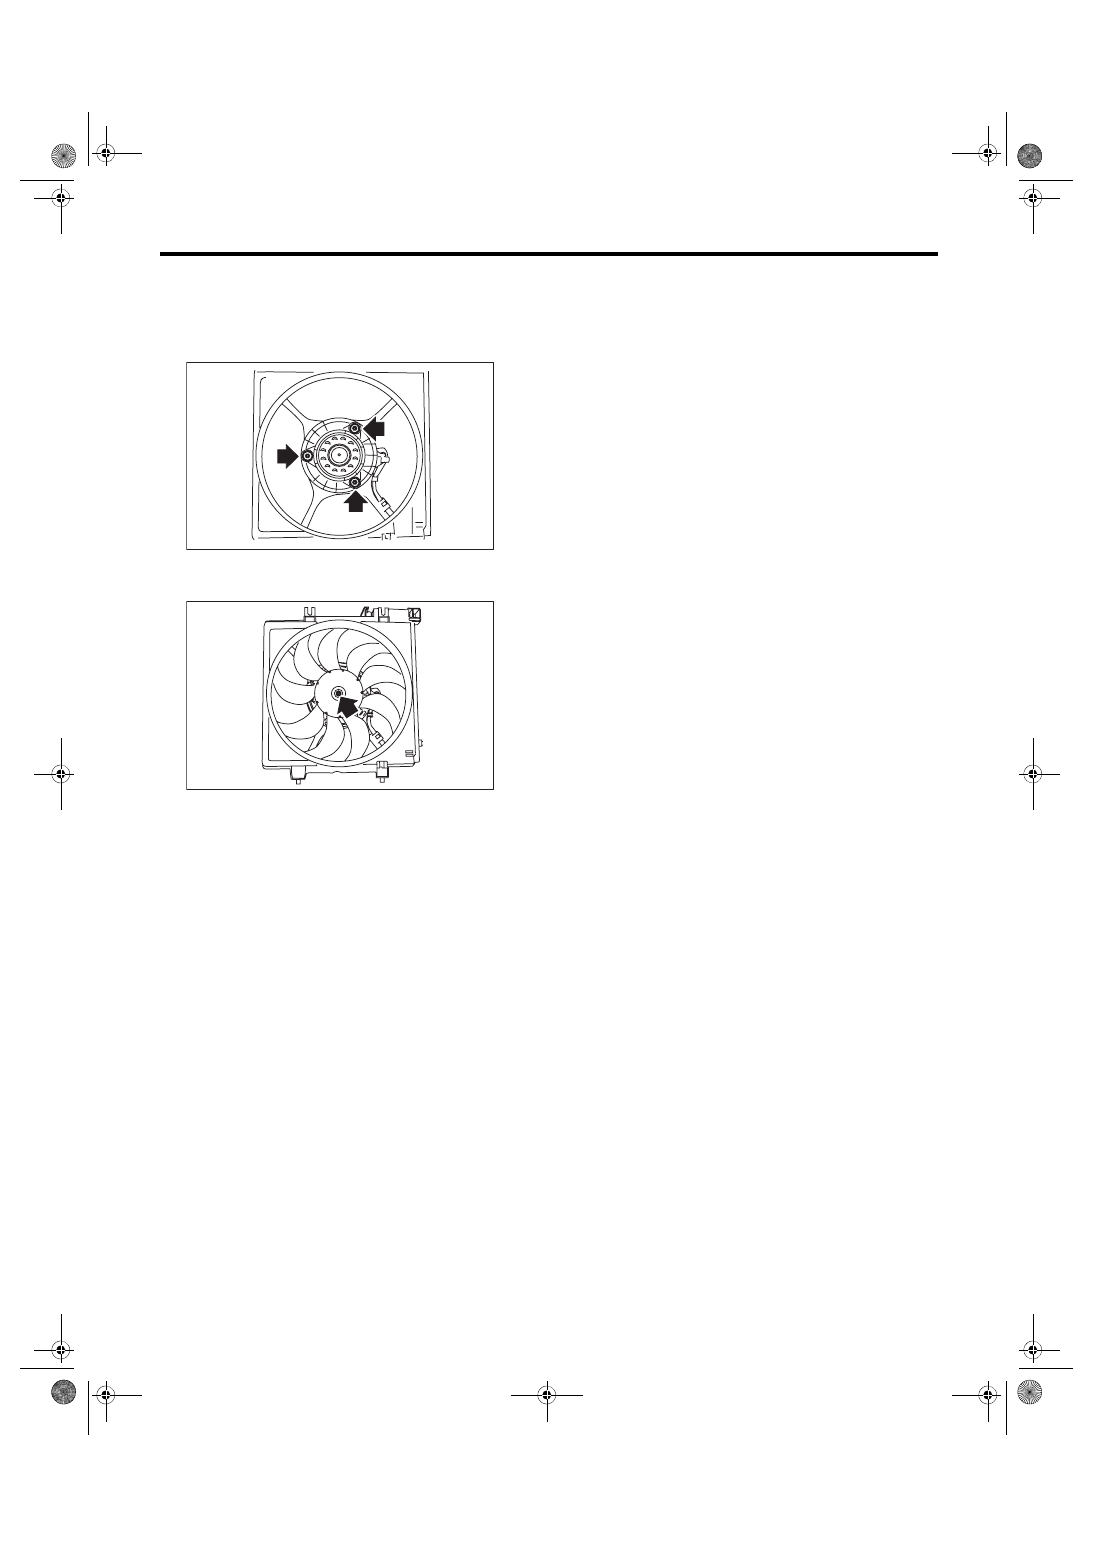
D: ASSEMBLY
Assemble in the reverse order of disassembly.
Tightening torque:
4.41 N·m (0.45 kgf-m, 3.25 ft-lb)
Tightening torque:
3.4 N·m (0.3 kgf-m, 2.5 ft-lb)
E: INSPECTION
Check that the radiator main fan, radiator main fan
shroud and main fan motor do not have deforma-
tion, cracks or damage.
CO-02373
CO-02372
Нет комментариевНе стесняйтесь поделиться с нами вашим ценным мнением.
Текст