Subaru Impreza 3 / Impreza WRX / Impreza WRX STI. Service manual — part 494
DI-21
Front Differential Assembly
DIFFERENTIALS
3. Front Differential Assembly
A: NOTE
• 6MT
For front differential for the 6MT, refer to the “6MT”
section. <Ref. to 6MT-100, Front Differential As-
• 5MT
For front differential for the 5MT, refer to the “5MT”

DI-22
Rear Differential (T-type)
DIFFERENTIALS
4. Rear Differential (T-type)
A: REMOVAL
1) Disconnect the ground cable from battery.
2) Place the gear shift lever in neutral.
3) Release the parking brake.
4) Loosen the wheel nuts.
5) Lift up the vehicle.
6) Remove the wheels.
7) Disconnect the oil temperature switch connector
and ground connector. (H3)
8) Drain differential gear oil. <Ref. to DI-19, RE-
PLACEMENT, Differential Gear Oil.>
9) Remove the rear exhaust pipe and muffler.
<Ref. to EX(w/o STI)-2, General Description.>
<Ref. to EX(STI)-13, REMOVAL, Rear Exhaust
Pipe.> <Ref. to EX(w/o STI)-2, General Descrip-
tion.> <Ref. to EX(STI)-15, REMOVAL, Muffler.>
10) Remove the heat shield cover.
11) Remove the propeller shaft. <Ref. to DS-11,
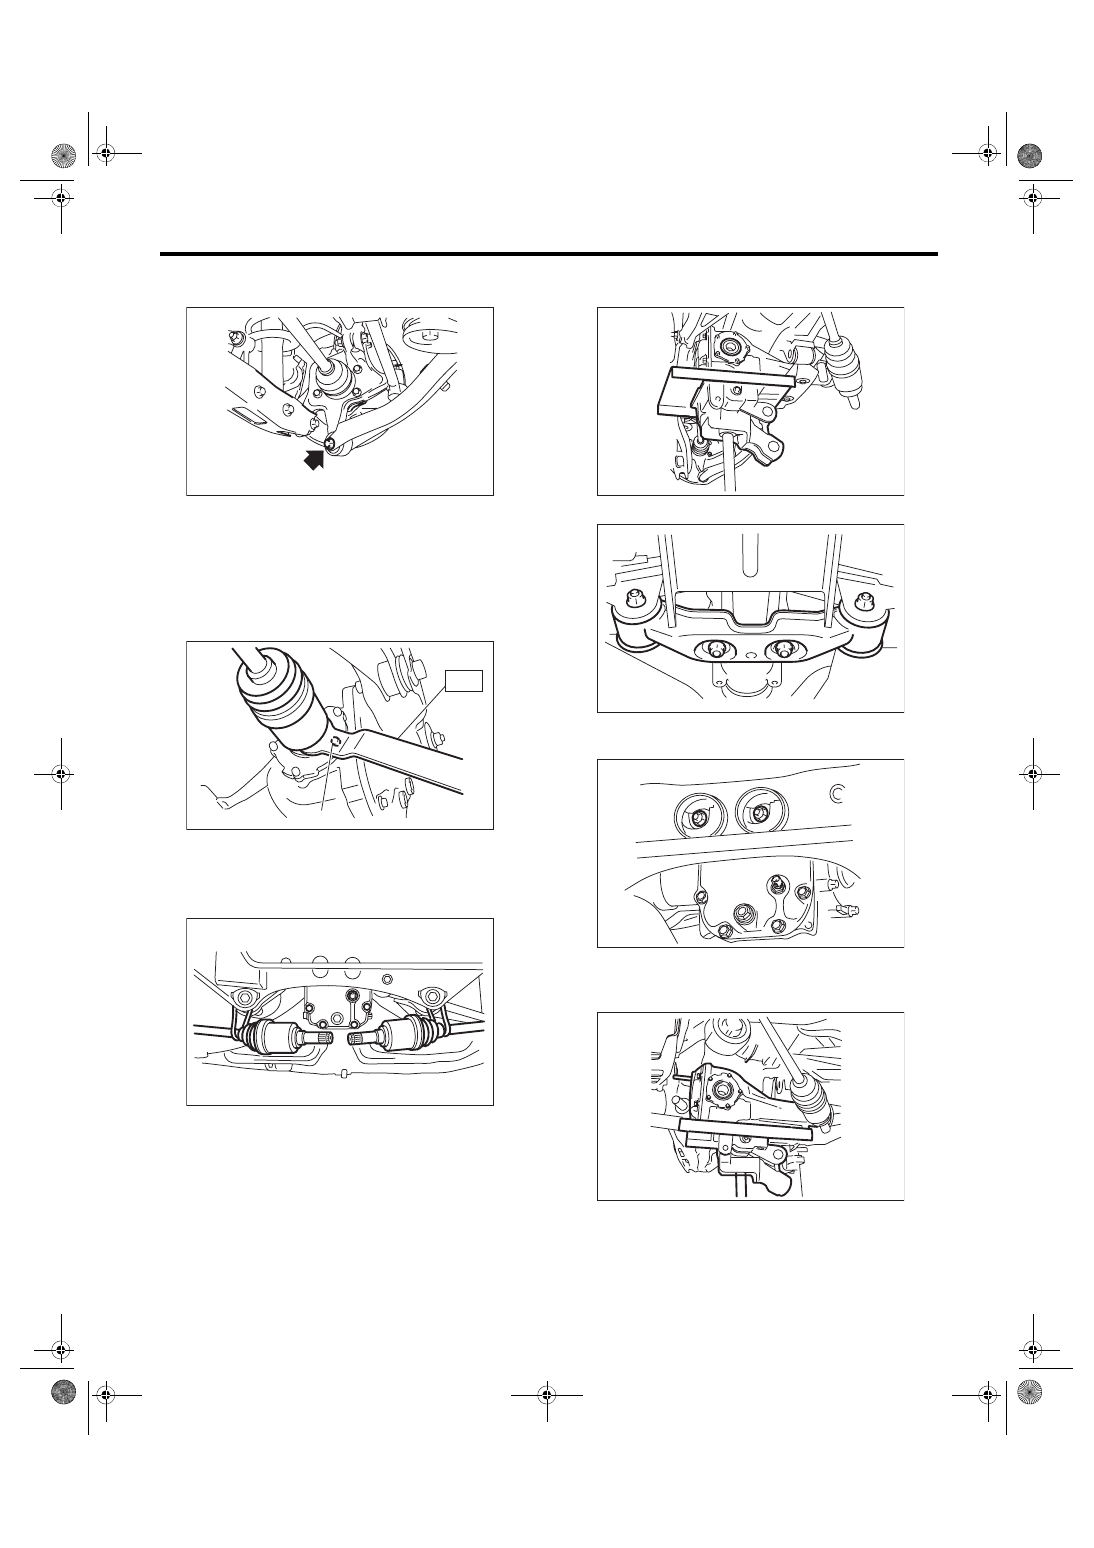
12) Remove the DOJ of rear drive shaft from rear
differential.
(1) Remove the ABS wheel speed sensor cable
from the clamp.
(2) Remove the bolts which secure the rear sta-
bilizer link to the rear lateral link.
(3) Remove the bolts which secure the shock
absorber to the rear lateral link.
(4) Remove the bolts which secure the rear lat-
eral link to the housing.
(A) Oil temperature switch connector
(B) Ground connector
DI-00536
(A)
(B)
MT-01660
(A) ABS wheel speed sensor cable
DI-00507
(A)
DI-00508
FU-03359
DI-00509
DI-23
Rear Differential (T-type)
DIFFERENTIALS
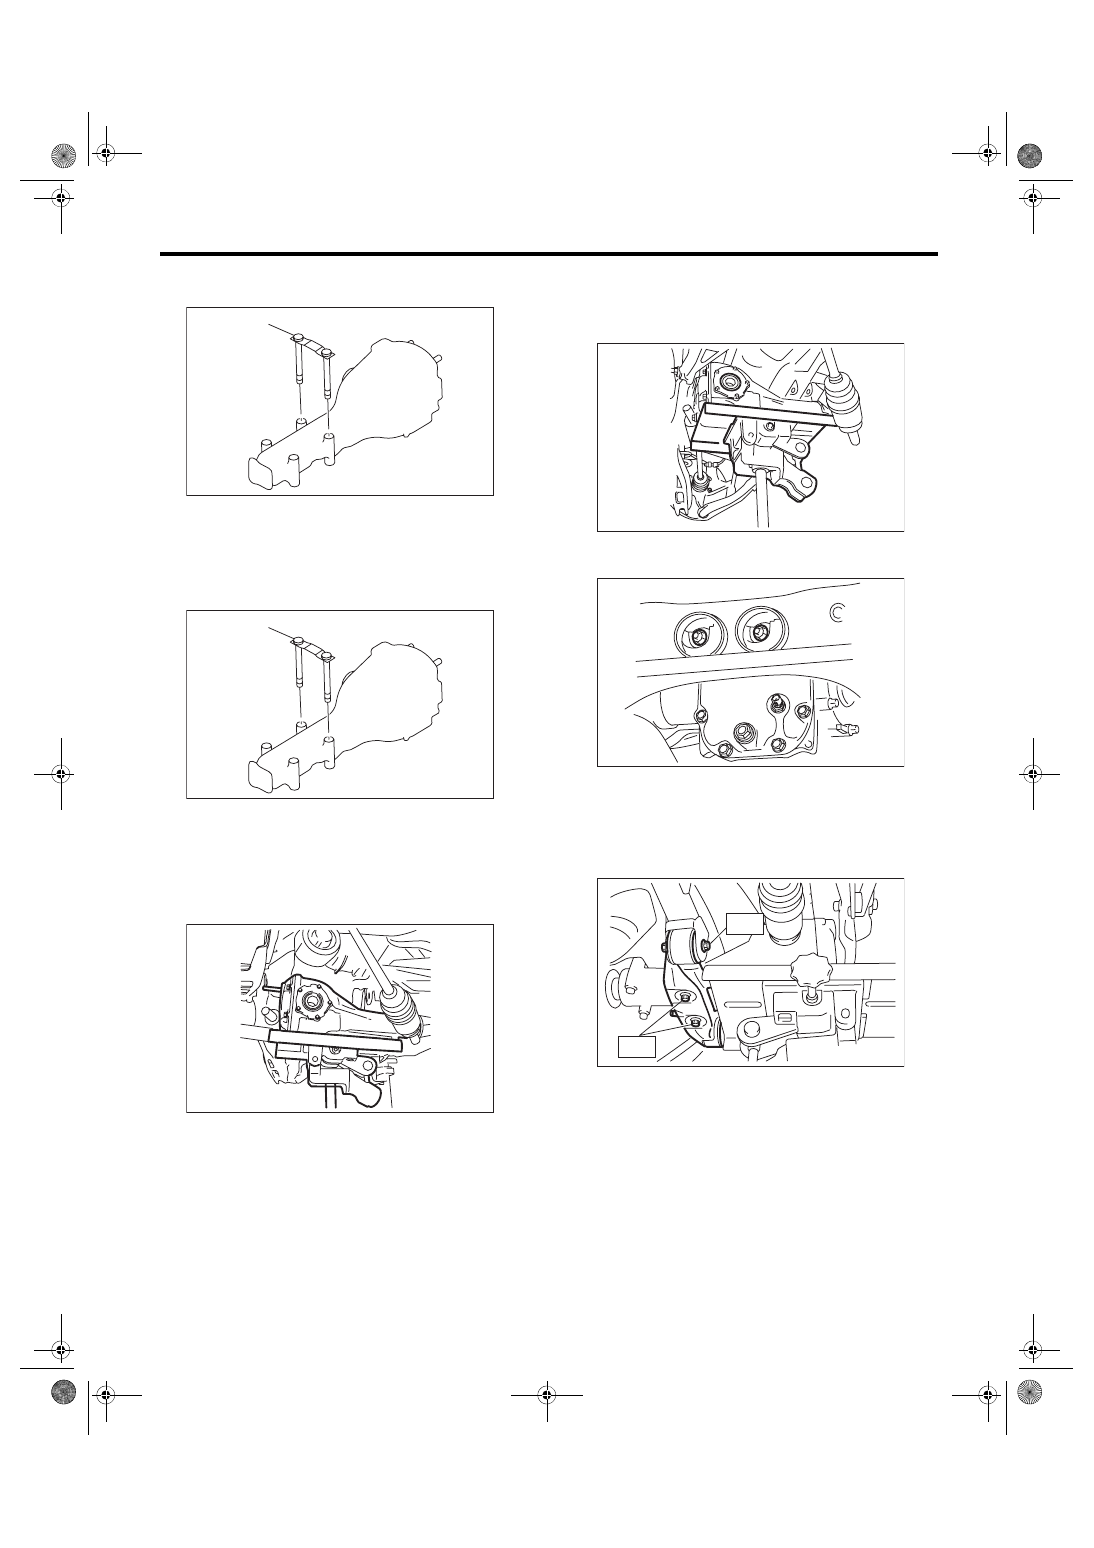
(5) Remove the bolts which secure the trailing
link to the housing.
(6) Remove the DOJ from the rear differential
by using ST.
NOTE:
When removing the DOJ from the rear differential,
fit the ST to the bolts as shown in the figure so as
not to damage the side retainer.
ST 28099PA100 DRIVE SHAFT REMOVER
13) Suspend the rear drive shaft to the rear cross-
member using wire.
14) Support the rear differential with the transmis-
sion jack.
15) Remove the rear differential front member.
16) Remove the self-lock nuts which hold the rear
differential to the rear crossmember.
17) While slowly lowering the transmission jack,
move the rear differential forward, and remove the
rear differential from the vehicle.
(A) Bolt
DI-00510
DI-00270
(A)
ST
DI-00583
DI-00745
DI-00742
DI-00602
DI-00614
DI-24
Rear Differential (T-type)
DIFFERENTIALS
18) Remove the rear differential member plate from
the rear differential.
B: INSTALLATION
1) Attach the rear differential member plate to the
rear differential.
2) Set the rear differential to transmission jack.
3) Adjust the transmission jack and properly insert
the rear differential stud bolt into rear crossmember
bushing.
4) After inserting the rear differential stud bolt into
the rear crossmember bushing, lift up the transmis-
sion jack and align the rear differential to its attach-
ment position.
5) Tighten a new self-locking nut temporarily to rear
crossmember.
6) Install the rear differential front member with a
new self-locking nut.
Tightening torque:
T1: 50 N·m (5.1 kgf-m, 36.9 ft-lb)
T2: 110 N·m (11.2 kgf-m, 81.1 ft-lb)
(A) Rear differential member plate
(A) Rear differential member plate
DI-00359
(A)
DI-00359
(A)
DI-00614
DI-00613
DI-00602
DI-00541
T2
T1
Нет комментариевНе стесняйтесь поделиться с нами вашим ценным мнением.
Текст