Subaru Impreza 3 / Impreza WRX / Impreza WRX STI. Service manual — part 684
WW-17
Front Wiper Motor and Link
WIPER AND WASHER SYSTEMS
7. Front Wiper Motor and Link
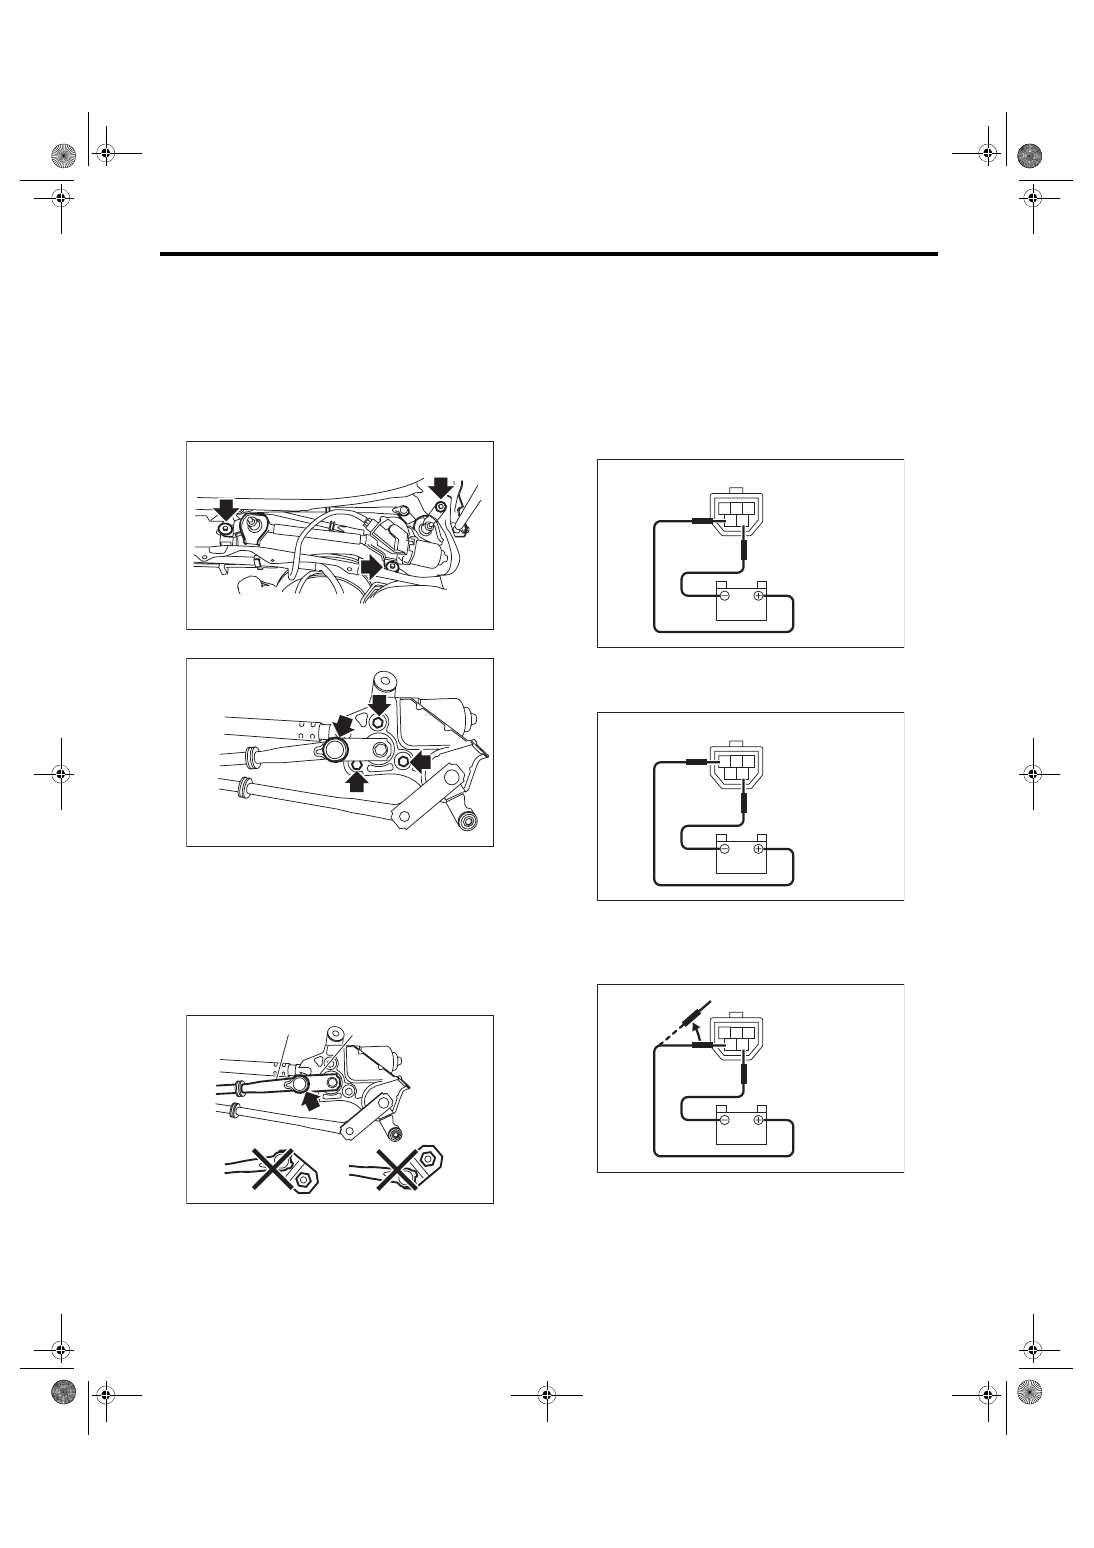
A: REMOVAL
1) Disconnect the ground cable from battery.
2) Remove the cowl panel. <Ref. to EI-40, RE-
3) Disconnect the connector of motor.
4) Remove the bolts, and then remove the wiper
link.
5) Remove the bolt and link and remove the motor.
B: INSTALLATION
1) Connect the battery ground terminal.
2) To confirm that the motor is at the auto stop po-
sition, connect the harness to the motor and turn
the wiper switch to ON/OFF once.
3) Disconnect the ground cable from battery.
4) Set the link where rod (A) and link plate (B) are
aligned in a straight line.
5) Install each part in the reverse order of removal.
Tightening torque:
Refer to “COMPONENT” of “General Descrip-
tion”. <Ref. to WW-2, FRONT WIPER, COM-
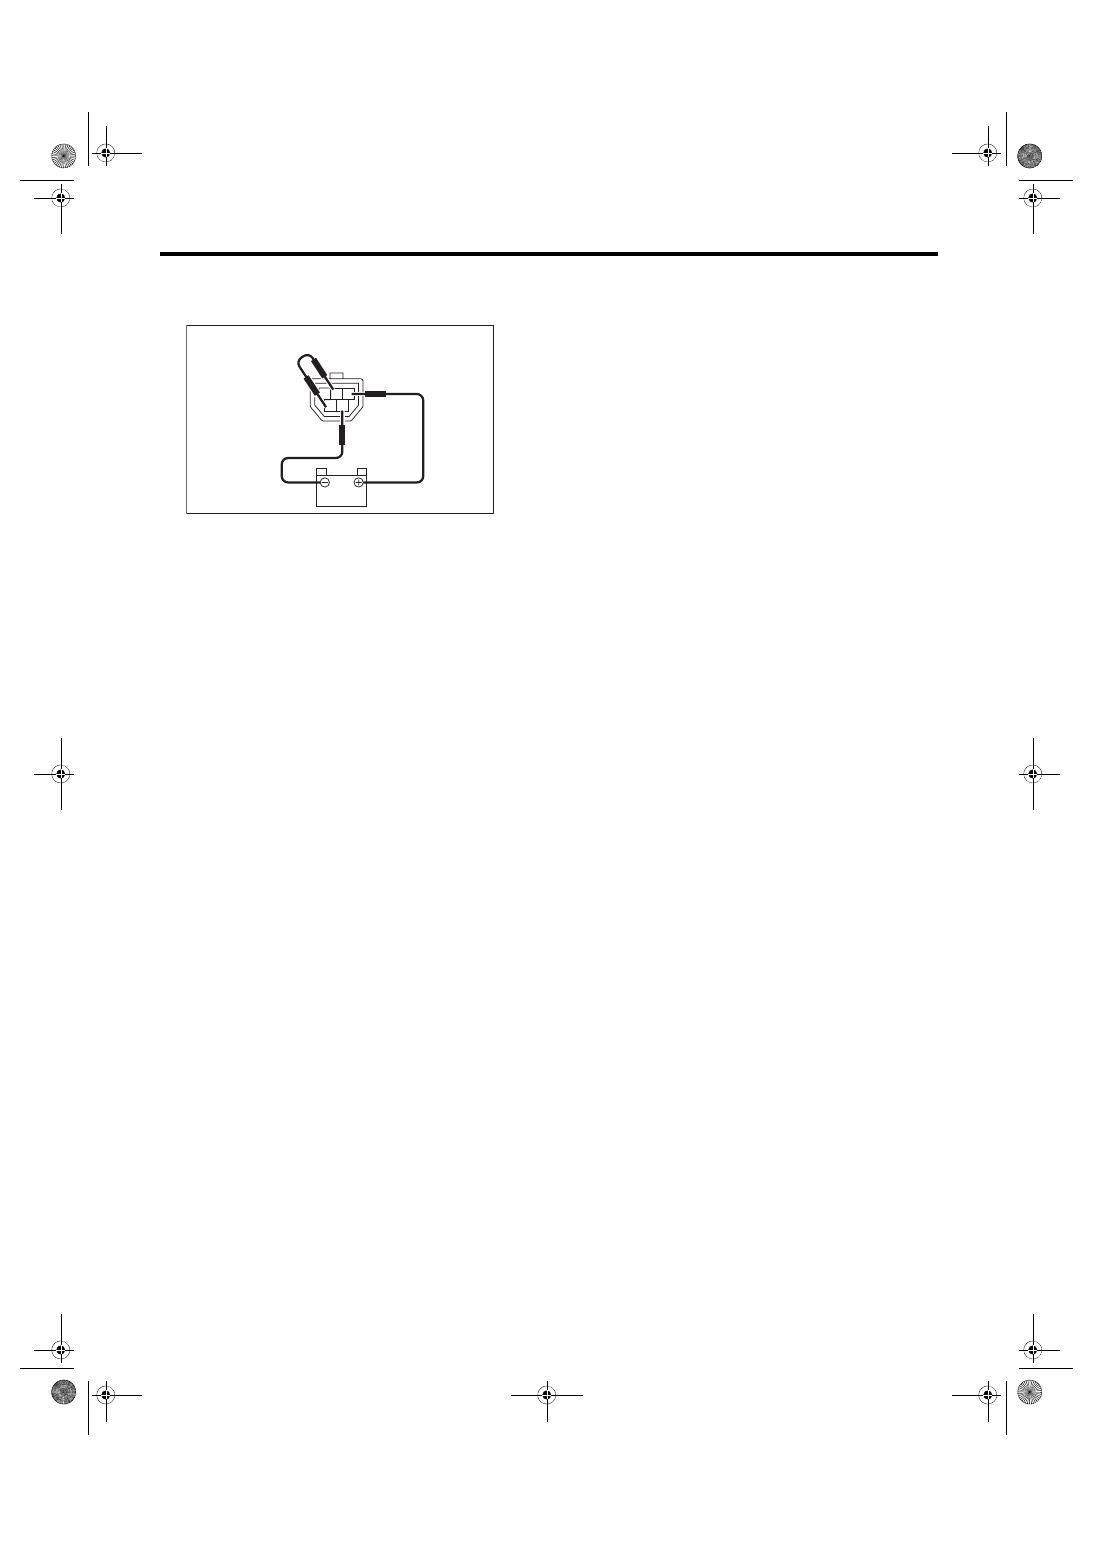
C: INSPECTION
1) When the battery is connected to the terminal of
connectors as shown in the figure, confirm that the
motor operates at low speed.
2) When the battery is connected to the terminal of
connectors as shown in the figure, confirm that the
wiper motor operates at high speed.
3) Connect the battery to terminals of the connec-
tor, and remove the terminal connection with motor
rotating at low speed, and stop the wiper motor in
mid-operation.
WW-00511
WW-01104
WW-01105
(A)
(B)
3 2
5 4
1
WW-00519
3 2
5 4
1
WW-00518
3 2
5 4
1
WW-00517
WW-18
Front Wiper Motor and Link
WIPER AND WASHER SYSTEMS
4) Connect the battery and confirm that the motor
stops at the automatic stop position after the motor
operates at low speed again.
3 2
5 4
1
WW-00516
WW-19
Front Washer Nozzle
WIPER AND WASHER SYSTEMS
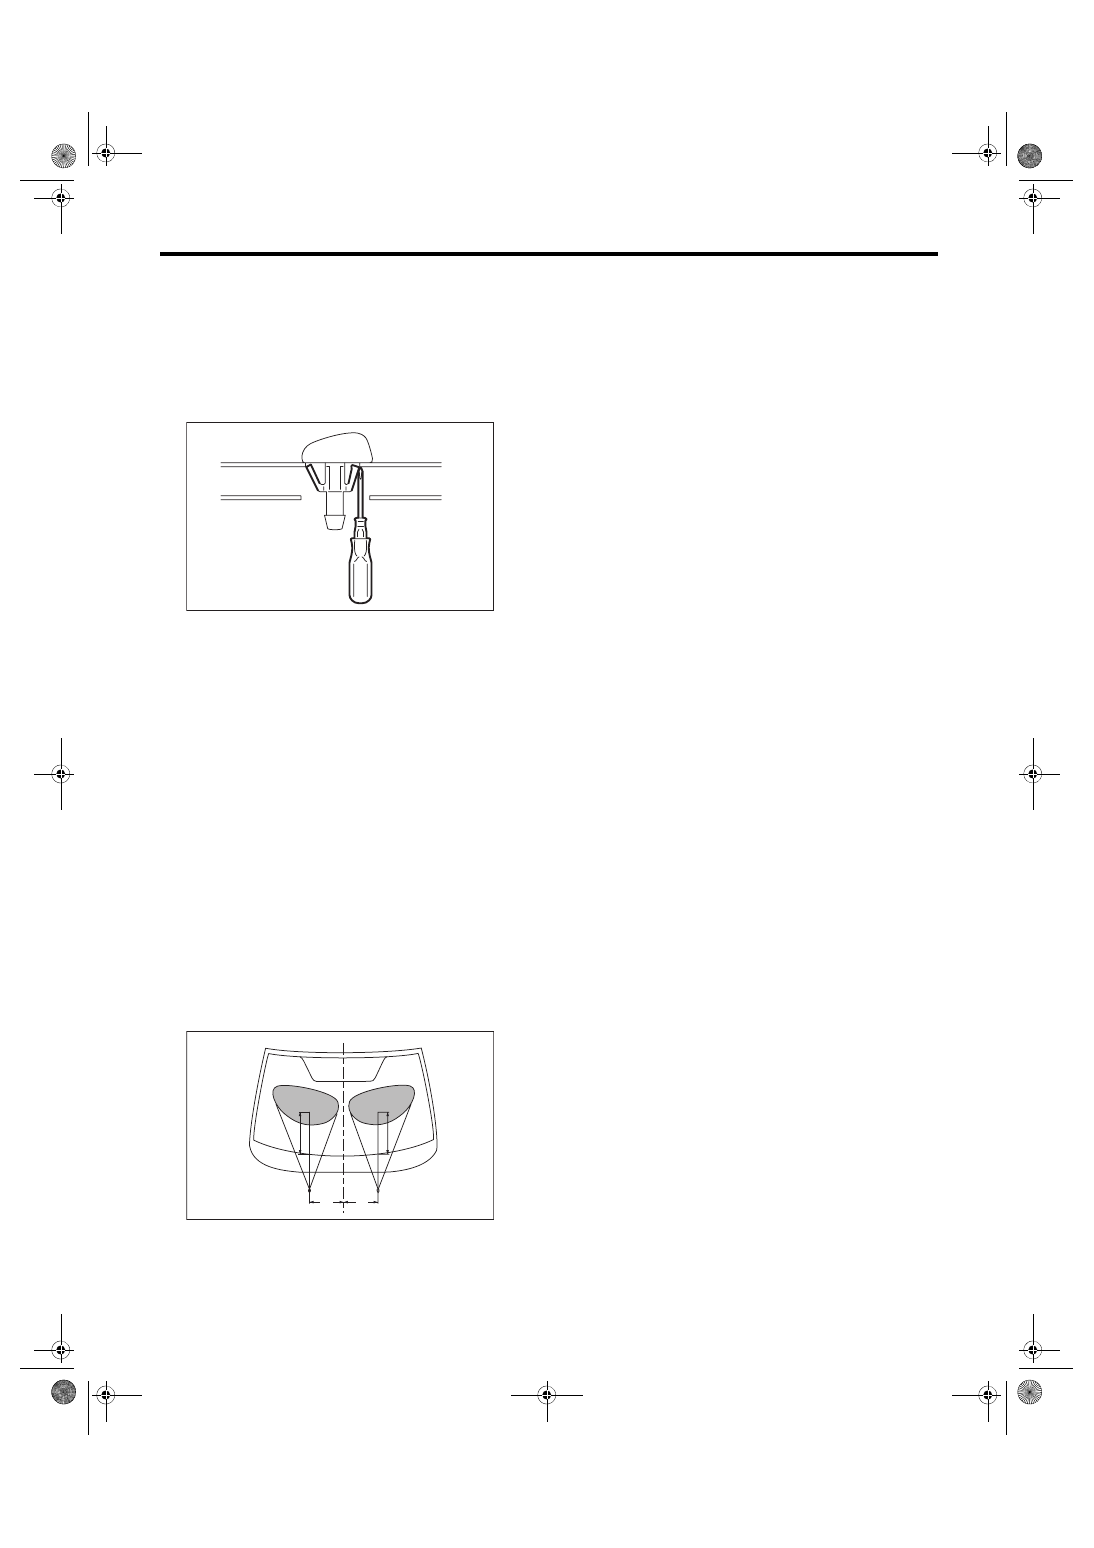
8. Front Washer Nozzle
A: REMOVAL
1) Remove the washer hose from the washer noz-
zle.
2) Open the clips on the underside of the front hood
with a thin screwdriver or other tool, and remove
the washer nozzle.
B: INSTALLATION
Install each part in the reverse order of removal.
C: INSPECTION
1. VISUAL CHECK
Check the following items, if a failure is found re-
place the parts.
• Make sure the nozzle and hose are not clogged.
• Make sure the hose is not bent.
2. SPRAY POSITION CHECK
1) Turn the wiper switch to OFF position.
2) While the vehicle is at a standstill, make sure
that the washer injection position is as shown in the
figure.
3) After check, if the spray position is largely differ-
ent from the position, replace with a new washer
nozzle.
Spray position:
A: 250 mm (9.84 in)
B: 315 mm (12.4 in)
WW-00023
WW-00493
A
B
B
A
WW-20
Rear Wiper Arm
WIPER AND WASHER SYSTEMS
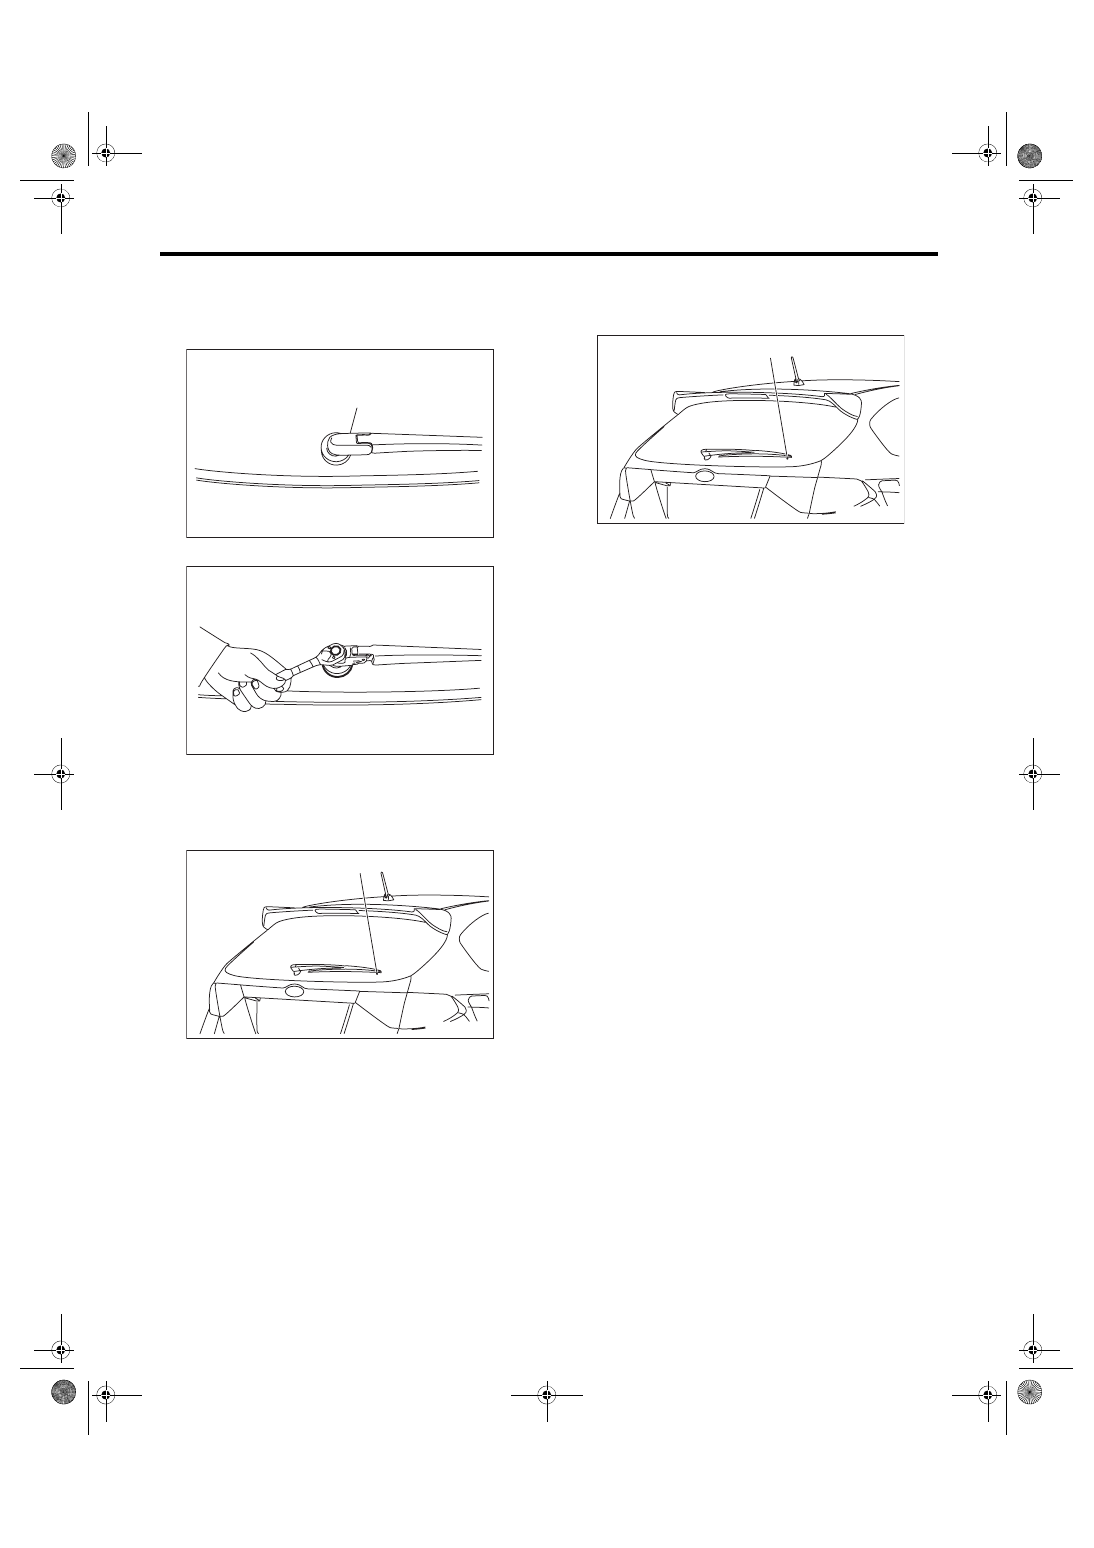
9. Rear Wiper Arm
A: REMOVAL
1) Detach the wiper arm cover (A).
2) Remove the nut and remove the wiper arm.
B: INSTALLATION
1) Install each part in the reverse order of removal.
2) Operate the rear wiper once.
3) Align the blade with the marking (A) of the glass.
Tightening torque:
Refer to “COMPONENT” of “General Descrip-
tion”. <Ref. to WW-3, REAR WIPER, COMPO-
C: ADJUSTMENT
1) Operate the rear wiper once.
2) Align the blade with the marking (A) of the glass.
WW-00506
(A)
WW-00507
WW-00544
(A)
WW-00544
(A)
Нет комментариевНе стесняйтесь поделиться с нами вашим ценным мнением.
Текст