Subaru Impreza 3 / Impreza WRX / Impreza WRX STI. Service manual — part 446
6MT-121
Clutch Housing
MANUAL TRANSMISSION AND DIFFERENTIAL
23.Clutch Housing
A: REMOVAL
1) Remove the manual transmission assembly
from the vehicle. <Ref. to 6MT-31, REMOVAL,
Manual Transmission Assembly.>
2) Prepare the transmission for overhaul. <Ref. to
6MT-37, Preparation for Overhaul.>
3) Remove the neutral position switch, back-up
light switch and harness. <Ref. to 6MT-41, RE-
MOVAL, Neutral Position Switch.> <Ref. to 6MT-
39, REMOVAL, Back-up Light Switch.>
4) Remove the extension case. <Ref. to 6MT-43,
5) Remove the transfer driven gear. <Ref. to 6MT-
55, REMOVAL, Transfer Driven Gear.>
6) Remove the center differential. <Ref. to 6MT-57,
REMOVAL, Center Differential.>
7) Remove the transmission case. <Ref. to 6MT-
58, REMOVAL, Transmission Case.>
8) Remove the individual gear assemblies. <Ref. to
6MT-65, REMOVAL, Main Shaft Assembly.>
9) Remove the drive pinion shaft assembly. <Ref.
to 6MT-94, REMOVAL, Drive Pinion Shaft Assem-
10) Remove the front differential assembly. <Ref.
to 6MT-100, REMOVAL, Front Differential Assem-
B: INSTALLATION
1) Install the pitching stopper bracket.
Tightening torque:
41 N·m (4.2 kgf-m, 30.2 ft-lb)
2) Install the front differential assembly. <Ref. to
6MT-100, INSTALLATION, Front Differential As-
3) Install the drive pinion shaft assembly. <Ref. to
6MT-94, INSTALLATION, Drive Pinion Shaft As-
4) Install the individual gear assemblies all at once.
<Ref. to 6MT-66, INSTALLATION, Main Shaft As-
5) Install the transmission case. <Ref. to 6MT-60,
INSTALLATION, Transmission Case.>
6) Install the center differential. <Ref. to 6MT-57,
INSTALLATION, Center Differential.>
7) Install the transfer driven gear. <Ref. to 6MT-55,
INSTALLATION, Transfer Driven Gear.>
8) Install the extension case. <Ref. to 6MT-43, IN-
9) Install the neutral position switch, back-up light
switch and harness. <Ref. to 6MT-41, INSTALLA-
TION, Neutral Position Switch.> <Ref. to 6MT-39,
INSTALLATION, Back-up Light Switch.>
10) Install the manual transmission assembly to the
vehicle. <Ref. to 6MT-33, INSTALLATION, Manual
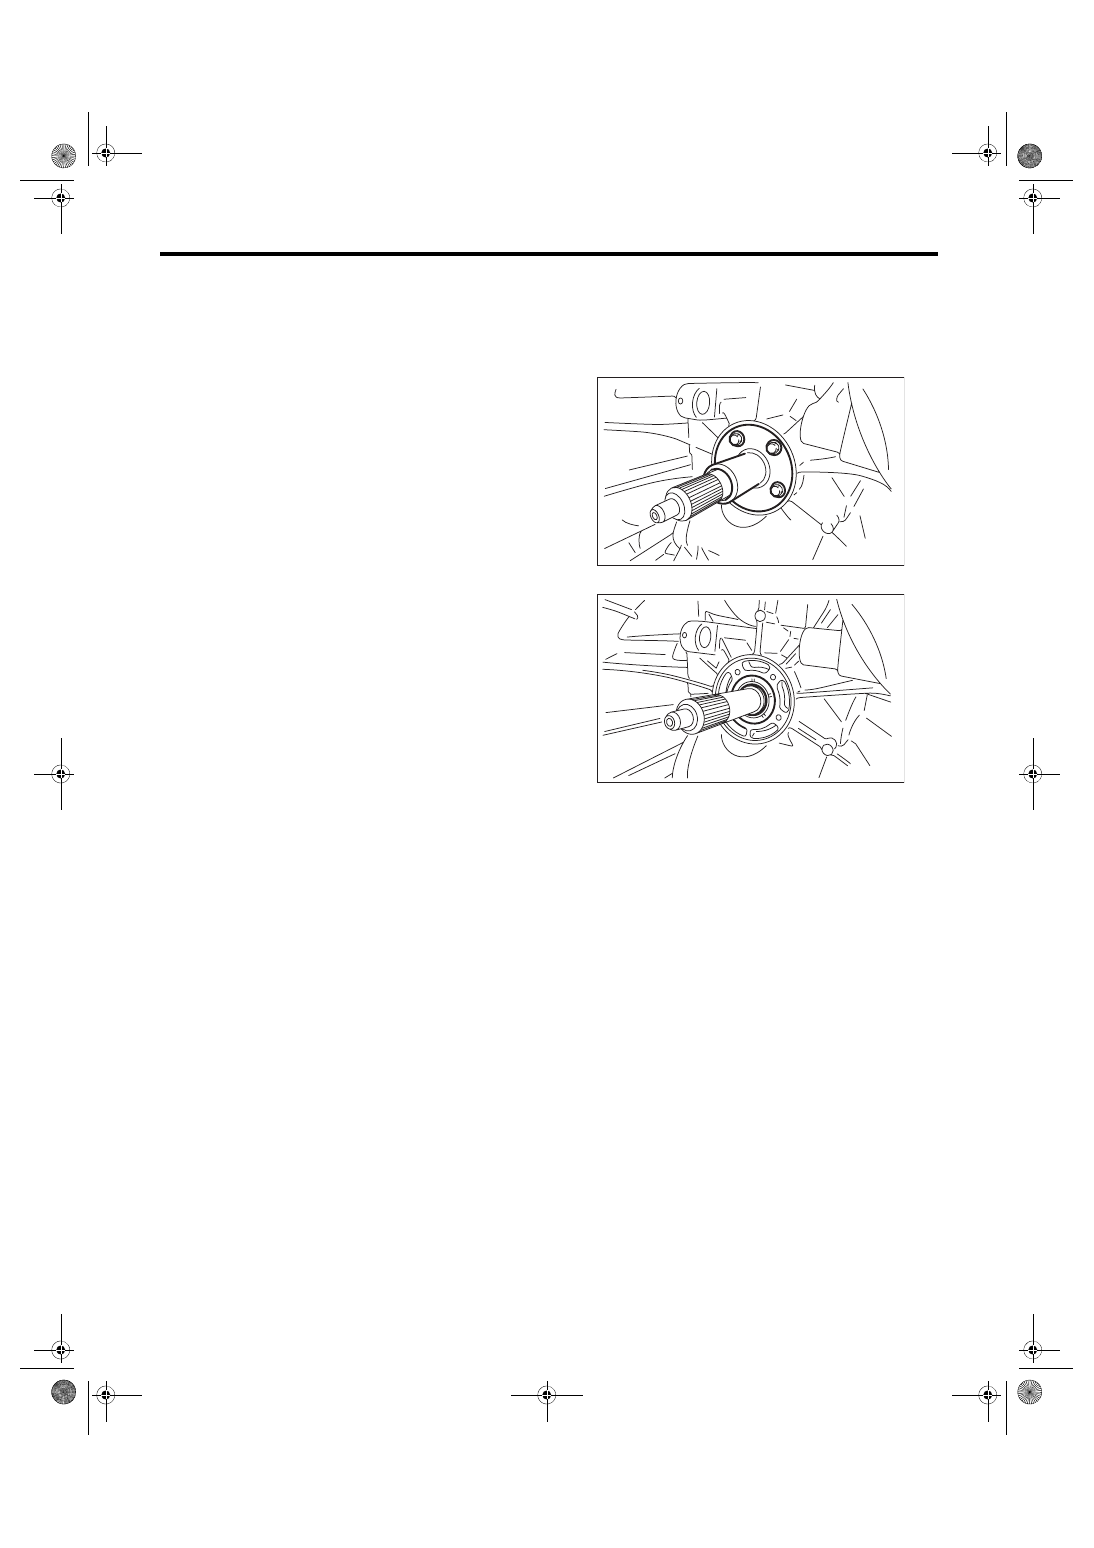
C: DISASSEMBLY
1) Remove the clutch release bearing guide.
2) Remove the oil seal.
MT-01383
MT-01381
6MT-122
Clutch Housing
MANUAL TRANSMISSION AND DIFFERENTIAL
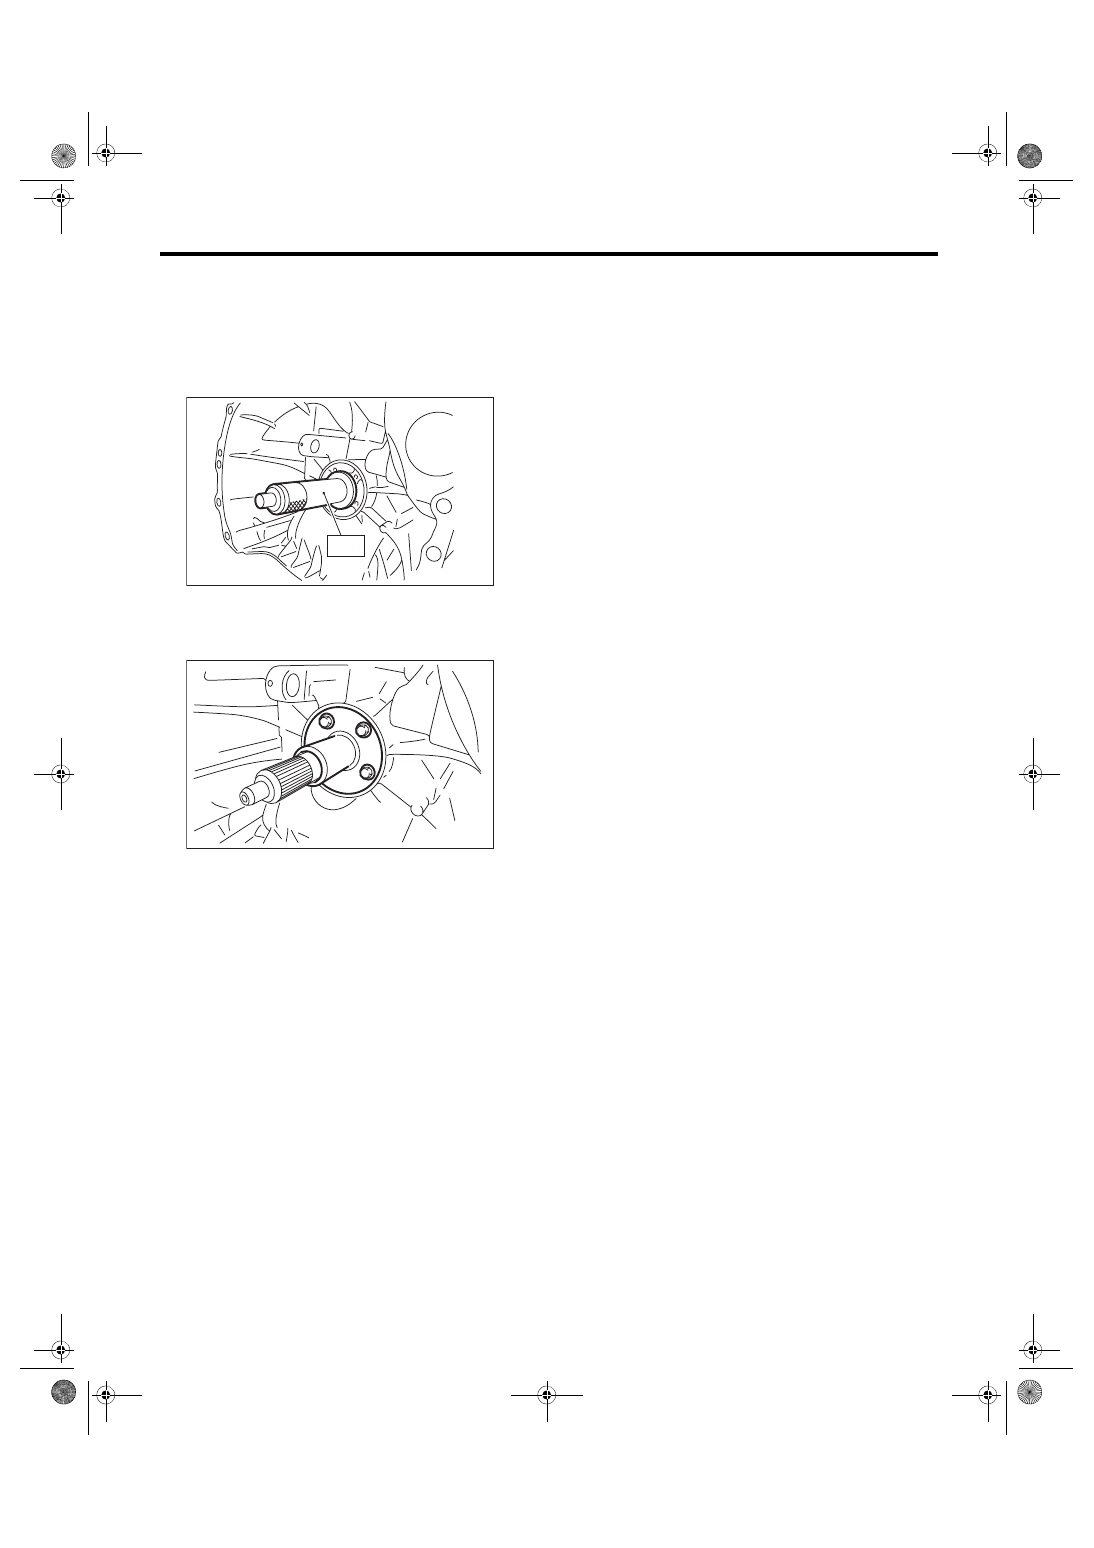
D: ASSEMBLY
1) Attach the oil seal to the clutch housing, being
careful not to damage the seal.
NOTE:
Use a new oil seal.
ST 18657AA020 OIL SEAL INSTALLER
2) Install the clutch release bearing guide.
Tightening torque:
6.4 N·m (0.7 kgf-m, 4.7 ft-lb)
E: INSPECTION
1) Check to make sure there is no damage or
cracks on the clutch housing. If there is excessive
damage, replace the clutch housing.
2) Inspect the clutch housing for transmission gear
oil leakage. If any oil leaks are found, repair or re-
place the applicable part.
MT-01382
ST
MT-01383
6MT-123
Driver’s Control Center Differential Control Module
MANUAL TRANSMISSION AND DIFFERENTIAL
24.Driver’s Control Center Dif-
ferential Control Module
A: REMOVAL
1) Disconnect the ground cable from battery.
2) Remove the instrument panel lower. <Ref. to EI-
54, INSTRUMENT PANEL LOWER, REMOVAL,
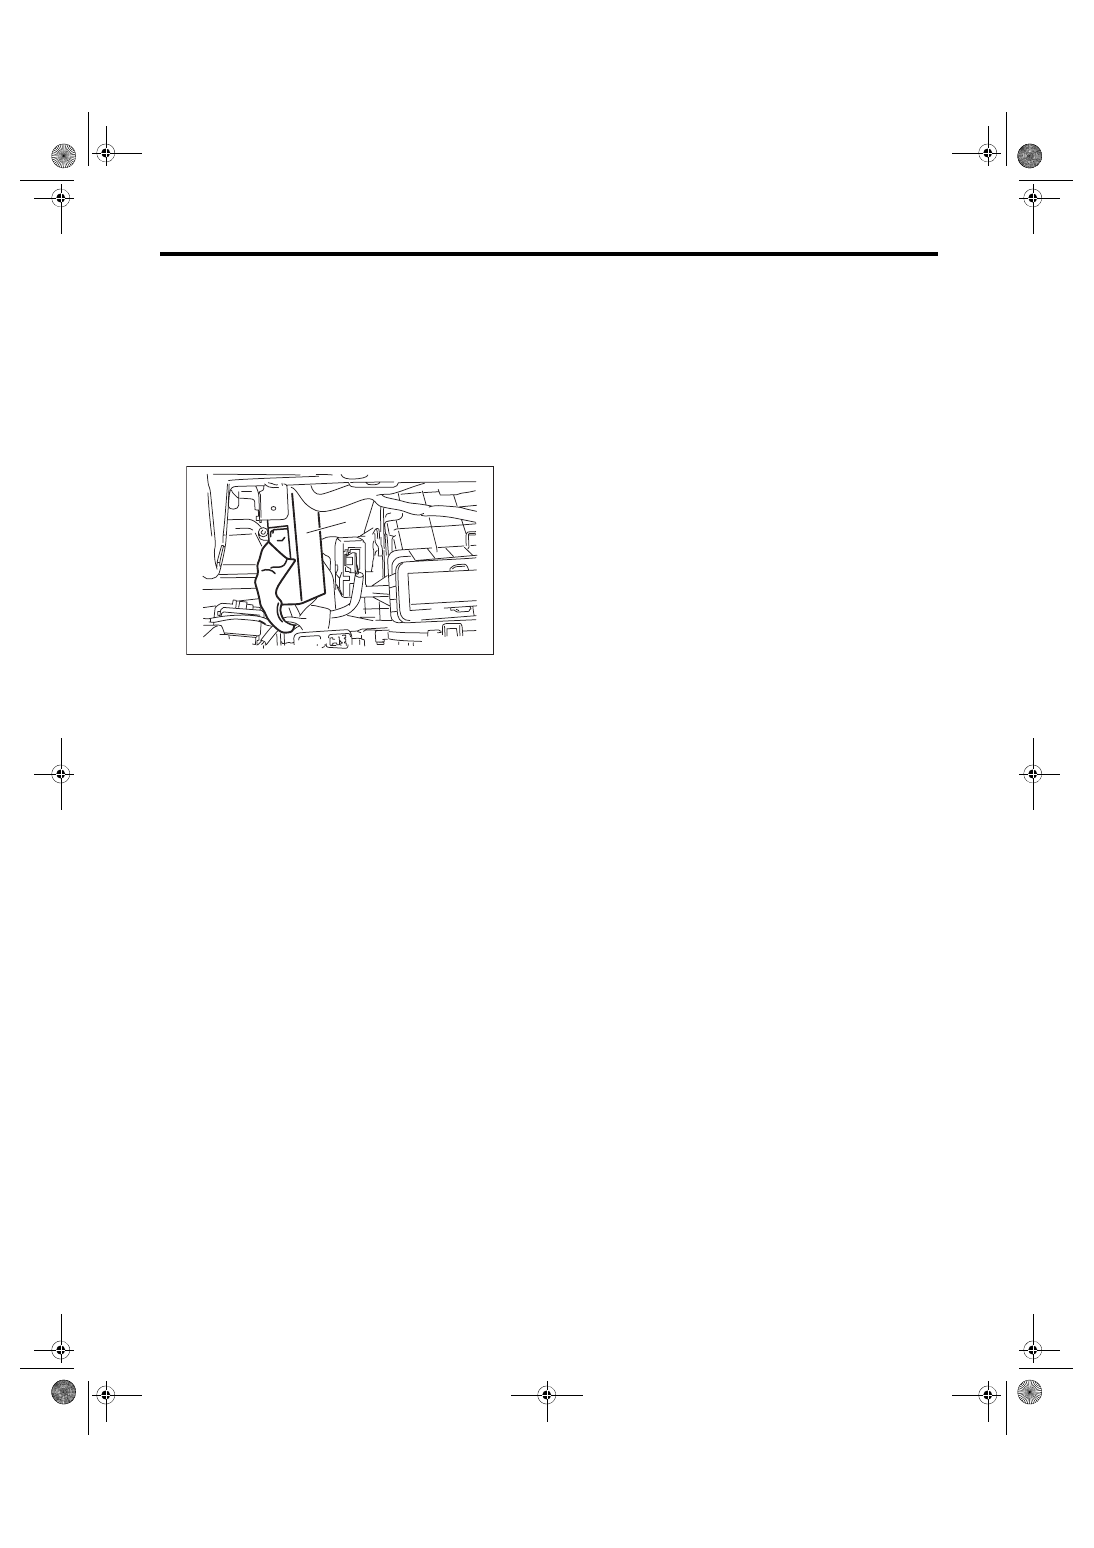
3) Remove the driver’s control center differential
control module by disconnecting the connector.
B: INSTALLATION
Install in the reverse order of removal.
Tightening torque:
15 N·m (1.5 kgf-m, 11.1 ft-lb)
(A) Driver’s control center differential control mod-
ule
MT-01742
(A)
6MT-124
General Diagnostic Table
MANUAL TRANSMISSION AND DIFFERENTIAL
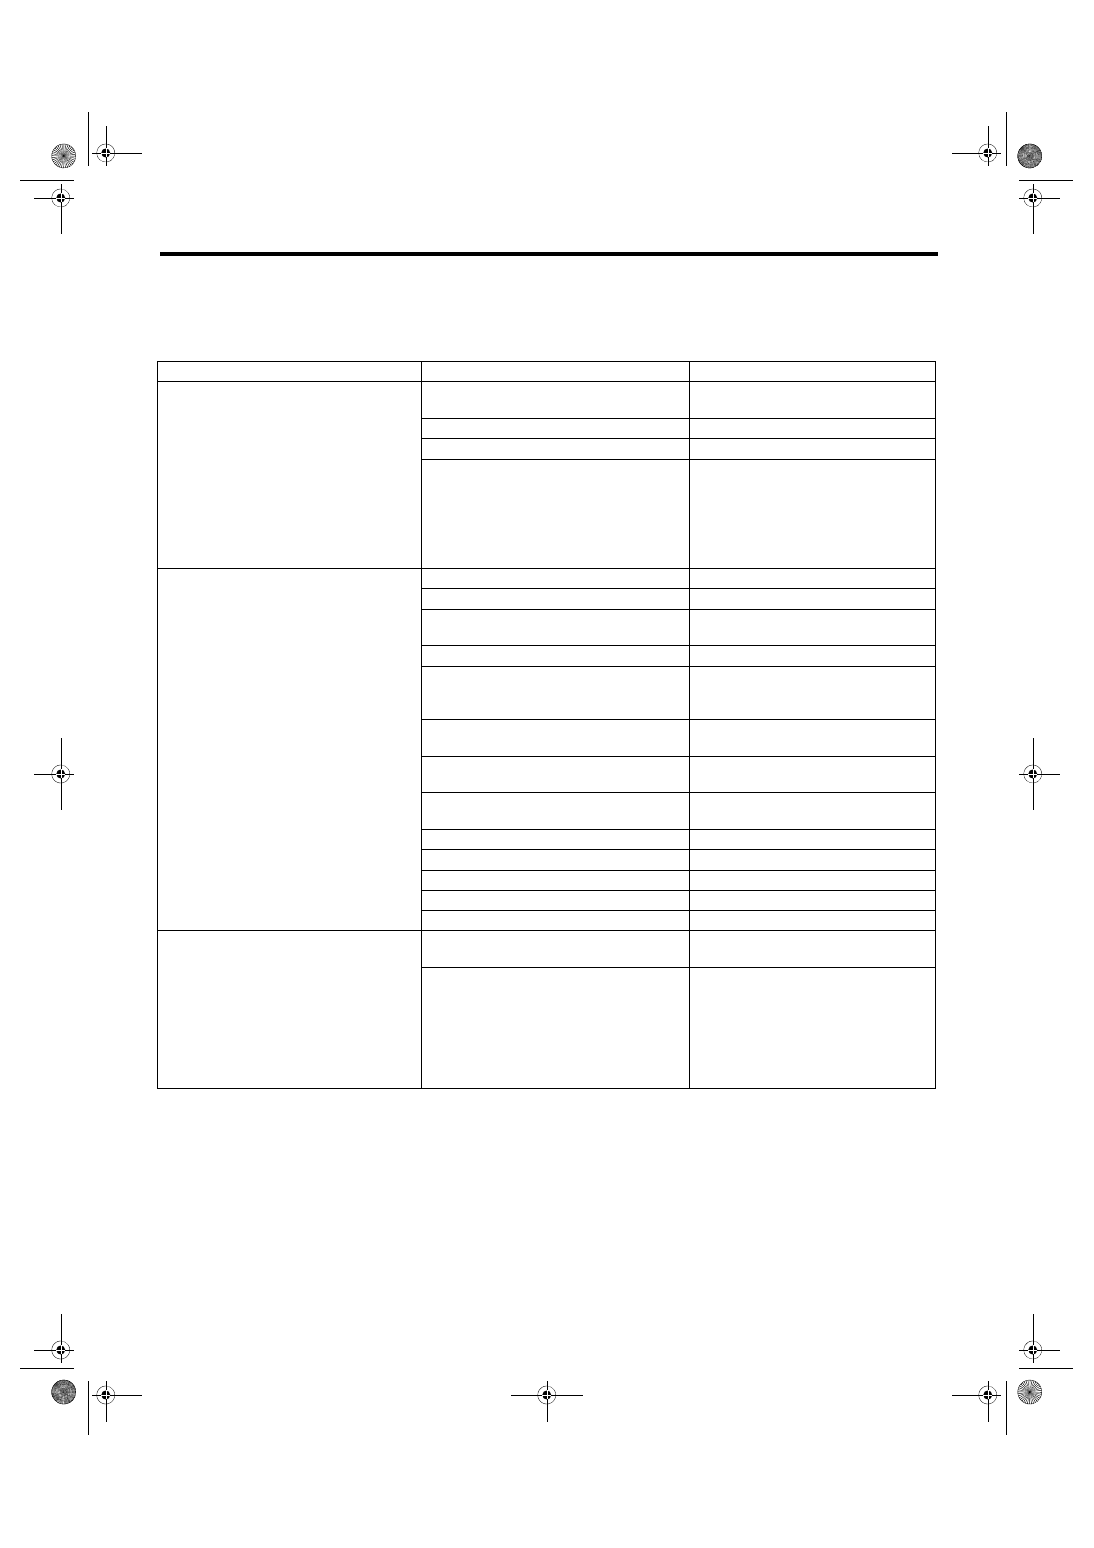
25.General Diagnostic Table
A: INSPECTION
1. MANUAL TRANSMISSION
Symptoms
Possible cause
Corrective action
1. Gears are difficult to engage.
NOTE:
If it is difficult to shift, there are two possible
causes. One is a defective gear shift sys-
tem and the other is defective transmis-
sion. However, if the operation is heavy
and engagement of the gears is difficult, a
defective clutch function may also be re-
sponsible. Check whether the clutch is cor-
rectly functioning, before checking the
gear shift system and transmission.
(a) Worn, damaged or burred chamfer at
internal spline of the sleeve
Replace.
(b) Gear spline wear, damage, dents
Replace.
(c) Worn or scratched bushings
Replace.
(d) Incorrect contact or wear between syn-
chronizer ring and gear cone
Repair or replace.
2. Gear slip-out
• Gear slips out when coasting on rough
road.
• Gear slips out during acceleration.
(a) Defective pitching stopper adjustment
Adjust.
(b) Loose engine mounting bolts
Tighten or replace.
(c) Worn shifter fork, broken shifter fork rail
spring
Replace.
(d) Worn or damaged ball bearing
Replace.
(e) Excessive clearance between splines
of synchronizer hub and synchronizer
sleeve
Replace.
(f) Worn in the synchronizer hub chamfer
angle
Replace.
(g) Worn 1st driven gear, needle bearing
and race
Replace.
(h) Worn 2nd driven gear, needle bearing
and race
Replace.
(i) Worn 3rd drive gear and bushing
Replace.
(j) Worn 4th drive gear and bushing
Replace.
(k) Worn 5th drive gear and bushing
Replace.
(l) Worn 6th drive gear and bushing
Replace.
(m) Worn reverse idler gear and bushing
Replace.
3. Noise emitted from transmission
NOTE:
If a noise is heard when the vehicle is
parked with its engine idling and ceases
when the clutch is disengaged, it may be
considered that the noise is coming from
the transmission.
(a) Insufficient or improper lubrication
Replenish or replace with the specified
amount of recommended oil.
(b) Worn or damaged gears and bearings
NOTE:
If the trouble is only wear of the gear teeth
surfaces, only a high whirring noise will oc-
cur at high speeds, but if any part is broken,
rhythmical clicking sounds will be heard
even at low speeds.
Replace.
Нет комментариевНе стесняйтесь поделиться с нами вашим ценным мнением.
Текст