Subaru Legacy (2005 year). Service manual — part 297
CO(H4DOTC)-19
COOLING
Radiator
6. Radiator
A: REMOVAL
WARNING:
The radiator is pressurized. Wait until engine
cools down before working on the radiator.
1) Set the vehicle on a lift.
2) Remove the collector cover.
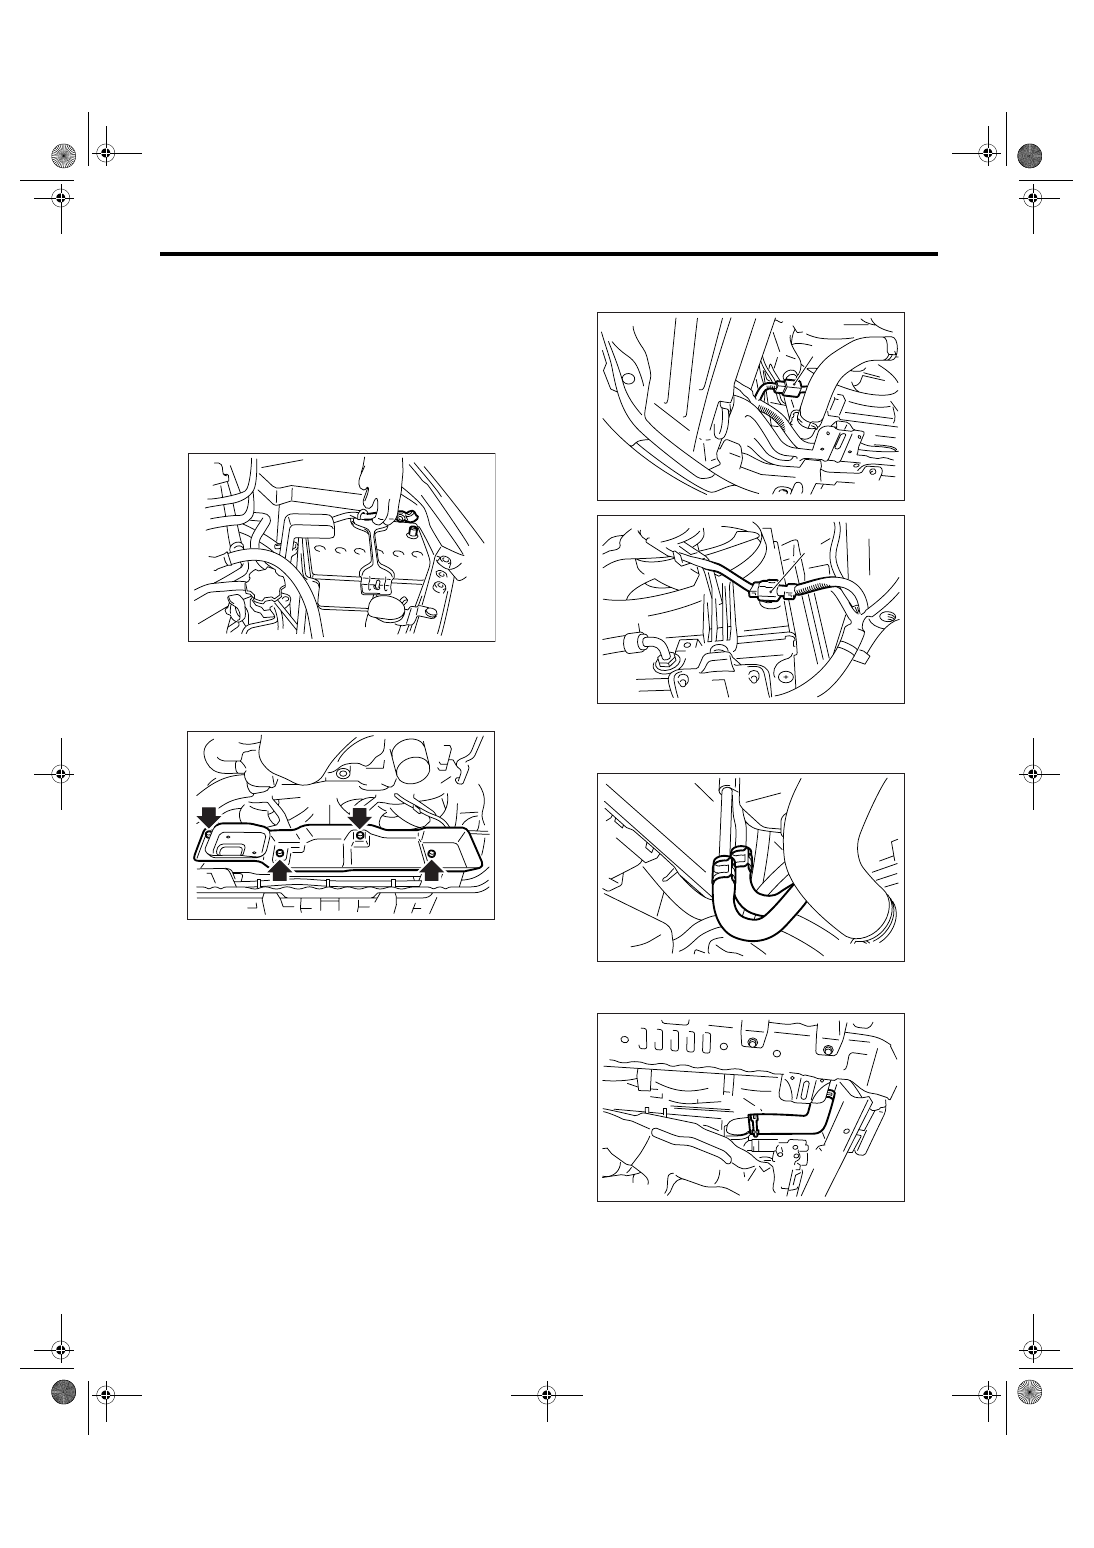
3) Disconnect the ground cable from battery.
4) Lift-up the vehicle.
5) Remove the under cover.
6) Remove the heat shield cover from radiator.
(Model without ATF warmer)
7) Drain engine coolant completely.
<Ref. to CO(H4DOTC)-13, DRAINING OF EN-
GINE COOLANT, REPLACEMENT, Engine Cool-
ant.>
8) Disconnect the connectors of radiator main fan
motor (A) and sub fan motor (B).
9) Disconnect the ATF cooler hoses from ATF
pipes. (Model without ATF warmer)Plug the ATF
pipe to prevent ATF leaks.
10) Disconnect the radiator outlet hose from ther-
mostat cover.
11) Lower the vehicle.
12) Remove the air intake duct.
IN(H4DOTC)-9, REMOVAL, Air Intake Duct.>
13) Disconnect the over flow hose.
IN-00203
CO-00250
CO-00251
(A)
CO-00252
(B)
CO-00253
CO-00249
CO(H4DOTC)-20
COOLING
Radiator
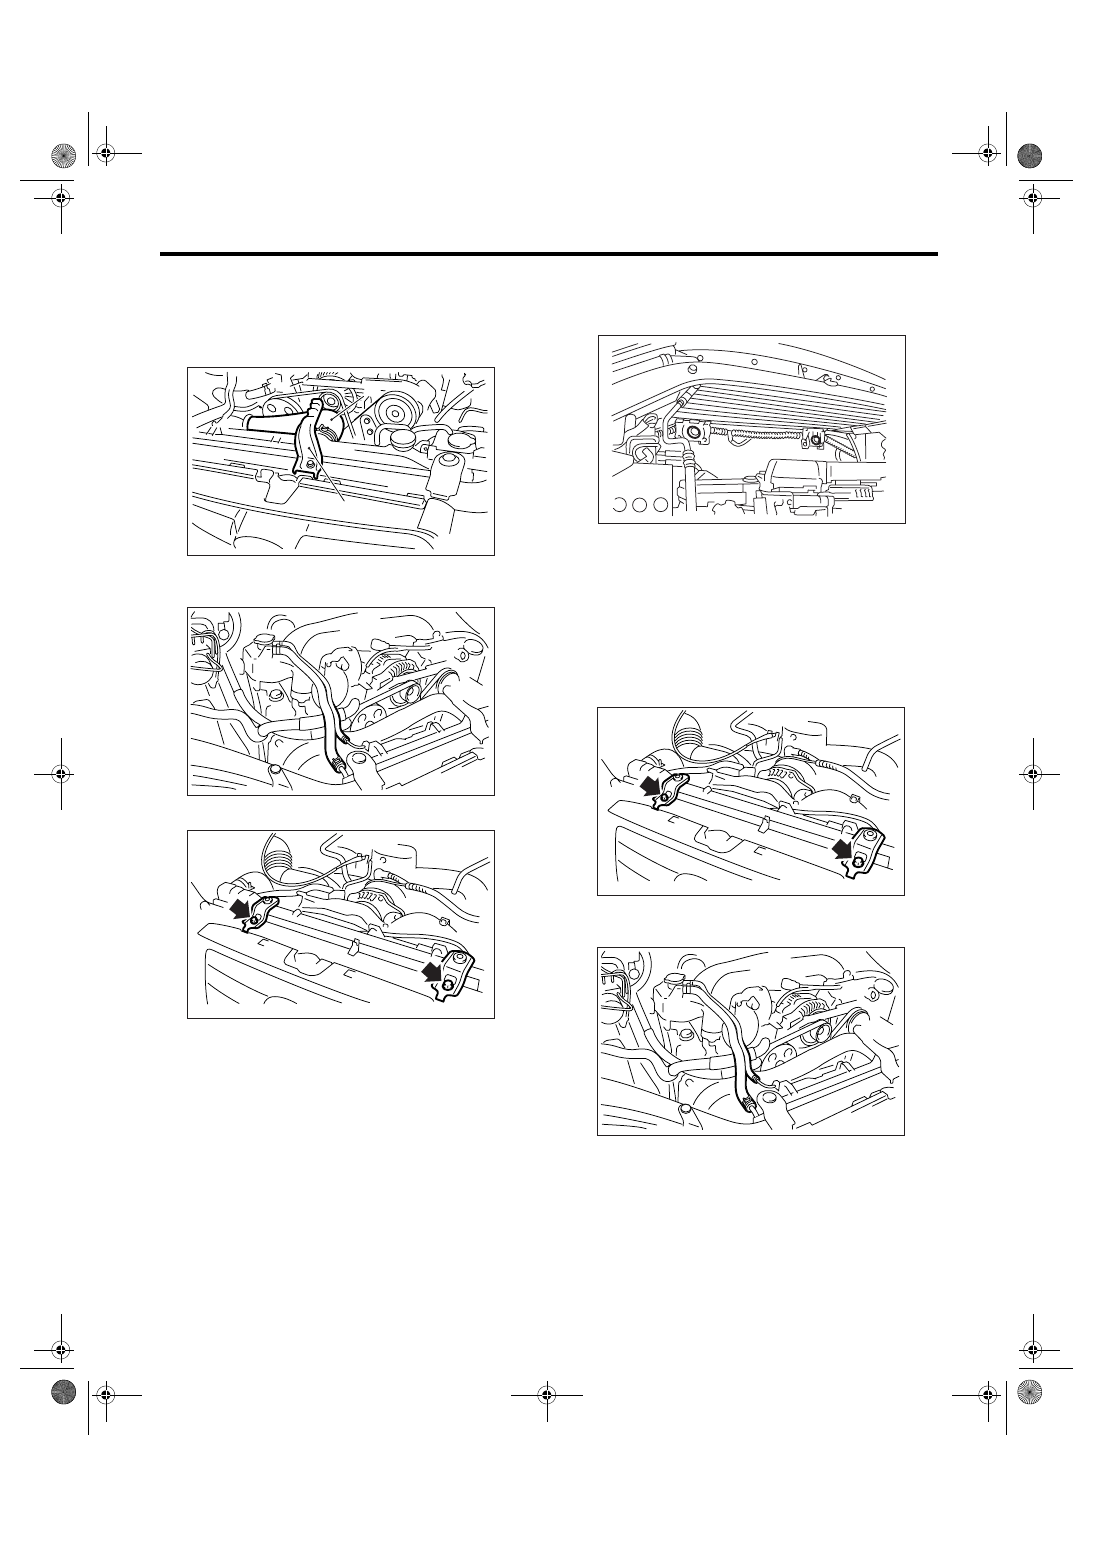
14) Remove the reservoir tank. <Ref. to
CO(H4DOTC)-30, REMOVAL, Reservoir Tank.>
15) Disconnect the radiator inlet hose (A) from ra-
diator.
16) Remove the hood stay holder (B).
17) Disconnect the two coolant filler tank hoses
from radiator.
18) Remove the radiator upper brackets.
19) While lifting the radiator up, slide it to the left.
20) Lift the radiator up and away from vehicle.
B: INSTALLATION
1) Install the radiator lower cushions to holes on the
radiator lower bracket.
2) Install the radiator to vehicle.
NOTE:
Make pins on the lower side of radiator be fitted into
the radiator lower cushions on body side.
3) Install the radiator upper brackets and tighten
the bolts.
Tightening torque:
12 N
⋅
m (1.2 kgf-m, 8.9 ft-lb)
4) Connect the two coolant filler tank hoses to radi-
ator.
5) Connect the radiator inlet hose (A).
CO-00255
(A)
(B)
CO-00256
CO-00040
CO-00041
CO-00040
CO-00256
CO(H4DOTC)-21
COOLING
Radiator
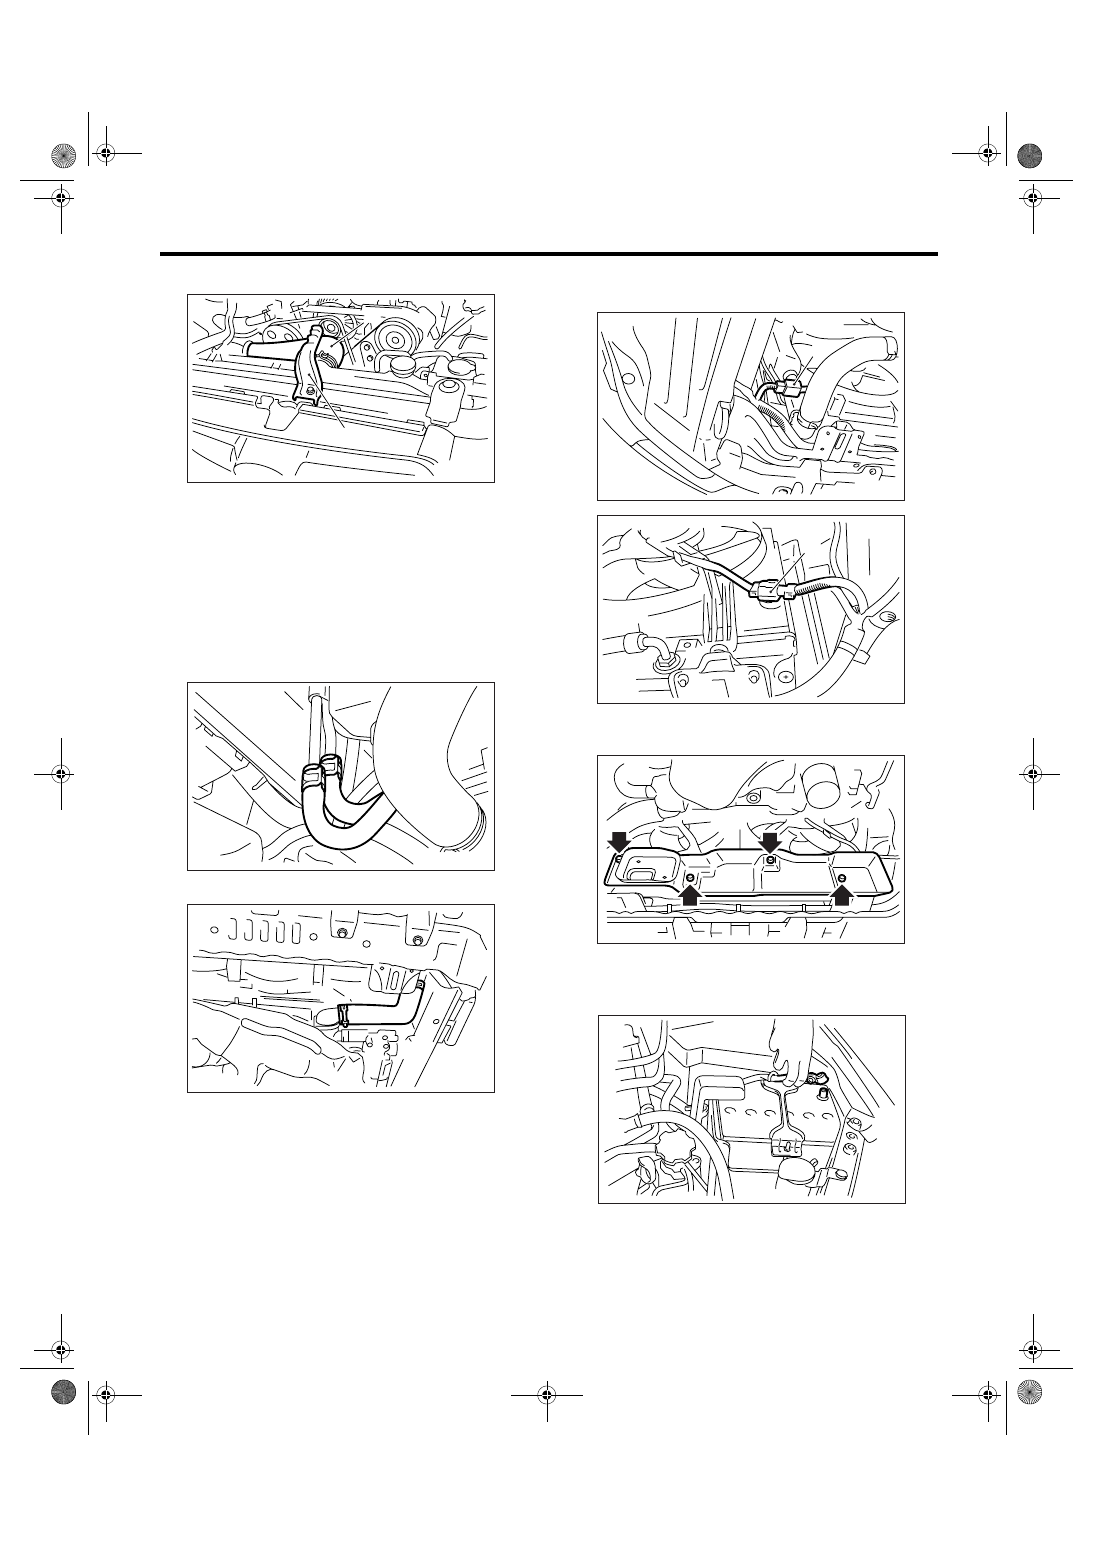
6) Install the hood stay holder (B).
7) Install the reservoir tank. <Ref. to
CO(H4DOTC)-30, INSTALLATION, Reservoir
Tank.>
8) Connect the over flow hose.
9) Install the air intake duct.
<Ref. to IN(H4DOTC)-9, INSTALLATION, Air In-
take Duct.>
10) Lift-up the vehicle.
11) Connect the ATF cooler hoses. (Model without
ATF warmer)
12) Connect the radiator outlet hose.
13) Connect the connectors to radiator main fan
motor (A) and sub fan motor (B).
14) Install the heat shield cover. (Model without
ATF warmer)
15) Install the under cover.
16) Lower the vehicle.
17) Connect the ground cable to battery.
18) Fill engine coolant.
<Ref. to CO(H4DOTC)-13, FILLING OF ENGINE
COOLANT, REPLACEMENT, Engine Coolant.>
19) Check the ATF level. <Ref. to 5AT-28, IN-
SPECTION, Automatic Transmission Fluid.>
CO-00255
(A)
(B)
CO-00253
CO-00249
CO-00251
(A)
CO-00252
(B)
CO-00250
IN-00203
CO(H4DOTC)-22
COOLING
Radiator
20) Install the collector cover.
C: INSPECTION
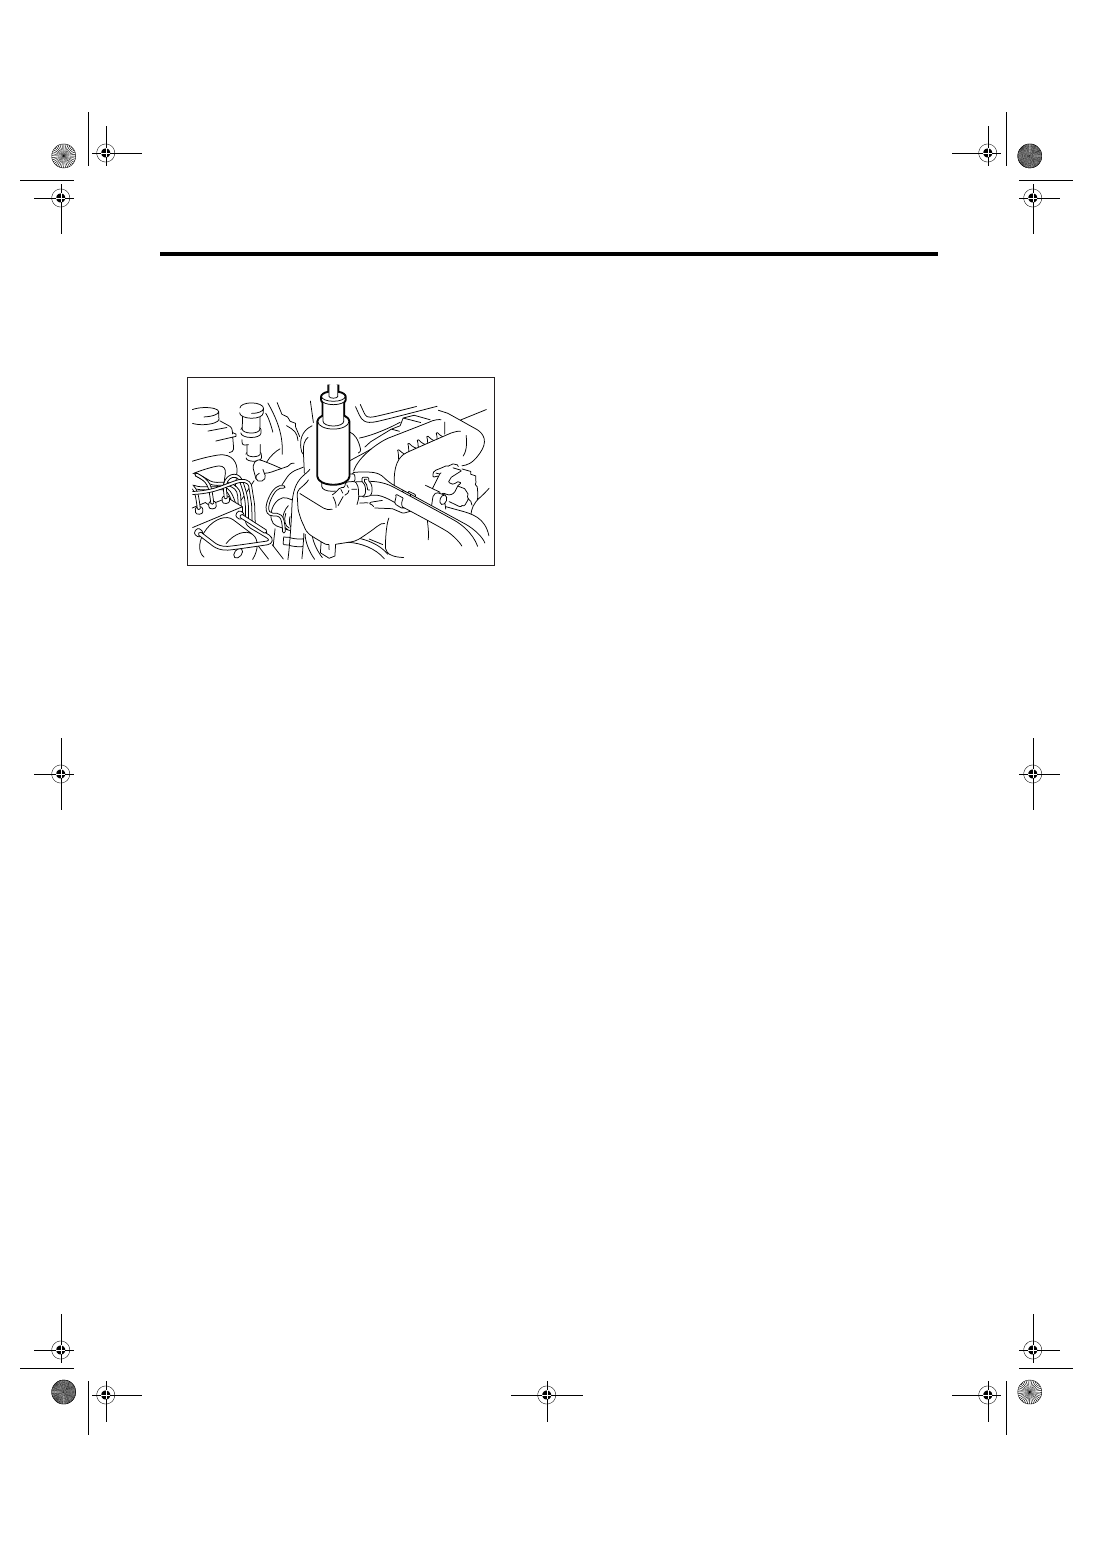
1) Remove the coolant filler tank cap and fill engine
coolant to coolant filler tank, then attach the tester
to radiator in place of cap.
2) Apply a pressure of 122 kPa (1.2 kgf/cm
2
, 18
psi) to the radiator to check if:
• Engine coolant leaks at/around radiator.
• Engine coolant leaks at/around hoses or connec-
tions.
CAUTION:
• Inspection must be carried out at the side of
coolant filler tank, not at the side of radiator.
• Engine should be turned off.
• Wipe engine coolant from check points in ad-
vance.
• Be careful to prevent engine coolant from
spurting out when removing tester.
• Be careful not to deform the filler neck of
coolant filler tank when installing or removing
the tester.
CO-00257
Нет комментариевНе стесняйтесь поделиться с нами вашим ценным мнением.
Текст