Subaru Legacy (2005 year). Service manual — part 966
SE-7
SEATS
Front Seat
2. Front Seat
A: REMOVAL
CAUTION:
The airbag system is fitted with a backup power
source. After disconnecting the battery ground
cable, the airbag may deploy if you do not wait
for 20 seconds before starting the repair of air-
bag system.
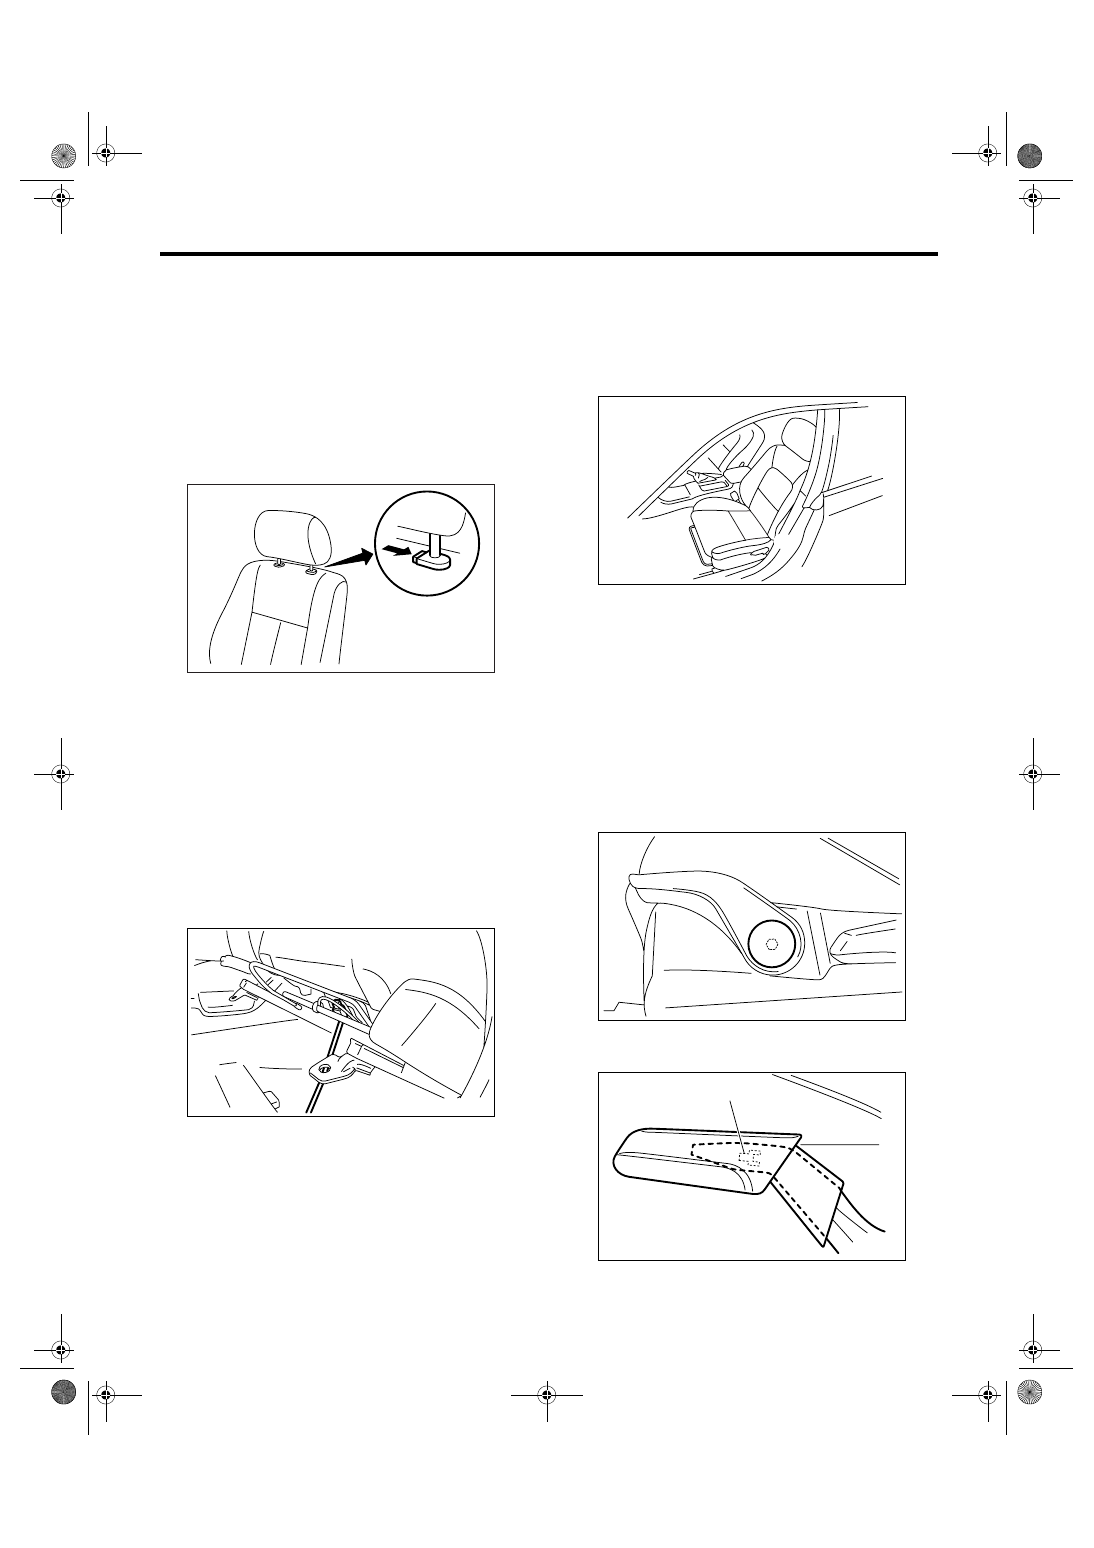
1) Remove the headrest with headrest lock button
depressed.
2) Tilt forward the backrest, and slide the seat for-
ward.
3) Remove the rear bolt cover, and remove the two
bolts at the rear side of slide rail.
4) Slide the seat backward, and remove the two
bolts at the front side of slide rail.
5) Remove the battery ground cable, and wait for
more than 20 seconds before starting work.
6) Disconnect the connector under the seat.
• Seat belt warning light connector (Driver’s side).
• Side airbag connector (Model with side airbag)
• Seat heater connector (Model with seat heater)
• Power seat connector (Model with power seat)
7) Remove the seat from vehicle.
B: INSTALLATION
Install in the reverse order of removal.
NOTE:
Tighten the slide rail installing bolt gradually in sev-
eral steps to the specified torque in the order as
shown in the figure.
Tightening torque:
Refer to “COMPONENT” of “General Descrip-
tion”. <Ref. to SE-2, COMPONENT, General
Description.>
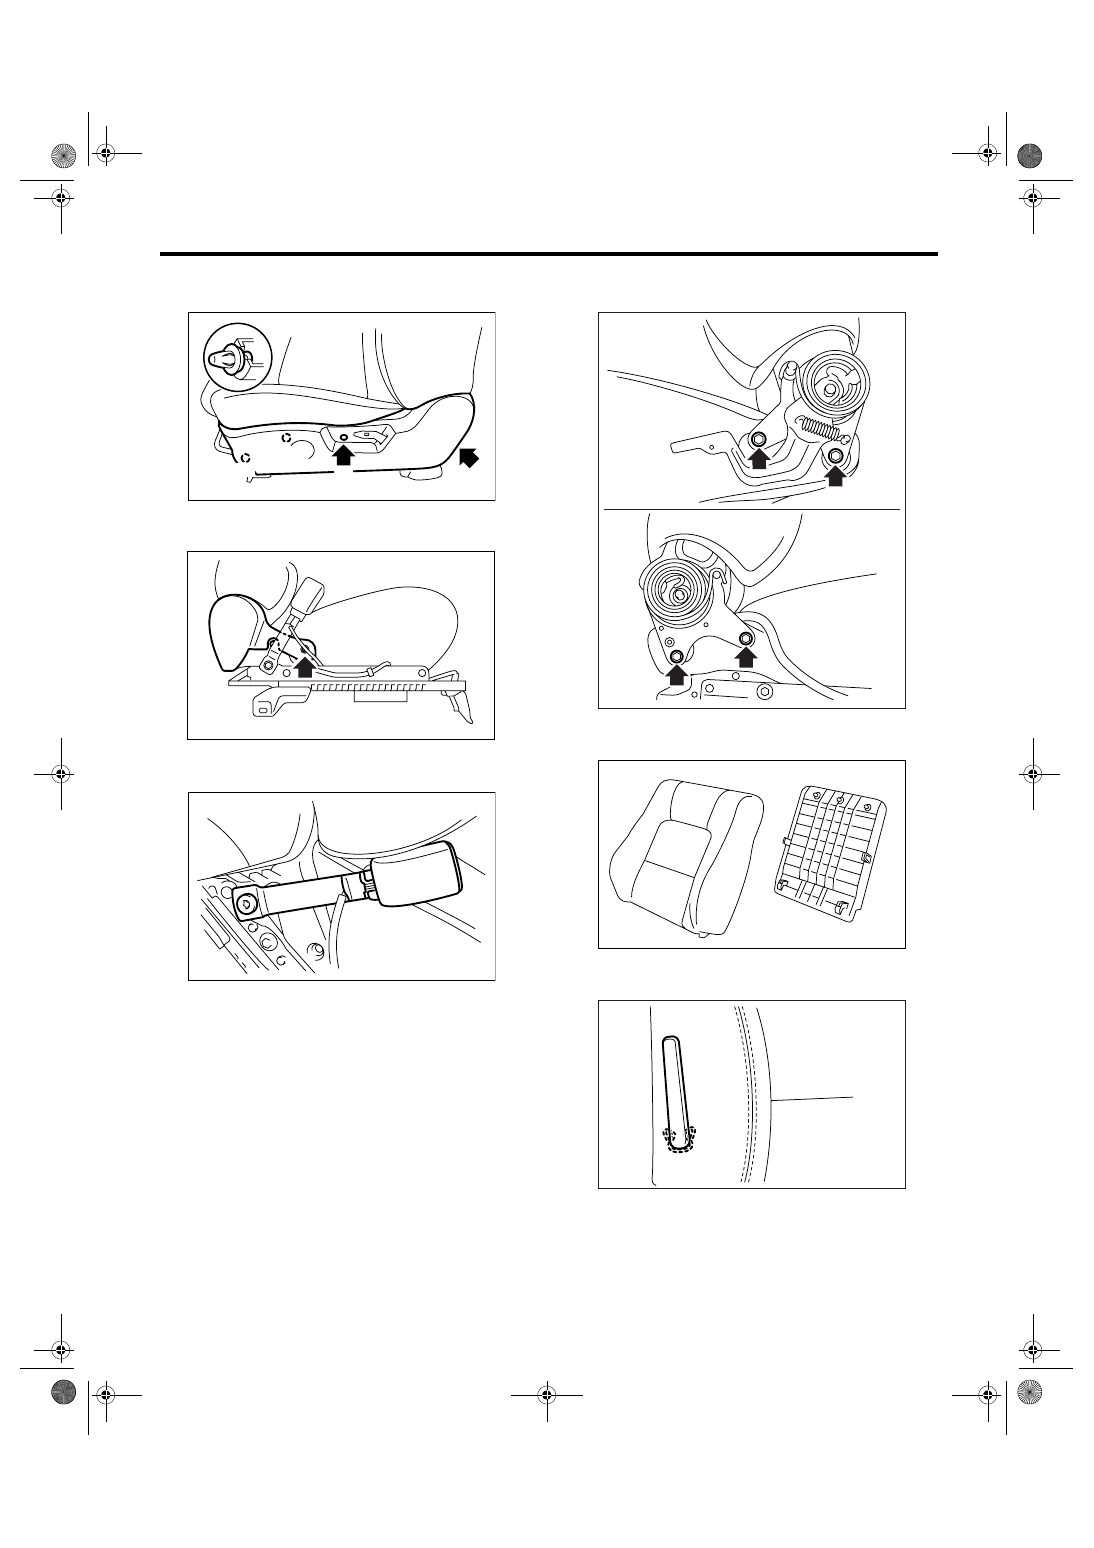
C: DISASSEMBLY
1. MANUAL SEAT
1) Remove the seat from vehicle. <Ref. to SE-7,
REMOVAL, Front Seat.>
2) Remove the seat lifter cover using a flat tip
screwdriver, and loosen the inner bolt to remove
seat lifter lever.
3) Remove the hook (A) and detach reclining lever
cover.
SE-00003
SE-00474
SE-00479
(1)
(3)
(4)
(2)
SE-00290
SE-00404
(A)
SE-8
SEATS
Front Seat
4) Remove the screws (A) and clips (B), and then
detach the seat side cover outside.
5) Loosen the screw to remove seat side cover in-
side.
6) Remove the TORX
®
bolt, and then remove the
inner seat belt assembly.
7) Remove the two bolts from each LH and RH side
of reclining hinge.
8) Remove the clips and hooks, and then detach
the backrest back cover.
9) Remove the lock clip, and then remove the lum-
ber support lever.
SE-00405
(A)
(A)
(B)
(B)
SE-00406
SE-00407
SE-00408
SE-00334
SE-00414
SE-9
SEATS
Front Seat
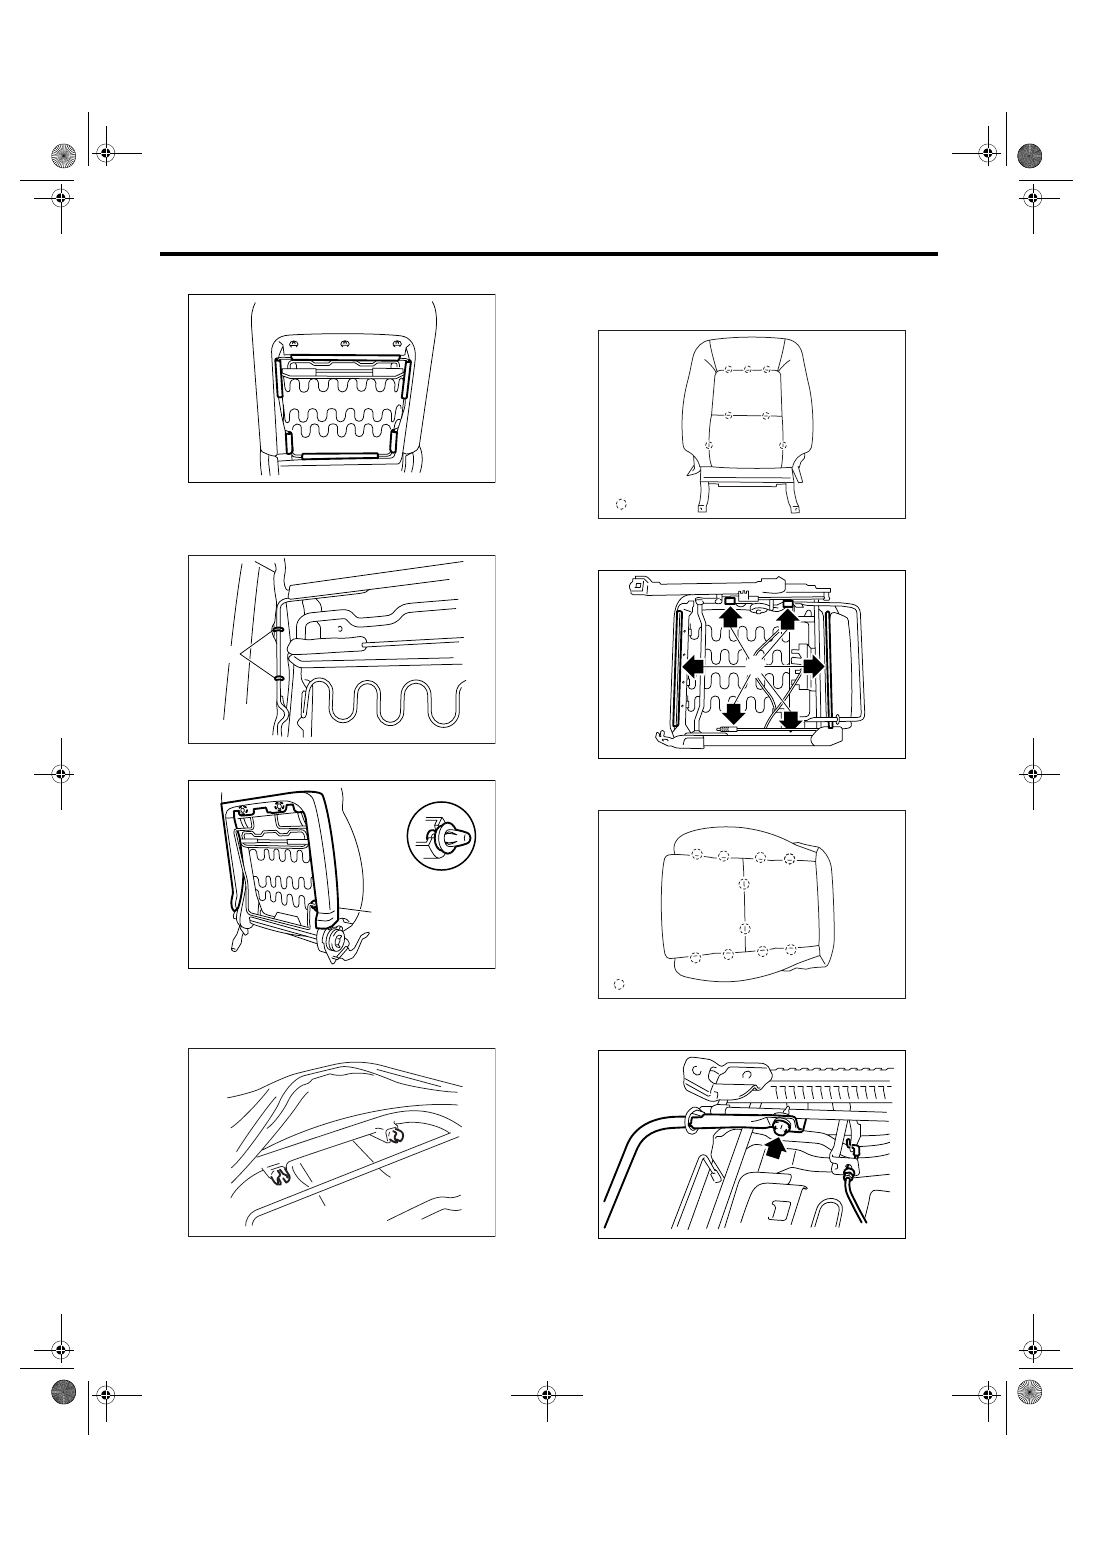
10) Remove the hooks at the rear side of backrest.
NOTE:
For the seat with side airbag, the airbag module in-
stallation side is secured with hog rings (A).
11) Remove the cover frame (A).
12) Remove the headrest lock bushing.
NOTE:
Push outside to remove it from the inside of seat.
13) Pull out the backrest frame assembly.
14) Remove the hog rings (A) on the surface side
of backrest, and then remove the backrest cover
from backrest.
15) Remove the hooks (A), and then remove the
seat cushion frame assembly.
16) Remove the hog rings (A), and then remove the
seat cushion cover from seat cushion pad.
17) Remove the bolt of sliding adjustment bar and
connecting wire.
SE-00335
SE-00415
(A)
(A)
SE-00337
SE-00243
SE-00372
: (A)
SE-00338
(A)
SE-00339
: (A)
SE-00340
SE-10
SEATS
Front Seat
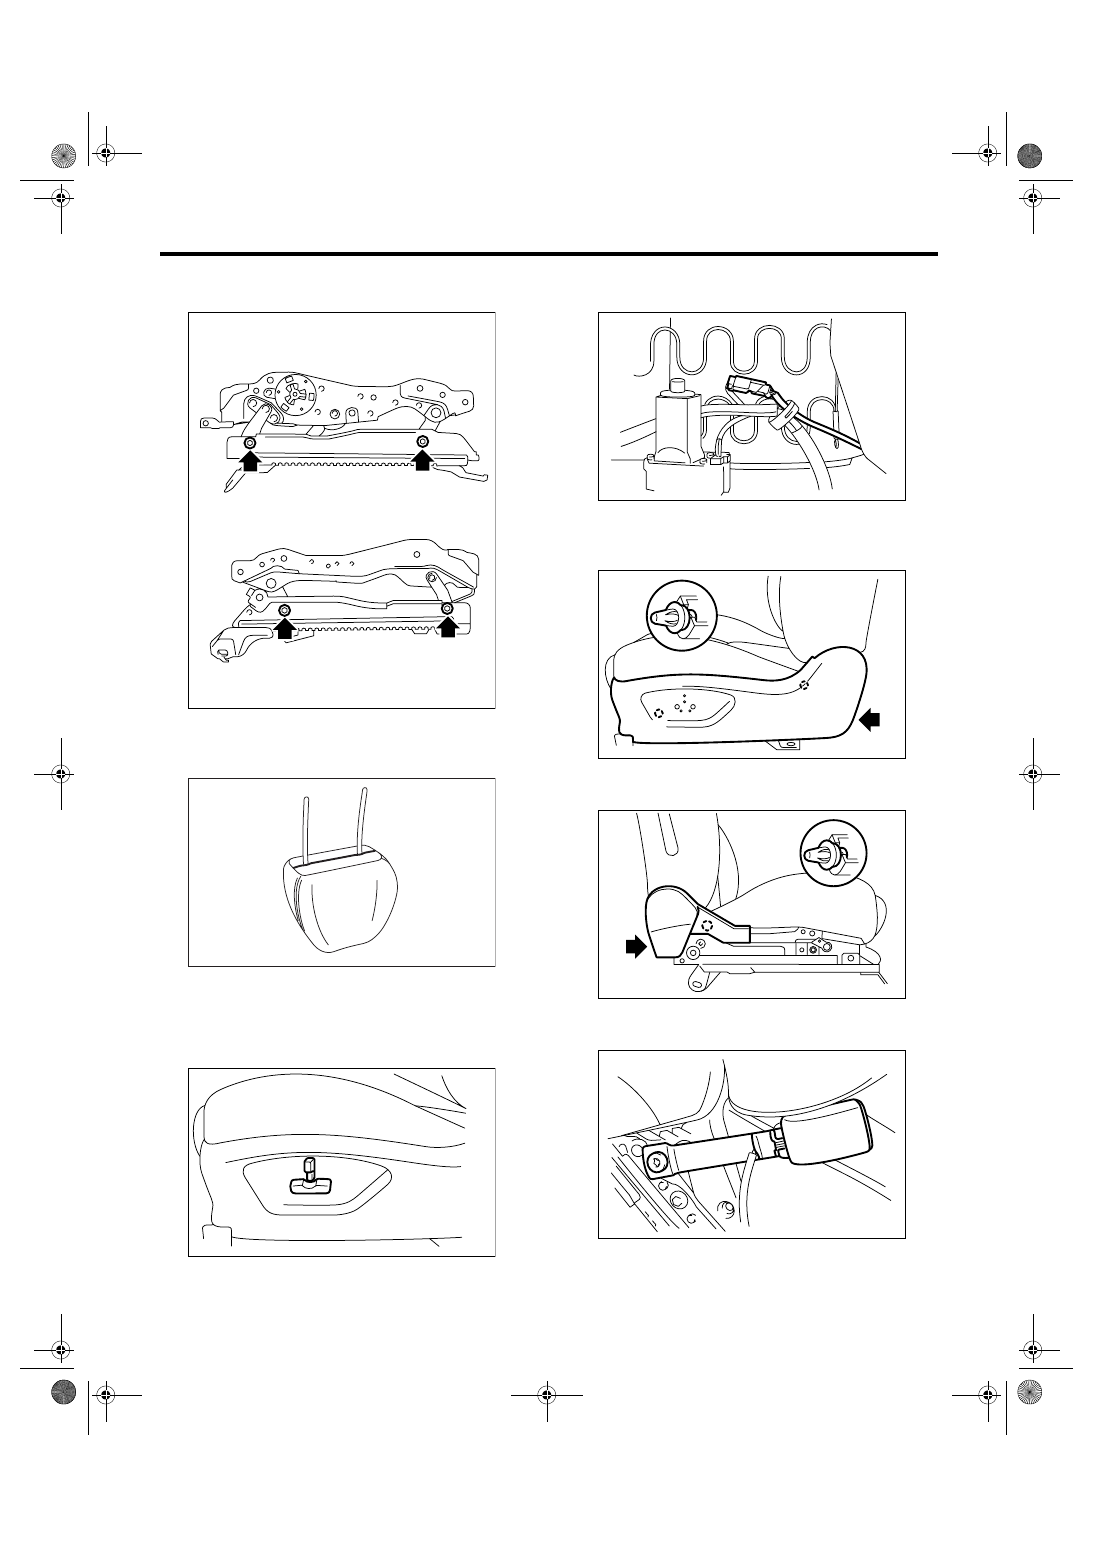
18) Remove the bolts, and then remove the slide
rail.
19) Remove the hooks and hog rings at the bottom
of headrest, and then remove the headrest cover
from headrest.
2. POWER SEAT
1) Remove the seat from vehicle. <Ref. to SE-7,
REMOVAL, Front Seat.>
2) Remove the power seat switch knob.
3) Disconnect the connector of reclining motor from
the backside of seat cushion.
4) Remove the screw (A) and clips (B), and then
disconnect the seat switch connector to remove
seat side cover outside.
5) Remove the screw (A) and clip (B), and then re-
move the seat side cover inside.
6) Remove the TORX
®
bolt, and then remove the
inner seat belt assembly.
SE-00409
SE-00342
SE-00410
SE-00383
SE-00411
(B)
(A)
(B)
SE-00412
(A)
(B)
SE-00407
Нет комментариевНе стесняйтесь поделиться с нами вашим ценным мнением.
Текст