Subaru Legacy (2005 year). Service manual — part 582
5AT-27
AUTOMATIC TRANSMISSION
General Description
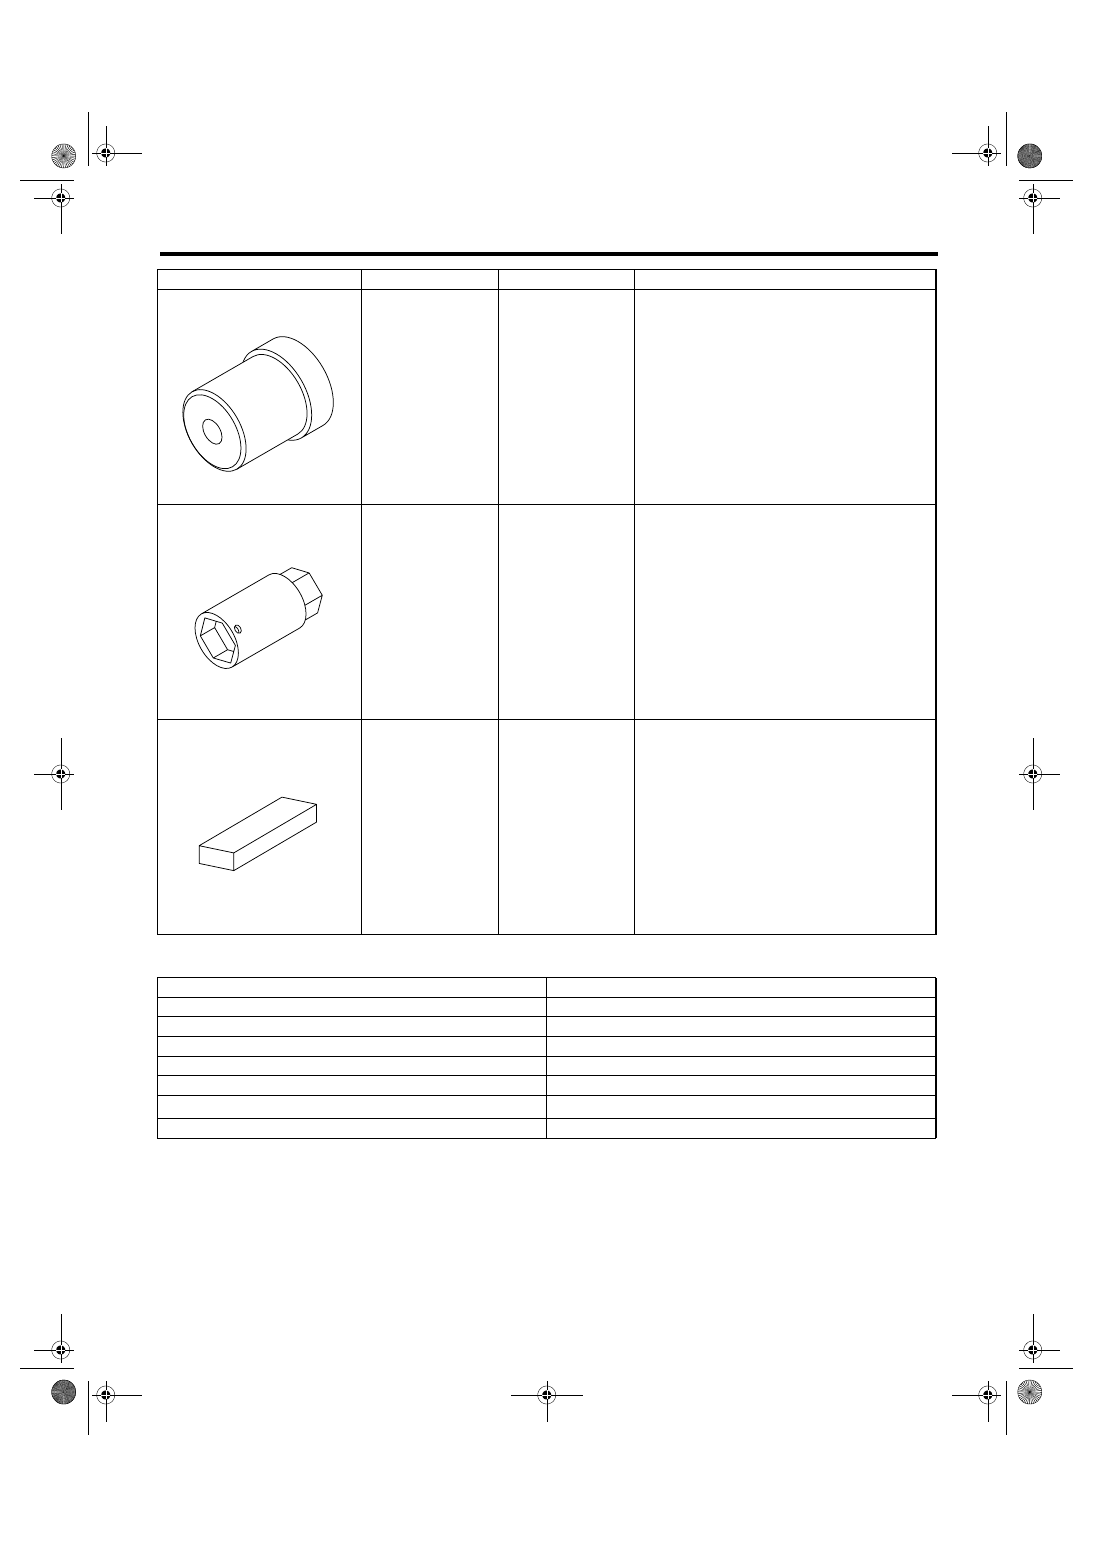
2. GENERAL TOOL
499587100
OIL SEAL
INSTALLER
Used for installing oil seal.
499787500
ADAPTER
Used for removing and installing drive pinion lock
nut.
499575400
GAUGE
Used for measuring height of total end play.
TOOL NAME
REMARKS
Depth gauge
Used for measuring transmission end play.
Thickness gauge
Used for measuring clearance of clutch, brake and oil pump.
Micro meter
Used for measuring thickness of drive pinion.
Spring balance
Used for measuring starting torque of drive pinion.
Circuit tester
Used for measuring resistance and voltage.
TORX
®
T70
Used for removing and installing differential gear oil drain plug.
Snap ring pliers
Used for removing and installing each snap ring.
ILLUSTRATION
TOOL NUMBER
DESCRIPTION
REMARKS
ST-499587100
ST-499787500
ST-499575400
5AT-28
AUTOMATIC TRANSMISSION
Automatic Transmission Fluid
2. Automatic Transmission Flu-
id
A: INSPECTION
NOTE:
The level of ATF varies with fluid temperature. Pay
attention to the ATF temperature when checking
ATF level.
1) Raise the ATF temperature by driving a distance
of 5 to 10 km (3 to 6 miles). Otherwise, idle the en-
gine to raise ATF temperature to 70 — 80
°C (158
— 176
°F) on Subaru Select Monitor. <Ref. to
5AT(diag)-17, READ CURRENT DATA, OPERA-
TION, Subaru Select Monitor.>
2) Park the vehicle on a level surface.
3) After selecting all positions (P, R, N, D), set the
select lever in “P” range. Measure the ATF level
with engine idling for one or two minutes.
4) Make sure that ATF level is above the center be-
tween upper and lower marks at HOT side.
5) If the ATF level is below the center between up-
per and lower marks, add the recommended ATF
until the fluid level is found above the center be-
tween upper and lower marks.
CAUTION:
• Use care not to exceed the upper level.
• When the transmission is cold, be careful not
to add ATF to the upper level on HOT side.
Overfilling of ATF may cause oil splashing.
6) Raise the ATF temperature by driving a distance
of 5 to 10 km (3 to 6 miles). Otherwise, idle the en-
gine to raise ATF temperature to 70 — 80
°C (158
— 176
°F) on Subaru Select Monitor. <Ref. to
5AT(diag)-17, READ CURRENT DATA, OPERA-
TION, Subaru Select Monitor.>
7) Check the ATF for leaks.
Visually check for leaks in the transmission. If there
are leaks, replace the gasket, oil seal, plug or other
parts.
B: REPLACEMENT
1) Lift-up the vehicle.
2) Remove the ATF drain plug to drain ATF.
CAUTION:
Directly after the vehicle has been running, the
ATF is hot. Be careful not to burn yourself.
3) Check the condition of ATF.
<Ref. to 5AT-29, CONDITION CHECK, Automatic
Transmission Fluid.>
4) Tighten the ATF drain plug.
NOTE:
Use a new gasket.
Tightening torque:
20 N
⋅
m (2.0 kgf-m, 14.8 ft-lb)
5) Lower the vehicle.
6) Pour ATF from the oil charge pipe.
Specified fluid:
SUBARU ATF (Part No. K0140Y0700)
Recommended fluid:
IDEMITSU ATF HP
Castrol Transmax J
NOTE:
Use of recommended fluid is permitted only on the
area where the specified fluid is not available.
Capacity:
Fill the same amount of ATF when drained.
Capacity when transmission is overhauled:
9.6 — 10.0
2 (10.1 — 10.6 US qt, 8.4 — 8.8 Imp
qt)
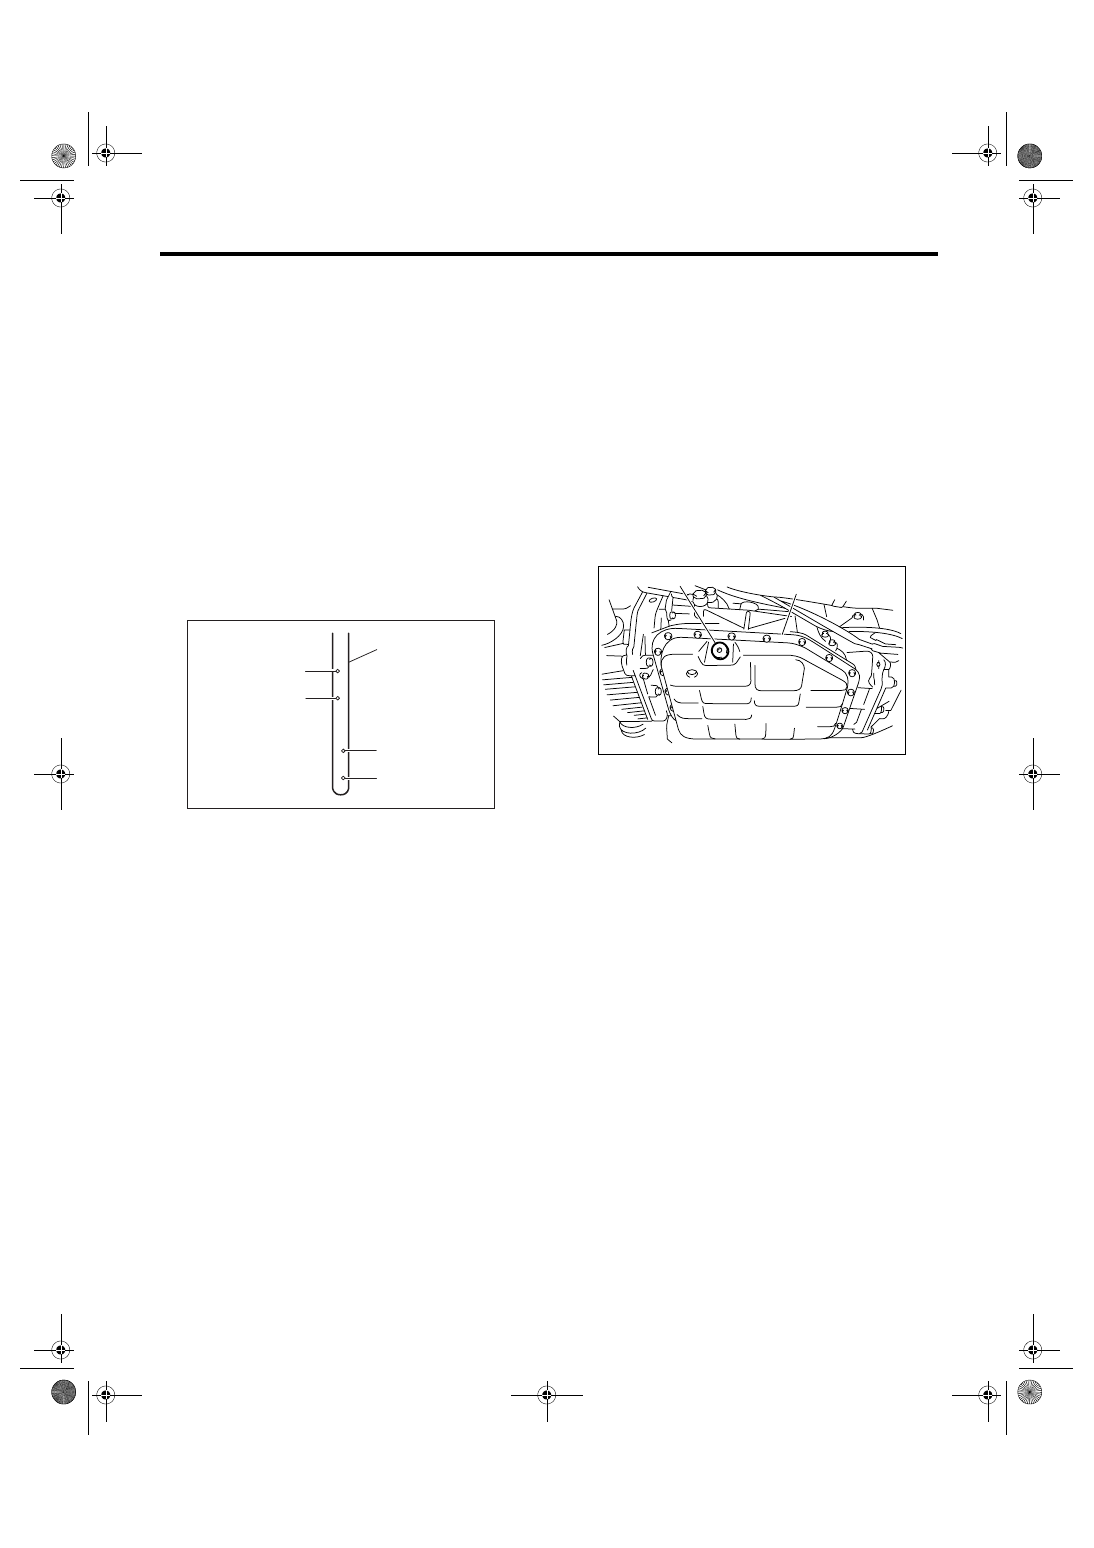
7) Check the level and leaks of ATF.
<Ref. to 5AT-28, INSPECTION, Automatic Trans-
mission Fluid.>
(A) ATF level gauge
(B) Upper level
(C) Lower level
AT-00674
COLD
LF
HOT
LF
(C)
(C)
(B)
(B)
(A)
(A) Oil pan
(B) ATF drain plug
(A)
AT-03126
(B)
5AT-29
AUTOMATIC TRANSMISSION
Automatic Transmission Fluid
C: CONDITION CHECK
NOTE:
When replacing ATF, check the inside condition of transmission body by inspecting the drained ATF.
Fluid condition
Trouble and possible cause
Corrective action
Large amount of metallic pieces are
found.
Excessive wear of the internal of the trans-
mission body
Replace ATF and check if AT operates
correctly.
Thick and varnish-form fluid
Burned clutch and etc.
Replace ATF and check if AT or vehicle
for faulty.
Clouded fluid or bubbles are found in
fluid.
Water mixed in fluid
Replace ATF and check the water enter-
ing point.
5AT-30
AUTOMATIC TRANSMISSION
Differential Gear Oil
3. Differential Gear Oil
A: INSPECTION
1) Park the vehicle on a level surface.
2) Remove the collector cover.
3) Remove the oil level gauge and wipe it clean.
4) Reinsert the level gauge all the way. Be sure that
the level gauge is correctly inserted and in the
proper orientation.
5) Remove the oil level gauge again, and check the
level of differential gear oil. If the differential gear oil
level is below “L” line, add oil to bring the level up to
“F” line.
NOTE:
To prevent overfilling the differential gear oil, do not
fill oil above the “F” line.
B: REPLACEMENT
1) Lift-up the vehicle.
2) Remove the differential gear oil drain plug using
TORX
®
BIT T70, and then drain differential gear
oil.
CAUTION:
• Directly after the vehicle has been running,
differential gear oil is hot. Be careful not to burn
yourself.
• Be careful not to spill the differential gear oil
on exhaust pipe to prevent it from emitting
smoke or fire. When the differential gear oil is
spilled on exhaust pipe, wipe it away complete-
ly.
3) Tighten the differential gear oil drain plug using
TORX
®
BIT T70.
NOTE:
Use a new gasket.
Tightening torque:
70 N
⋅
m (7.1 kgf-m, 51.6 ft-lb)
4) Lower the vehicle.
5) Pour gear oil through the gauge hole.
Recommended gear oil:
<Ref. to 5AT-3, RECOMMENDED GEAR OIL,
SPECIFICATION, General Description.>
Gear oil capacity:
1.3 — 1.5
2 (1.3 — 1.6 US qt, 1.1 — 1.3 Imp qt)
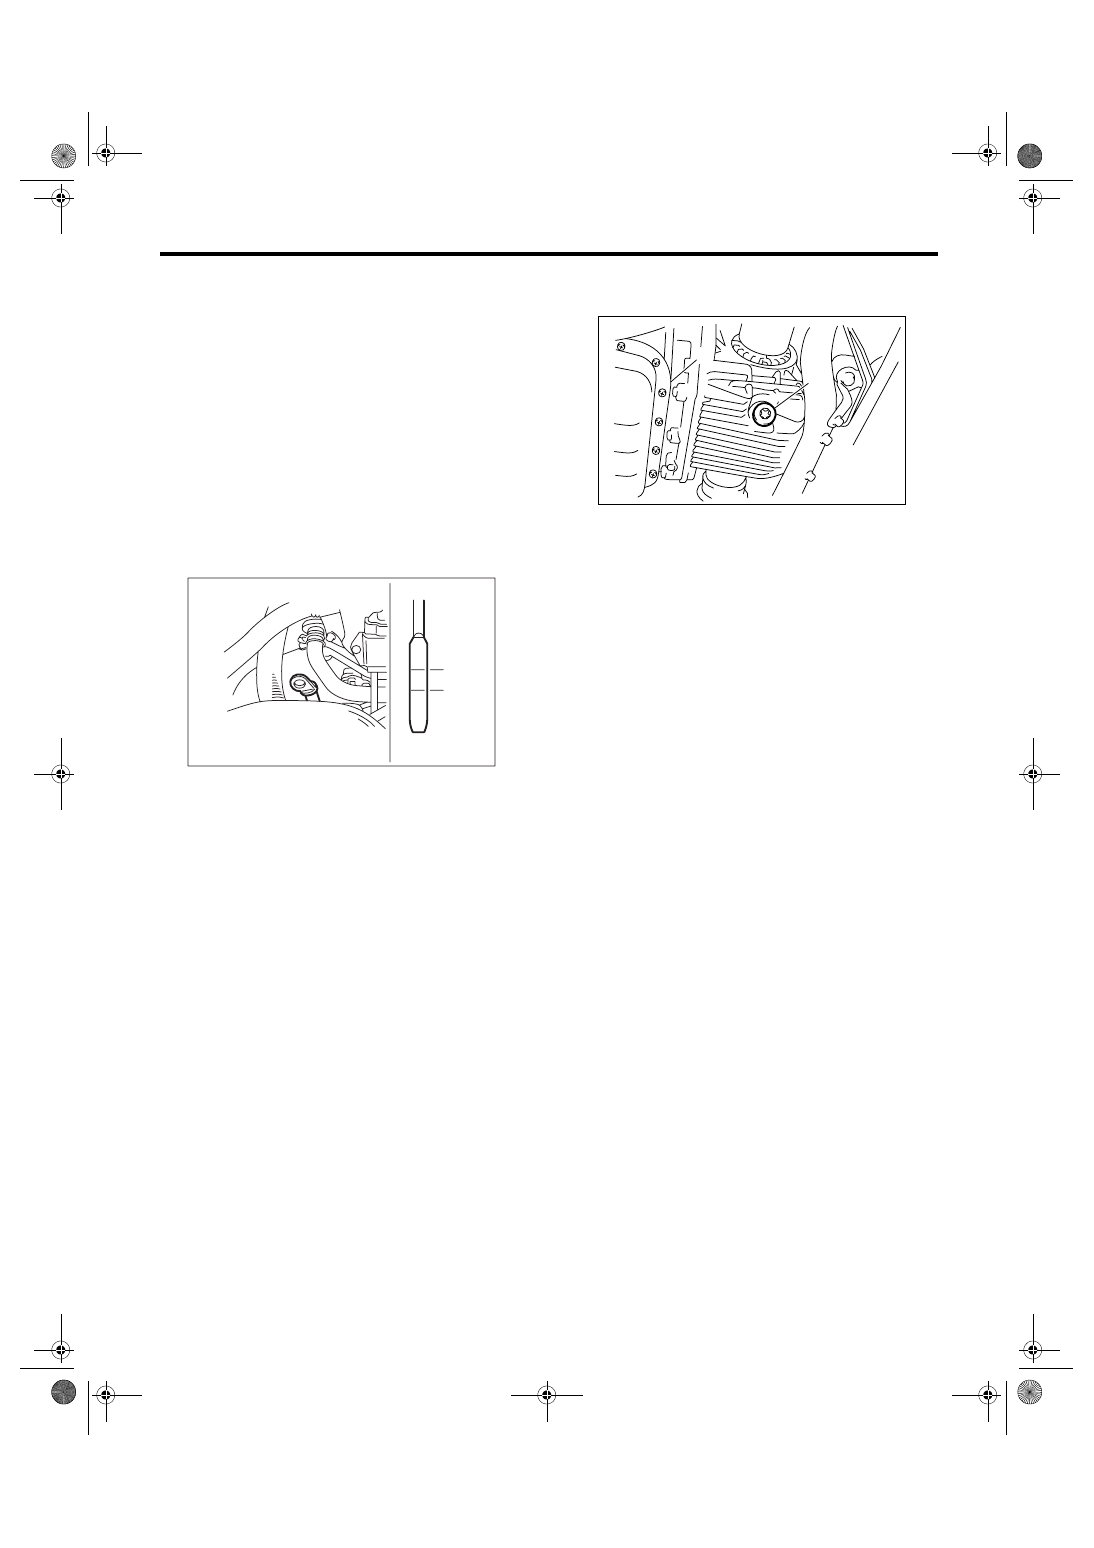
6) Check the level of differential gear oil.
<Ref. to 5AT-30, INSPECTION, Differential Gear
Oil.>
(A) Upper level
(B) Lower level
AT-00017
( A )
( B )
LF
(A) Oil pan
(B) Differential gear oil drain plug
(B)
AT-03127
(A)
Нет комментариевНе стесняйтесь поделиться с нами вашим ценным мнением.
Текст