Subaru Legacy (2005 year). Service manual — part 80
EX(H4SO 2.0)-7
EXHAUST
Front Exhaust Pipe
11) Remove the front oxygen (A/F) sensor and rear
oxygen sensor. <Ref. to FU(H4SO 2.0)-32, RE-
MOVAL, Front Oxygen (A/F) Sensor.> <Ref. to
FU(H4SO 2.0)-33, REMOVAL, Rear Oxygen Sen-
sor.> or <Ref. to FU(H4SO 2.5)-35, REMOVAL,
Front Oxygen (A/F) Sensor.> <Ref. to FU(H4SO
2.5)-36, REMOVAL, Rear Oxygen Sensor.>
B: INSTALLATION
1) Install the front oxygen (A/F) sensor and rear ox-
ygen sensor. <Ref. to FU(H4SO 2.0)-32, INSTAL-
LATION, Front Oxygen (A/F) Sensor.> <Ref. to
FU(H4SO 2.0)-33, INSTALLATION, Rear Oxygen
Sensor.> or <Ref. to FU(H4SO 2.5)-35, INSTALLA-
TION, Front Oxygen (A/F) Sensor.> <Ref. to
FU(H4SO 2.5)-36, INSTALLATION, Rear Oxygen
Sensor.>
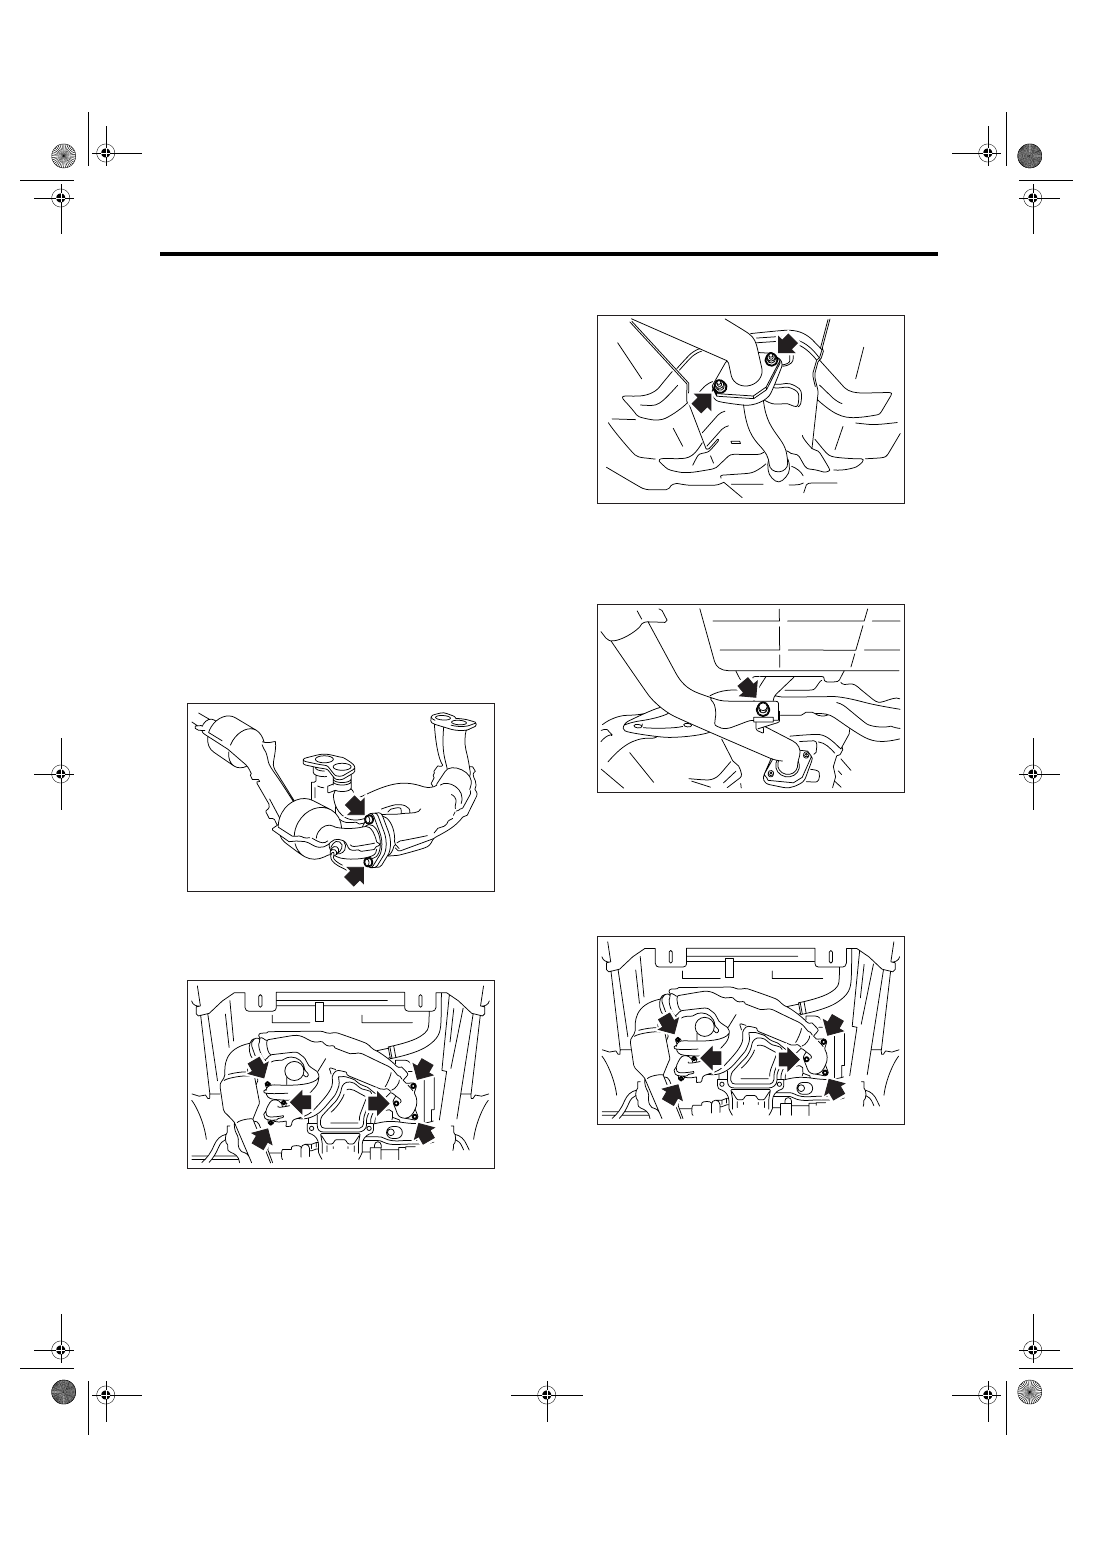
2) Install the front exhaust pipe to center exhaust
pipe.
NOTE:
Use a new gasket.
Tightening torque:
40.8 N
⋅
m (4.2 kgf-m, 30.1 ft-lb)
3) Install the front and center exhaust pipe assem-
bly to vehicle.
4) Temporarily tighten the nuts which hold front ex-
haust pipe to cylinder heads.
5) Install the front and center exhaust pipe assem-
bly to rear exhaust pipe.
NOTE:
Use a new gasket.
Tightening torque:
18 N
⋅
m (1.8 kgf-m, 13.0 ft-lb)
6) Tighten the bolt which holds center exhaust pipe
to hanger bracket.
Tightening torque:
35 N
⋅
m (3.6 kgf-m, 26.0 ft-lb)
7) Tighten the nuts which hold front exhaust pipe to
cylinder heads.
NOTE:
Use a new gasket.
Tightening torque:
30 N
⋅
m (3.1 kgf-m, 22.4 ft-lb)
8) Install the under cover.
EX-00217
EX-00215
EX-00214
EX-00216
EX-00215
EX(H4SO 2.0)-8
EXHAUST
Front Exhaust Pipe
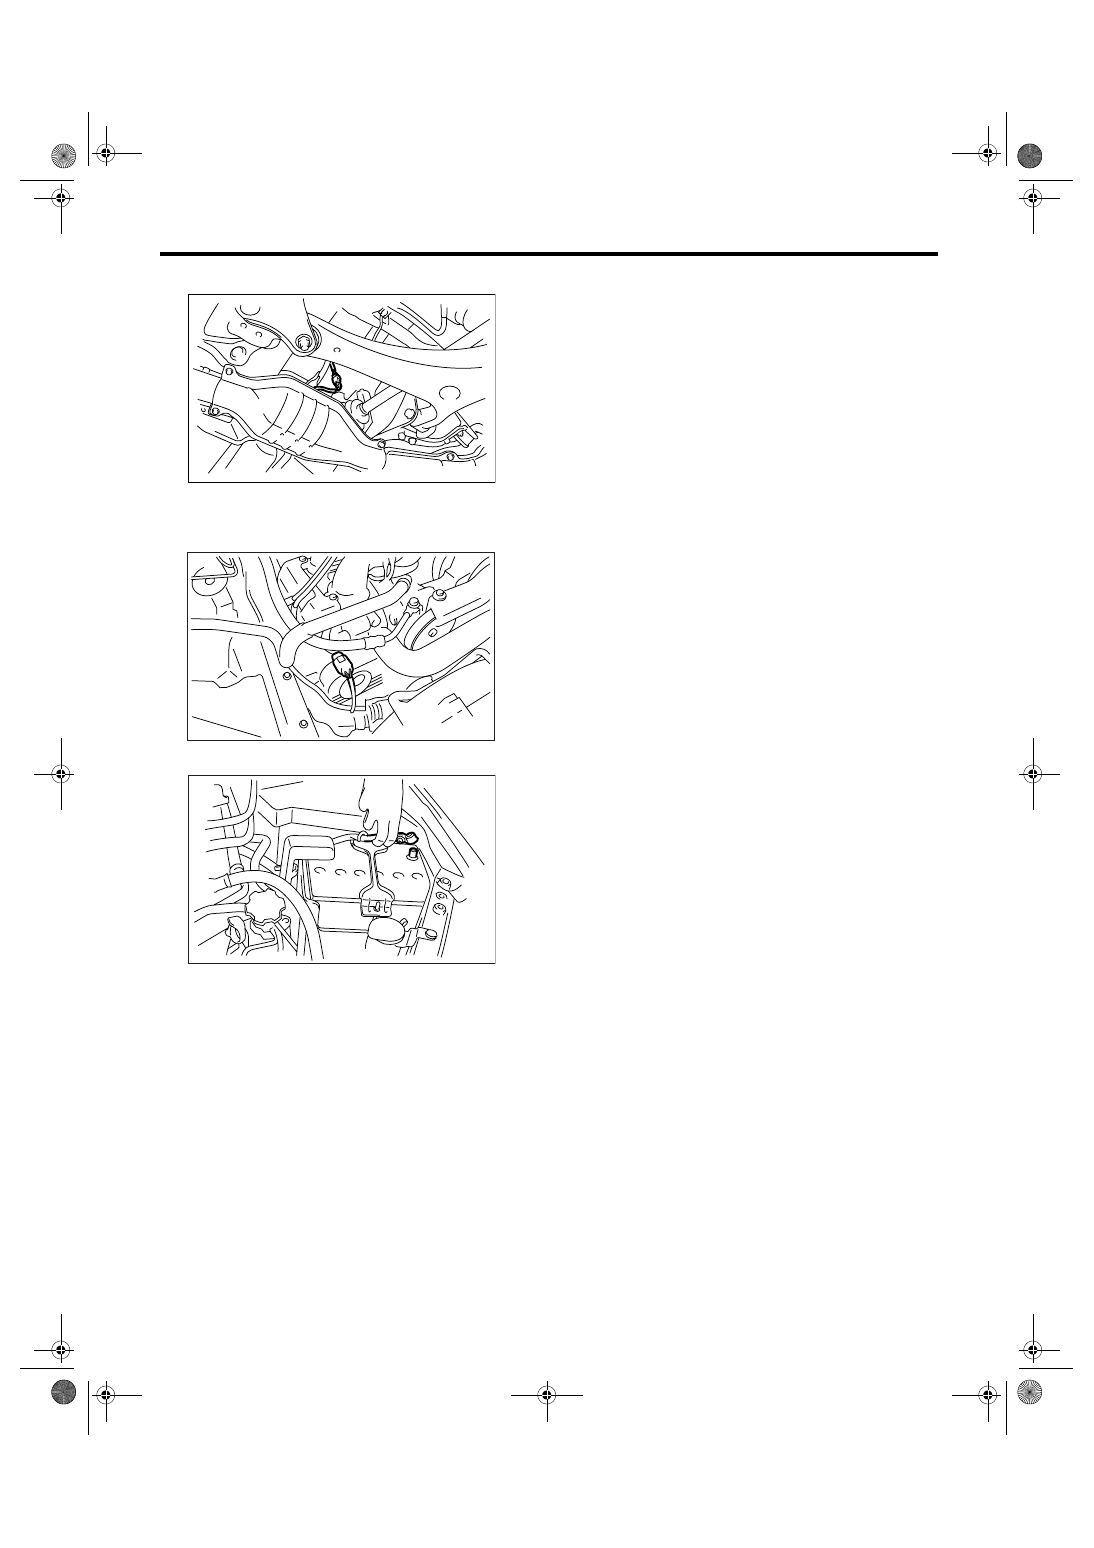
9) Connect the rear oxygen sensor connector.
10) Lower the vehicle.
11) Connect the front oxygen (A/F) sensor connec-
tor.
12) Connect the ground cable to battery.
C: INSPECTION
1) Check the connections and welds for exhaust
leaks.
2) Check for hole or rust.
FU-01116
ME-00859
IN-00203
EX(H4SO 2.0)-9
EXHAUST
Center Exhaust Pipe
3. Center Exhaust Pipe
A: REMOVAL
After removing the center and front exhaust pipes
as an assembly, separate them. Refer to “Front Ex-
haust Pipe” for removal procedure. <Ref. to
EX(H4SO 2.0)-6, REMOVAL, Front Exhaust Pipe.>
B: INSTALLATION
Install the center exhaust pipe and front exhaust
pipe as an assembly. Refer to “Front Exhaust Pipe”
for installation procedure. <Ref. to EX(H4SO 2.0)-
7, INSTALLATION, Front Exhaust Pipe.>
C: INSPECTION
1) Check the connections and welds for exhaust
leaks.
2) Check for hole or rust.
EX(H4SO 2.0)-10
EXHAUST
Rear Exhaust Pipe
4. Rear Exhaust Pipe
A: REMOVAL
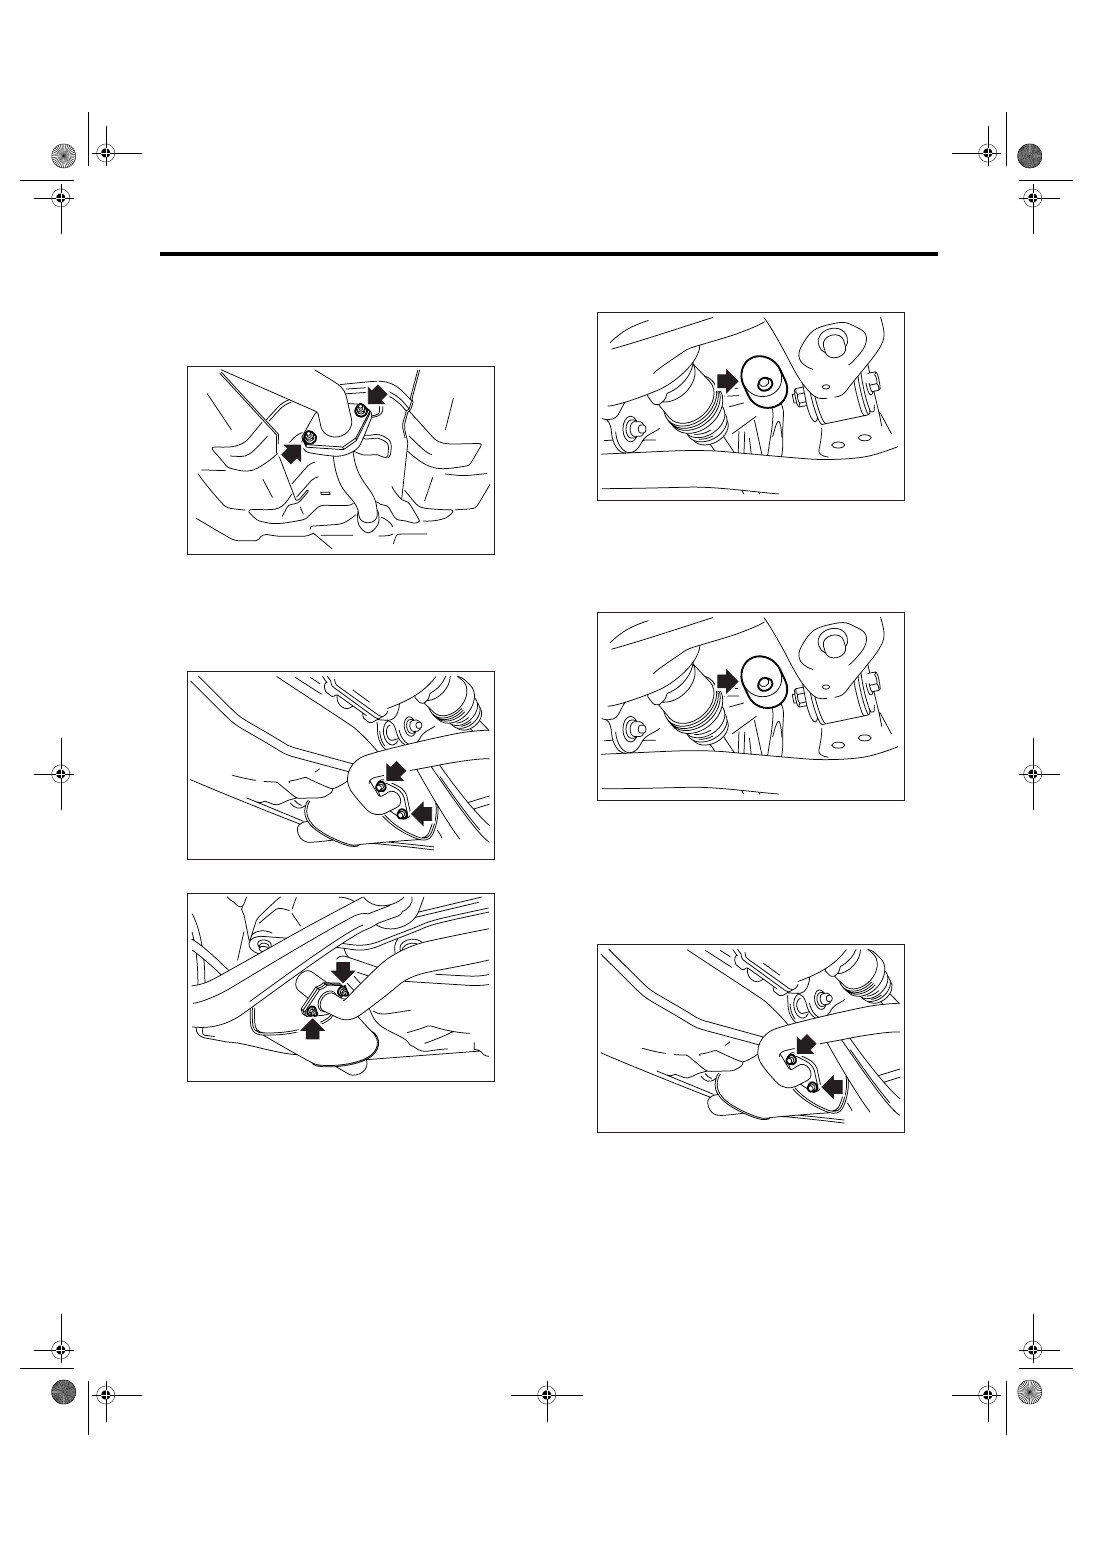
1) Separate the rear exhaust pipe from center ex-
haust pipe.
2) Separate the rear exhaust pipe from muffler.
CAUTION:
Be careful not to pull down the rear exhaust
pipe.
• LH side
• RH side (2.5 L model)
3) Apply a coat of spray type lubricant to the mating
area of cushion rubber.
4) Remove the rear exhaust pipe bracket from
cushion rubber.
B: INSTALLATION
1) Apply a coat of spray type lubricant to the mating
area of cushion rubber.
2) Install the rear exhaust pipe bracket to cushion
rubber.
3) Install the rear exhaust pipe to muffler.
NOTE:
Use a new gasket and self-locking nut.
Tightening torque:
48 N
⋅
m (4.9 kgf-m, 35.4 ft-lb)
• LH side
EX-00214
EX-00222
EX-00218
EX-00219
EX-00219
EX-00222
Нет комментариевНе стесняйтесь поделиться с нами вашим ценным мнением.
Текст