Subaru Legacy (2005 year). Service manual — part 738
DI-59
DIFFERENTIALS
Rear Differential (VA-type)
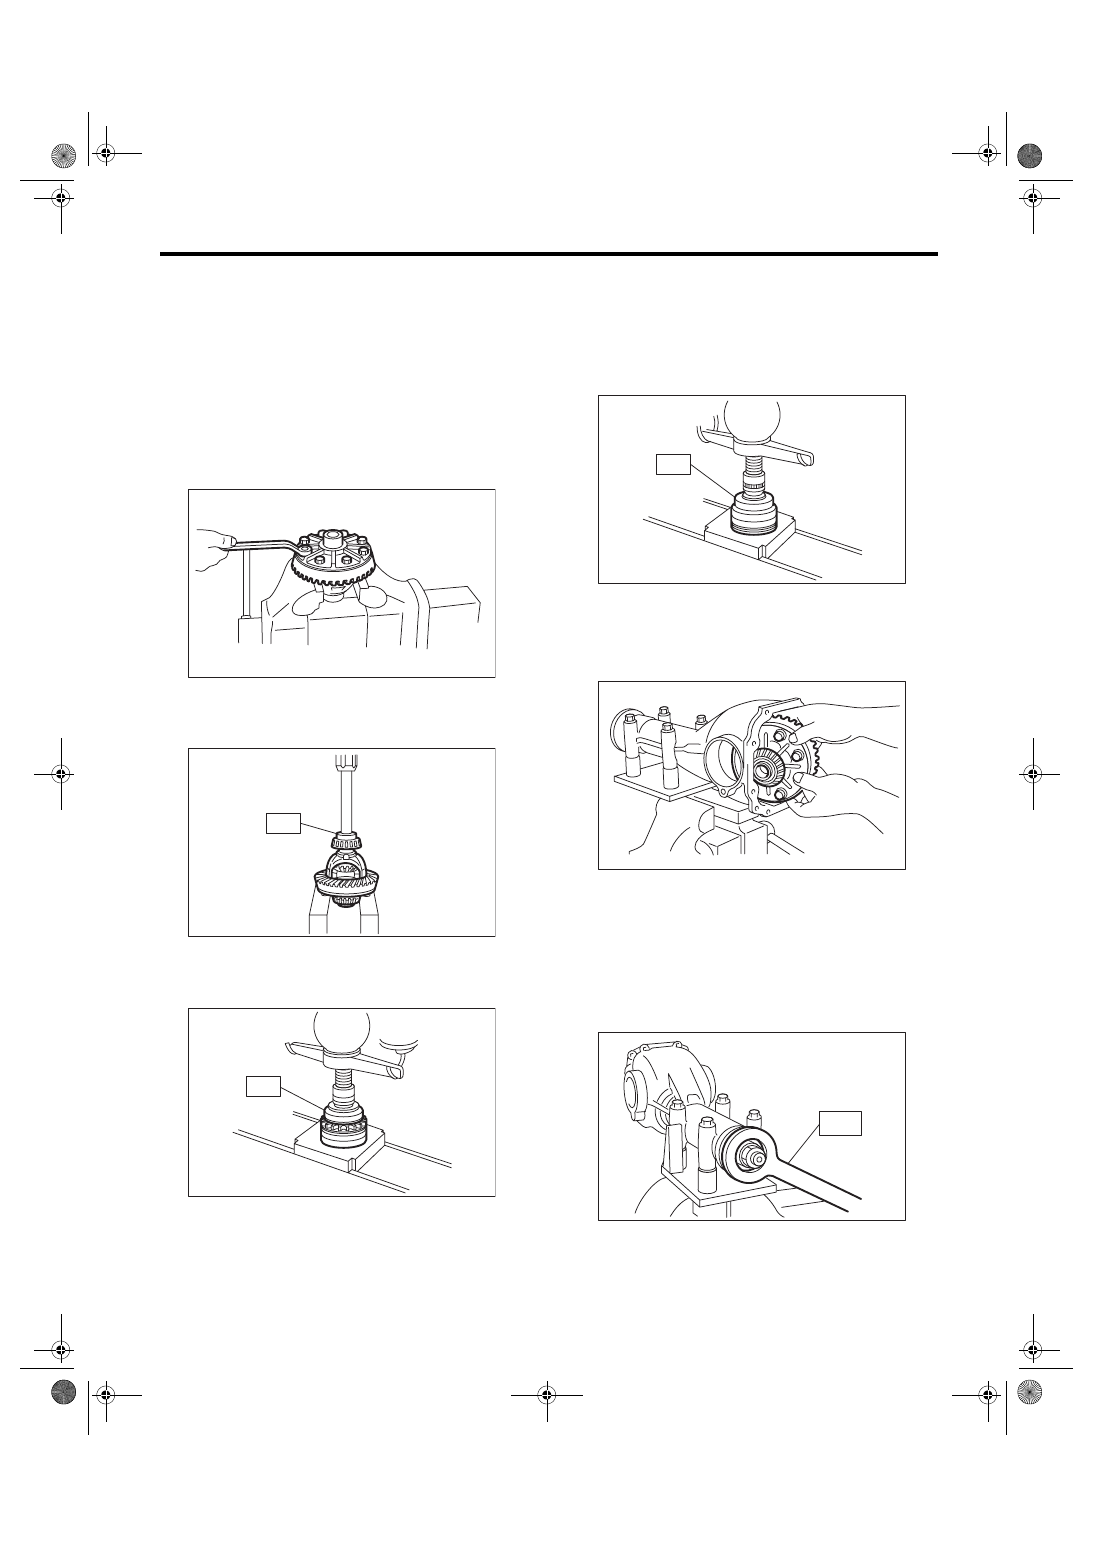
11) Install the hypoid driven gear on differential
case.
NOTE:
• Before installing bolts, apply Lock Tite to bolt
threads.
Lock Tite:
THREE BOND 1324 (Part No. 004403042)
• Tighten diagonally while tapping the bolt heads.
Tightening torque:
62 N
⋅
m (6.3 kgf-m, 45.6 ft-lb)
12) Press the side bearing into differential case us-
ing ST.
ST
498485400
DRIFT
13) Assemble holders.
(1) Install the oil seal into holder RH and LH.
ST
498447100
INSTALLER
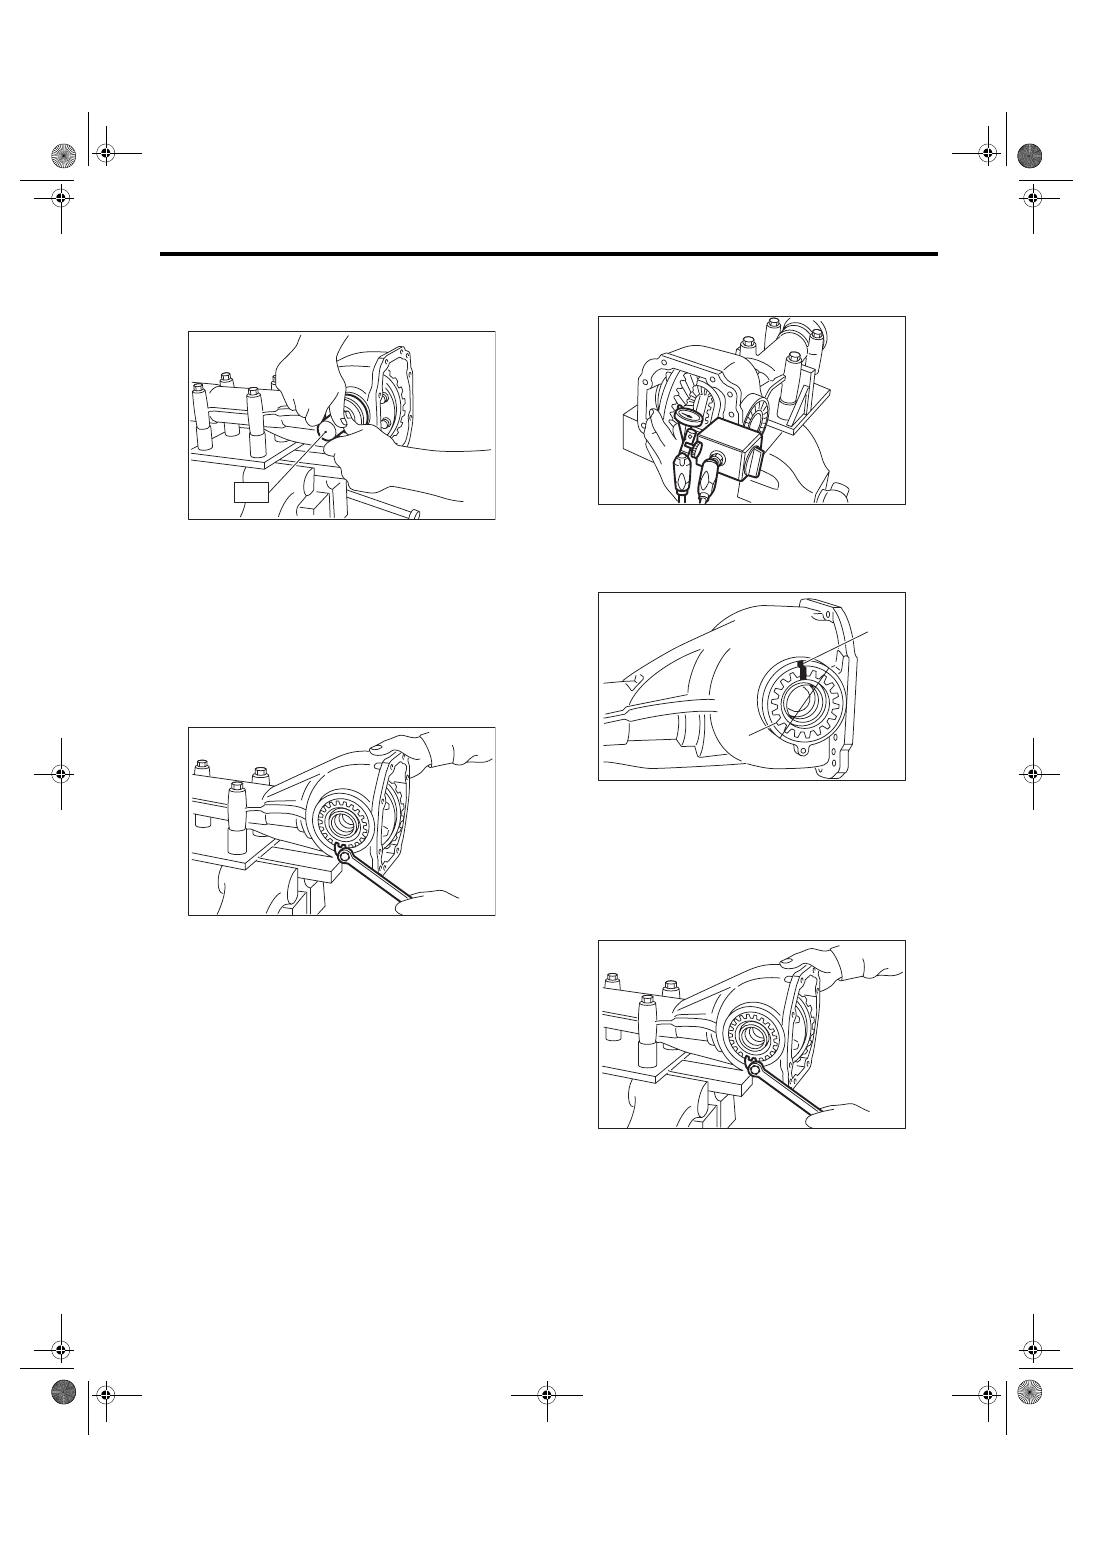
(2) Install the bearing race into holder RH and
LH.
ST
398477702
DRIFT
CAUTION:
Make sure that the oil seal, bearing outer race
and cone are properly assembled.
(3) Install the differential assembly into differen-
tial carrier in the reverse order of disassembly.
NOTE:
Be careful not to hit the teeth against the case.
(4) Temporally tighten the side holder RH and
LH in differential carrier to install.
14) Perform the backlash adjustment between the
hypoid driven gear and drive pinion, and preload
adjustment of differential side bearing.
(1) Turn the drive pinion with ST for better fitting
of differential side bearing.
ST
498427200
FLANGE WRENCH
DI-00068
ST
DI-00095
ST
DI-00166
ST
DI-00167
DI-00134
ST
DI-00169
DI-60
DIFFERENTIALS
Rear Differential (VA-type)
(2) Screw in the side holder LH until light con-
tact is made with ST.
ST
499785500
WRENCH ASSY
(3) Back off the side (hypoid driven gear side)
holder approx. 1 1/2 teeth of holder, and tighten
the other side holder by approx. 2 teeth (approx.
1 1/2 + 1/2 teeth). [Back off amount of side (hy-
poid driven gear side) holder + 1/2 tooth.]
This + 1/2 tooth gives preload.
(4) Temporarily tighten the lock plate.
NOTE:
Turn over the lock plate to displace the holder 1/2
tooth.
(5) Measure the hypoid driven gear-to-drive
pinion backlash. Set the magnet base on differ-
ential carrier. Align the contact point of dial
gauge with tooth face of hypoid driven gear, and
move hypoid driven gear while holding drive pin-
ion still. Read the value indicated on dial gauge.
NOTE:
If measured backlash is not within specified range,
repeat the procedures for pinion driven gear set
backlash adjustment and differential side bearing
preload adjustment.
Backlash:
0.10 — 0.15 mm (0.0039 — 0.0059 in)
15) Draw a matching mark on both differential car-
rier and holder. Remove the holder side at a time.
Replace in the original position after inserting an O-
ring and applying grease to threaded portion.
16) Tighten the bolt of lock plate to specified
torque.
Tightening torque:
25 N
⋅
m (2.5 kgf-m, 18.4 ft-lb)
DI-00133
ST
DI-00132
(A) Alignment mark
(B) Holder
DI-00172
(A)
(B)
DI-00173
DI-00132
DI-61
DIFFERENTIALS
Rear Differential (VA-type)
17) Recheck the hypoid driven gear to pinion back-
lash.
Backlash:
0.10 — 0.15 mm (0.0039 — 0.0059 in)
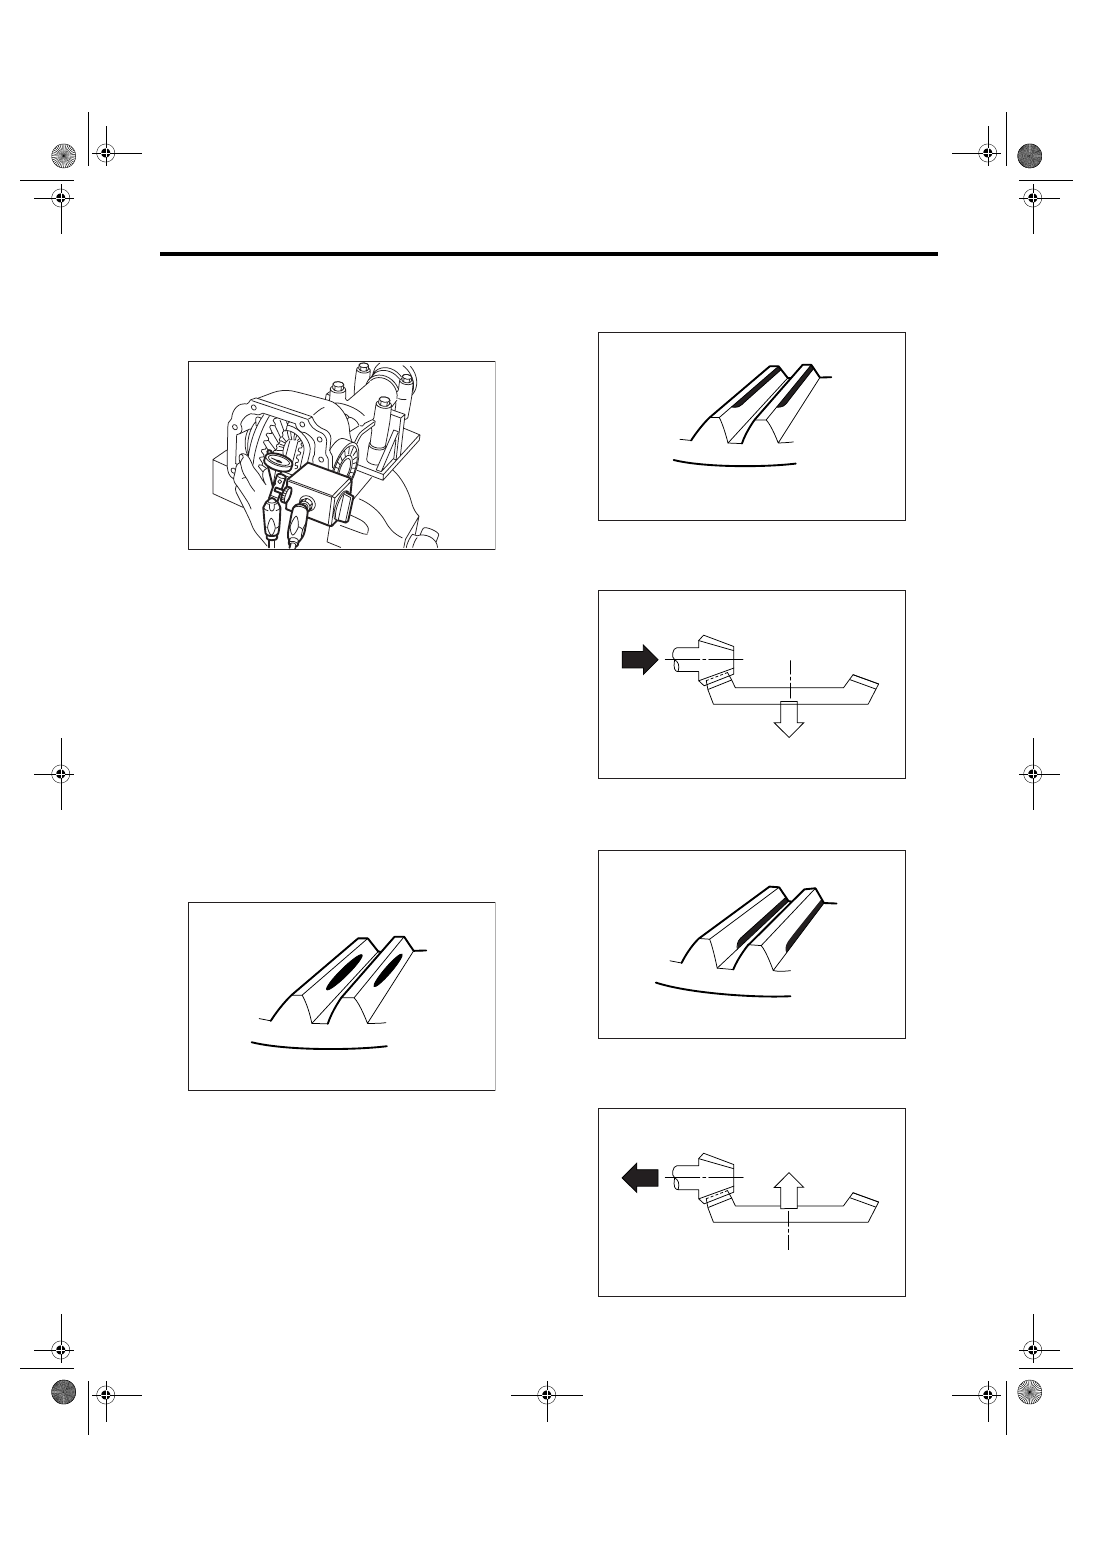
18) Checking and adjusting the tooth contact of hy-
poid driven gear
(1) Apply an even coat of red lead on both sides
of three or four teeth on the hypoid driven gear.
Check the contact pattern after rotating the hy-
poid driven gear several revolutions back and
forth until a definite contact pattern appears on
the hypoid driven gear.
(2) When the contact pattern is incorrect, read-
just.
NOTE:
Be sure to wipe off red lead completely after adjust-
ment is completed.
• Correct tooth contact
Checking item: Tooth contact pattern is slightly
shifted toward to toe side under no-load
rotation. [When loaded, contact pattern moves
toward heel.]
• Face contact
Checking item: Backlash is too large.
Contact pattern
Corrective action: Increase thickness of drive pin-
ion height adjusting washer in order to bring drive
pinion close to hypoid driven gear.
• Flank contact
Checking item: Backlash is too small.
Contact pattern
Corrective action: Reduce thickness of drive pinion
height adjusting washer in order to bring drive pin-
ion away from hypoid driven gear.
(A) Toe side
(B) Heel side
DI-00172
AT-00207
(A)
(B)
AT-00208
AT-00212
AT-00209
AT-00213
DI-62
DIFFERENTIALS
Rear Differential (VA-type)
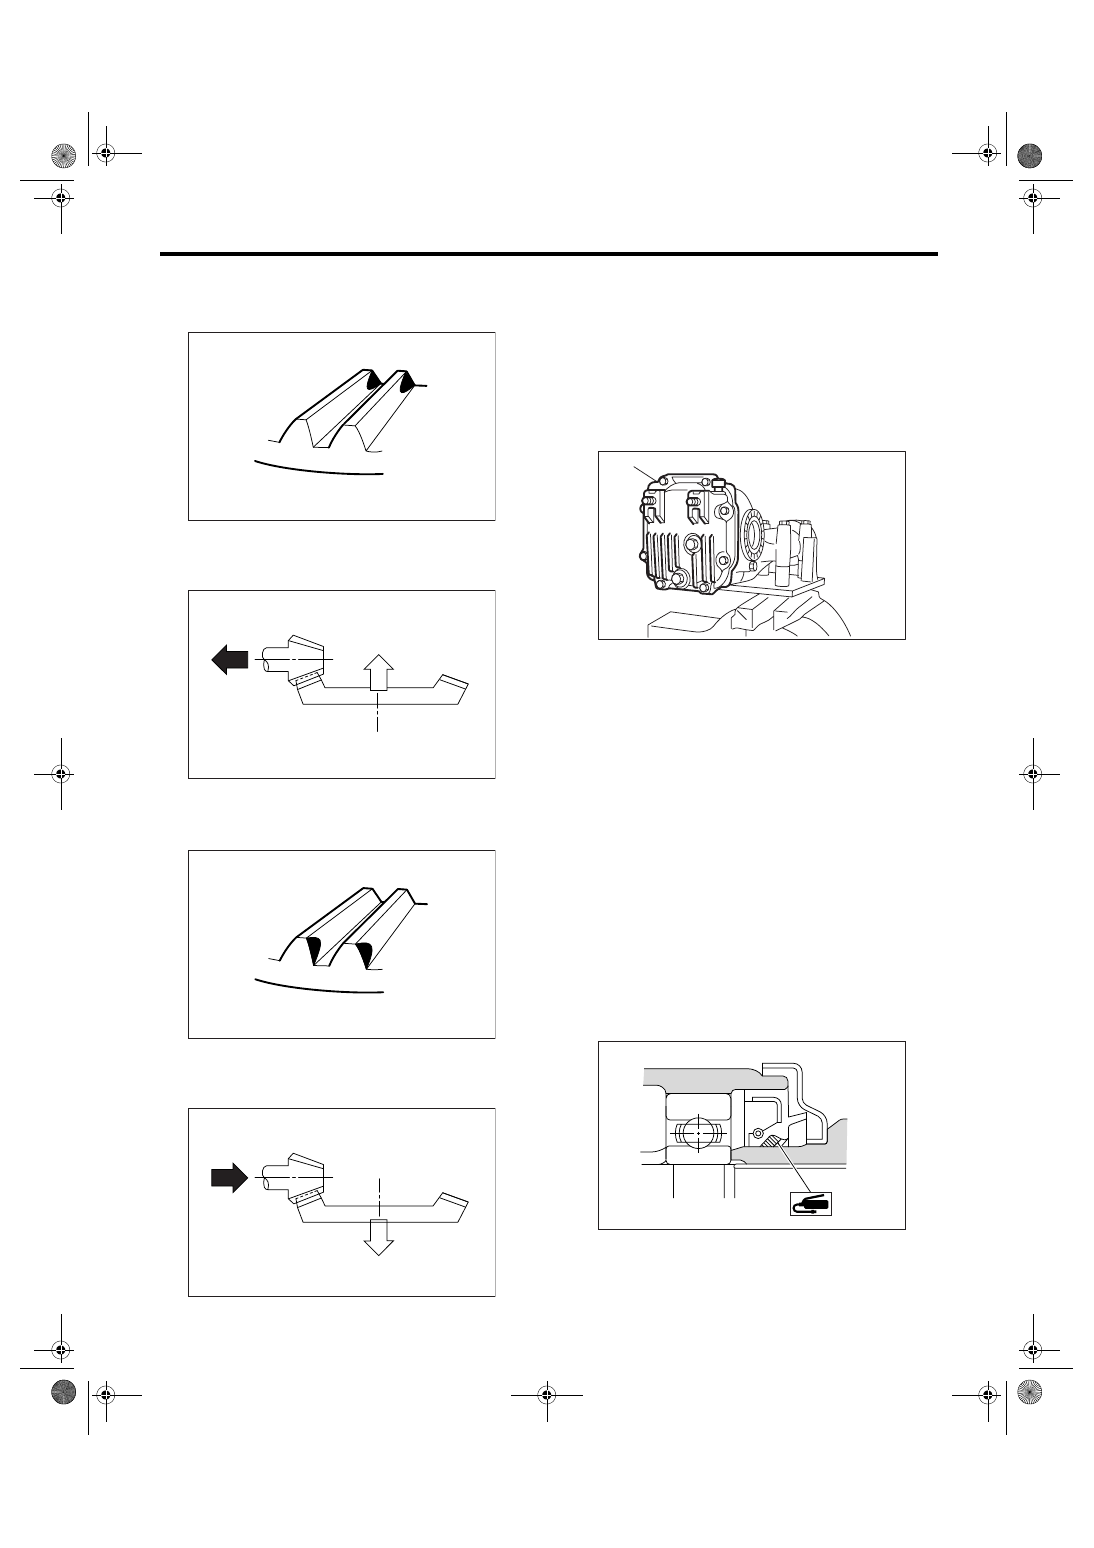
• Toe contact (inside end contact)
Checking item: Contact areas is small
Contact pattern
Corrective action: Reduce thickness of drive pinion
height adjusting washer in order to bring drive pin-
ion away from hypoid driven gear.
• Heel contact (outside end contact)
Checking item: Contact areas is small
Contact pattern
Corrective action: Increase thickness of drive pin-
ion height adjusting washer in order to bring drive
pinion close to hypoid driven gear.
19) If proper tooth contact is not obtained, once
again adjust the drive pinion height and the differ-
ential side bearing preload (already mentioned)
and the hypoid gear backlash.
20) Install the new gasket and rear cover to differ-
ential carrier and tighten the bolts to specified
torque.
Tightening torque:
25 N
⋅
m (2.5 kgf-m, 18.4 ft-lb)
2. VA2-TYPE
NOTE:
• Assemble in the reverse order of disassembly.
• Check and adjust each part during assembly.
• Use a new gasket.
• Keep the shims and washers in order, so that
they are not improperly installed.
• Thoroughly clean the surfaces on which the
shims, washers and bearings are to be installed.
• Apply gear oil when installing the bearings and
thrust washers.
• Be careful not to mix up the bearing races RH
and LH.
• Replace the oil seal with a new one at every dis-
assembly. Apply grease to the lips when installing
the oil seal.
• Be careful not to mix up the differential oil seal
RH and LH.
AT-00210
AT-00213
AT-00211
AT-00212
(A) Rear cover
(A)
DI-00189
DI-00463
Нет комментариевНе стесняйтесь поделиться с нами вашим ценным мнением.
Текст