Subaru Legacy (2005 year). Service manual — part 993
EI-29
EXTERIOR/INTERIOR TRIM
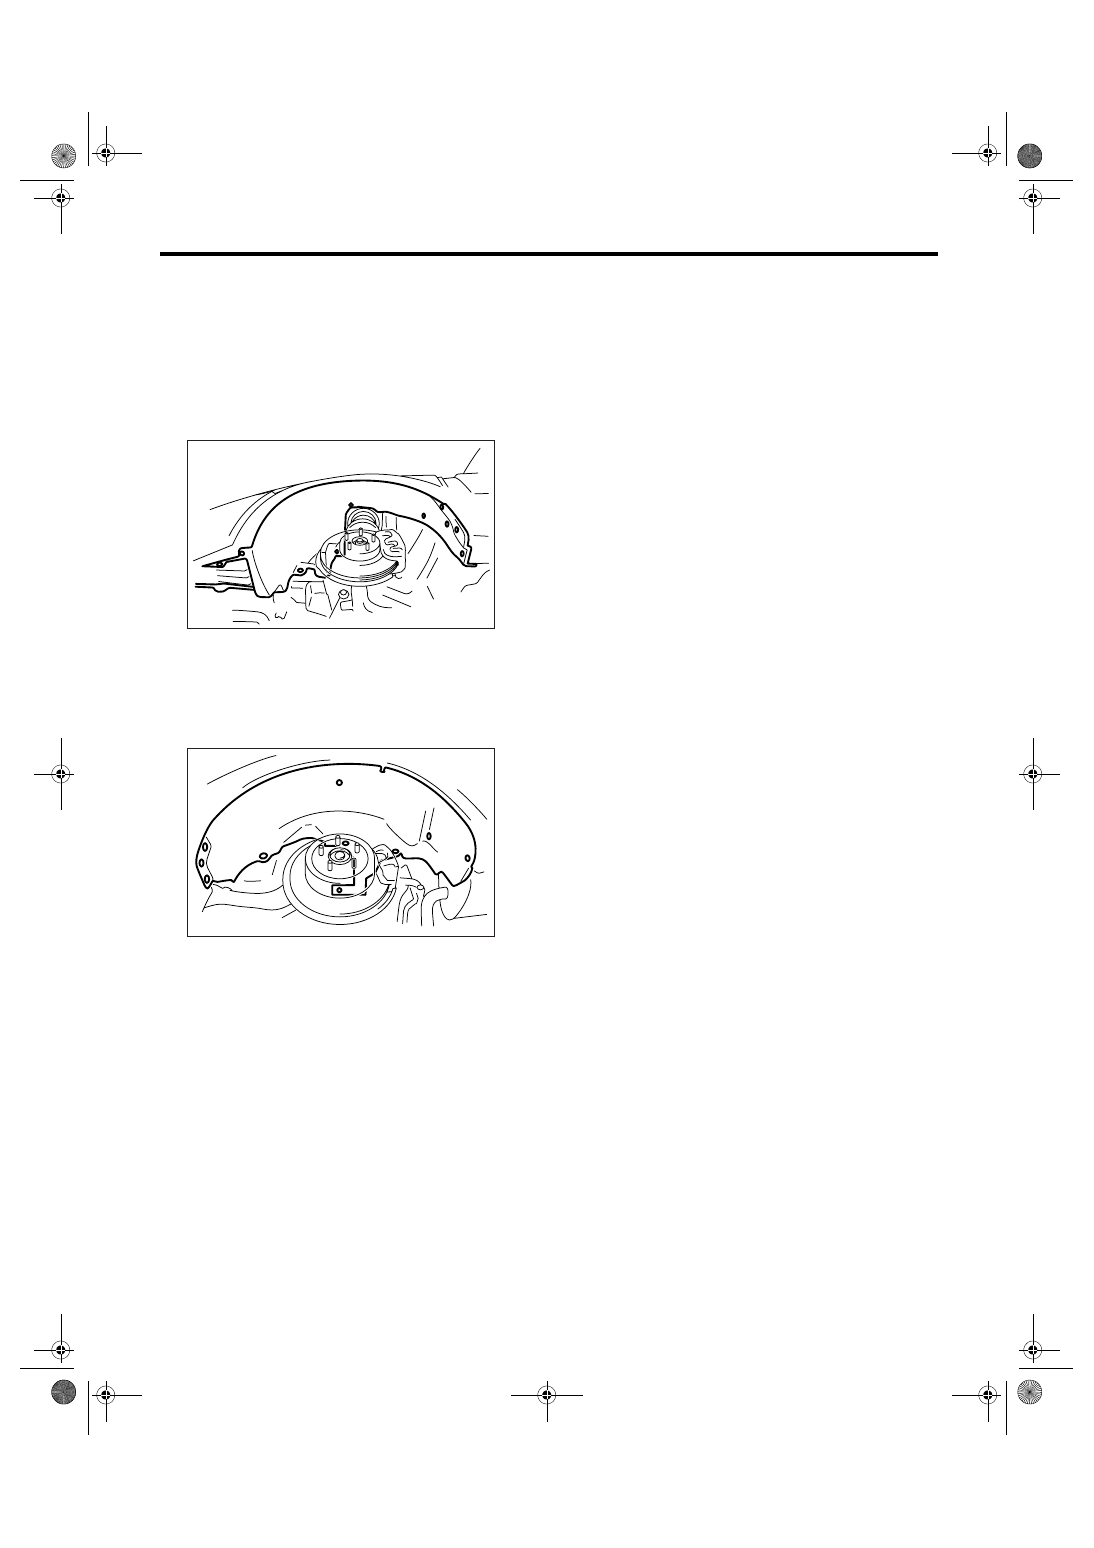
Mud Guard
7. Mud Guard
A: REMOVAL
1. FRONT MUD GUARD
1) Jack-up the vehicle.
2) Remove the front wheels.
3) Loosen the screws and clips to remove mud
guard.
2. REAR MUD GUARD
1) Jack-up the vehicle.
2) Remove the rear wheels.
3) Loosen the screws and clips to remove mud
guard.
B: INSTALLATION
1. FRONT MUD GUARD
Install in the reverse order of removal.
2. REAR MUD GUARD
Install in the reverse order of removal.
EI-00639
EI-00640
EI-30
EXTERIOR/INTERIOR TRIM
Front Bumper
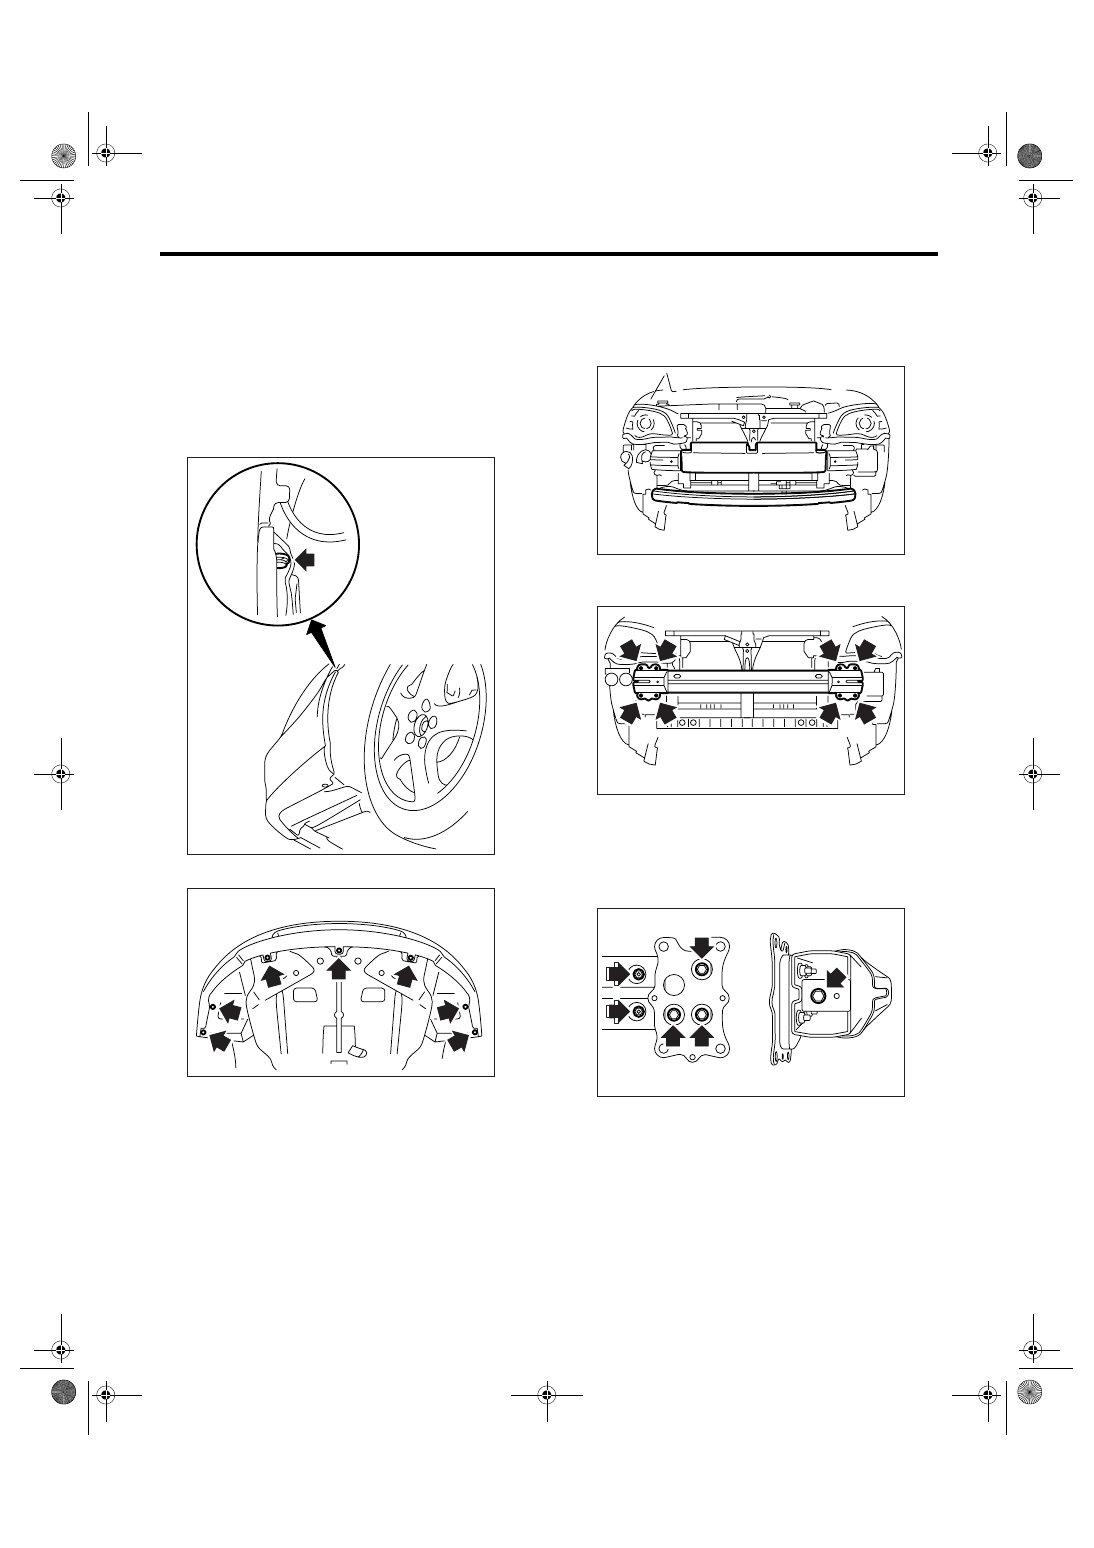
8. Front Bumper
A: REMOVAL
1. FRONT BUMPER FACE
1) Disconnect the ground cable from battery.
2) Remove the front grille. <Ref. to EI-24, REMOV-
AL, Front Grille.>
3) Turn over the front mud guard, and remove the
clip connecting fender with bumper.
4) Remove the clips at the lower side of bumper.
5) Disconnect the fog light connector. (Model with
fog light)
6) Remove the bumper from vehicle body.
7) Remove the fog light from bumper face. <Ref. to
LI-21, REMOVAL, Front Fog Light Assembly.>
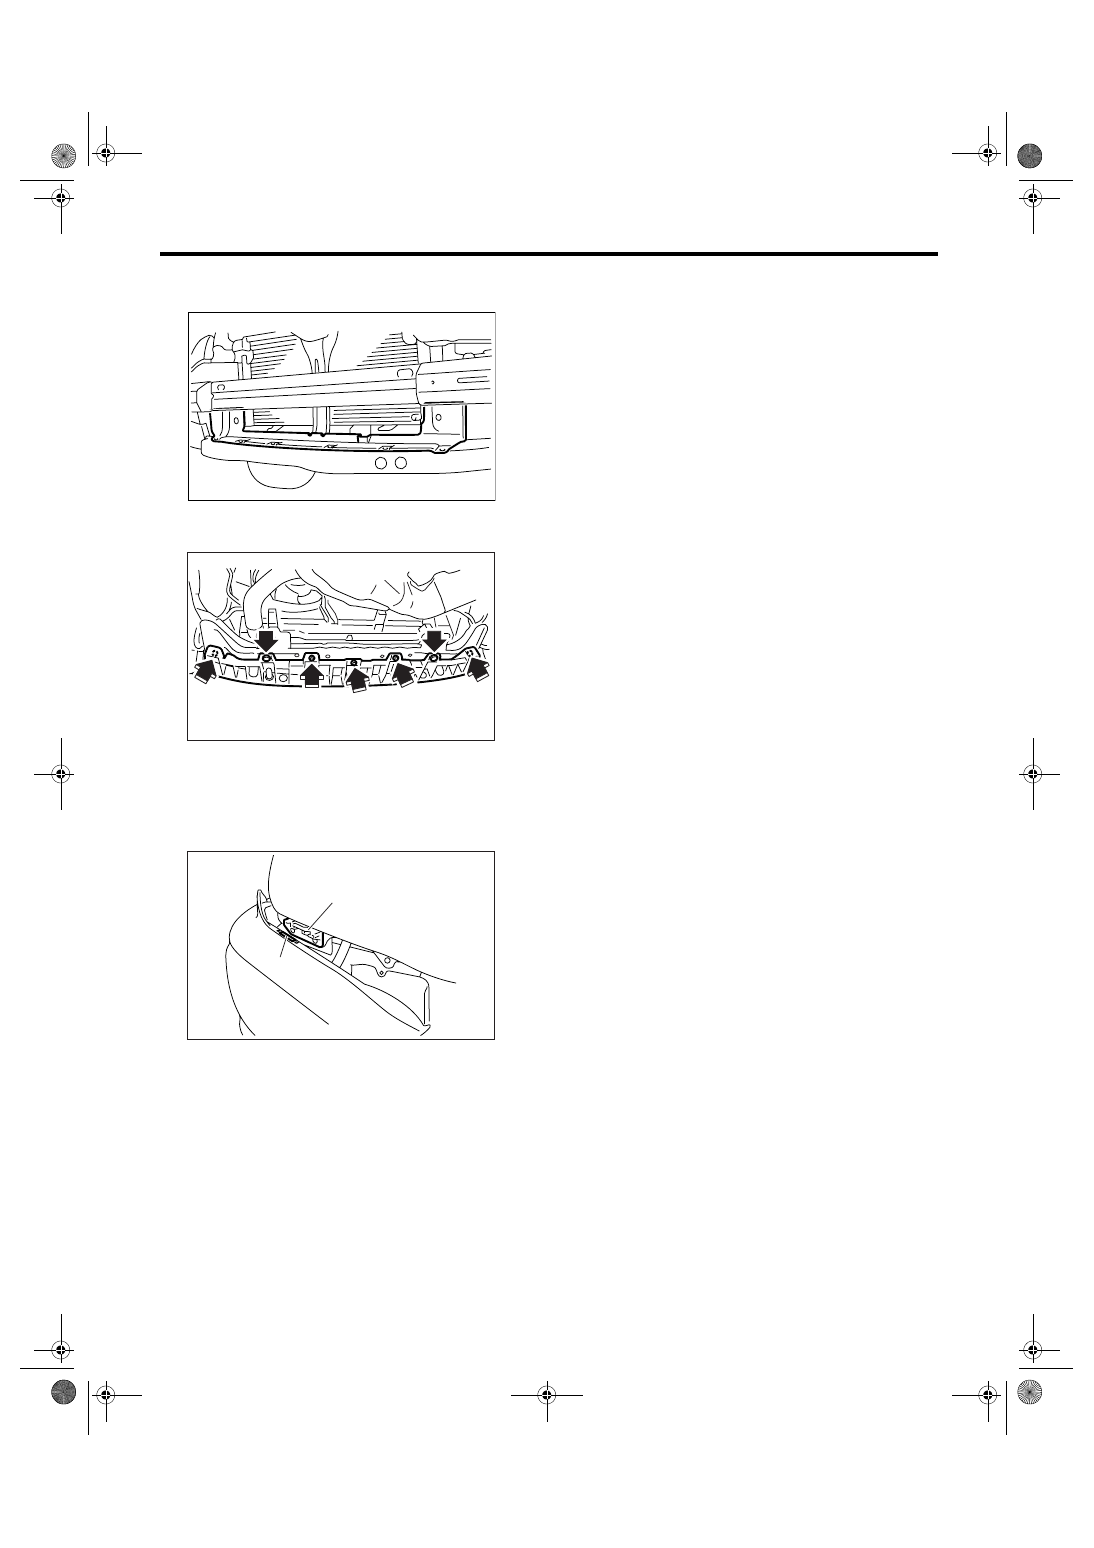
2. FRONT BUMPER BEAM ASSEMBLY
1) Disconnect the ground cable from battery.
2) Remove the front grille. <Ref. to EI-24, REMOV-
AL, Front Grille.>
3) Remove the front bumper face. <Ref. to EI-30,
FRONT BUMPER FACE, REMOVAL, Front
Bumper.>
4) Remove the energy absorber foam from bumper
beam.
5) Remove the bolts, and remove the bumper
beam assembly from vehicle body.
NOTE:
After all bolts are removed, raise the whole bumper
beam a little to remove it from vehicle body.
6) Remove the bolts and nuts to disassemble
bumper beam.
EI-00572
EI-00573
EI-00575
EI-00576
EI-00577
EI-31
EXTERIOR/INTERIOR TRIM
Front Bumper
7) Remove the clips, and remove the radiator
guide.
8) Remove the bolts and clips, and remove the
bumper lower center bracket.
B: INSTALLATION
1. FRONT BUMPER FACE
1) Install in the reverse order of removal.
2) Fit the slider (A) to the guide plate (B) securely.
2. FRONT BUMPER BEAM ASSEMBLY
Install in the reverse order of removal.
Tightening torque:
Refer to “COMPONENT” of “General Descrip-
tion”. <Ref. to EI-5, FRONT BUMPER, COM-
PONENT, General Description.>
EI-00801
EI-00578
EI-00571
(B)
(A)
EI-32
EXTERIOR/INTERIOR TRIM
Front Bumper
C: REPAIR
1. COATING METHOD FOR PP BUMPER
Pro-
cess
No.
Process name
Job contents
1
Bumper installation
Place the bumper on a paint worktable as
required. Use the paint worktable conforming to
inner shape of bumper when possible.
(1) Bumper
(2) Bumper cross-section view
2
Masking
Mask specified part (black base) with masking tape. Use masking tape for PP (example: Nichiban
No. 533, etc.).
3
Degreasing, clean-
ing
Clean all parts to be painted with white gasoline, ordinary alcohol, etc. to remove dirt, oil, fat, etc.
4
Primer paint
Apply primer to all parts to be painted, using spray gun. Use primer (non-color).
5
Drying
Dry at normal temperature [10 — 15 min. at 20
°C (68°F)].
In half-dried condition, PP primer paint is dissolved by solvent, e. g. thinner, etc.
Therefore, if dust or dirt must be removed, use ordinary alcohol, etc.
6
Top coat paint (I)
Non-colored
Metallic paint
Use section (block) paint for top coat.
• Paint to be used (for each color):
Solid paint
Hardener PB
Thinner T-301
• Mixing ratio:
Main agent vs. hardener = 4:1
• Viscosity: 10 — 13 sec. /20
°C (68°F)
• Film thickness: 35 — 45
µ
• Spraying pressure: 245 — 343 kPa
(2.5 — 3.5 kgf/cm
2
, 36 — 50 psi)
Use section (block) paint for top coat.
• Paint to be used (for each color):
Metallic paint
Hardener PB
Thinner T-306
• Mixing ratio:
Main agent vs. hardener = 10:1
• Viscosity: 10 — 13 sec. /20
°C (68°F)
• Film thickness: 15 — 20
µ
• Spraying pressure: 245 — 343 kPa
(2.5 — 3.5 kgf/cm
2
, 36 — 50 psi)
7
Drying
Not required.
Dry at normal temperature [more than 10 min.
at 20
°C (68°F)].
In half-dried condition, avoid dust, dirt.
8
Top coat paint (II)
Not required.
Apply clear coat to the parts with top coat paint
(I), three times at 5 — 7 minutes interval.
• Paint to be used:
Metallic paint
Hardener PB
Thinner T-301
• Mixing ratio:
Clear coat vs. hardener = 6:1
• Viscosity: 14 — 16 sec. /20
°C (68°F)
• Film thickness: 25 — 30
µ
• Spraying pressure: 245 — 343 kPa
(2.5 — 3.5 kgf/cm
2
, 36 — 50 psi)
9
Drying
60 min. at 60
°C (140°F), or 30 min. at 80°C (176°F)
If higher than 80
°C (176°F), PP may be deformed. Keep maximum temperature at 80°C (176°F).
10
Inspection
Paint check.
11
Masking removal
Remove masking tape applied in process No. 2.
EI-00234
(2)
(1)
Нет комментариевНе стесняйтесь поделиться с нами вашим ценным мнением.
Текст