Subaru Legacy (2005 year). Service manual — part 412
CO(H6DO)-19
COOLING
Radiator Cap
7. Radiator Cap
A: INSPECTION
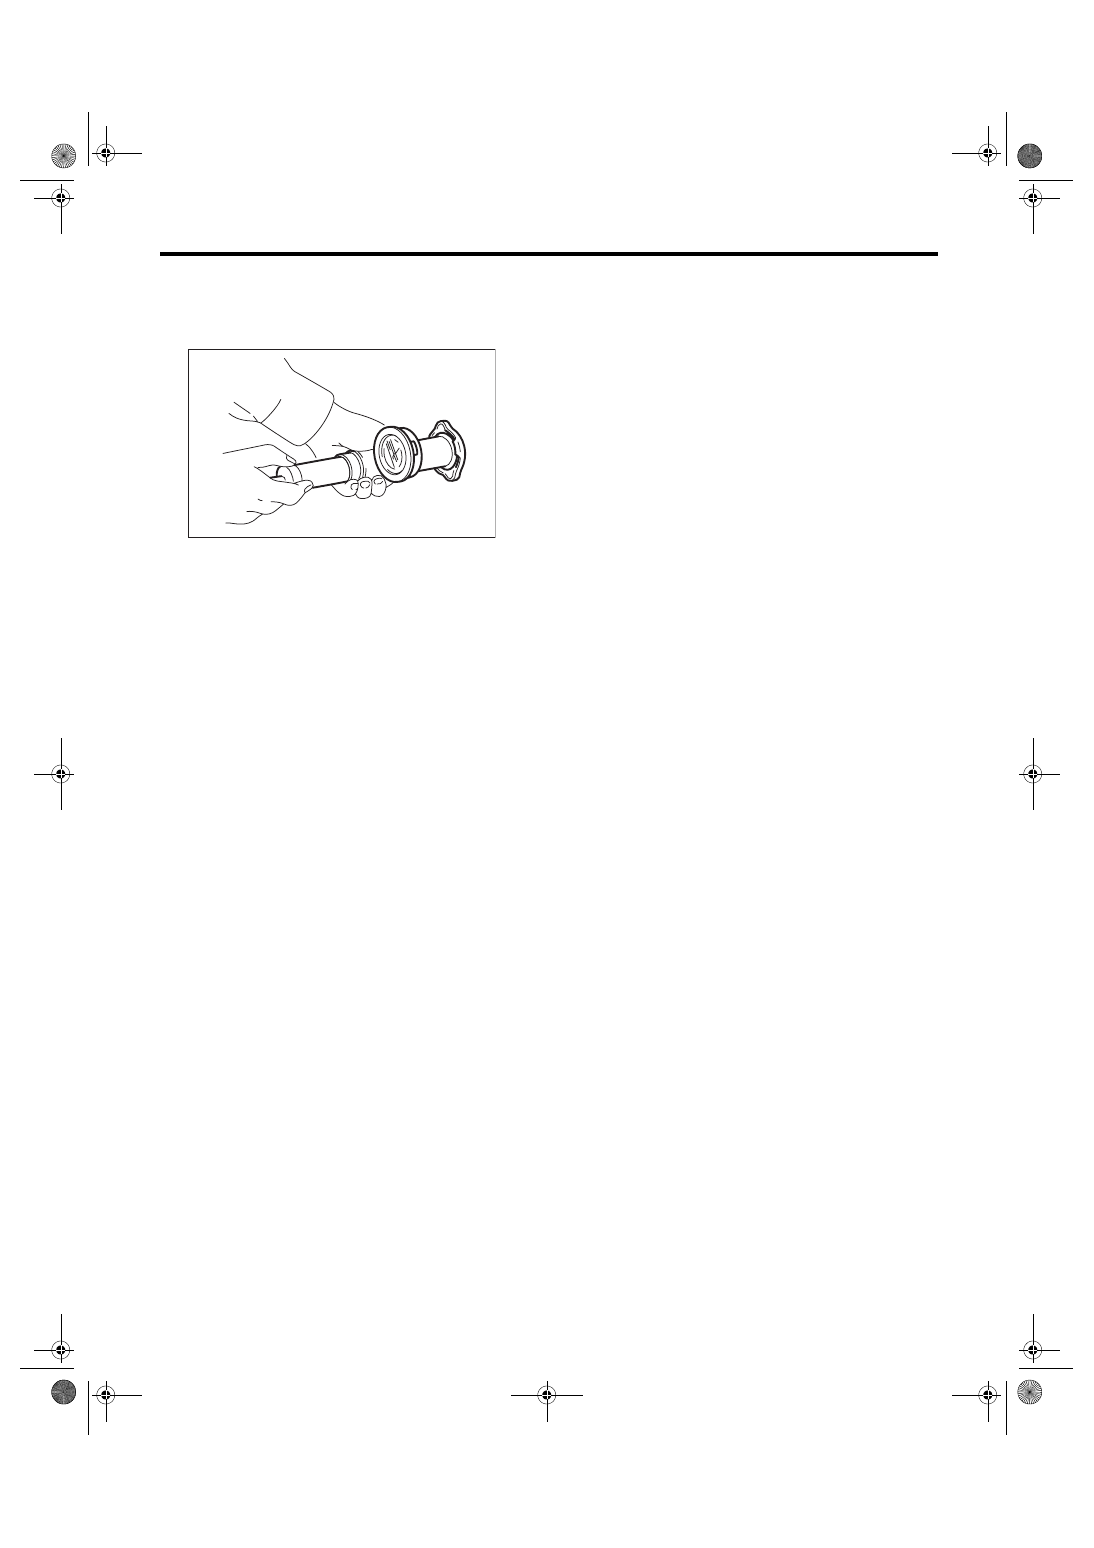
1) Attach the radiator cap to tester.
2) Increase pressure until the tester gauge pointer
stops. Radiator cap is functioning properly if it holds
the service limit pressure for five to six seconds.
Specified pressure:
93—123 kPa (0.95—1.25 kgf/cm
2
, 14—18 psi)
Service limit pressure:
83 kPa (0.85 kgf/cm
2
, 12 psi)
CAUTION:
Be sure to remove foreign matter and rust from
the cap in advance, otherwise results of pres-
sure test will be incorrect.
CO-00044

CO(H6DO)-20
COOLING
Radiator Main Fan and Fan Motor
8. Radiator Main Fan and Fan
Motor
A: REMOVAL
1) Set the vehicle on a lift.
2) Remove the collector cover.
3) Disconnect the ground cable from battery.
4) Remove the hood stay holder.
5) Remove the air intake duct. <Ref. to IN(H6DO)-
8, REMOVAL, Air Intake Duct.>
6) Disconnect the connector from radiator fan con-
trol unit.
7) Lift-up the vehicle.
8) Remove the under cover.
9) Drain engine coolant completely.
<Ref. to CO(H6DO)-11, DRAINING OF ENGINE
COOLANT, REPLACEMENT, Engine Coolant.>
10) Disconnect the ATF hose from the clip of radi-
ator main fan shroud. (model without ATF warmer)
11) Remove the radiator main fan motor harness
from clip.
12) Lower the vehicle.
13) Remove the reservoir tank. <Ref. to
CO(H6DO)-25, REMOVAL, Reservoir Tank.>
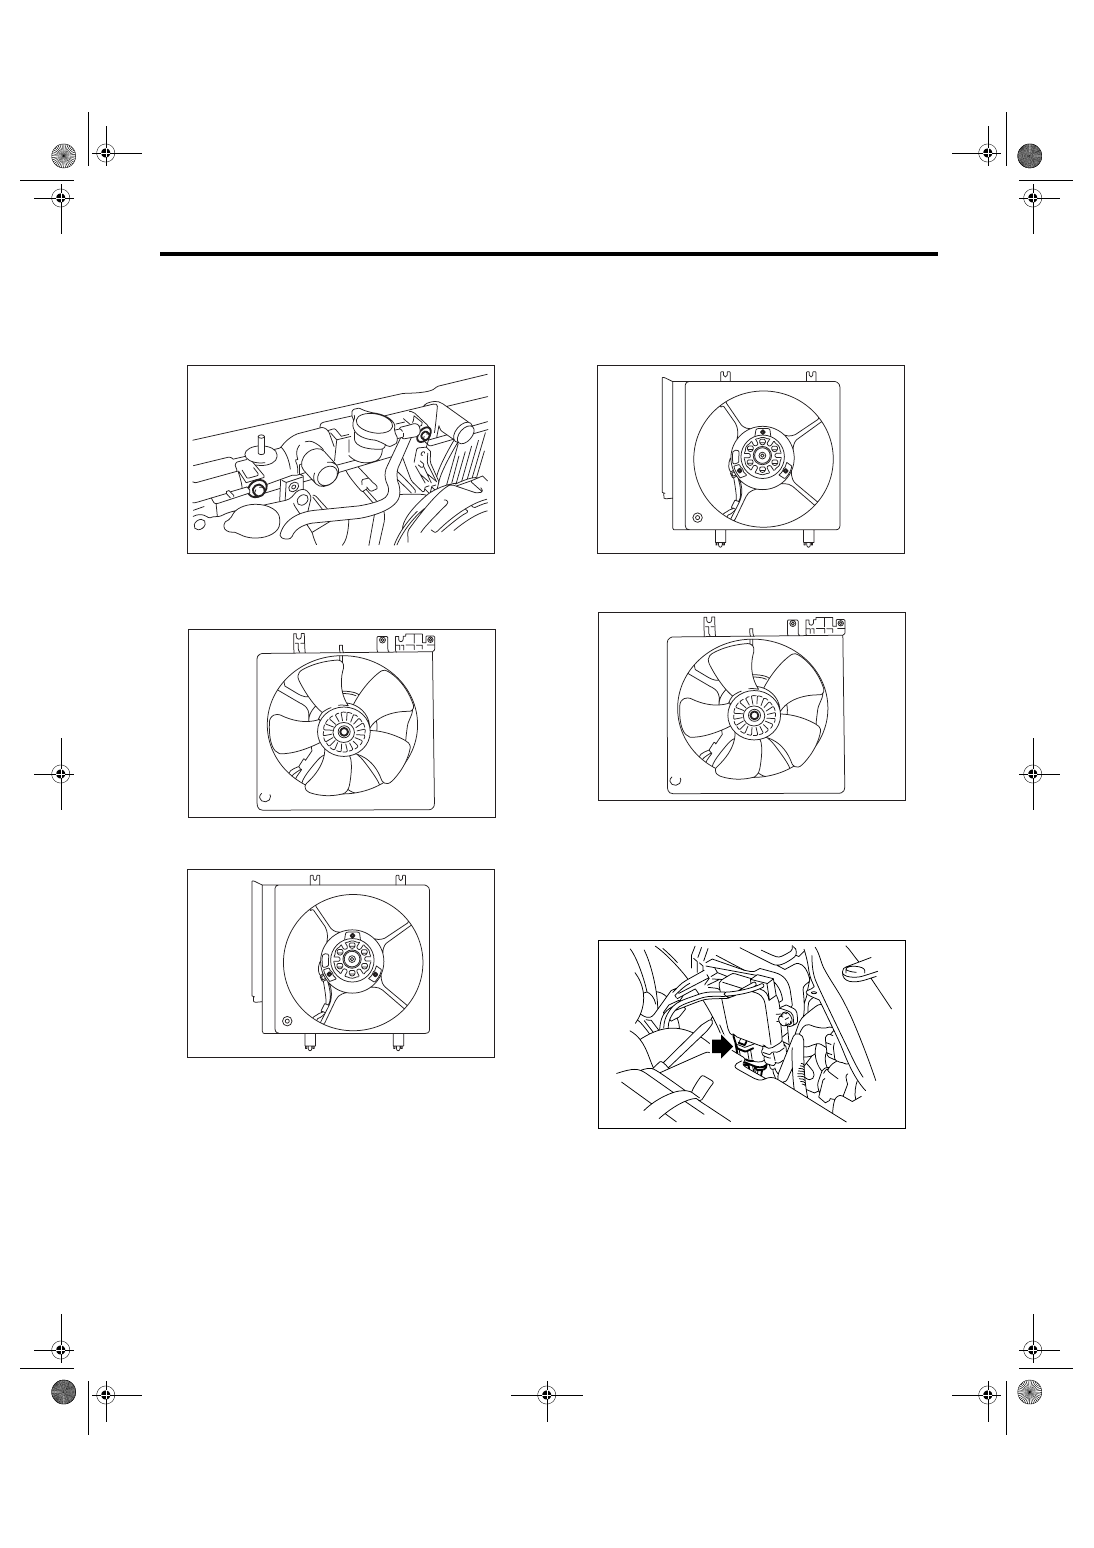
14) Disconnect the inlet hose from radiator.
15) Remove the radiator sub fan motor assembly.
16) Remove the radiator main fan motor assembly.
NOTE:
When removing the main fan assembly with lifting it
up, the main fan shroud contacts to inlet part of en-
gine coolant. To avoid contacting it, move the main
fan assembly to sub fan assembly side before re-
moval.
IN-00203
CO-02017
CO-02029
CO-02020
CO-00129
CO-00130
CO(H6DO)-21
COOLING
Radiator Main Fan and Fan Motor
B: INSTALLATION
Install in the reverse order of removal.
Tightening torque:
7.5 N
⋅
m (0.76 kgf-m, 5.5 ft-lb)
C: DISASSEMBLY
1) Remove the nut which holds fan itself onto fan
motor and shroud assembly.
2) Remove the screws which hold the fan motor
onto shroud.
D: ASSEMBLY
Assemble in the reverse order of disassembly.
Tightening torque:
3.8 N
⋅
m (0.39 kgf-m, 2.8 ft-lb)
Tightening torque:
6.2 N
⋅
m (0.63 kgf-m, 4.6 ft-lb)
E: INSPECTION
1) Disconnect the connector from radiator fan con-
trol unit.
NOTE:
Do not remove the main fan motor harness connec-
tor.
CO-00130
CO-00132
CO-00133
CO-00133
CO-00132
CO-02018
CO(H6DO)-22
COOLING
Radiator Main Fan and Fan Motor
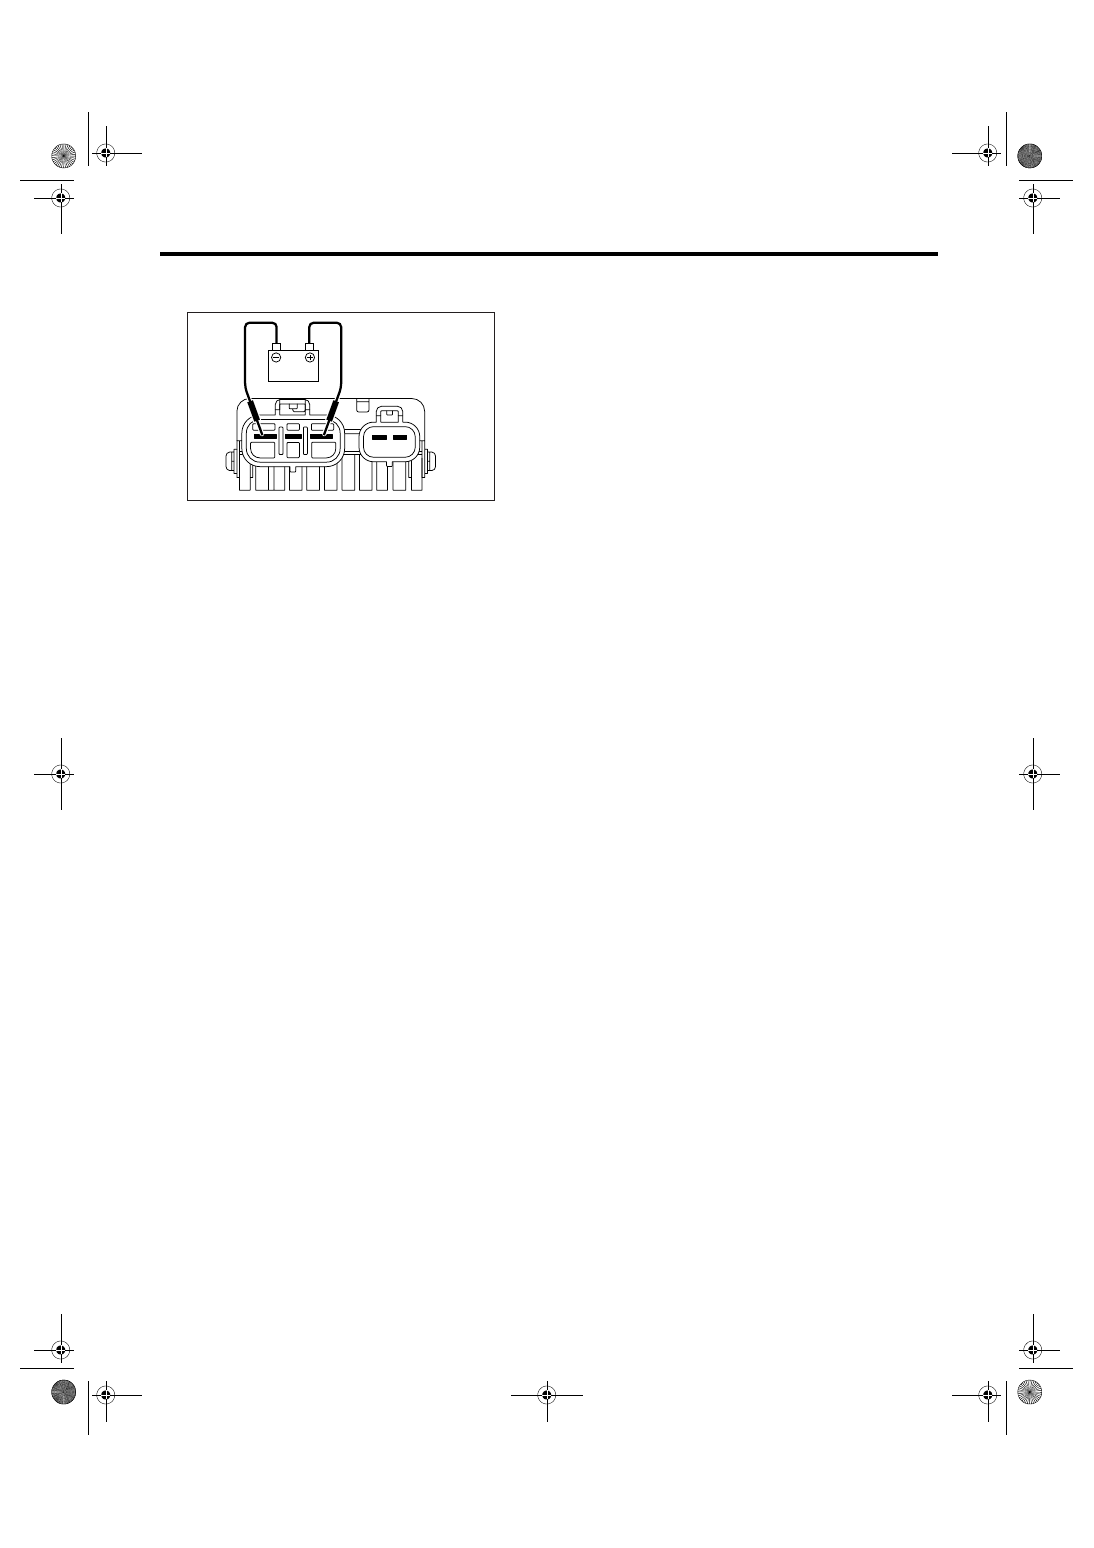
2) Connect the battery to radiator fan control unit as
shown in the figure.
3) Check the fan motor for normal operation. If it
does not operate, replace the fan motor.
CO-02037
Нет комментариевНе стесняйтесь поделиться с нами вашим ценным мнением.
Текст