Subaru Legacy (2005 year). Service manual — part 821
BR-13
BRAKE
General Description
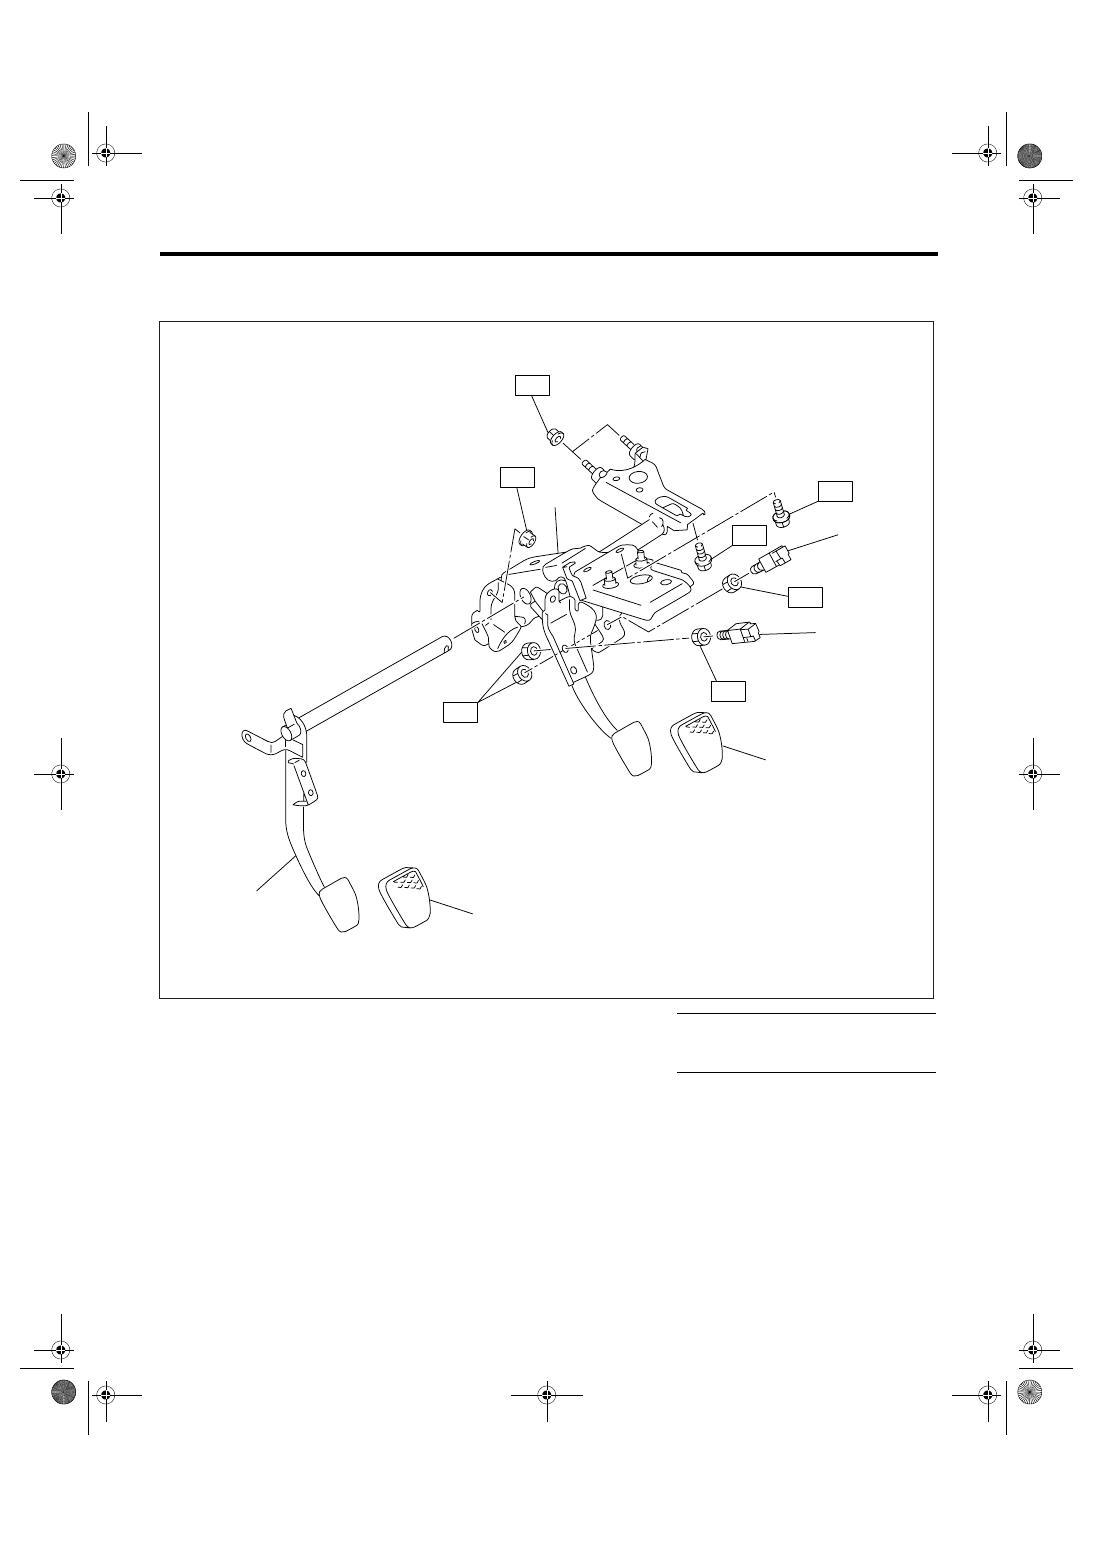
7. BRAKE PEDAL
• LHD MT model
(1)
Brake pedal ASSY
(4)
Clutch pedal
Tightening torque: N
⋅
m (kgf-m, ft-lb)
(2)
Stop light switch
(5)
Clutch pedal pad
T1: 8 (0.8, 5.9)
(3)
Brake pedal pad
(6)
Clutch switch
T2: 18 (1.8, 13.0)
T2
(5)
(4)
(3)
(2)
(6)
(1)
T2
T2
T1
T1
T2
T1
BR-00550
BR-14
BRAKE
General Description
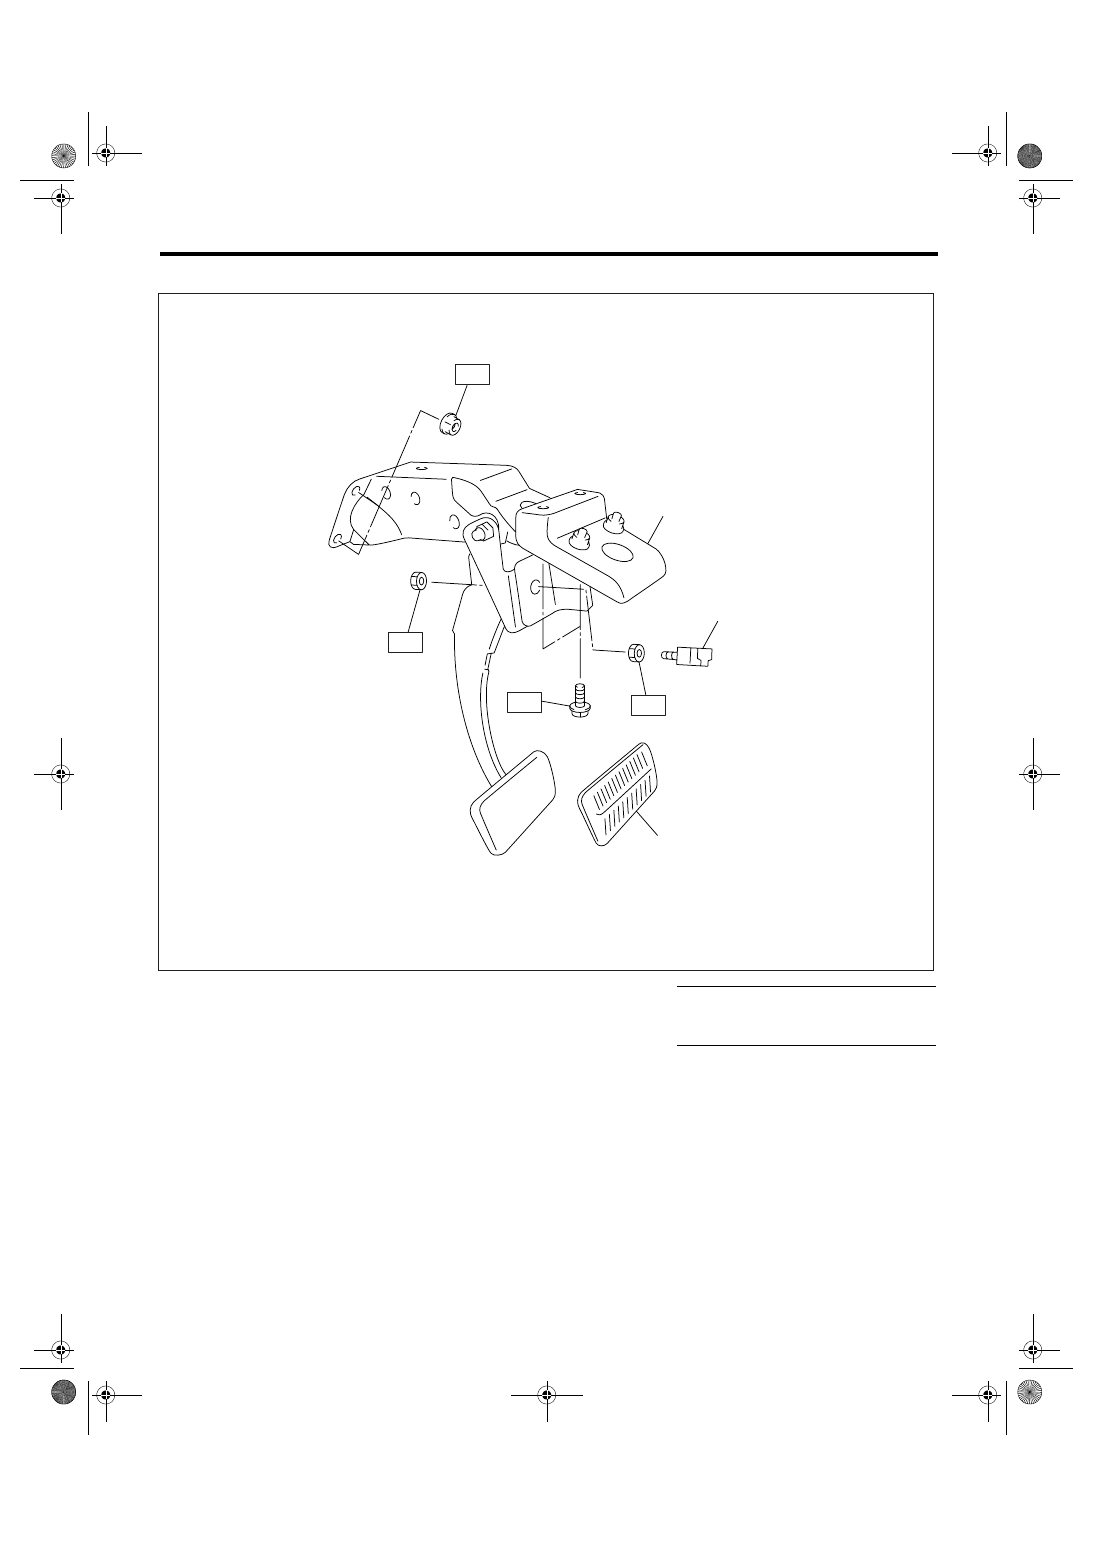
• LHD AT model, RHD model
C: CAUTION
• Wear work clothing, including a cap, protective
goggles, and protective shoes during operation.
• Before removal, installation or disassembly, be
sure to clarify the failure. Avoid unnecessary re-
moval, installation, disassembly and replacement.
• Use SUBARU genuine grease or the equivalent.
Do not mix grease, etc. with that of another grade
or from other manufacturers.
• Before securing a part on a vise, place cushion-
ing material such as wood blocks, aluminum plate
or cloth between the part and the vise.
• Be sure to tighten fasteners including bolts and
nuts to the specified torque.
• Place shop jacks or rigid racks at the specified
points.
(1)
Brake pedal ASSY
(3)
Brake pedal pad
Tightening torque: N
⋅
m (kgf-m, ft-lb)
(2)
Stop light switch
T1: 8 (0.8, 5.9)
T2: 18 (1.8, 13.0)
BR-00338
T2
T1
T2
T1
(1)
(2)
(3)

BR-15
BRAKE
General Description
D: PREPARATION TOOL
1. GENERAL TOOL
TOOL NAME
REMARKS
Snap ring pliers
Used for removing and installing snap ring.
BR-16
BRAKE
Front Brake Pad
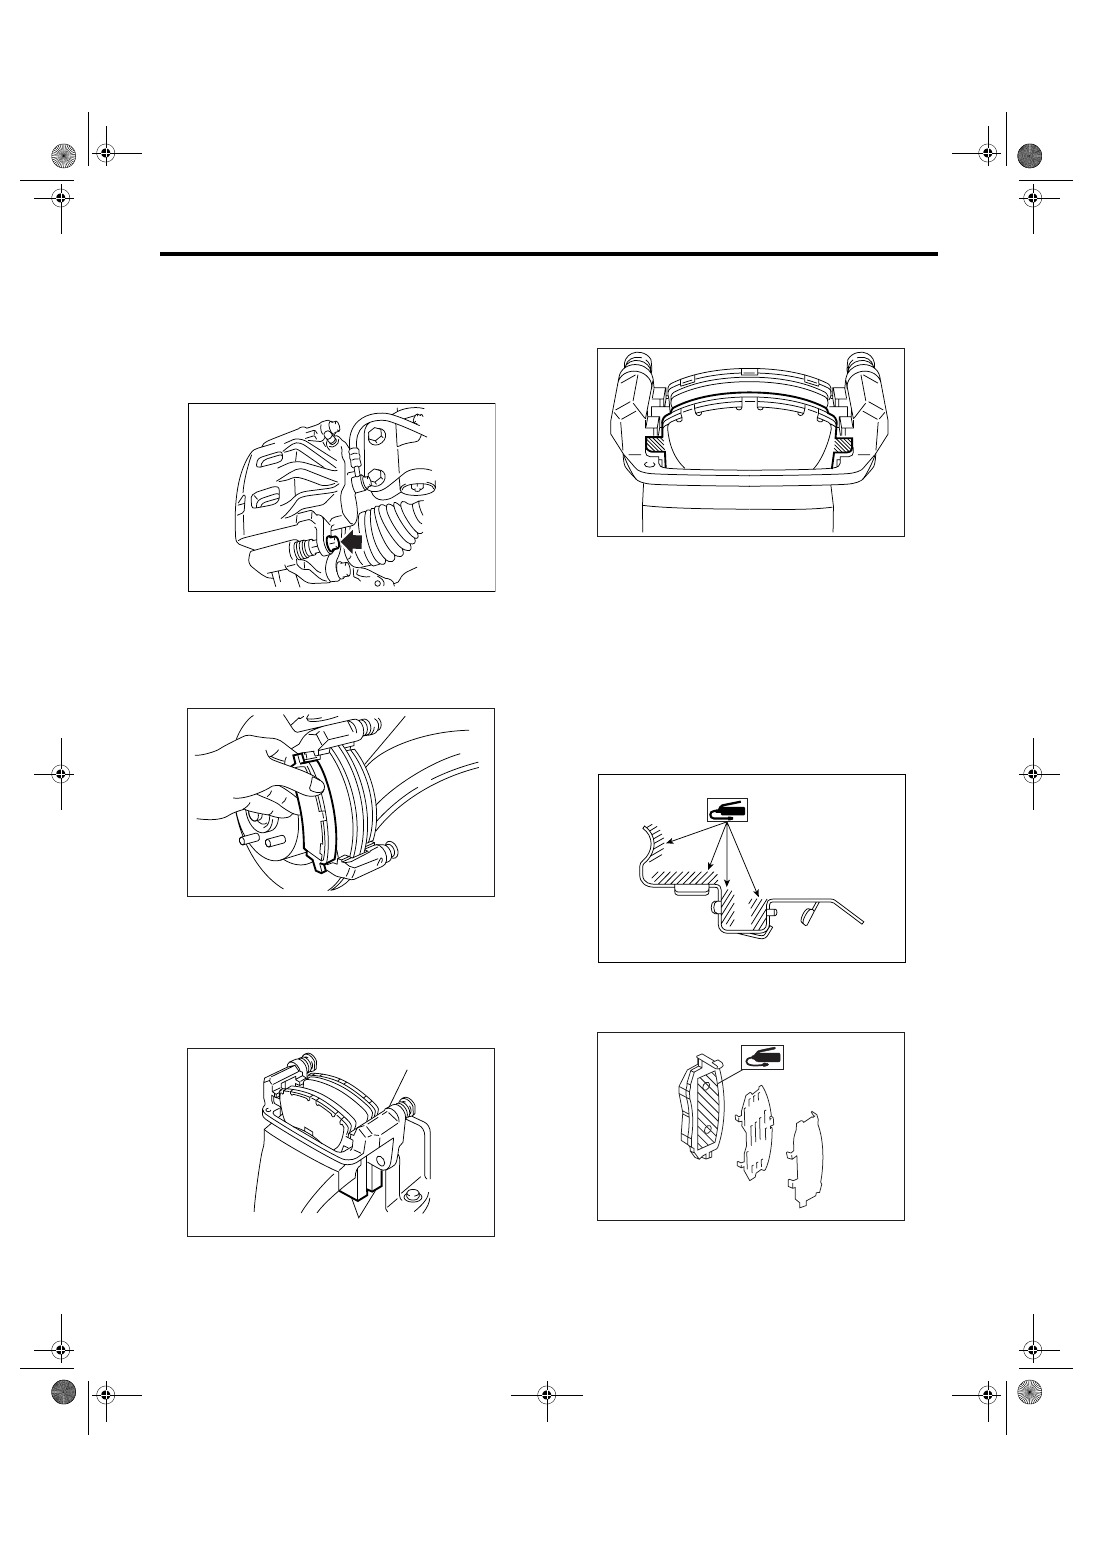
2. Front Brake Pad
A: REMOVAL
1. 15-INCH TYPE
1) Lift-up the vehicle, and remove the front wheels.
2) Remove the caliper bolt.
3) Raise the caliper body and support it.
NOTE:
Do not disconnect the brake hose from caliper
body.
4) Remove the pad.
NOTE:
If the brake pad is difficult to remove, proceed as
follows:
(1) Remove the caliper body from support.
(2) Remove the support.
(3) Place the support in a vise between wooden
blocks.
(4) Attach a rod of less than 12 mm (0.47 in) di-
ameter to the shaded area of the brake pad, and
strike the rod with a hammer to drive brake pad
out of place.
2. 16-INCH TYPE
Refer to 15-inch type. <Ref. to BR-16, 15-INCH
TYPE, REMOVAL, Front Brake Pad.>
3. 17-INCH TYPE
Refer to 15-inch type. <Ref. to BR-16, 15-INCH
TYPE, REMOVAL, Front Brake Pad.>
B: INSTALLATION
1. 15-INCH TYPE
1) Apply a thin coat of Molykote M7439 to pad clip.
2) Apply a thin coat of Molykote AS880N (Part No.
K0779YA010) to the frictional portion between pad
and pad inner shim.
(1) Support
(2) Wooden block
BR-00339
BR-00012
(1)
(2)
BR-00013
BR-00014
BR-00340
BR-00238
Нет комментариевНе стесняйтесь поделиться с нами вашим ценным мнением.
Текст