Subaru Legacy IV (2008 year). Service manual — part 1148
EB-12
General Description
EXTERIOR BODY PANELS
C: CAUTION
• Exterior body panels are heavy. Do not drop and damage the panels. During removal and installation, do
not damage the panel painting surface.
• While removing mounting bolts, using assistance devices such as a support jack will help support the pan-
el.
• Be careful not to lose small parts.
D: PREPARATION TOOL
1. SPECIAL TOOL
2. GENERAL TOOL
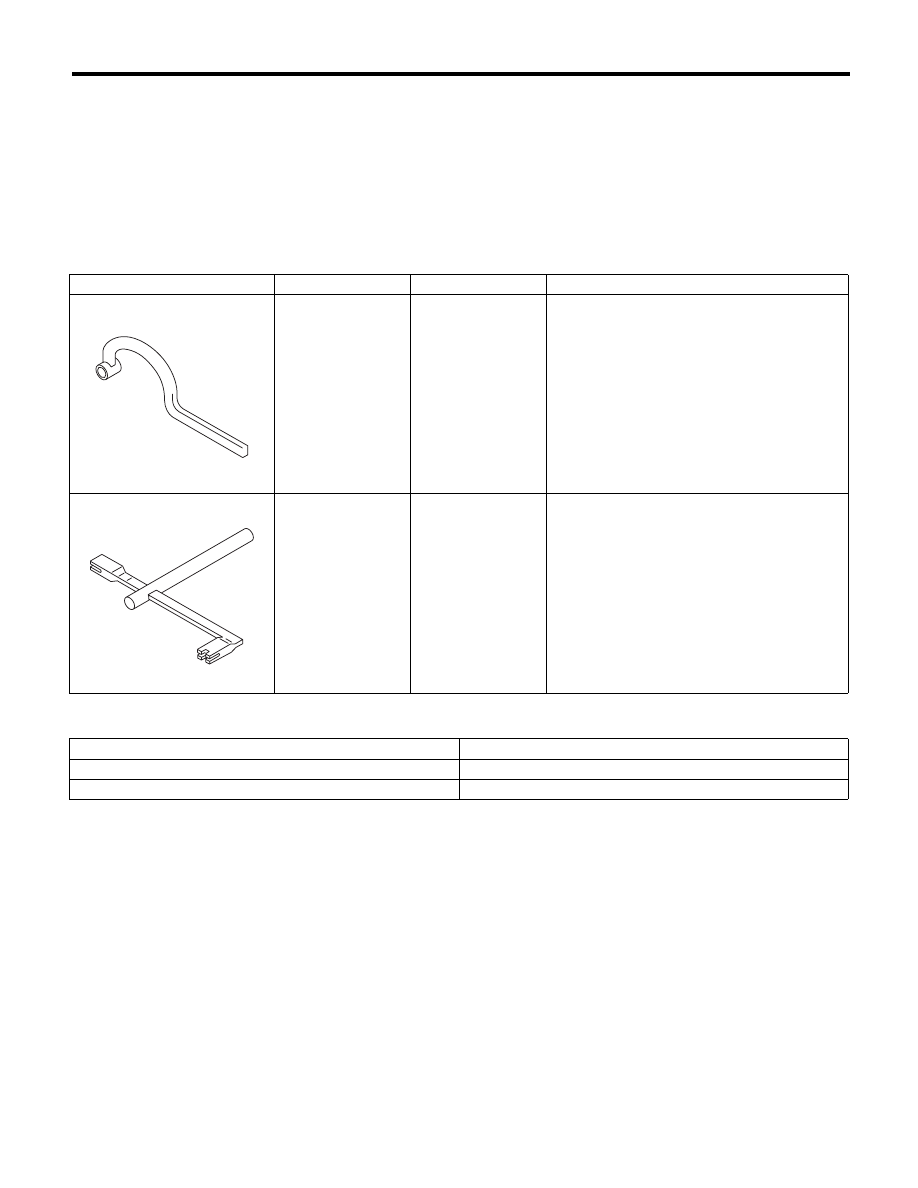
ILLUSTRATION
TOOL NUMBER
DESCRIPTION
REMARKS
925610000
WRENCH
Used for removing and installing door hinge.
927780000
REMOVER
Used for removing and installing the trunk tor-
sion bar.
TOOL NAME
REMARKS
Support jack
Used for supporting door panel.
Clip remover
Used for removing various types of clips.
ST-925610000
ST-927780000
EB-13
Front Hood
EXTERIOR BODY PANELS
2. Front Hood
A: REMOVAL
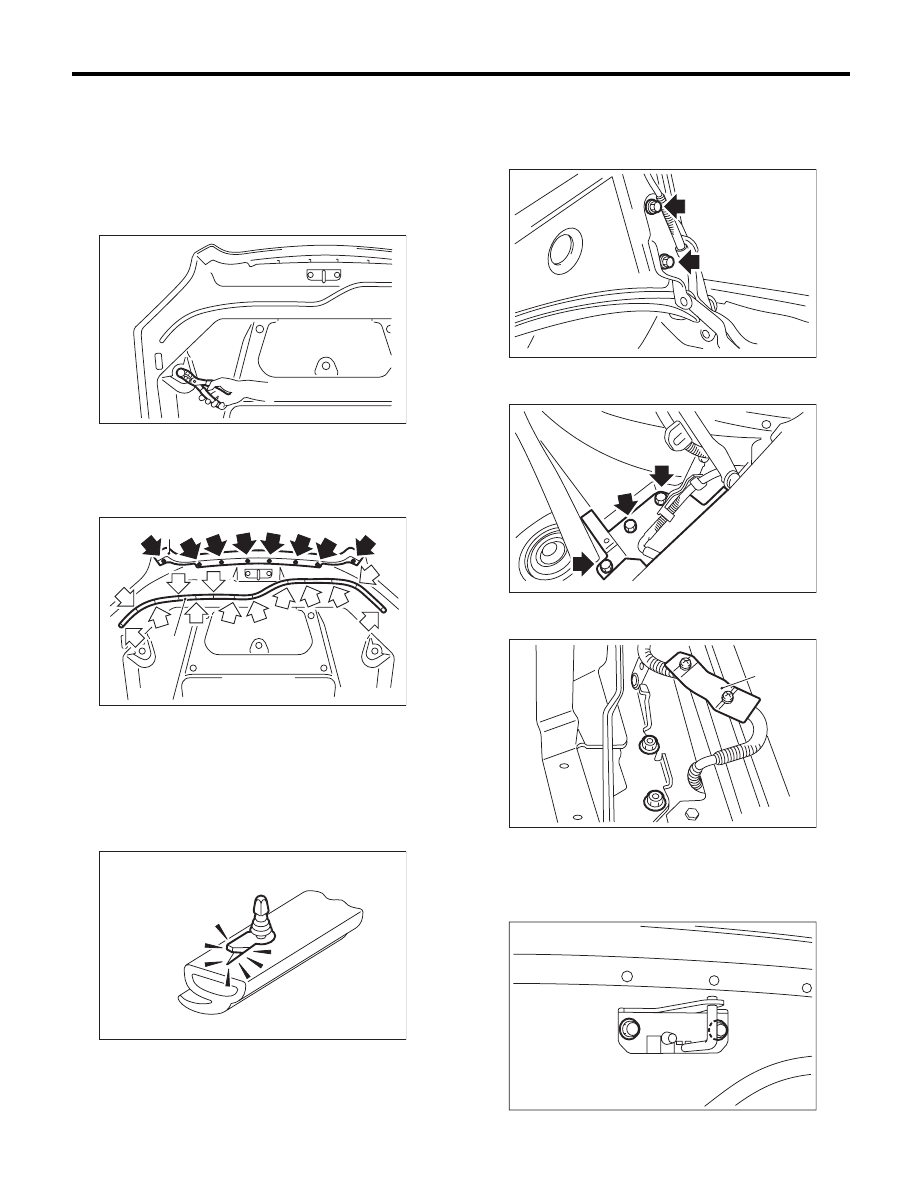
1. FRONT HOOD INSULATOR
1) Open the front hood.
2) Release the clips to remove the front hood insu-
lator.
2. FRONT HOOD WEATHER STRIP
1) Open the front hood.
2) Remove the clips, and remove the front hood
weather strip (A) and intake duct weather strip (B).
NOTE:
If the weather strip clip is removed with excessive
force, the weather strip may be damaged. Be sure
to use clip remover to remove.
3. FRONT HOOD HINGE
1) Remove the bolt, and remove the front hood
panel. <Ref. to EB-14, FRONT HOOD PANEL, RE-
MOVAL, Front Hood.>
2) Remove the clip, and remove the cowl side pan-
el front.
3) Remove clamp (A) of the window washer hose,
and remove the bolt of the hinge.
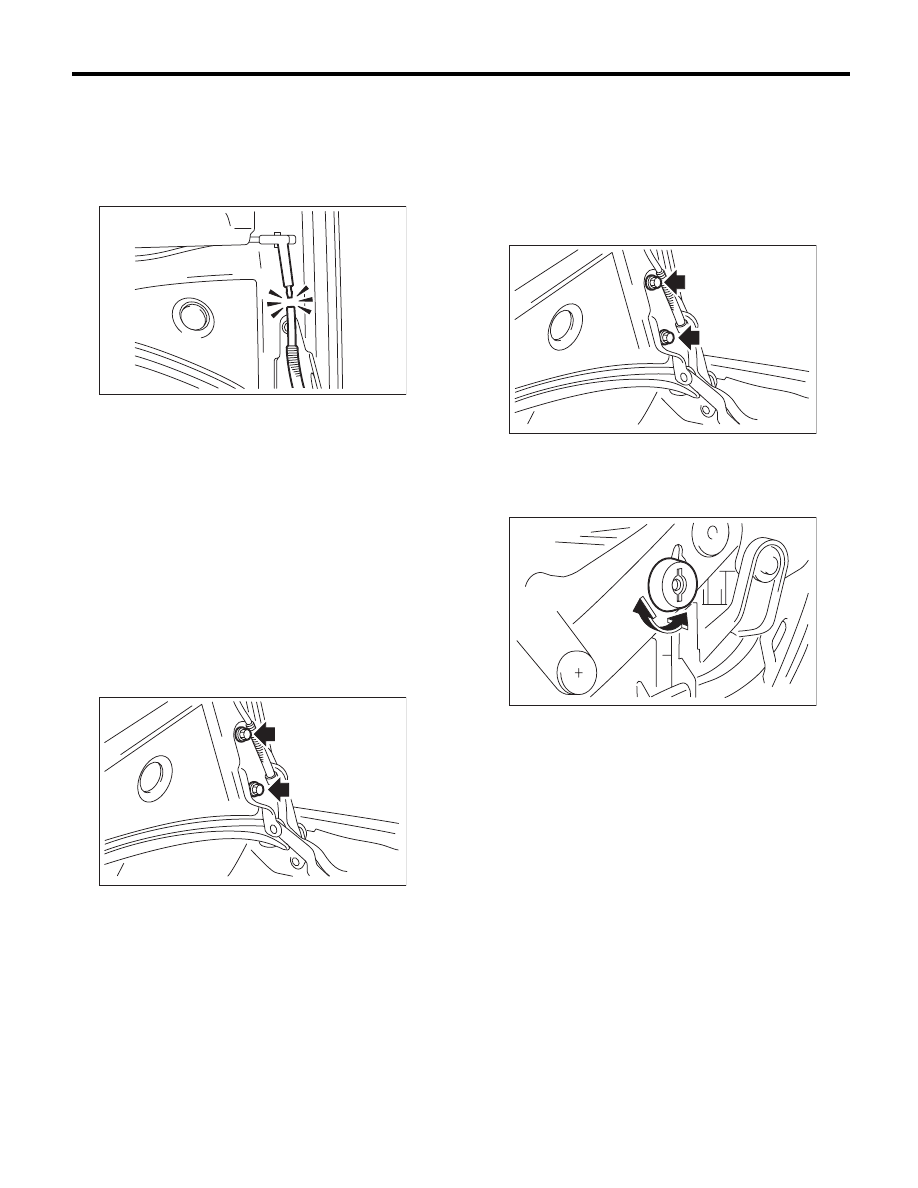
4. FRONT HOOD STRIKER
1) Open the front hood.
2) Remove the bolt, and remove the front hood
striker.
(C) Clip
(D) Weather strip clip
EB-00139
EB-00140
(D)
(C)
(A)
(B)
EB-00141
EB-00138
EB-00142
EB-00143
(A)
EB-00144
EB-14
Front Hood
EXTERIOR BODY PANELS
5. FRONT HOOD PANEL
1) Remove the upper grille of the front grille. (OUT-
BACK model) <Ref. to EI-24, REMOVAL, Front
Grille.>
2) Open the front hood to remove the window
washer hose.
3) Remove the front hood insulator. <Ref. to EB-
13, FRONT HOOD INSULATOR, REMOVAL,
Front Hood.>
4) Remove the front hood weather strip. <Ref. to
EB-13, FRONT HOOD WEATHER STRIP, RE-
MOVAL, Front Hood.>
5) Remove the front hood striker. <Ref. to EB-13,
FRONT HOOD STRIKER, REMOVAL, Front
Hood.>
6) Remove the front hood duct. (Turbo model)
<Ref. to EI-25, REMOVAL, Front Hood Grille.>
7) Remove the window washer hose and nozzle.
<Ref. to WW-16, REMOVAL, Front Washer Noz-
zle.>
8) Remove the bolt, and remove the front hood
panel from the front hood hinge.
B: INSTALLATION
Install in the reverse order of removal.
NOTE:
Be careful not to catch the window washer hose in
when installing the front hood insulator.
Tightening torque:
Refer to “COMPONENT” of “General Descrip-
tion”. <Ref. to EB-6, FRONT HOOD, COMPO-
NENT, General Description.>
C: ADJUSTMENT
1) Adjust the clearance between front hood panel
and front fender panel. Clearance must be equal at
both sides. For the dimension of clearance, refer to
“SPECIFICATION” in “General Description”. <Ref.
to EB-2, SPECIFICATION, General Description.>
2) Use the hinge mounting bolts to align the front
hood longitudinal and lateral position.
3) Adjust the height at the front end of hood. <Ref.
to SL-46, ADJUSTMENT, Front Hood Lock Assem-
bly.>
4) Rotate the hood buffer to adjust lateral height.
EB-00137
EB-00138
EB-00138
EB-00164
EB-15
Front Fender
EXTERIOR BODY PANELS
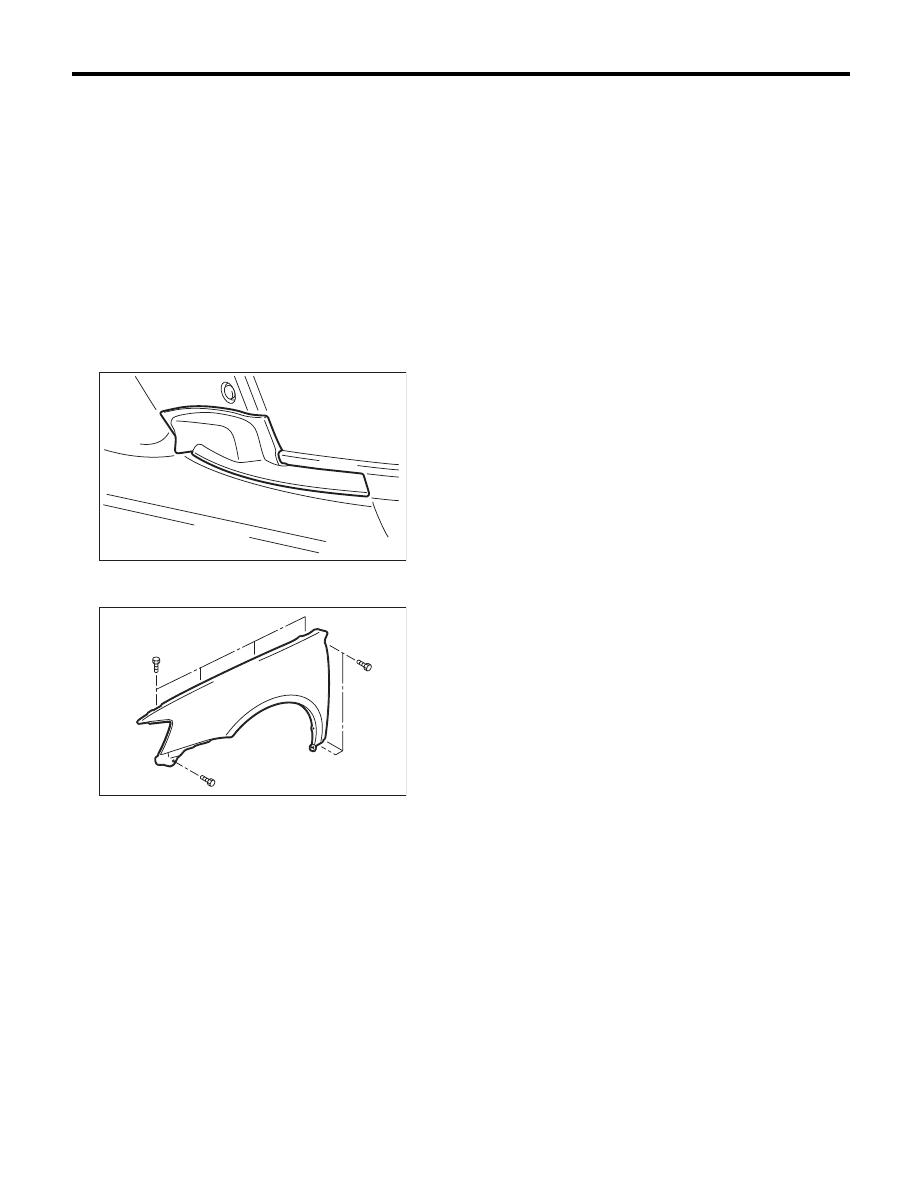
3. Front Fender
A: REMOVAL
1) Disconnect the ground cable from the battery.
2) Remove the side sill spoilers. <Ref. to EI-42, RE-
MOVAL, Side Sill Spoiler.>
3) Remove the front grille. <Ref. to EI-24, REMOV-
AL, Front Grille.>
4) Remove the front bumper face. <Ref. to EI-30,
REMOVAL, Front Bumper.>
5) Remove the headlight assembly. <Ref. to LI-13,
REMOVAL, Headlight Assembly.>
6) Remove the mud guard. <Ref. to EI-29, RE-
MOVAL, Mud Guard.>
7) Remove the cowl panel side.
8) Remove the bolt, and remove the front fender
panel.
B: INSTALLATION
1) Install in the reverse order of removal.
2) Install with attention to make uniform clearance
between front fender panel and front hood panel.
For the dimension of clearance, refer to “SPECIFI-
CATION” in “General Description”. <Ref. to EB-2,
SPECIFICATION, General Description.>
Tightening torque:
7.5 N·m (0.76 kgf-m, 5.5 ft-lb)
EB-00147
EB-00146
Нет комментариевНе стесняйтесь поделиться с нами вашим ценным мнением.
Текст