Subaru Legacy IV (2008 year). Service manual — part 290
CO(H4DOTC)-22
Radiator
COOLING
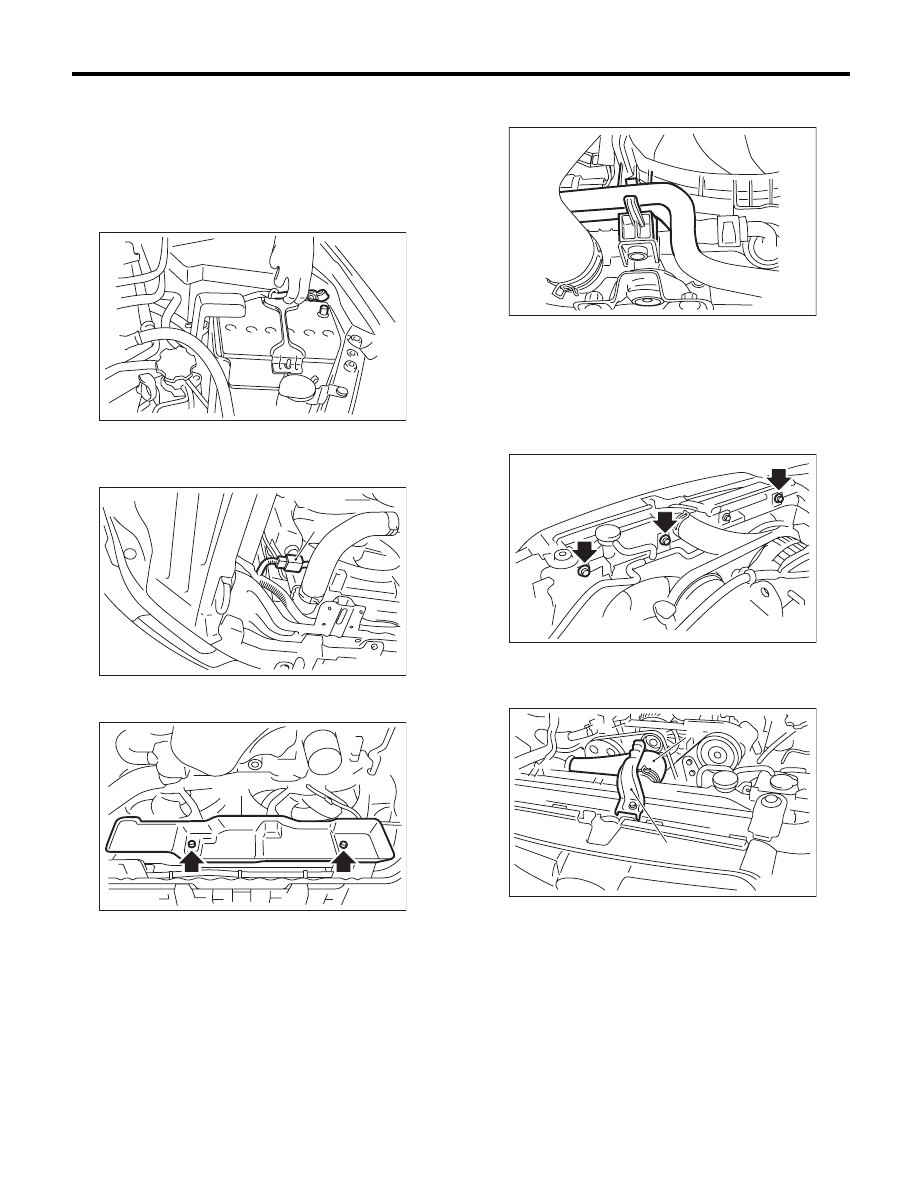
6) Install the hood stay holder (B).
Tightening torque:
7.5 N·m (0.8 kgf-m, 5.5 ft-lb)
7) Install the reservoir tank. <Ref. to CO(H4DOTC)-29,
INSTALLATION, Reservoir Tank.>
8) Install the air intake duct. <Ref. to IN(H4DOTC)-9,
INSTALLATION, Air Intake Duct.>
9) Lift up the vehicle.
10) Connect the ATF cooler hoses. (AT model)
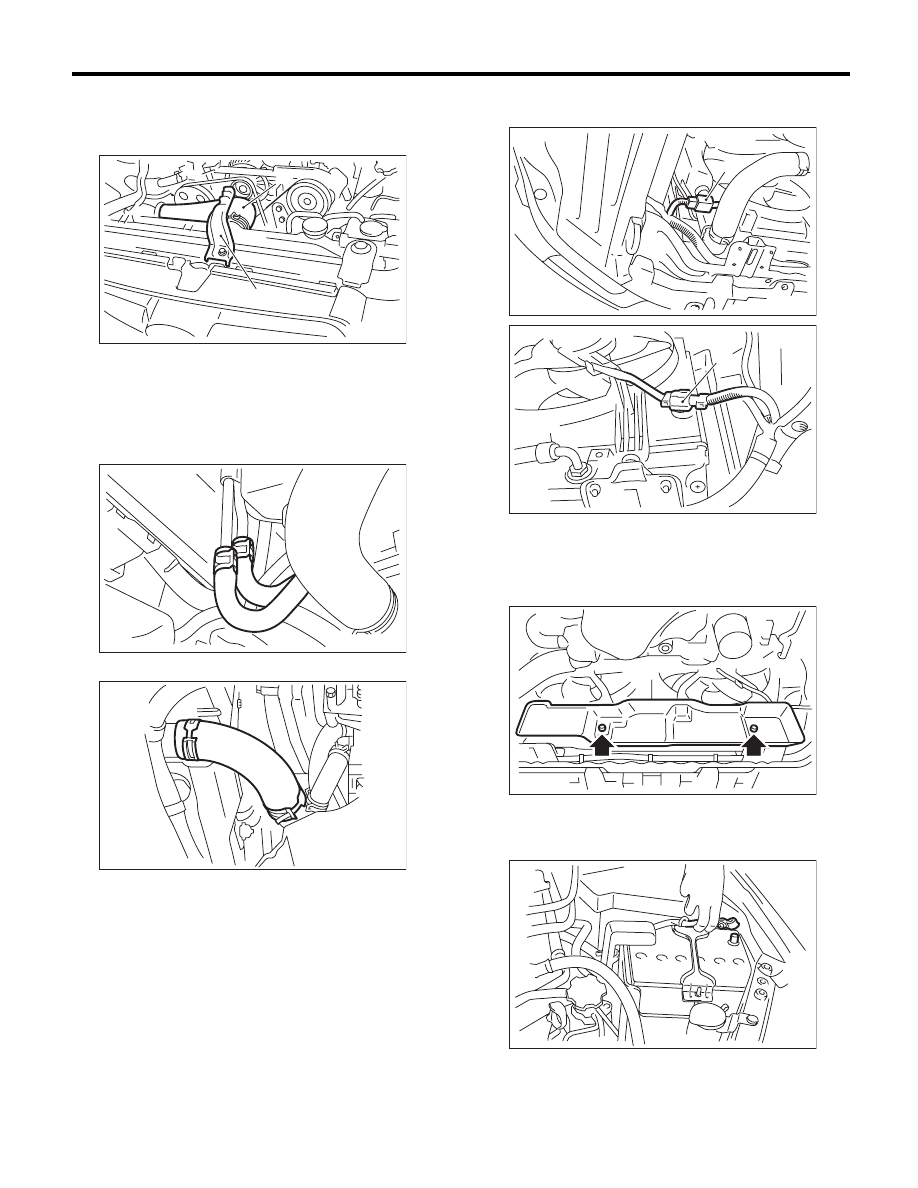
11) Connect the radiator outlet hose.
12) Connect the connectors of main fan motor con-
nector (A) and sub fan motor connector (B).
13) Install the heat shield cover to the radiator. (AT
model)
Tightening torque:
3 N·m (0.3 kgf-m, 2.2 ft-lb)
14) Install the under cover.
15) Lower the vehicle.
16) Connect the ground cable to battery.
17) Fill engine coolant. <Ref. to CO(H4DOTC)-14,
FILLING OF ENGINE COOLANT, REPLACE-
MENT, Engine Coolant.>
CO-00255
(A)
(B)
CO-00253
CO-02124
CO-00251
(A)
CO-00252
(B)
CO-02355
IN-00203

CO(H4DOTC)-23
Radiator
COOLING
18) Check the ATF level. (AT model) <Ref. to 5AT-
28, INSPECTION, Automatic Transmission Fluid.>
19) Install the collector cover.
C: INSPECTION
1) Remove the coolant filler tank cap, fill the cool-
ant filler tank with engine coolant, then install the
tester to the installation position of the cap.
2) Apply a pressure of 122 kPa (1.2 kg/cm
2
, 18 psi)
to the radiator and check the following points:
• Leakage from the radiator or its vicinity
• Leakage from the hose or its connections
CAUTION:
• Inspection must be carried out at the side of
coolant filler tank, not at the side of radiator.
• Engine should be turned off.
• Wipe engine coolant from check points in ad-
vance.
• Be careful of the spurt of engine coolant
when removing the tester.
• Be careful not to deform the filler neck of the
coolant filler tank when installing and removing
the tester.
CO-02244
CO(H4DOTC)-24
Radiator Cap
COOLING
7. Radiator Cap
A: INSPECTION
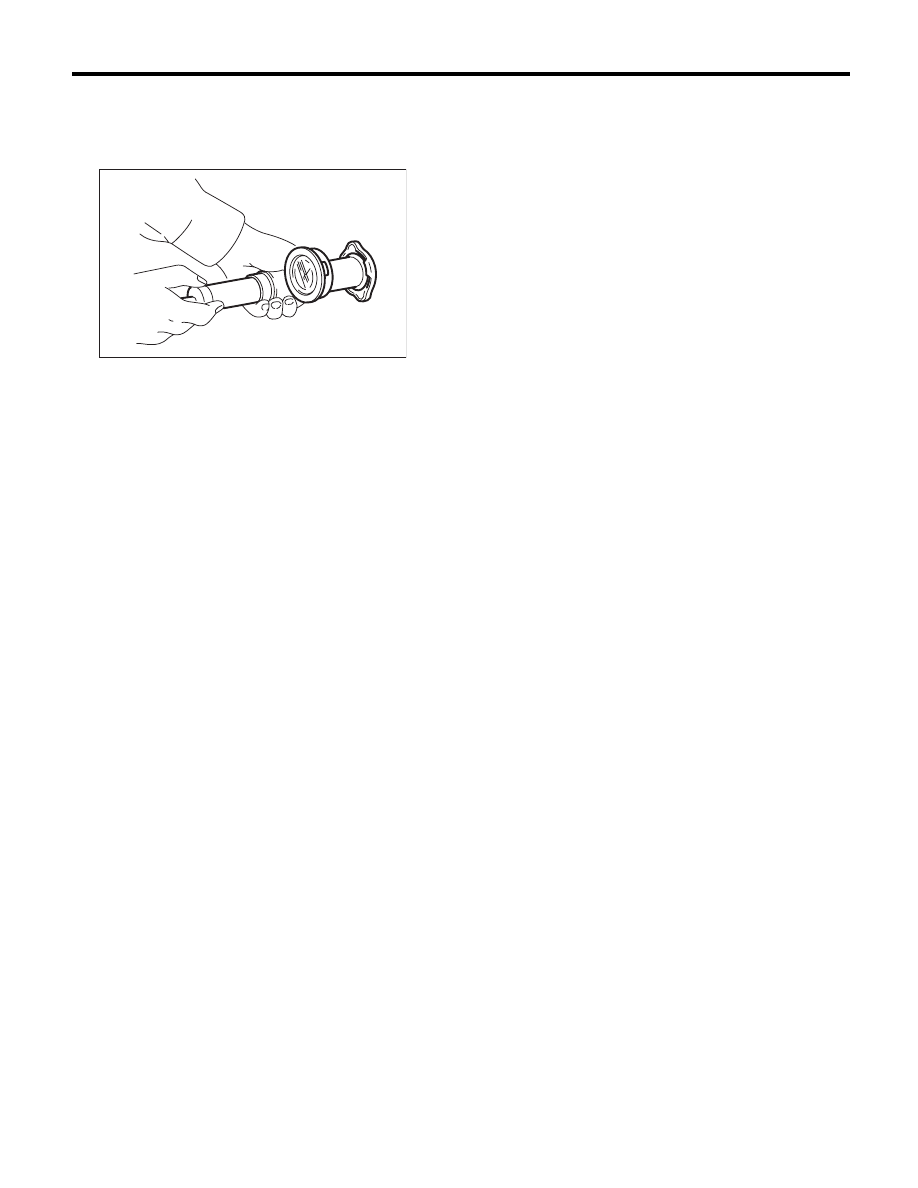
1) Attach the radiator cap to tester.
2) Increase pressure until the tester gauge pointer
stops. Radiator cap is functioning properly if it holds
the service limit pressure for five to six seconds.
Remove the cap if it is opened under a pressure
less than the service limit value
Coolant filler tank side
Specification:
93 — 123 kPa (0.95 — 1.25 kg/cm
2
,
14 — 18 psi)
Service limit:
83 kPa (0.85 kg/cm
2
, 12 psi)
Radiator side
Specification:
122 — 152 kPa (1.24 — 1.55 kg/cm
2
,
18 — 22 psi)
Service limit:
112 kPa (1.14 kg/cm
2
, 16 psi)
CAUTION:
• Be sure to remove foreign matter and rust
from the cap in advance. Otherwise, results of
pressure test will be incorrect.
• Do not confuse the cap of coolant filler tank
and cap of radiator.
CO-00044
CO(H4DOTC)-25
Radiator Main Fan and Fan Motor
COOLING
8. Radiator Main Fan and Fan
Motor
A: REMOVAL
1) Set the vehicle on a lift.
2) Remove the collector cover.
3) Disconnect the ground cable from battery.
4) Lift up the vehicle.
5) Remove the under cover.
6) Disconnect the main fan motor connector (A).
7) Remove the heat shield cover from radiator. (AT
model)
8) Drain approximately 3.0
2 (3.2 US qt, 2.6 Imp
qt) of coolant. <Ref. to CO(H4DOTC)-14, DRAIN-
ING OF ENGINE COOLANT, REPLACEMENT,
Engine Coolant.>
9) Remove the ATF hose from the hose clip of the
radiator main fan motor assembly. (AT model)
10) Lower the vehicle.
11) Remove the air intake duct. <Ref. to
IN(H4DOTC)-9, REMOVAL, Air Intake Duct.>
12) Remove the reservoir tank. <Ref. to
CO(H4DOTC)-29, REMOVAL, Reservoir Tank.>
13) Remove the bolts that hold the radiator main
fan motor assembly and the over flow pipe.
14) Disconnect the radiator inlet hose (A) from the
radiator.
15) Remove the hood stay holder (B).
16) Remove the radiator main fan motor assembly
from the upper side of the vehicle.
IN-00203
CO-00251
(A)
CO-02355
CO-02375
CO-02494
CO-00255
(A)
(B)
Нет комментариевНе стесняйтесь поделиться с нами вашим ценным мнением.
Текст