Subaru Legacy IV (2008 year). Service manual — part 881

DI-73
Rear Differential (VA-type)
DIFFERENTIALS
17) Tighten the bolt of lock plate to specified
torque.
Tightening torque:
25 N·m (2.5 kgf-m, 18.4 ft-lb)
18) Recheck the hypoid driven gear to pinion back-
lash.
Backlash:
0.10 — 0.15 mm (0.004 — 0.006 in)
19) Checking and adjusting the tooth contact of hy-
poid driven gear
(1) Apply lead-free red dye evenly on the both
sides of three to four teeth of the hypoid driven
gear. Check the contact pattern after rotating
the hypoid driven gear several revolutions back
and forth until a definite contact pattern appears
on the hypoid driven gear.
(2) When the contact pattern is not correct, re-
adjust.
NOTE:
Be sure to wipe off the lead-free red dye after the
adjustment is completed.
• Correct tooth contact
Check item: Tooth contact pattern is slightly
shifted towards the toe side under no-load
rotation. (When driving, it moves towards
the heel side.)
• Face contact
Check item: Backlash is too large.
Contact pattern
Corrective action: Increase thickness of drive
pinion height adjusting washer in order to bring
drive pinion close to hypoid driven gear.
DI-00132
DI-00172
(A) Toe side
(B) Heel side
(A)
(B)
MT-01401
AT-00208
AT-00212

DI-74
Rear Differential (VA-type)
DIFFERENTIALS
• Flank contact
Check item: Backlash is too small.
Contact pattern
Corrective action: Reduce the thickness of pin-
ion height adjusting washer according to the
procedure for bringing drive pinion away from
hypoid driven gear.
• Toe contact (inside contact)
Check item: Contact area is too small.
Contact pattern
Corrective action: Reduce the thickness of pin-
ion height adjusting washer according to the
procedure for bringing drive pinion away from
hypoid driven gear.
• Heel contact (outside end contact)
Check item: Contact area is too small.
Contact pattern
Corrective action: Increase thickness of drive
pinion height adjusting washer in order to bring
drive pinion close to hypoid driven gear.
20) If correct tooth contact is not obtained, once
again adjust the drive pinion height and the differ-
ential side bearing preload (already mentioned)
and the hypoid gear backlash.
21) Install the new gasket and rear cover to the dif-
ferential carrier, and tighten the bolts to specified
torque.
Tightening torque:
25 N·m (2.5 kgf-m, 18.4 ft-lb)
AT-00209
AT-00213
AT-00210
AT-00213
(A) Rear cover
AT-00211
AT-00212
(A)
DI-00189
DI-75
Rear Differential (VA-type)
DIFFERENTIALS
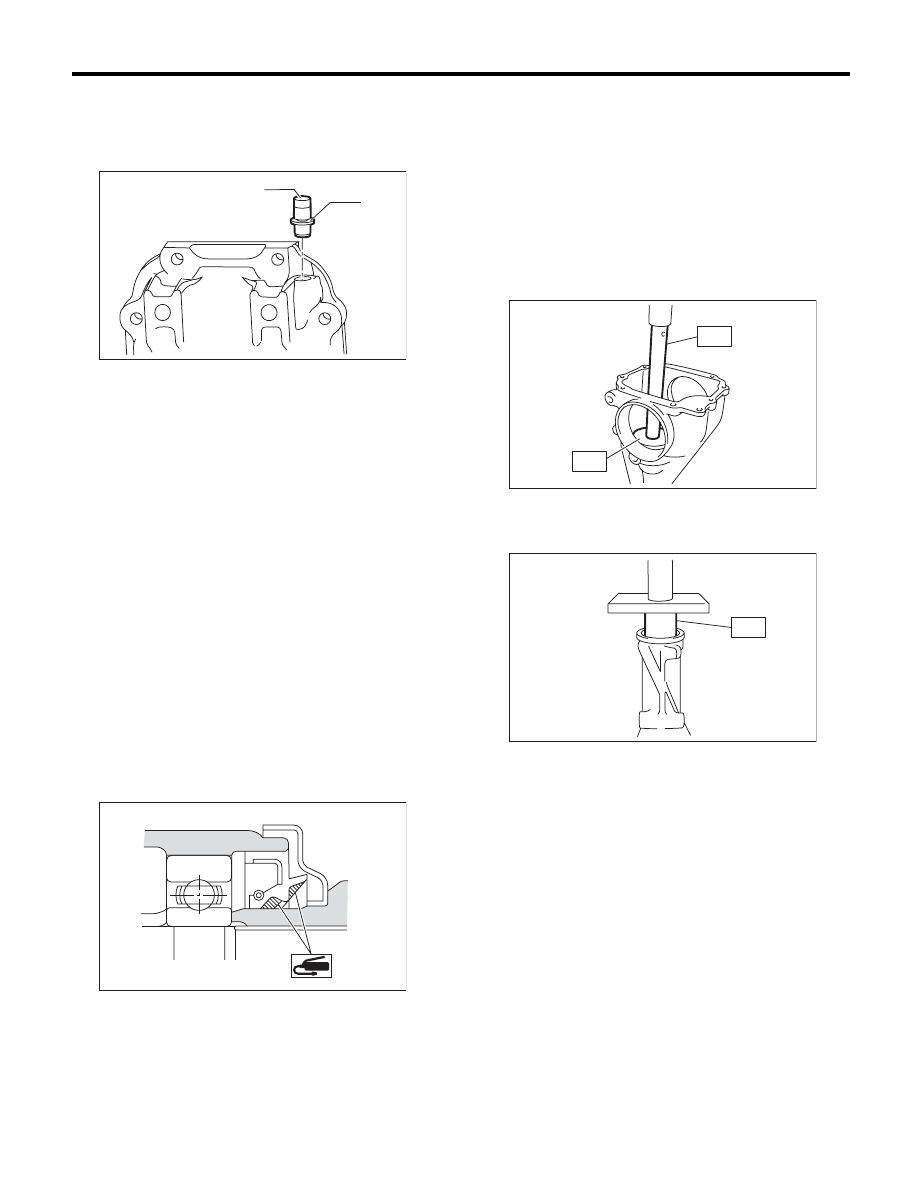
22) Install the air breather cap.
NOTE:
When installing the air breather cap, hit on section
(A). Be sure to hit on section (B) to install.
23) Install the oil drain plug and filler plug.
Tightening torque:
34 N·m (3.5 kgf-m, 25.1 ft-lb)
2. VA2-TYPE
NOTE:
• Assemble in the reverse order of disassembly.
• Check and adjust each part during assembly.
• Use new gaskets and O-rings.
• Keep the shims and washers in order, so that
they are not improperly installed.
• Thoroughly clean the surfaces on which the
shims, washers and bearings are to be installed.
• Apply gear oil when installing the bearings and
thrust washers.
• Be careful not to mix up the RH and LH bearing
races.
• Replace the oil seal with a new part at every dis-
assembly.
• Apply differential gear oil to the lips when install-
ing the oil seal.
• Be careful not to mix up the differential oil seal
RH and LH.
1) Adjusting preload for front and rear bearings
NOTE:
Adjust the bearing preload between front and rear
bearings with spacer and washer. Pinion height ad-
justing washer is not affected by this adjustment.
The adjustment must not be carried out with oil seal
inserted.
(1) Install the rear bearing race into the differen-
tial carrier using ST1 and ST2.
ST1
398477701
HANDLE
ST2
398477703
DRIFT 2
(2) Using the ST, install the front bearing race to
the differential carrier.
ST
499277200
INSTALLER
(3) Insert the front bearing cone.
NOTE:
Use new front bearing cone.
(4) Measure and record the thickness of pinion
height adjusting washer.
NOTE:
If tooth contact (drive pinion, hypoid driven gear) is
normal in the inspection before disassembling, ver-
ify that the washer is not deformed, and then re-use
the used washer.
(5) Insert the ST1 into carrier with the pinion
height adjusting washer and rear bearing cone
fitted onto it.
NOTE:
Use new rear bearing cone.
DI-00563
(A)
(B)
DI-00078
DI-00375
ST2
ST1
DI-00376
ST
DI-76
Rear Differential (VA-type)
DIFFERENTIALS
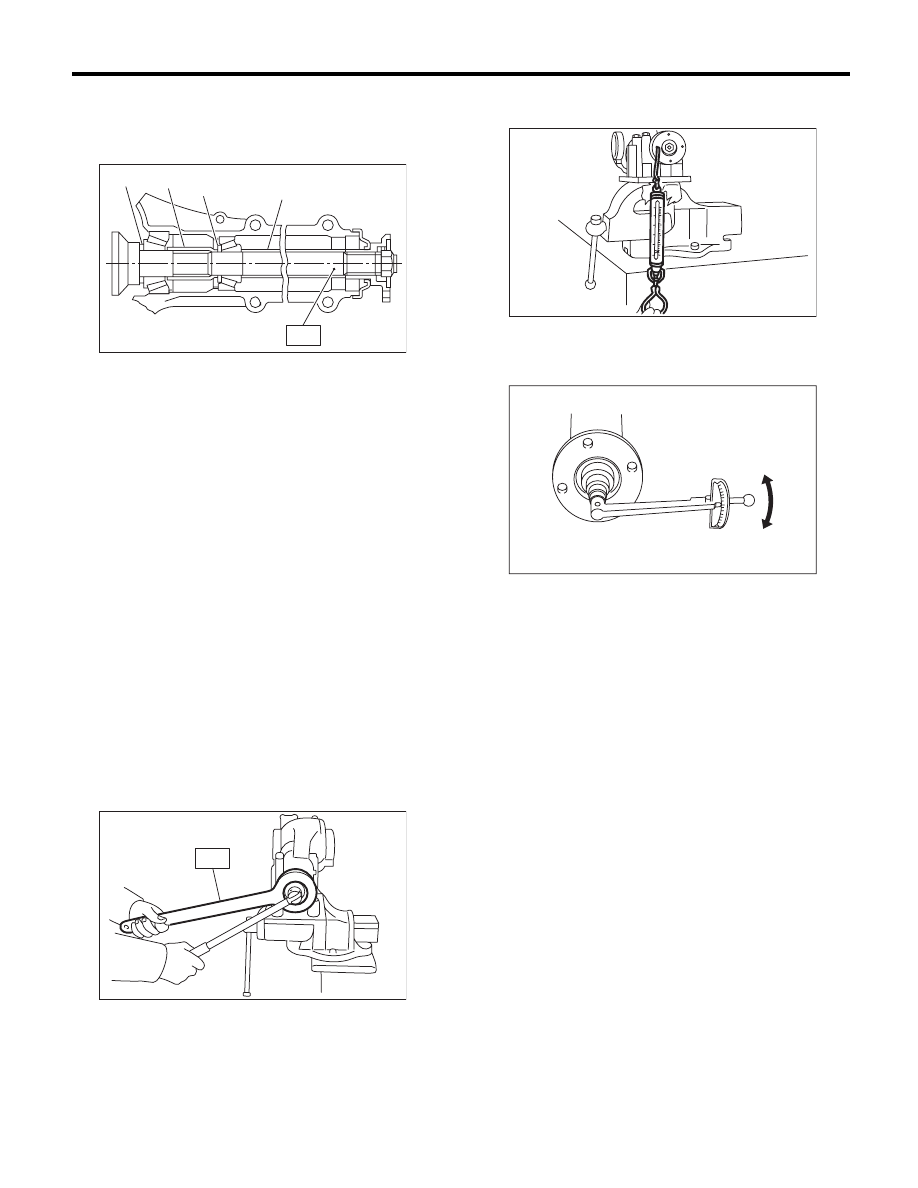
(6) Install the preload adjusting spacer & wash-
er, front bearing cone, spacer, companion
flange, and washer & self-locking nut.
ST1
18678AA000 DUMMY SHAFT
(7) Turn ST1 by hand to seat the bearing, and
measure the initial load and initial torque with a
spring scale or a torque wrench while tightening
the self-locking nut. Select the preload adjust-
ing washer and spacer so that the specified pre-
load is obtained when nut is tightened to the
specified torque.
NOTE:
• Use a new self-locking nut.
• Be careful not to give excessive preload.
• When tightening the self-locking nut, lock com-
panion flange with ST2 as shown in the figure.
• Measure the preload in direction of tangent to the
flange.
ST1
18678AA000 DUMMY SHAFT
ST2
498427200
FLANGE WRENCH
Tightening torque:
191 N·m (19.5 kgf-m, 140.9 ft-lb)
Initial load:
12.7 — 32.2 N (1.3 — 3.3 kgf, 2.9 — 7.2 lb)
Initial torque:
0.48 — 1.22 N·m
(0.05 — 0.12 kgf-m, 0.35 — 0.90 ft-lb)
(A) Pinion height adjusting washer
(B) Preload adjusting spacer
(C) Preload adjusting washer
(D) Spacer
ST1
DI-00377
(D)
(C)
(B)
(A)
DI-00398
ST2
DI-00152
DI-00481
Нет комментариевНе стесняйтесь поделиться с нами вашим ценным мнением.
Текст