Subaru Legacy IV (2008 year). Service manual — part 1139
EI-55
Center Console
EXTERIOR/INTERIOR TRIM
21.Center Console
A: REMOVAL
1) Disconnect the ground cable from the battery.
2) Remove the console box. <Ref. to EI-54, RE-
MOVAL, Console Box.>
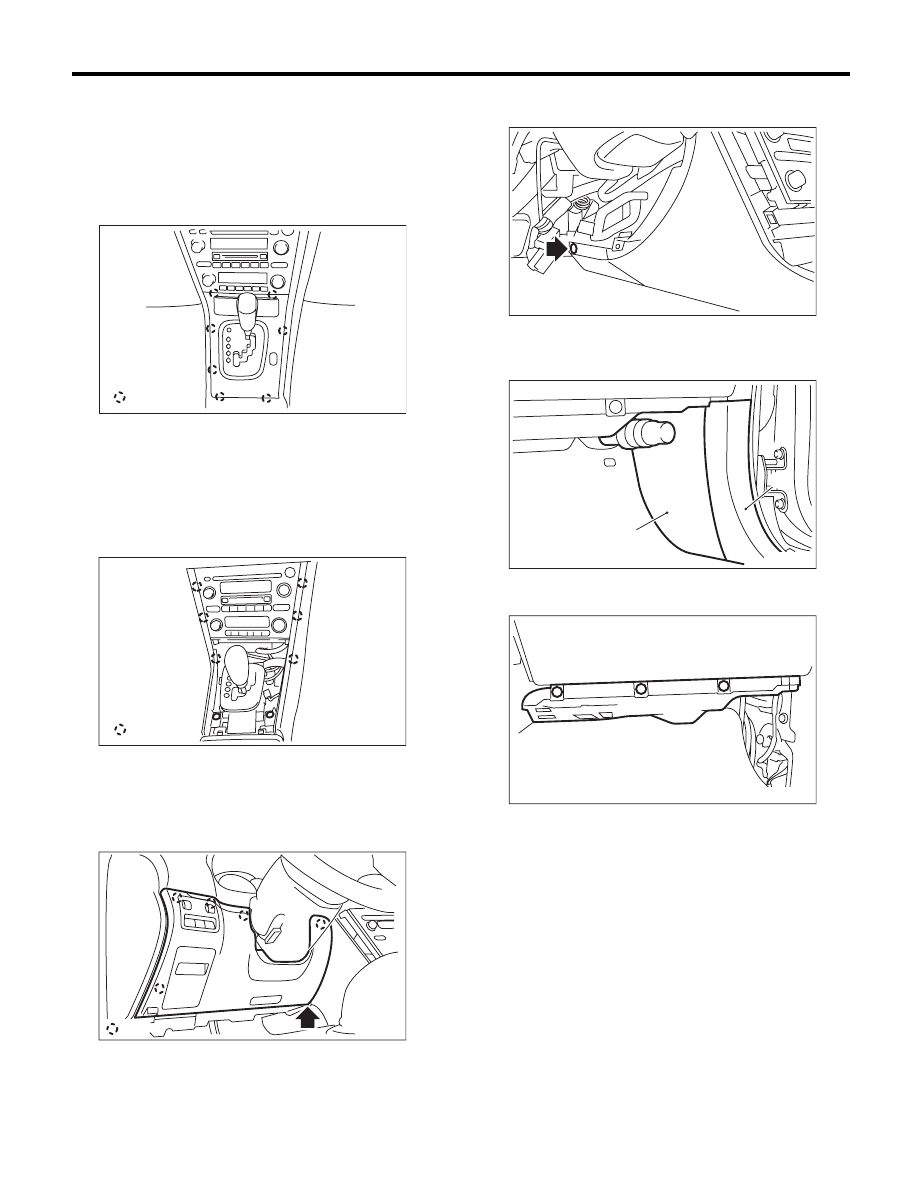
3) Remove the console front panel.
NOTE:
For the AT model, remove the ring indicator.
For the MT model, remove the shift knob.
4) Loosen the screw, remove the hook, and re-
move the console side garnish.
5) Remove the instrument panel lower cover. <Ref.
to EI-51, REMOVAL, Instrument Panel Lower Cov-
er.>
6) Remove the clip at the tip of the console side
panel.
7) Remove the passenger’s side front inside scuff
plate (A) and front pillar lower trim (B). <Ref. to EI-
61, REMOVAL, Lower Inner Trim.>
8) Remove the clips, and remove the glove box
lower cover.
(A) Hook
(A) Hook
EI-00761
: (A)
EI-00762
: (A)
EI-01728
(A)
:(B)
EI-00769
EI-00763
(B)
(A)
EI-00764
EI-56
Center Console
EXTERIOR/INTERIOR TRIM
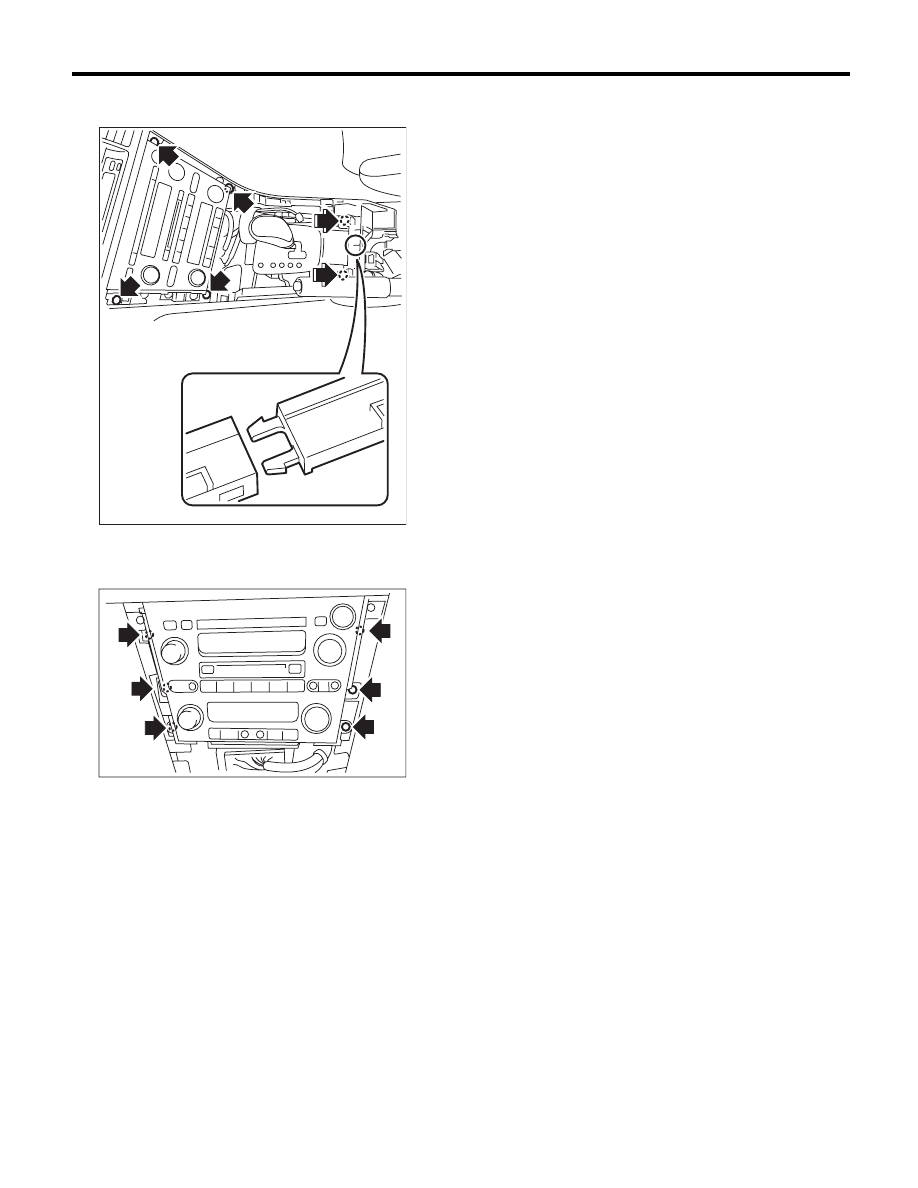
9) Remove the screws, and remove the console
side panel.
10) Loosen the screws and pull out the audio unit
assembly, and disconnect the connector for remov-
al.
NOTE:
The audio unit assembly can be removed without
removing the console side panel.
B: INSTALLATION
Install in the reverse order of removal.
EI-00770
EI-00794
EI-57
Instrument Panel Assembly
EXTERIOR/INTERIOR TRIM
22.Instrument Panel Assembly
A: REMOVAL
1. INSTRUMENT PANEL
(EXCLUDING STEERING SUPPORT BEAM)
CAUTION:
Be careful not to damage the airbag system
harness when servicing the instrument panel.
Damage may cause the system to malfunction.
1) Disconnect the ground cable from the battery.
2) Remove the front pillar upper trim. <Ref. to EI-
62, REMOVAL, Upper Inner Trim.>
3) Remove the console box. <Ref. to EI-54, RE-
MOVAL, Console Box.>
4) Remove the center console. <Ref. to EI-55, RE-
MOVAL, Center Console.>
5) Remove the instrument panel lower cover. <Ref.
to EI-51, REMOVAL, Instrument Panel Lower Cov-
er.>
6) Remove the glove box. <Ref. to EI-52, REMOV-
AL, Glove Box.>
7) Remove the combination meter assembly. <Ref.
to IDI-22, REMOVAL, Combination Meter.>
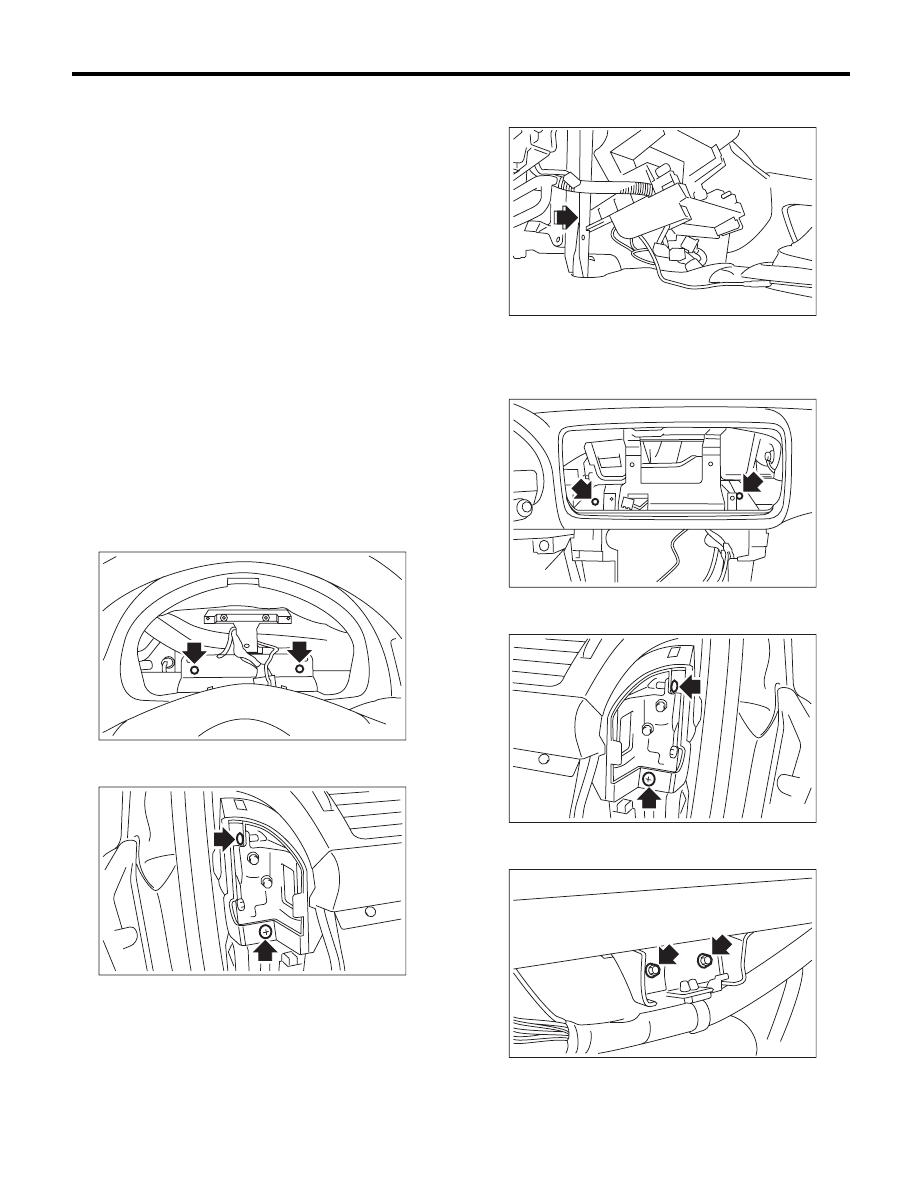
8) Remove the screws.
9) Remove the driver’s side instrument panel side
cover, and remove the screws.
10) Remove the screw at the side of the center
console.
11) Remove the center air vent grille of the instru-
ment panel. <Ref. to AC-47, CENTER GRILLE,
REMOVAL, Air Vent Grille.>
12) Remove the screws.
13) Remove the screws at the side of the passen-
ger’s side instrument panel.
14) Remove the bolts securing the passenger’s
side airbag module to the steering support beam.
EI-00605
EI-00609
EI-00771
EI-00772
EI-00773
EI-00610

EI-58
Instrument Panel Assembly
EXTERIOR/INTERIOR TRIM
15) Disconnect the connectors, and remove the in-
strument panel from vehicle body.
NOTE:
• If necessary, make alignment marks for easy re-
assembly.
• When storing the removed instrument panel, be
sure to prepare a table or the like to place the in-
strument panel, in order to prevent scratches or
other damage to the panel.
16) Remove the side air vent grille. <Ref. to AC-47,
REMOVAL, Air Vent Grille.>
17) Remove the heater vent duct. <Ref. to AC-49,
REMOVAL, Heater Vent Duct.>
18) Loosen the screws to remove the center con-
sole frame.
19) Loosen the screws to remove the meter brack-
et
20) Loosen the screws to remove the instrument
panel matching pins.
21) Loosen the screws to remove the glove box
striker.
22) Remove the claw, and remove the passenger’s
airbag module.
EI-00774
EI-00612
EI-00613
EI-00614
EI-00615
Нет комментариевНе стесняйтесь поделиться с нами вашим ценным мнением.
Текст