Subaru Legacy IV (2008 year). Service manual — part 982
AC-31
Blower Resistor (Manual A/C Model)
HVAC SYSTEM (HEATER, VENTILATOR AND A/C)
10.Blower Resistor (Manual A/C
Model)
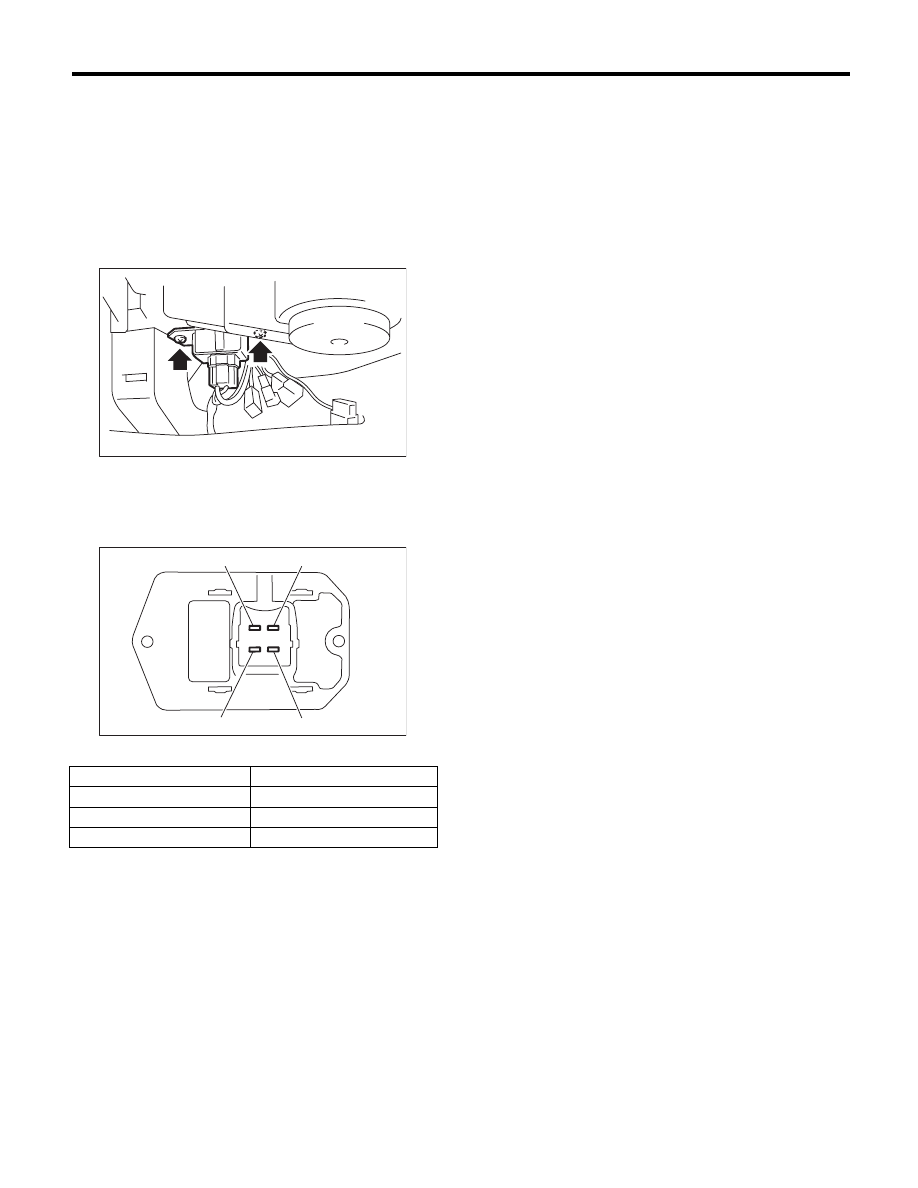
A: REMOVAL
1) Remove the glove box lower cover. <Ref. to EI-
52, REMOVAL, Glove Box.>
2) Disconnect the blower resistor connector.
3) Remove the two screws and remove the blower
resistor.
B: INSTALLATION
Install in the reverse order of removal.
C: INSPECTION
Measure the blower resistor resistance.
If NG, replace the blower resistor.
Terminal No.
Standard
4 and 2
Approx. 0.44
:
4 and 3
Approx. 1.12
:
4 and 1
Approx. 2.92
:
AC-00916
AC-00766
(2)
(4)
(3)
(1)
AC-32
Heater Core
HVAC SYSTEM (HEATER, VENTILATOR AND A/C)
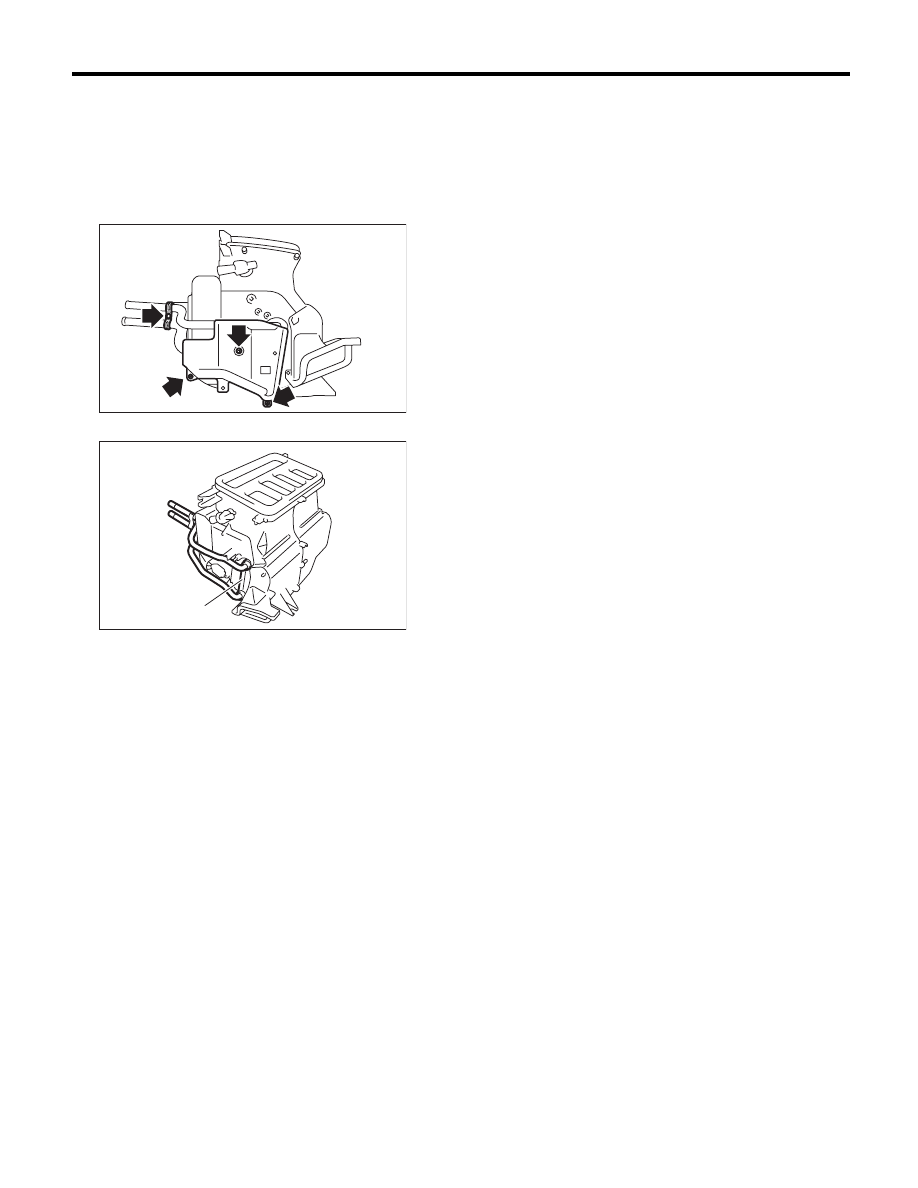
11.Heater Core
A: REMOVAL
1) Remove the heater and cooling unit. <Ref. to
AC-38, REMOVAL, Heater and Cooling Unit.>
2) Remove the screws and remove the heater core
cover and pipe clamp.
3) Remove the heater core (A).
B: INSTALLATION
Install in the reverse order of removal.
AC-01133
AC-01134
(A)
AC-33
Control Panel (Auto A/C Model)
HVAC SYSTEM (HEATER, VENTILATOR AND A/C)
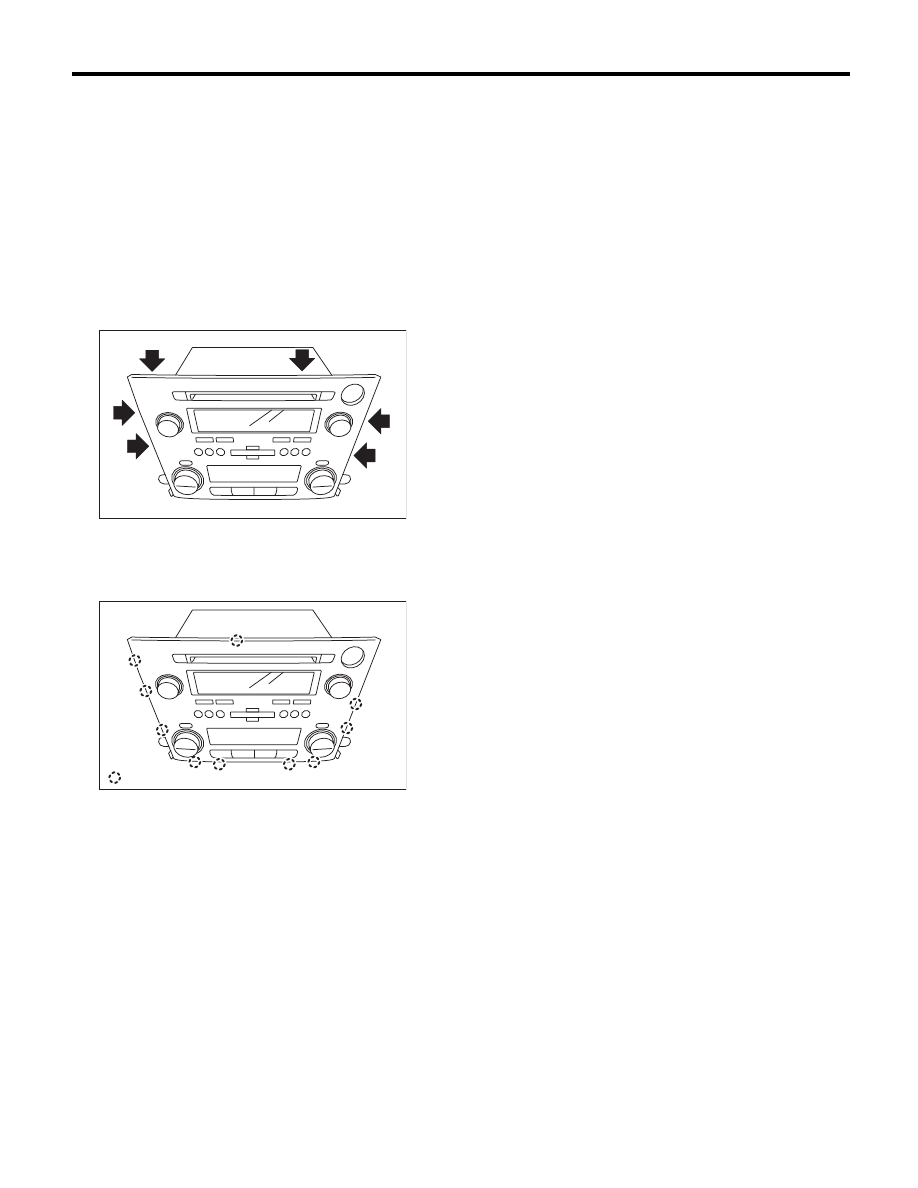
12.Control Panel (Auto A/C
Model)
A: REMOVAL
1) Remove the audio assembly. <Ref. to ET-4, RE-
MOVAL, Audio.>
2) Remove the six screws.
NOTE:
When working with the removed audio assembly
with its back facing down, place wooden blocks be-
tween the audio assembly and the workbench to
prevent the ground terminal from folding.
3) Use a fine flat tip screwdriver to lift the hooks in
10 locations gradually. Starting from the sides, pro-
ceed to loosen the lower hooks, then the upper
hooks, then remove.
4) Pull the panel straight out to remove.
CAUTION:
Be careful not to touch the circuit board of the
panel to prevent damage by static electricity.
B: INSTALLATION
1) After attaching the hooks, push the center of the
panel by hand and secure the connection between
the circuit board and the connector.
2) Install in the reverse order of removal.
(A) Hook
AC-01553
AC-01554
: (A)

AC-34
Control Unit (Manual A/C Model)
HVAC SYSTEM (HEATER, VENTILATOR AND A/C)
13.Control Unit (Manual A/C
Model)
A: REMOVAL
1) Disconnect the ground cable from the battery.
2) Remove the instrument panel lower cover. <Ref.
to EI-51, REMOVAL, Instrument Panel Lower Cov-
er.>
3) Remove the control wires.
4) Remove the audio assembly. <Ref. to ET-4, RE-
MOVAL, Audio.>
5) Loosen the screw to remove the control unit from
the bracket.
B: INSTALLATION
Install in the reverse order of removal.
AC-01597
Нет комментариевНе стесняйтесь поделиться с нами вашим ценным мнением.
Текст