Subaru Legacy III (2000-2003 year). Service manual — part 77
CO(H4SO)-16
COOLING
WATER PUMP
5. Water Pump
A: REMOVAL
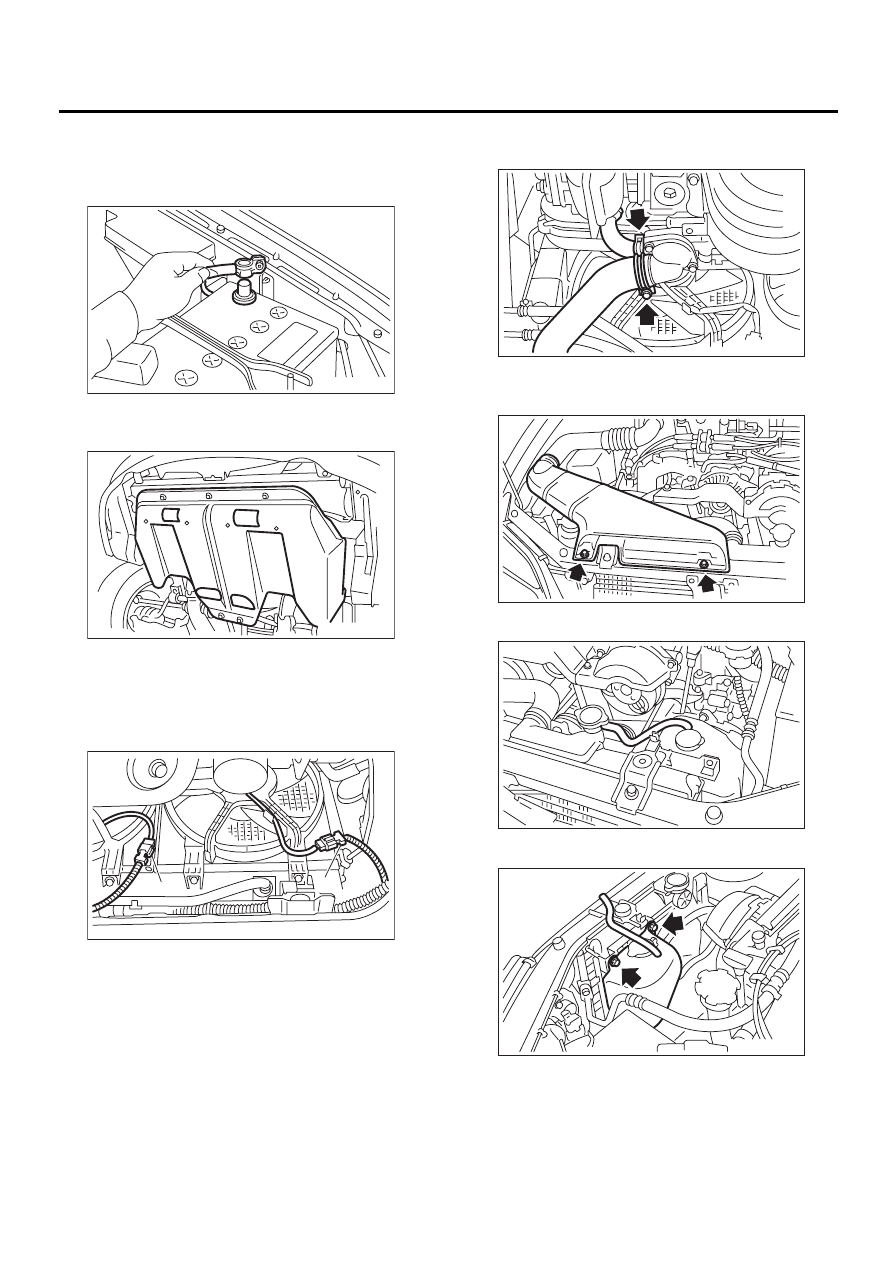
1) Disconnect ground cable from battery.
2) Lift-up the vehicle.
3) Remove under cover.
4) Drain engine coolant completely.
<Ref. to CO(H4SO)-14, DRAINING OF ENGINE
COOLANT, REPLACEMENT, Engine Coolant.>
5) Disconnect connectors from radiator main fan
(A) and sub fan (B) motors.
6) Disconnect radiator outlet hose and heater by-
pass hose from water pump.
7) Lower the vehicle.
8) Remove air intake duct.
9) Disconnect overflow hose.
10) Remove reservoir tank.
11) Remove radiator main fan and sub fan assem-
blies. <Ref. to CO(H4SO)-28, REMOVAL, Radiator
Main Fan and Fan Motor.> and <Ref. to
CO(H4SO)-30, REMOVAL, Radiator Sub Fan and
Fan Motor.>
FU-00009
LU-00095
( A )
( B )
CO-00084
CO-00085
IN-00059
CO-00086
CO-00087
CO(H4SO)-17
COOLING
WATER PUMP
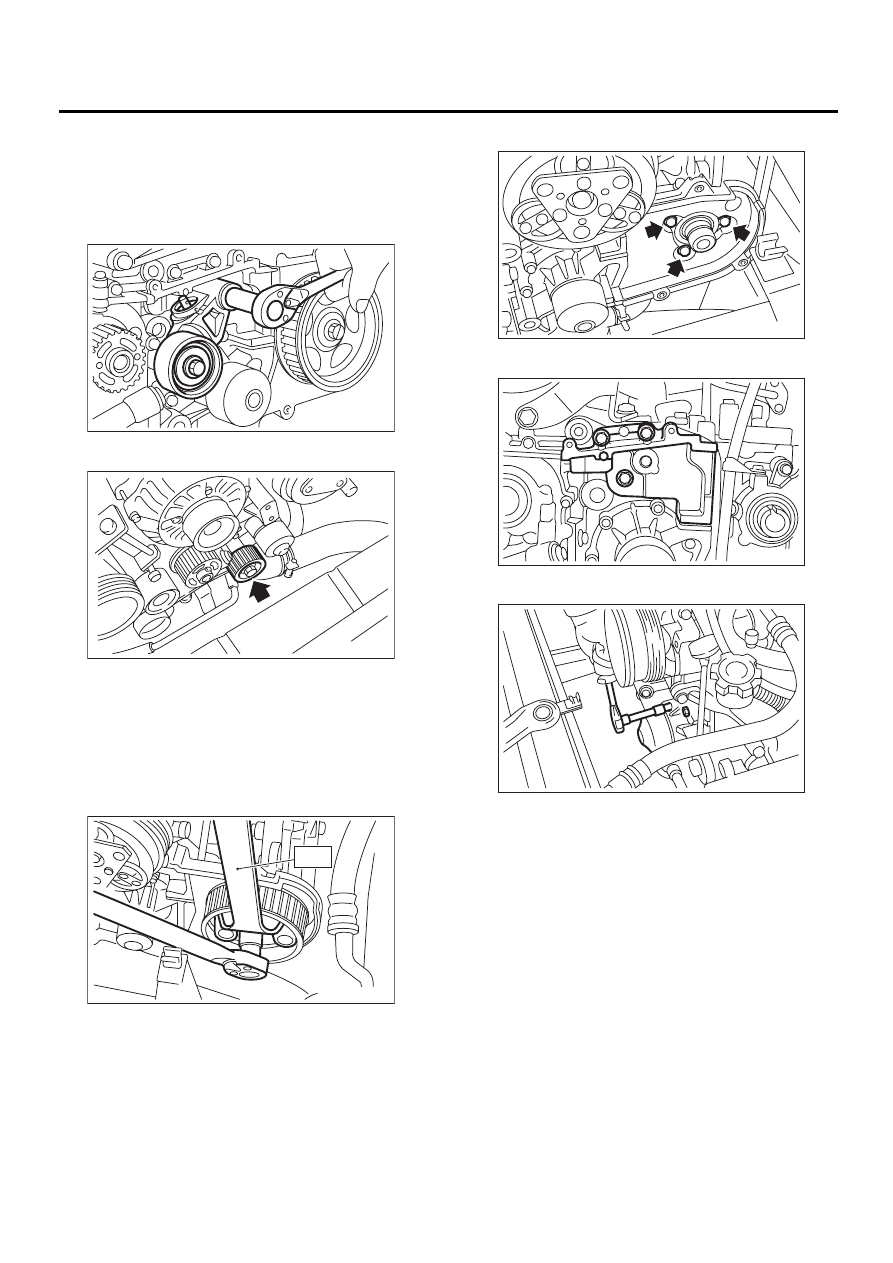
12) Remove V-belts.
<Ref. to ME(H4SO)-41, REMOVAL, V-belt.>
13) Remove timing belt.
<Ref. to ME(H4SO)-46, REMOVAL, Timing Belt
Assembly.>
14) Remove automatic belt tension adjuster.
15) Remove belt idler No. 2.
16) Remove left-hand camshaft sprocket by using
ST.
ST
18231AA010
CAMSHAFT SPROCKET
WRENCH
NOTE:
Camshaft sprocket wrench (499207100) is also
available.
17) Remove left-hand belt cover No. 2.
18) Remove tensioner bracket.
19) Remove water pump.
CO-00016
CO-00017
CO-00018
ST
CO-00019
CO-00020
CO-00021

CO(H4SO)-18
COOLING
WATER PUMP
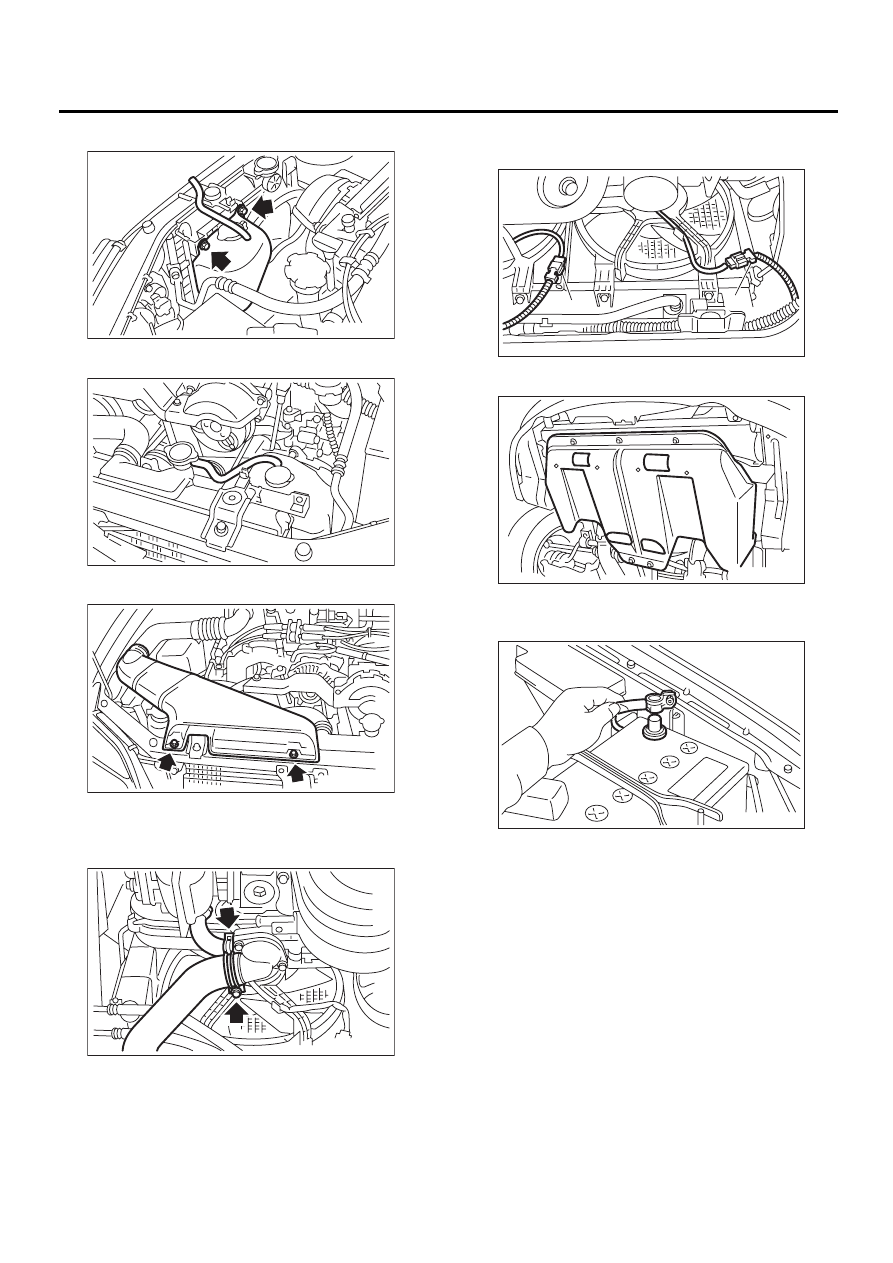
B: INSTALLATION
1) Install water pump onto left-hand cylinder block.
NOTE:
• Replace gasket with a new one.
• When installing water pump, tighten bolts in two
stages in alphabetical sequence as shown in fig-
ure.
Tightening torque:
First:
12 N·m (1.2 kgf-m, 8.7 ft-lb)
Second:
12 N·m (1.2 kgf-m, 8.7 ft-lb)
2) Install tensioner bracket.
Tightening torque:
25 N·m (2.5 kgf-m, 18.1 ft-lb)
3) Install left-hand belt cover No. 2.
Tightening torque:
5 N·m (0.5 kgf-m, 3.6 ft-lb)
4) Install left-hand camshaft sprockets by using ST.
ST
18231AA010
CAMSHAFT SPROCKET
WRENCH
NOTE:
Camshaft sprocket wrench (499207100) is also
available.
Tightening torque:
78 N·m (8.0 kgf-m, 57.9 ft-lb)
5) Install belt idler No. 2.
Tightening torque:
39 N·m (4.0 kgf-m, 28.9 ft-lb)
6) Install automatic belt tension adjuster which ten-
sion rod is held with pin. <Ref. to ME(H4SO)-47,
AUTOMATIC BELT TENSION ADJUSTER AS-
SEMBLY AND BELT IDLER, INSTALLATION,
Timing Belt Assembly.>
7) Install timing belt. <Ref. to ME(H4SO)-48, TIM-
ING BELT, INSTALLATION, Timing Belt Assem-
bly.>
8) Install V-belts. <Ref. to ME(H4SO)-42, INSTAL-
LATION, V-belt.>
9) Install radiator main fan and sub fan motor as-
semblies. <Ref. to CO(H4SO)-29, INSTALLATION,
Radiator Main Fan and Fan Motor.> and <Ref. to
CO(H4SO)-30, INSTALLATION, Radiator Sub Fan
and Fan Motor.>
CO-00026
( A )
( B )
( C )
( D )
( E )
( F )
CO-00020
CO-00019
CO-00018
ST
CO-00017
CO(H4SO)-19
COOLING
WATER PUMP
10) Install reservoir tank.
11) Connect overflow hose.
12) Install air intake duct.
13) Lift-up the vehicle.
14) Connect radiator outlet hose and heater by-
pass hose to water pump.
15) Connect connectors to radiator main fan (A)
and sub fan (B) motors.
16) Install under cover.
17) Lower the vehicle.
18) Connect battery ground cable.
19) Fill coolant. <Ref. to CO(H4SO)-14, FILLING
OF ENGINE COOLANT, REPLACEMENT, Engine
Coolant.>
CO-00087
CO-00086
IN-00059
CO-00085
( A )
( B )
CO-00084
LU-00095
FU-00009
Нет комментариевНе стесняйтесь поделиться с нами вашим ценным мнением.
Текст