Subaru Legacy III (2000-2003 year). Service manual — part 444

CO(H4DOSTC)-30
COOLING
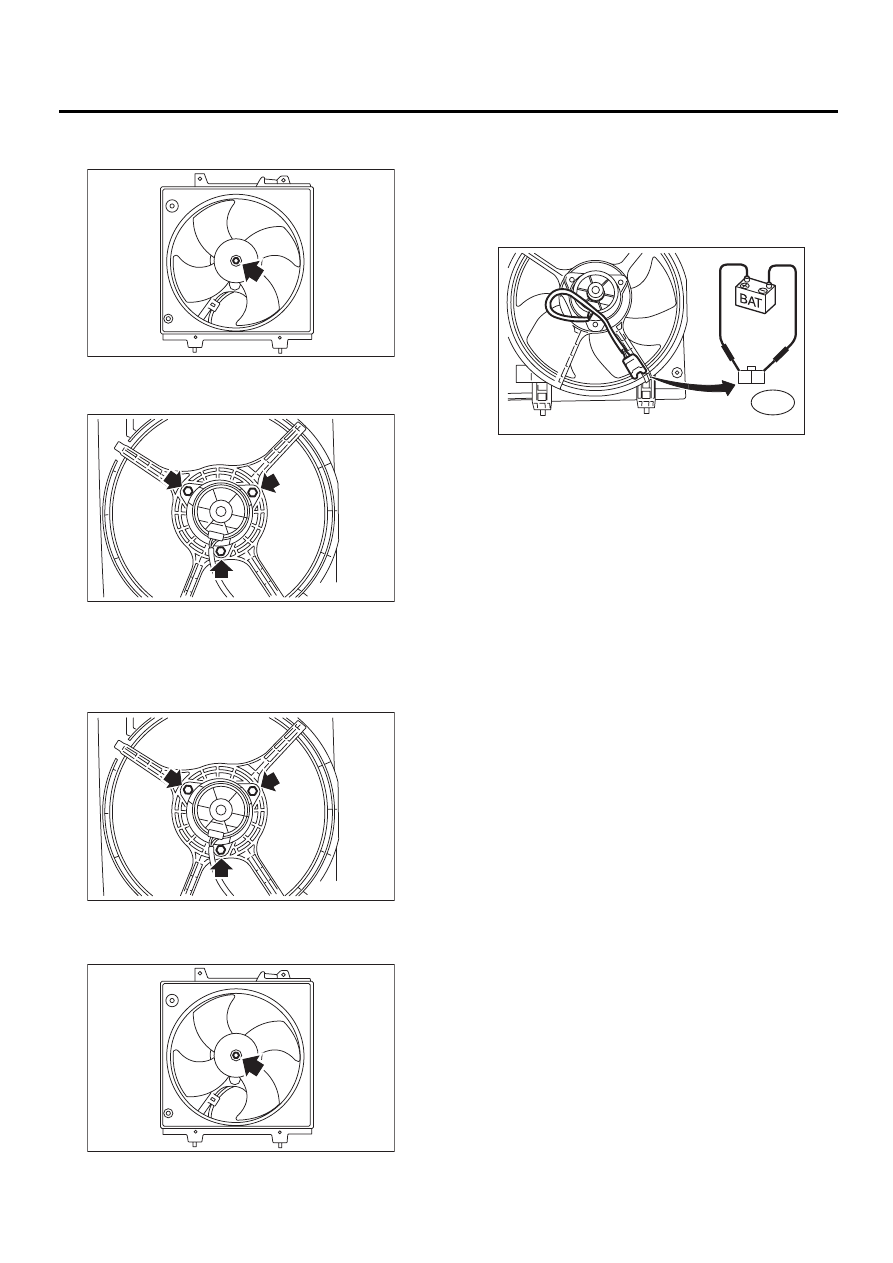
RADIATOR SUB FAN AND FAN MOTOR
10.Radiator Sub Fan and Fan
Motor
A: REMOVAL
1) Disconnect battery ground cable.
2) Lift-up the vehicle.
3) Remove under cover.
4) Disconnect connector of sub fan motor.
5) Lower the vehicle.
6) Remove air intake duct.
7) Remove bolts which hold sub fan shroud to radi-
ator.
8) Remove radiator sub fan shroud through the un-
der side of vehicle.
B: INSTALLATION
Install in the reverse order of removal.
Tightening torque:
4.9 N·m (0.50 kgf-m, 3.6 ft-lb)
C: DISASSEMBLY
1) Remove clip which holds motor harness onto
shroud.
FU-00009
CO-00100
CO-00156
CO-00101
CO-00101
CO-00046
CO(H4DOSTC)-31
COOLING
RADIATOR SUB FAN AND FAN MOTOR
2) Remove nut which holds fan itself onto fan motor
and shroud assembly.
3) Remove bolts which install fan motor onto
shroud.
D: ASSEMBLY
Assemble in the reverse order of disassembly.
Tightening torque:
4.4 N·m (0.45 kgf-m, 3.3 ft-lb)
Tightening torque:
3.4 N·m (0.35 kgf-m, 2.5 ft-lb)
E: INSPECTION
1) Connect battery positive (+) terminal to terminal
No. 2, and negative (
−
) terminal to terminal No. 1 of
sub fan motor connector.
2) Make sure the sub-fan motor operates properly.
Replace it if it doesn't.
CO-00102
CO-00098
CO-00098
CO-00102
CO-00104
F16
1 2
To
CO(H4DOSTC)-32
COOLING
RESERVOIR TANK
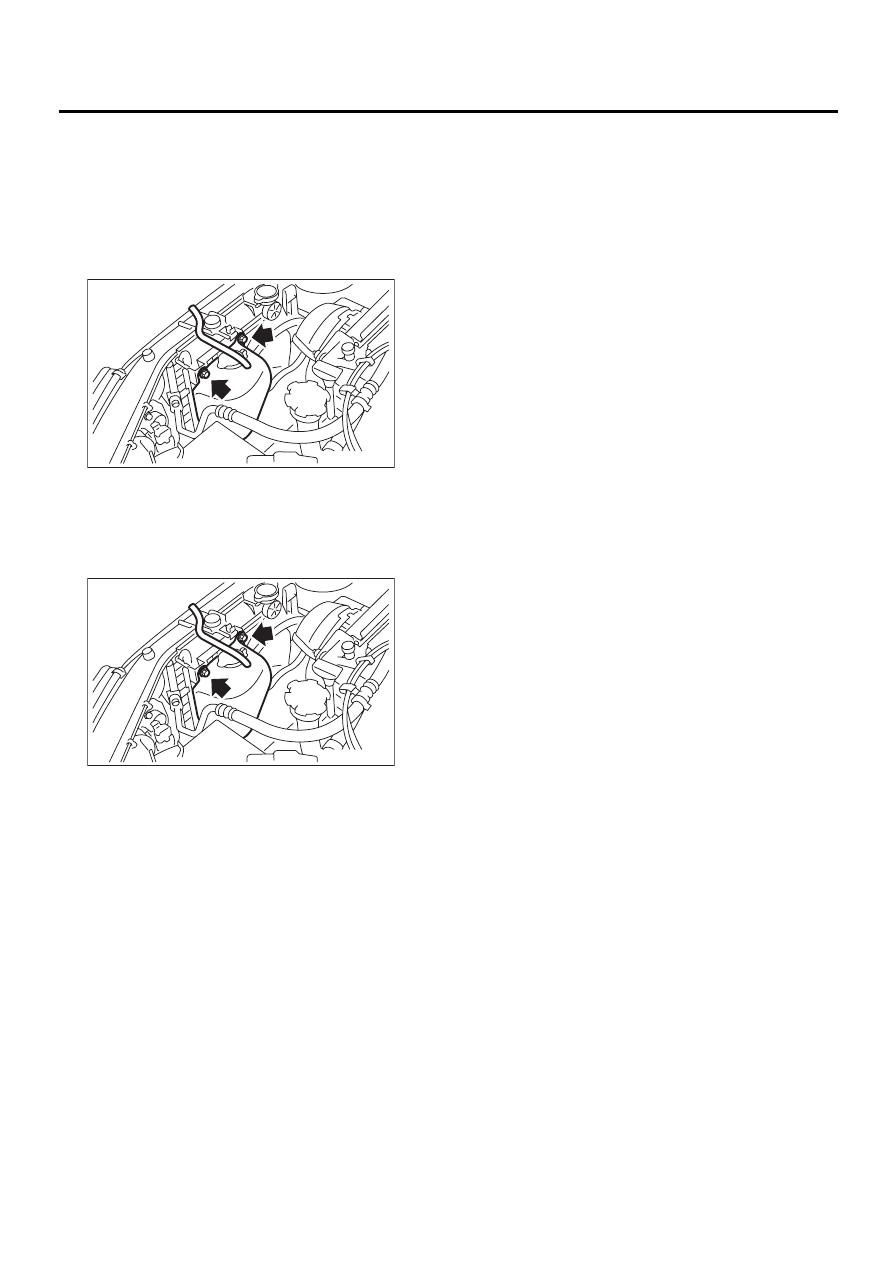
11.Reservoir Tank
A: REMOVAL
1) Disconnect overflow hose from radiator filler
neck position.
2) Remove bolts which install reservoir tank onto
radiator main fan shroud.
3) Remove reservoir tank.
B: INSTALLATION
Install in the reverse order of removal.
Tightening torque:
4.9N·m (0.50 kgf-m, 3.6 ft-lb)
C: INSPECTION
Make sure the engine coolant level is between full
and low.
CO-00087
CO-00087
CO(H4DOSTC)-33
COOLING
COOLANT FILLER TANK
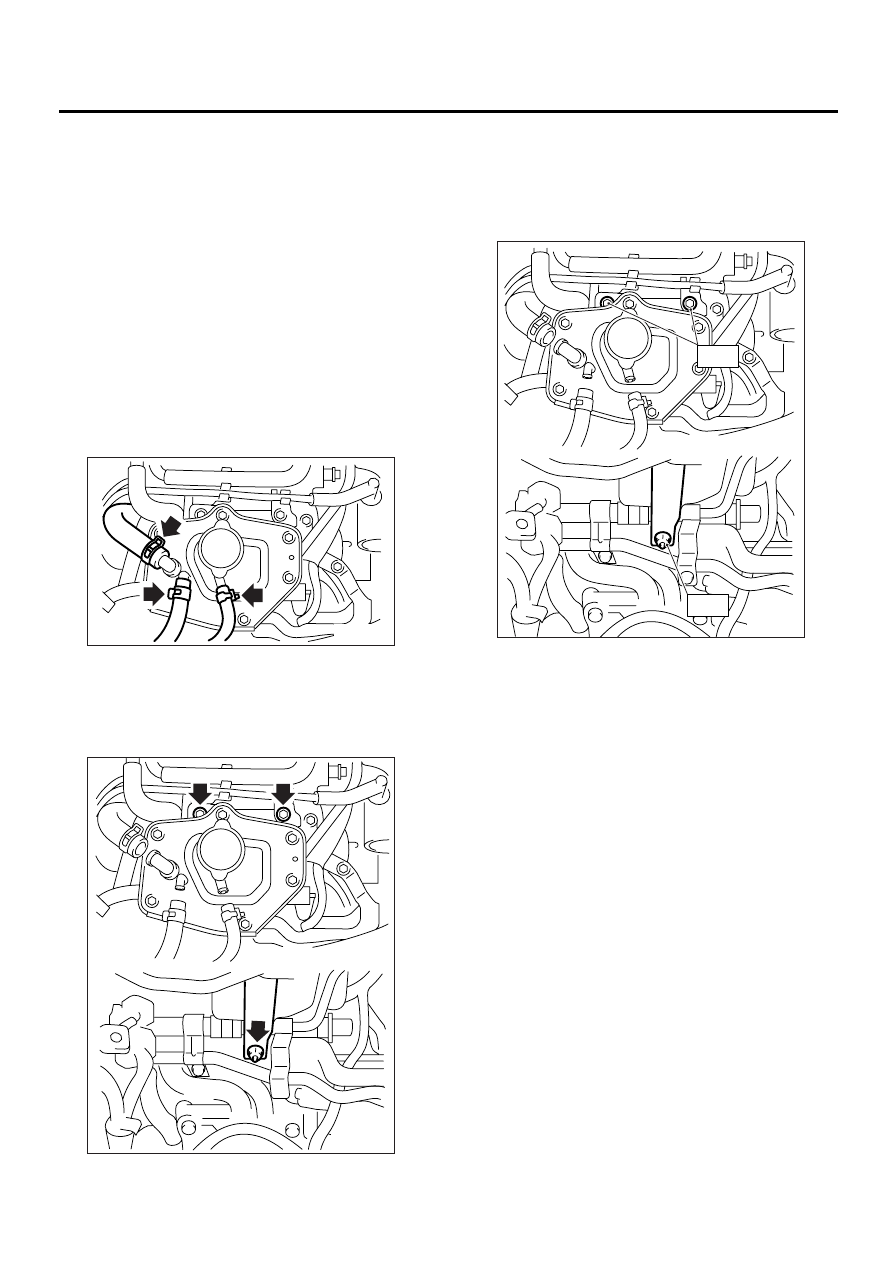
12.Coolant Filler Tank
A: REMOVAL
WARNING:
The radiator is pressurized. Wait until the en-
gine cools down before working on the radia-
tor.
1) Drain the coolant about 3.0
2
(3.2 US qt, 2.6
lmp qt). <Ref. to CO(H4DOSTC)-15, DRAINING
LOF ENGINE COOLANT, REPLACEMENT, En-
gine Coolant.>
2) Remove the air cleaner upper cover and air in-
take boot. <Ref. to IN(H4DOSTC)-10, REMOVAL,
Air Cleaner.>
3) Remove the air cleaner element.
4) Disconnect the engine coolant hoses from cool-
ant filler tank.
5) Remove the bolts and nut which installs coolant
filler tank.
6) Disconnect the engine coolant hose which con-
nects under side of coolant filler tank.
7) Remove the coolant filler tank.
B: INSTALLATION
1) Install in the reverse order of removal.
Tightening torque:
T1: 19 N·m (1.9 kgf-m, 13.7 ft-lb)
T2: 21 N·m (2.1 kgf-m, 15.2 ft-lb)
2) Fill the engine coolant. <Ref. to
CO(H4DOSTC)-15, FILLING OF ENGINE COOL-
ANT, REPLACEMENT, Engine Coolant.>
EN0125
CO-00160
CO-00161
T2
T1
CO-00162
Нет комментариевНе стесняйтесь поделиться с нами вашим ценным мнением.
Текст