Subaru Legacy III (2000-2003 year). Service manual — part 274
EX(H6DO)-4
EXHAUST
GENERAL DESCRIPTION
B: CAUTION
• Wear working clothing, including a cap, protec-
tive goggles, and protective shoes during opera-
tion.
• Remove contamination including dirt and corro-
sion before removal, installation or disassembly.
• Keep the disassembled parts in order and pro-
tect them from dust or dirt.
• Before removal, installation or disassembly, be
sure to clarify the failure. Avoid unnecessary re-
moval, installation, disassembly, and replacement.
• Be careful not to burn your hands, because each
part on the vehicle is hot after running.
• Be sure to tighten fasteners including bolts and
nuts to the specified torque.
• Place shop jacks or safety stands at the specified
points.
• Before disconnecting electrical connectors of
sensors or units, be sure to disconnect ground ca-
ble from battery.
EX(H6DO)-5
EXHAUST
FRONT EXHAUST PIPE
2. Front Exhaust Pipe
A: REMOVAL
1) Remove battery.
2) Remove air cleaner case and air intake duct.
<Ref. to IN(H6DO)-5, REMOVAL, Air Cleaner.>
and <Ref. to IN(H6DO)-7, REMOVAL, Air Intake
Duct.>
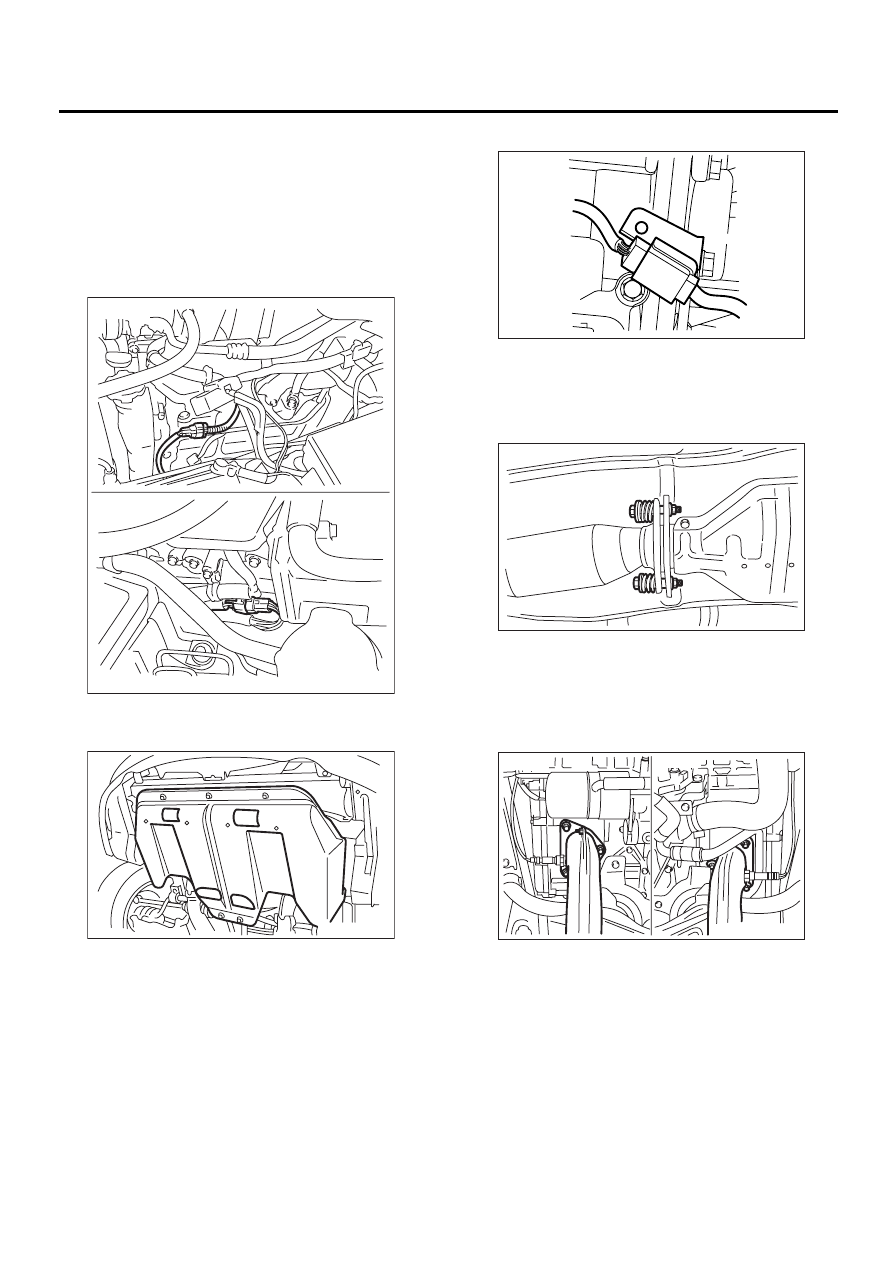
3) Disconnect front oxygen (A/F) sensor connector.
4) Lift-up the vehicle.
5) Remove under cover.
6) Disconnect rear oxygen sensor connector.
7) Separate front exhaust pipe assembly from rear
exhaust pipe.
WARNING:
Be careful, exhaust pipe is hot.
8) Remove nuts which hold front exhaust pipe onto
cylinder heads.
CAUTION:
Be careful not to pull down front exhaust pipe
assembly.
EX-00056
LH side
RH side
LU-00095
EX-00058
EX-00059
EX-00060
RH side
LH side
EX(H6DO)-6
EXHAUST
FRONT EXHAUST PIPE
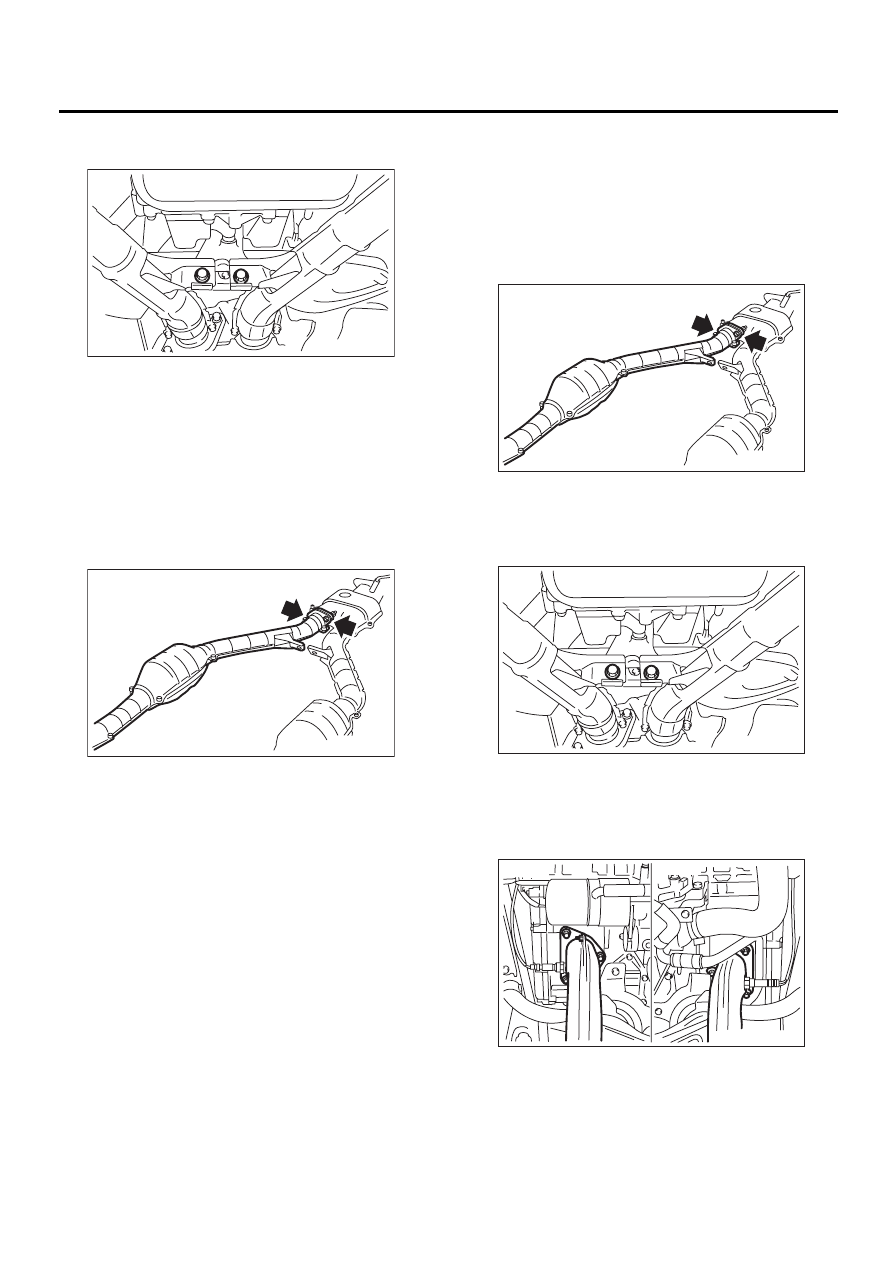
9) Remove bolt which secures front exhaust pipe
assembly to hanger bracket.
10) Remove front exhaust pipe from the vehicle.
CAUTION:
• Be careful not to let front exhaust pipe as-
sembly fall off when removing as it is quite
heavy.
• After removing front exhaust assembly, do
not apply excessive pulling force on rear ex-
haust pipe.
11) Separate front exhaust pipe (RH) from front ex-
haust pipe assembly.
B: INSTALLATION
1) Install front exhaust pipe (RH) to front exhaust
pipe assembly.
NOTE:
Replace gaskets with new ones.
Tightening torque:
30 N·m (3.1 kgf-m, 22.4 ft-lb)
2) Install front exhaust pipe assembly to the vehi-
cle.
3) Temporarily tighten bolt which installs front ex-
haust pipe assembly to hanger bracket.
4) Tighten nuts which hold front exhaust pipe onto
cylinder heads.
Tightening torque:
30 N·m (3.1 kgf-m, 22.4 ft-lb)
EX-00061
EX-00062
EX-00062
EX-00061
EX-00060
RH side
LH side
EX(H6DO)-7
EXHAUST
FRONT EXHAUST PIPE
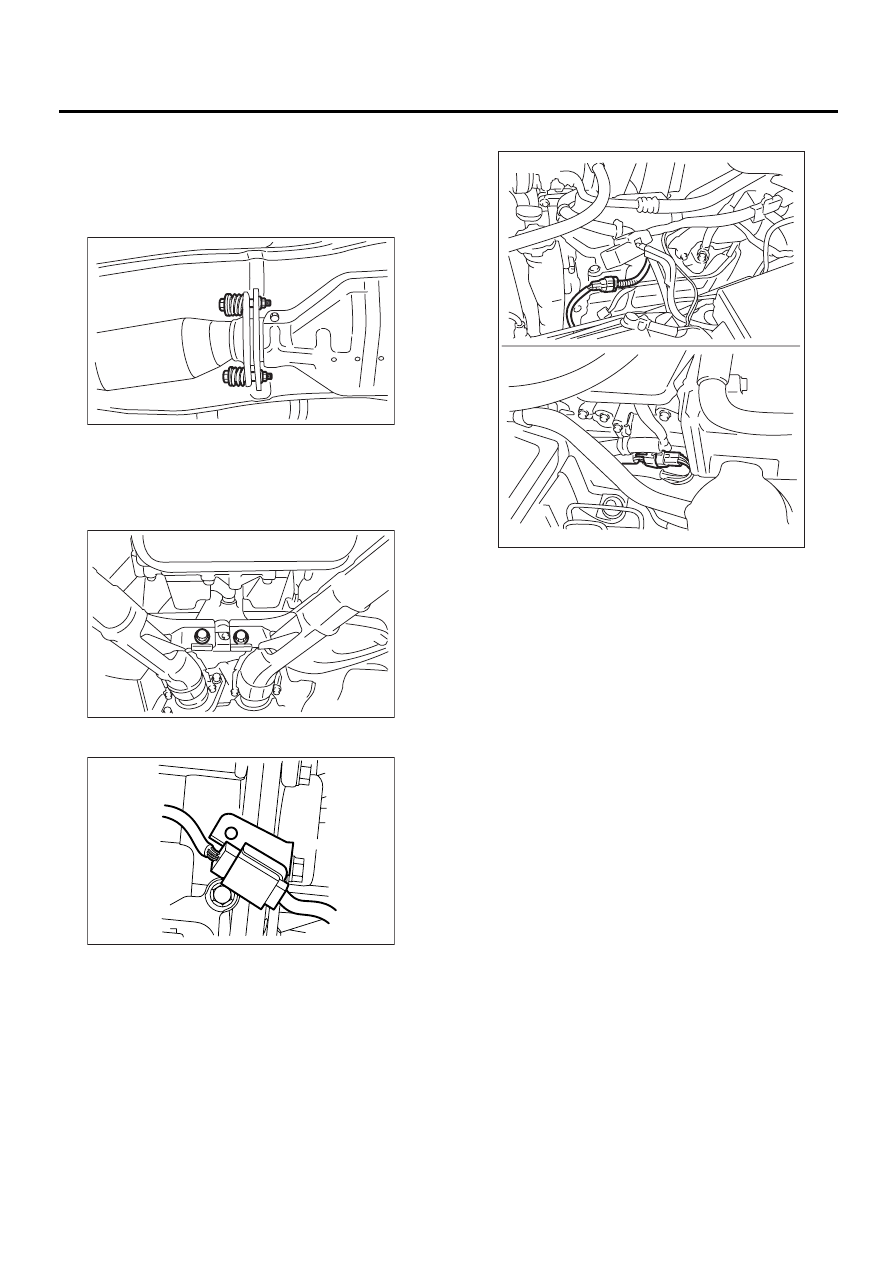
5) Install under cover.
6) Tighten bolts which install front exhaust pipe to
rear exhaust pipe.
Tightening torque:
18 N·m (1.8 kgf-m, 13.0 ft-lb)
7) Tighten bolt which holds front exhaust pipe as-
sembly to hanger bracket.
Tightening torque:
35 N·m (3.6 kgf-m, 26.0 ft-lb)
8) Connect rear oxygen sensor connector.
9) Install under cover.
10) Lower the vehicle.
11) Connect front oxygen (A/F) sensor connectors.
12) Install air cleaner case and air intake duct.
<Ref. to IN(H6DO)-5, INSTALLATION, Air Clean-
er.> and <Ref. to IN(H6DO)-7, INSTALLATION, Air
Intake Duct.>
13) Install battery.
C: INSPECTION
1) Make sure there are no exhaust leaks from con-
nections and welds.
2) Make sure there are no holes or rusting.
EX-00059
EX-00061
EX-00058
EX-00056
LH side
RH side
Нет комментариевНе стесняйтесь поделиться с нами вашим ценным мнением.
Текст