Subaru Legacy III (2000-2003 year). Service manual — part 232
FU(H6DO)-12
FUEL INJECTION (FUEL SYSTEMS)
GENERAL DESCRIPTION
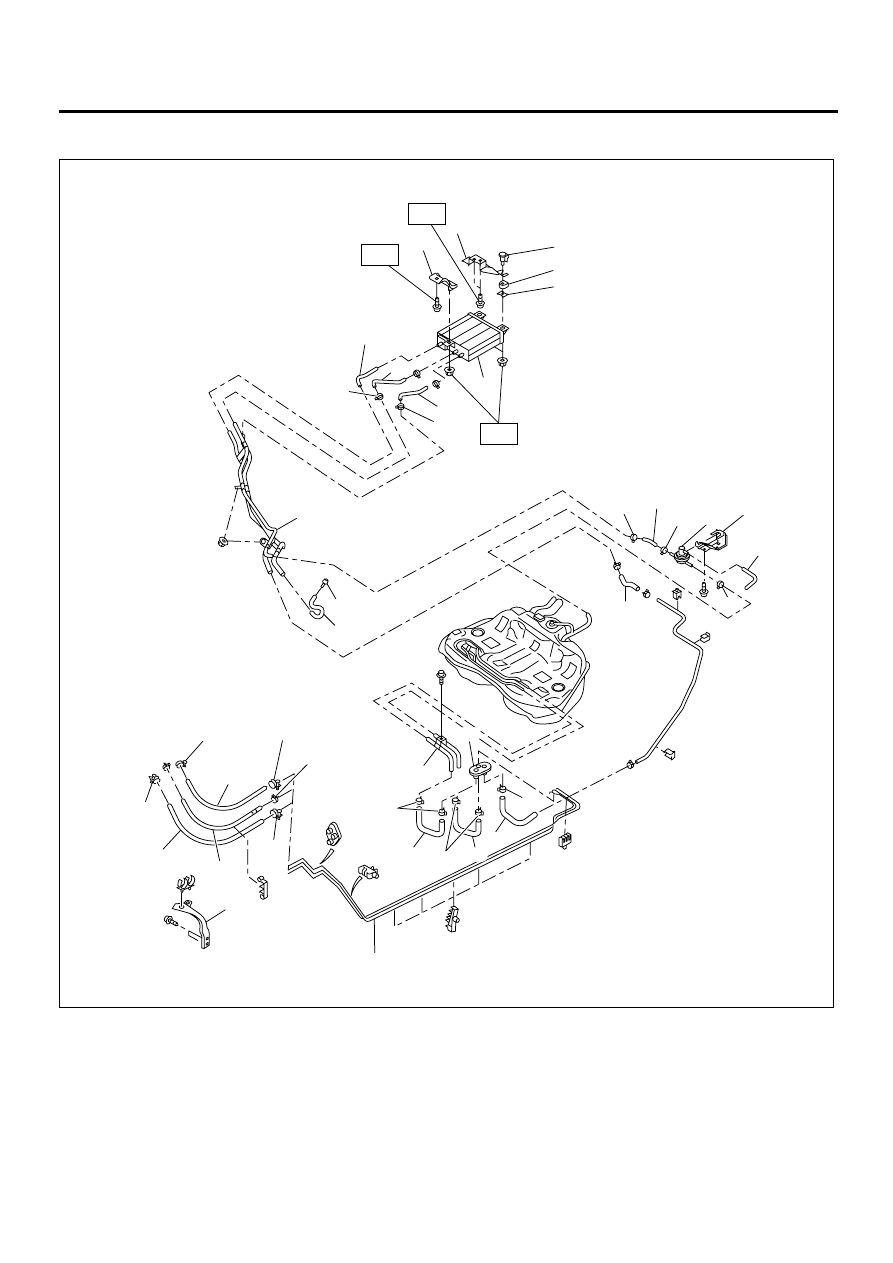
6. FUEL LINE
FU-00696
( 1 )
( 1 )
( 1 )
( 1 )
( 1 )
( 1 )
( 1 )
( 1 )
( 1 )
( 1 )
( 1 )
( 1 )
( 2 )
( 3 )
( 4 )
( 5 )
( 5 )
( 6 )
( 7 )
( 8 )
( 9 )
(10)
(11)
(12)
(13)
(14)
(15)
(16)
(17)
(18)
(19)
(21)
(20)
(22)
(28)
(27)
(26)
(25)
(24)
(23)
T1
T2
T2
FU(H6DO)-13
FUEL INJECTION (FUEL SYSTEMS)
GENERAL DESCRIPTION
(1) Clamp
(12) Two-way valve hose
(23) Front canister bracket
(2) Fuel return hose A
(13) Two-way valve
(24) Rear canister bracket
(3) Fuel return hose B
(14) Two-way valve bracket
(25) Canister bracket spacer
(4) Clip
(15) Two-way valve drain hose
(26) Cushion
(5) Fuel pipe ASSY
(16) Drain hose
(27) Canister bracket plate
(6) Grommet
(17) Fuel pipe connector
(28) Evaporation hose D
(7) Evaporation hose A
(18) Evaporation pipe ASSY
(8) Fuel delivery hose A
(19) Purge hose
Tightening torque: N·m (kgf-m, ft-lb)
(9) Fuel delivery hose B
(20) Evaporation hose C
T1: 23 (2.3, 16.6)
(10) Bracket
(21) Canister drain hose
T2: 33 (3.4, 25)
(11) Evaporation hose B
(22) Canister
FU(H6DO)-14
FUEL INJECTION (FUEL SYSTEMS)
GENERAL DESCRIPTION
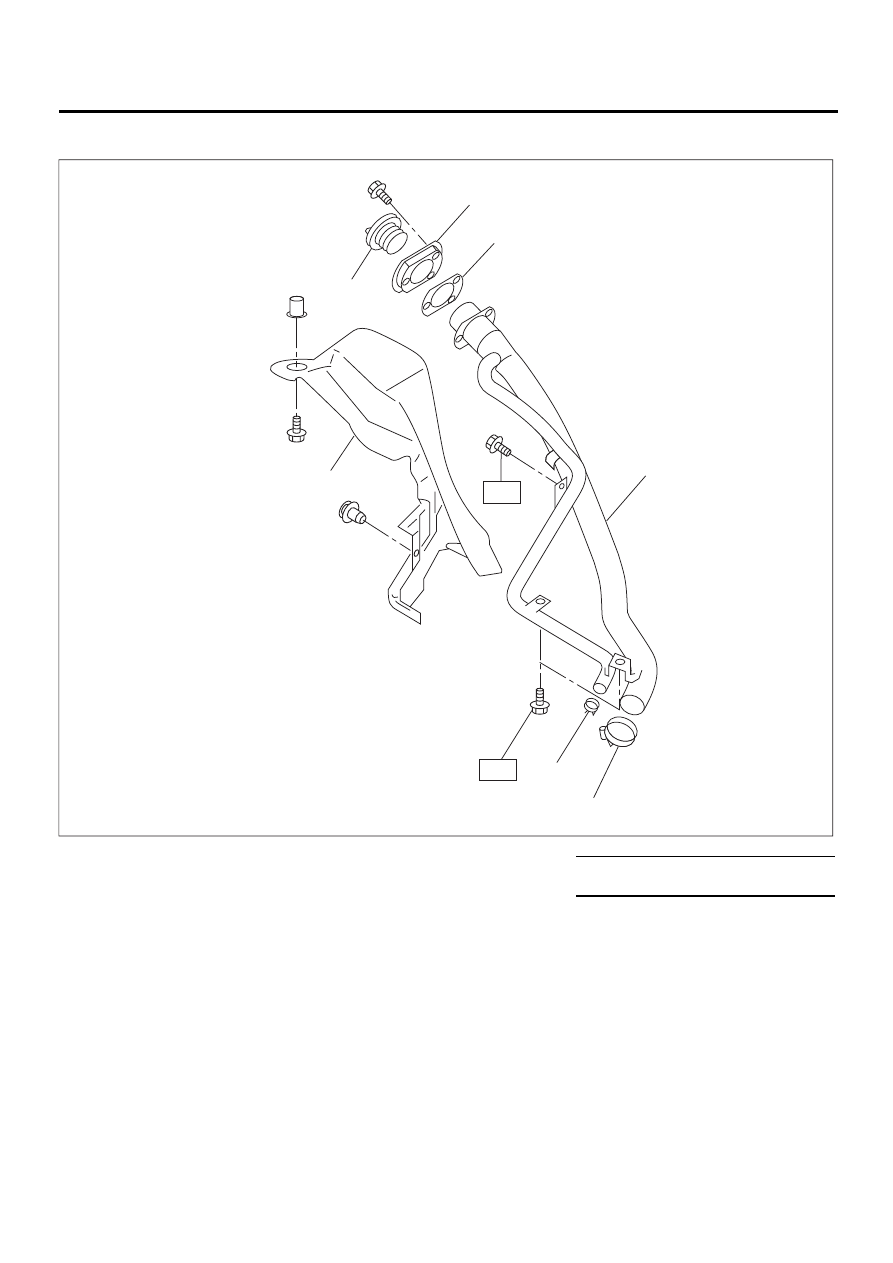
7. FUEL FILLER PIPE
(1) Fuel filler pipe ASSY
(5) Filler ring
Tightening torque: N·m (kgf-m, ft-lb)
(2) Clip
(6) Filler cap
T: 7.4 (0.75, 5.4)
(3) Clamp
(7) Filler pipe protector
(4) Filler pipe packing
FU-00628
( 1 )
( 2 )
( 3 )
( 4 )
( 5 )
( 6 )
( 7 )
T
T
FU(H6DO)-15
FUEL INJECTION (FUEL SYSTEMS)
GENERAL DESCRIPTION
C: CAUTION
• Wear working clothing, including a cap, protec-
tive goggles, and protective shoes during opera-
tion.
• Remove contamination including dirt and corro-
sion before removal, installation or disassembly.
• Keep the disassembled parts in order and pro-
tect them from dust or dirt.
• Before removal, installation or disassembly, be
sure to clarify the failure. Avoid unnecessary re-
moval, installation, disassembly, and replacement.
• Be careful not to burn your hands, because each
part on the vehicle is hot after running.
• Be sure to tighten fasteners including bolts and
nuts to the specified torque.
• Place shop jacks or safety stands at the specified
points.
• Before disconnecting electrical connectors of
sensors or units, be sure to disconnect ground ca-
ble from battery.
• Place “NO FIRE” signs near the working area.
• Be careful not to spill fuel on the floor.
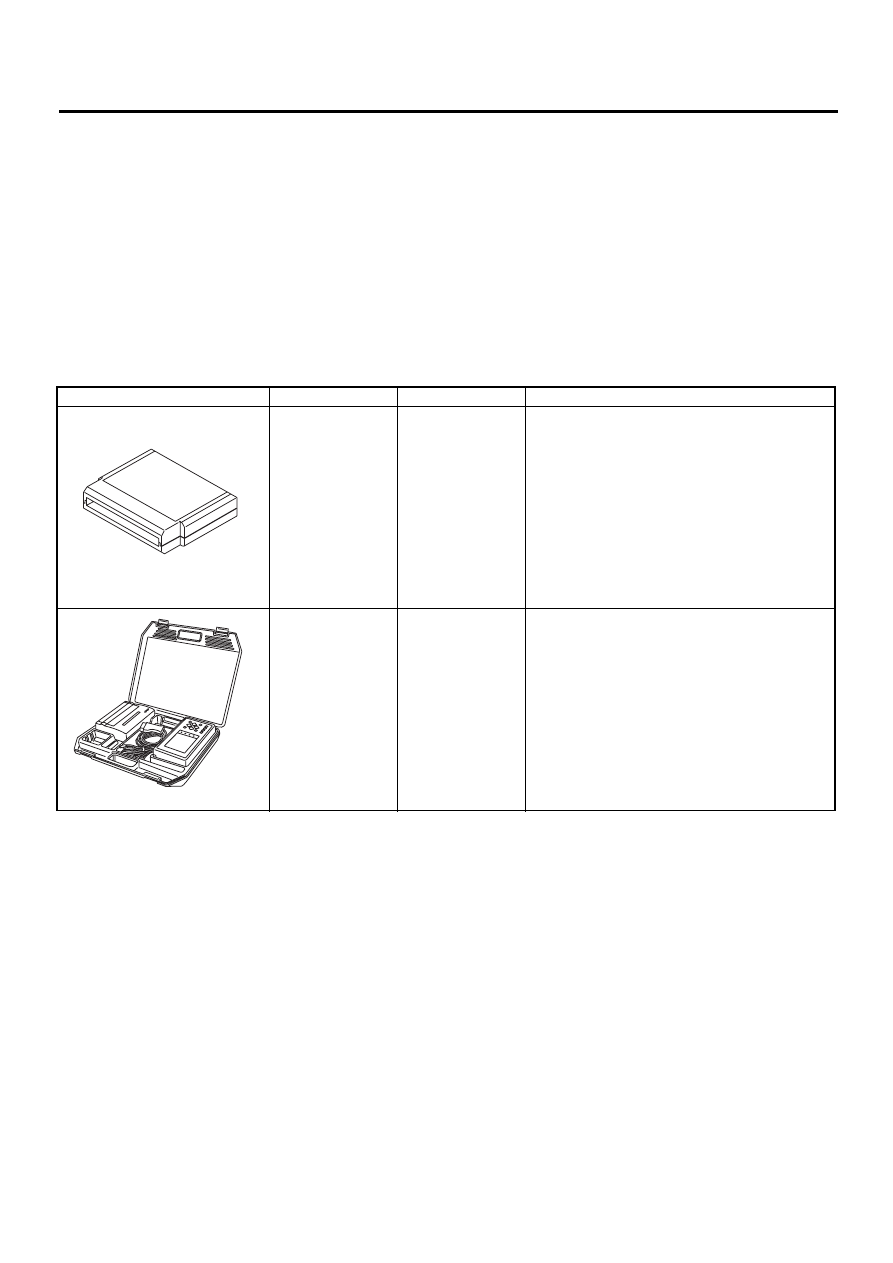
D: PREPARATION TOOL
ILLUSTRATION
TOOL NUMBER
DESCRIPTION
REMARKS
24082AA210
(Newly adopted
tool)
CARTRIDGE
Troubleshooting for electrical systems.
22771AA030
SELECT MONI-
TOR KIT
Troubleshooting for electrical systems.
• English: 22771AA030 (Without printer)
• German: 22771AA070 (Without printer)
• French: 22771AA080 (Without printer)
• Spanish: 22771AA090 (Without printer)
ST24082AA210
ST22771AA030
Нет комментариевНе стесняйтесь поделиться с нами вашим ценным мнением.
Текст