Subaru Legacy III (2000-2003 year). Service manual — part 249
EC(H6DO)-4
EMISSION CONTROL (AUX. EMISSION CONTROL DEVICES)
FRONT CATALYTIC CONVERTER
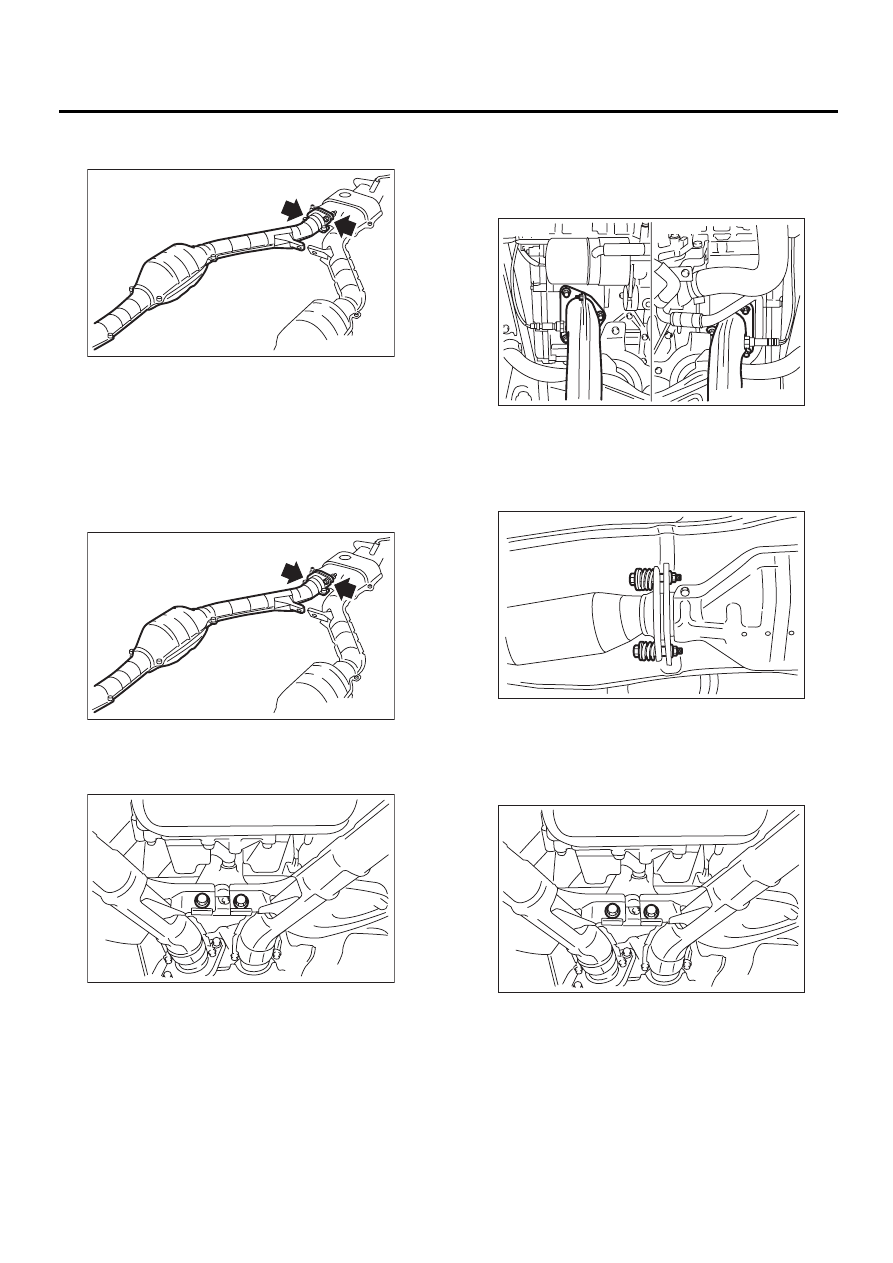
12) Separate front catalytic converter (RH) from
front exhaust pipe.
B: INSTALLATION
NOTE:
Replace gaskets with new ones.
1) Install front catalytic converter (RH) to front ex-
haust pipe.
Tightening torque:
30 N·m (3.1 kgf-m, 22.4 ft-lb)
2) Install front exhaust pipe assembly to the vehi-
cle. And temporarily tighten bolt which installs front
exhaust pipe to hanger bracket.
3) Tighten nuts which hold front exhaust pipe onto
cylinder heads.
Tightening torque:
30 N·m (3.1 kgf-m, 22.4 ft-lb)
4) Tighten bolts which secure front exhaust pipe
assembly to rear exhaust pipe.
Tightening torque:
18 N·m (1.8 kgf-m, 13.0 ft-lb)
5) Tighten bolt which holds front exhaust pipes to
hanger bracket.
Tightening torque:
35 N·m (3.6 kgf-m, 26.0 ft-lb)
EX-00062
EX-00062
EX-00061
EX-00060
RH side
LH side
EX-00059
EX-00061
EC(H6DO)-5
EMISSION CONTROL (AUX. EMISSION CONTROL DEVICES)
FRONT CATALYTIC CONVERTER
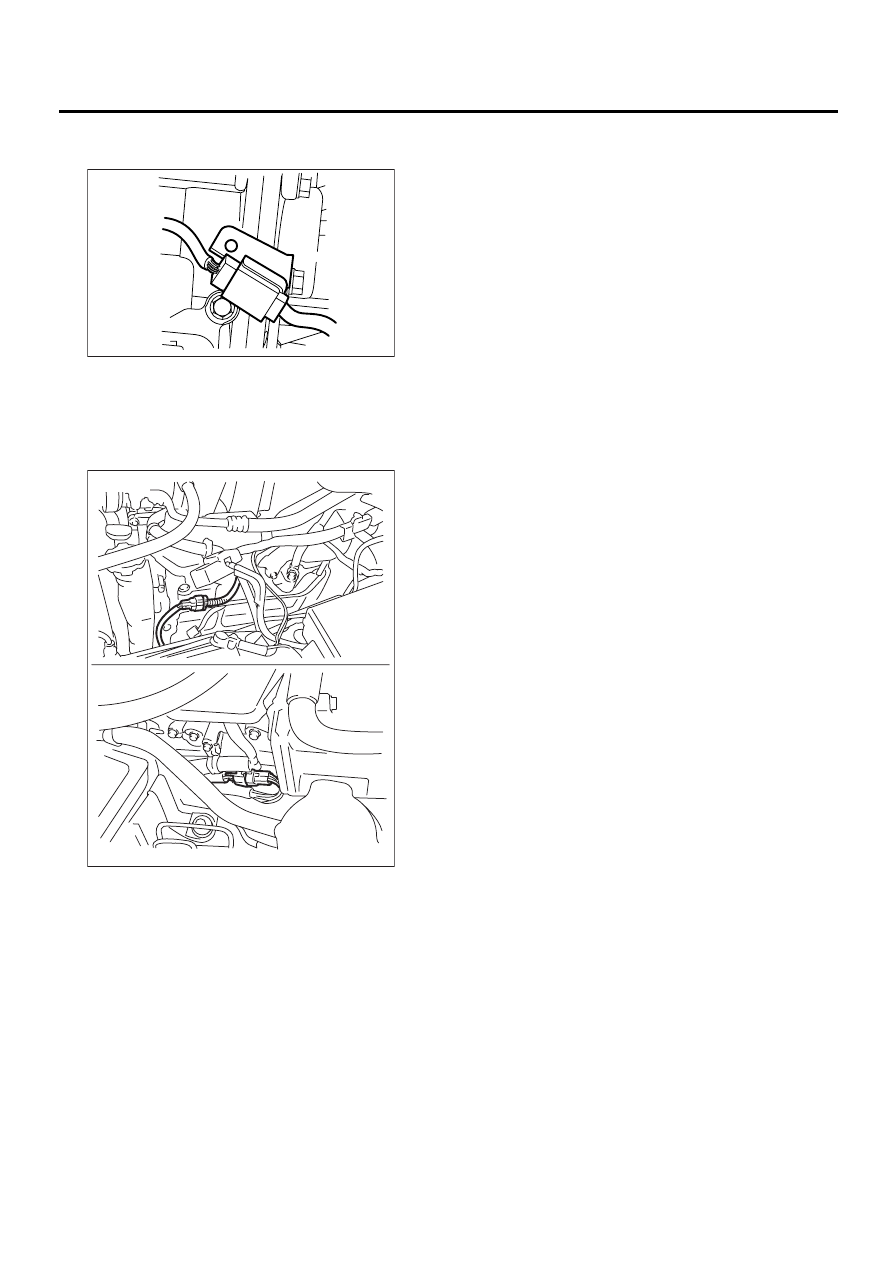
6) Connect connector to rear oxygen sensor con-
nector.
7) Install front oxygen (A/F) sensor harness to the
clips attached to the cylinder head covers.
8) Install under cover.
9) Lower the vehicle.
10) Connect front oxygen (A/F) sensor connector.
11) Install air cleaner case and air intake duct.
<Ref. to IN(H6DO)-5, INSTALLATION, Air Clean-
er.> and <Ref. to IN(H6DO)-7, INSTALLATION, Air
Intake Duct.>
12) Install battery.
C: INSPECTION
1) Make sure there are no exhaust leaks from con-
nections and welds.
2) Make sure there are no holes or rusting.
EX-00058
EX-00056
LH side
RH side
EC(H6DO)-6
EMISSION CONTROL (AUX. EMISSION CONTROL DEVICES)
REAR CATALYTIC CONVERTER
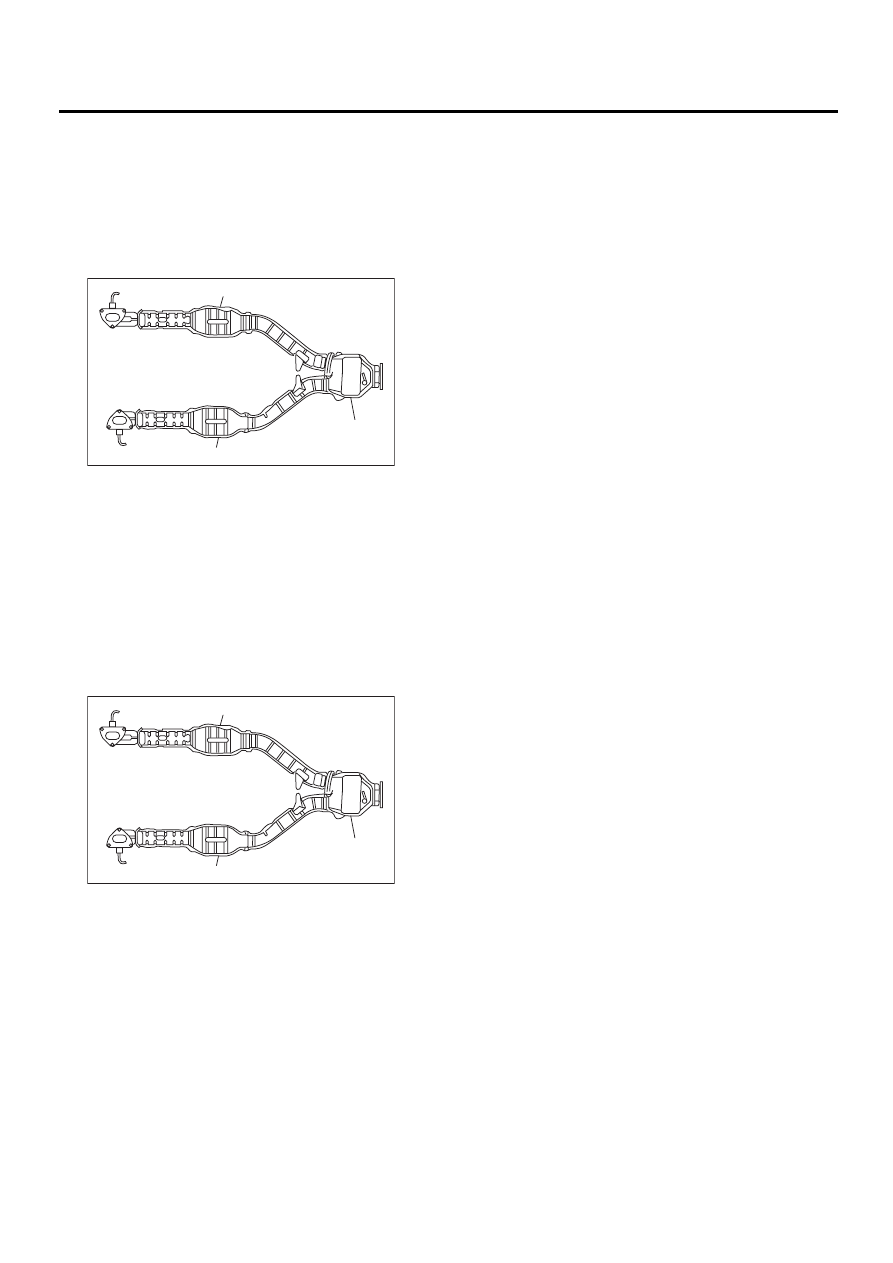
3. Rear Catalytic Converter
A: REMOVAL
The front and rear catalytic converter are integrated
into one unit. Therefore, the removal and installa-
tion procedures are the same as the those for the
front catalytic converter. <Ref. to EC(H6DO)-3, RE-
MOVAL, Front Catalytic Converter.>
B: INSTALLATION
The front and rear catalytic converter are integrated
into one unit. Therefore, the removal and installa-
tion procedures are the same as the ones de-
scribed under front catalytic converter. <Ref. to
EC(H6DO)-4, INSTALLATION, Front Catalytic
Converter.>
C: INSPECTION
1) Make sure there are no exhaust leaks from con-
nections and welds.
2) Make sure there are no holes or rusting.
(A) Front catalytic converter RH
(B) Front catalytic converter LH
(C) Rear catalytic converter
(A) Front catalytic converter RH
(B) Front catalytic converter LH
(C) Rear catalytic converter
EC-00108
( A )
( B )
( C )
EC-00108
( A )
( B )
( C )
EC(H6DO)-7
EMISSION CONTROL (AUX. EMISSION CONTROL DEVICES)
CANISTER
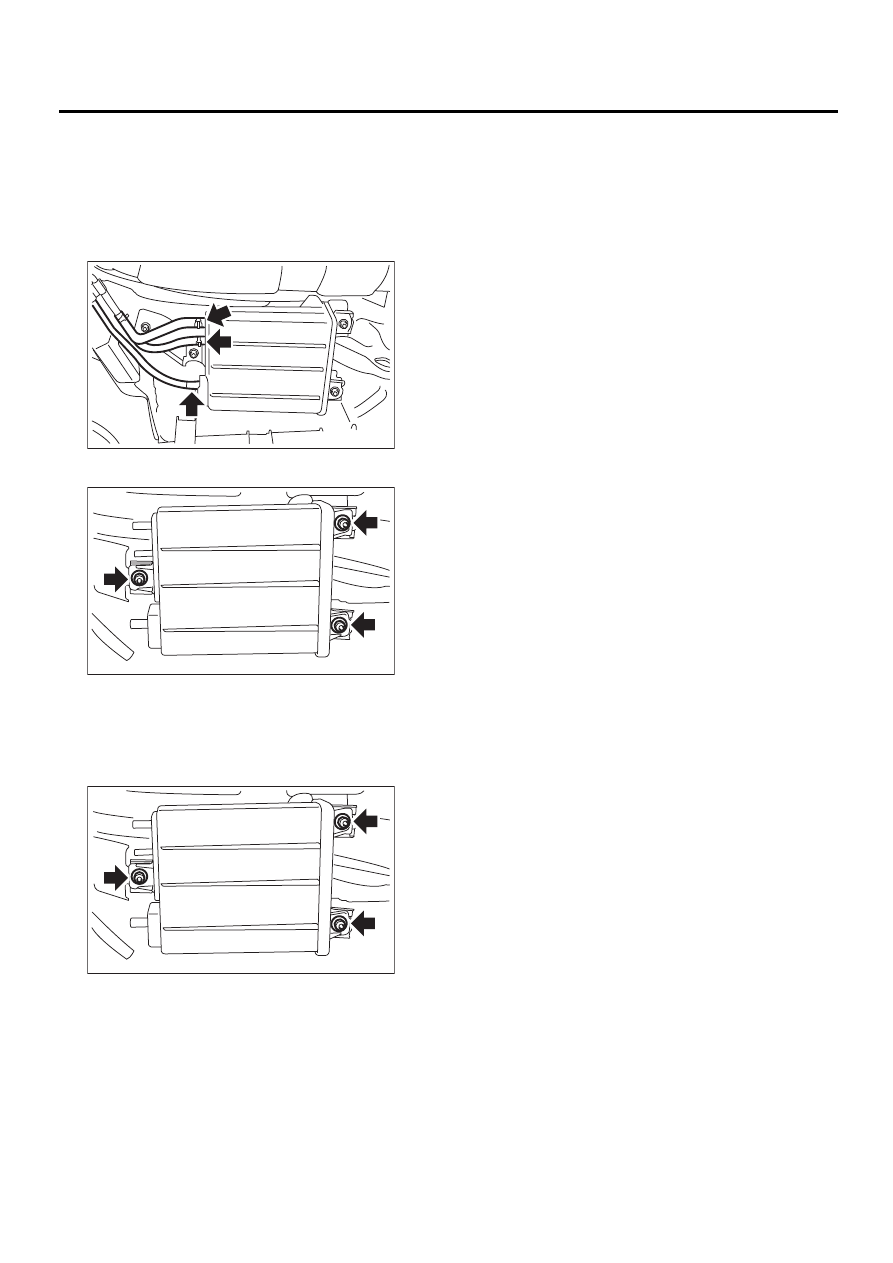
4. Canister
A: REMOVAL
1) Lift-up the vehicle.
2) Loosen two clamps which hold two canister hos-
es, and disconnect evaporation hoses from canis-
ter.
3) Remove canister from body.
B: INSTALLATION
Install in the reverse order of removal.
Tightening torque:
23 N·m (2.3 kgf-m, 17 ft-lb)
C: INSPECTION
Make sure the canister and canister hoses are not
cracked or loose.
EC-00127
EC-00128
EC-00128
Нет комментариевНе стесняйтесь поделиться с нами вашим ценным мнением.
Текст