Subaru Legacy III (2000-2003 year). Service manual — part 15

PM-10
PERIODIC MAINTENANCE SERVICES
SPARK PLUGS
5. Spark Plugs
A: REPLACEMENT
1. 2.0 L NON-TURBO AND 2.5 L MODEL
1) Disconnect battery ground cable.
2) Remove intake duct and intake chamber.
3) Remove washer tank and put it aside.
4) Disconnect spark plug cord.
5) Remove spark plug with a plug-wrench.
6) Set new spark plug.
Recommended spark plug :
With OBD
CHAMPION RC10YC4
CHAMPION RC8YC4
NGK BKR6E-11
NIPPONDENSO K20PR-U11
Spark plug gap
1.0 — 1.1 mm (0.039 — 0.043 in)
Without OBD
NGK BKR6E (Without catalytic converter)
CHAMPION RC10YC4 (With catalytic con-
verter)
NGK BKR5E-11 (With catalytic converter)
Spark plug gap
0.7 — 0.8 mm (0.028 — 0.031 in) (Without
catalytic converter)
1.0 — 1.1 mm (0.039 — 0.043 in) (With cat-
alytic converter)
7) Tighten spark plug lightly with hand, and then
secure with a plug-wrench to the specified torque.
Tightening torque:
21 N·m (2.1 kgf-m, 15 ft-lb)
NOTE:
• Be sure to place the gasket between the cylinder
head and spark plug.
• If torque wrench is not available, tighten spark
plug until gasket contacts cylinder head; then tight-
en further 1/4 to 1/2 turns.
2. 2.0 L TURBO AND 3.0 L MODEL
1) Disconnect battery cables and then remove bat-
tery and battery carrier.
2) Remove washer tank and put it aside.
3) Remove air cleaner lower case.
4) Disconnect connector from ignition coil.
5) Remove ignition coil.
• 3.0 L model
• Turbo model
6) Remove spark plug with a spark plug socket.
7) Set new spark plug.
Recommended spark plug:
• 3.0 L model
NGK PLFR 6A-11
• Turbo model
NGK PFR 6G
8) Tighten spark plug lightly with hand, and then
secure with a plug-wrench to the specified torque.
Tightening torque:
21 N·m (2.1 kgf-m, 15 ft-lb)
PM-00110
PM-00111
PM-00145
PM-00112
PM-11
PERIODIC MAINTENANCE SERVICES
SPARK PLUGS
9) Tighten ignition coil.
Tightening torque:
16 N·m (1.6 kgf-m, 11.7 ft-lb)
NOTE:
• Be sure to place the gasket between the cylinder
head and spark plug.
• If torque wrench is not available, tighten spark
plug until gasket contacts cylinder head: then tight-
en further 1/4 to 1/2 turn.
PM-12
PERIODIC MAINTENANCE SERVICES
DRIVE BELT(S)
6. Drive Belt(s)
A: INSPECTION
1. EXCEPT 3.0 L MODEL
1) Replace belts, if cracks, fraying or wear is found.
2) Check drive belt tension and adjust it if neces-
sary by changing generator installing position and/
or idler pulley installing position.
Belt tension
(A)
replaced: 7.0 — 9.0 mm (0.276 — 0.354 in)
reused: 9.0 — 11.0 mm (0.354 — 0.433 in)
(B)*
replaced: 7.5 — 8.5 mm (0.295 — 0.335 in)
reused: 9.0 — 10.0 mm (0.354 — 0.394 in)
*: There is no belt (B) on models without an air con-
ditioner.
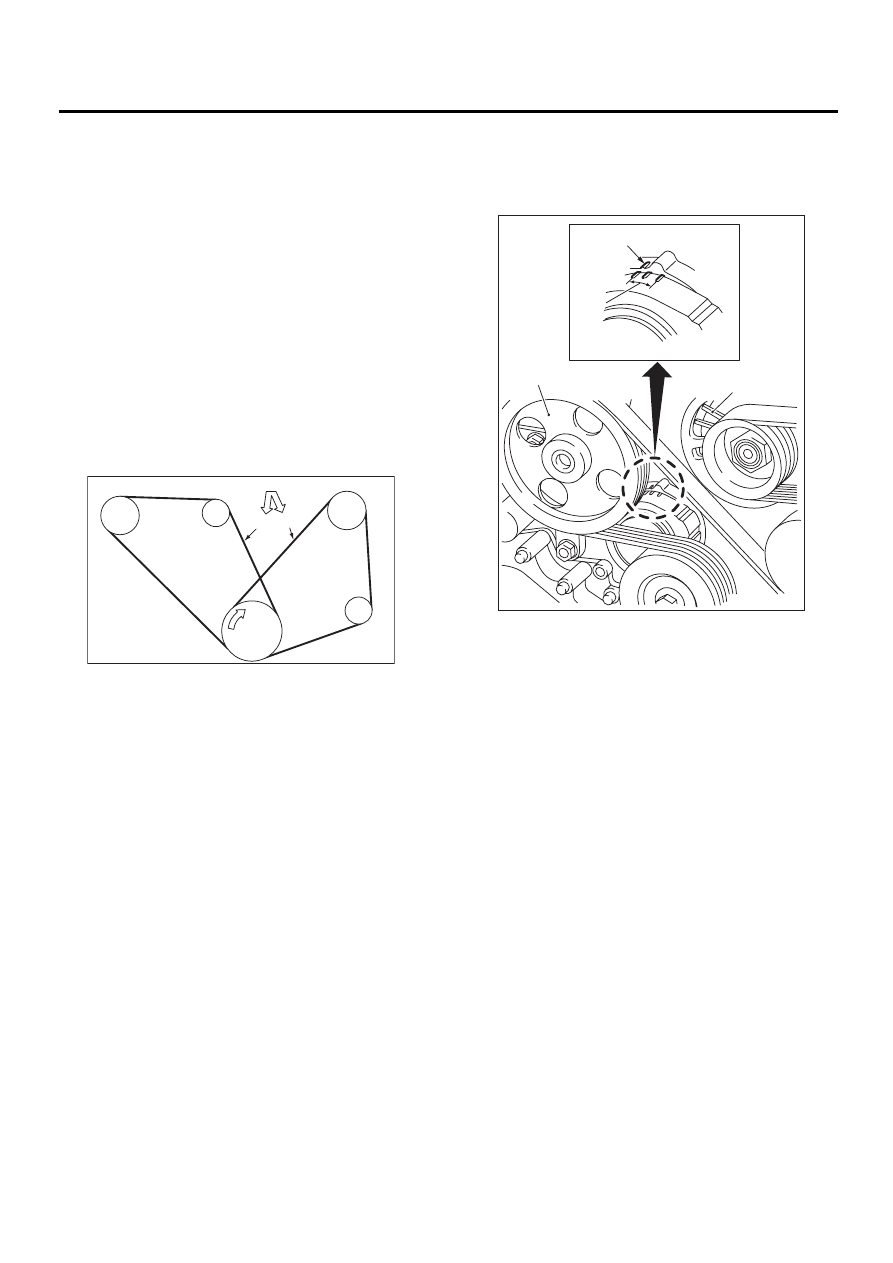
2. 3.0 L MODEL
1) Replace belts, if cracks, fraying or wear is found.
2) Check that the V-belt automatic tensioner indica-
tor is within the range (D).
C/P Crankshaft pulley
GEN Generator
P/S Power steering oil pump pulley
A/C Air conditioning compressor pulley
I/P Idler pulley
PM-00113
98 N (10 kg, 22 lb)
C/P
GEN
P/S
A/C
I/P
( A ) ( B )
(A) Indicator
(B) Generator
(C) Power steering oil pump
(D) Service limit
PM-00114
( B )
( A )
( D )
( C )
PM-13
PERIODIC MAINTENANCE SERVICES
DRIVE BELT(S)
B: REPLACEMENT
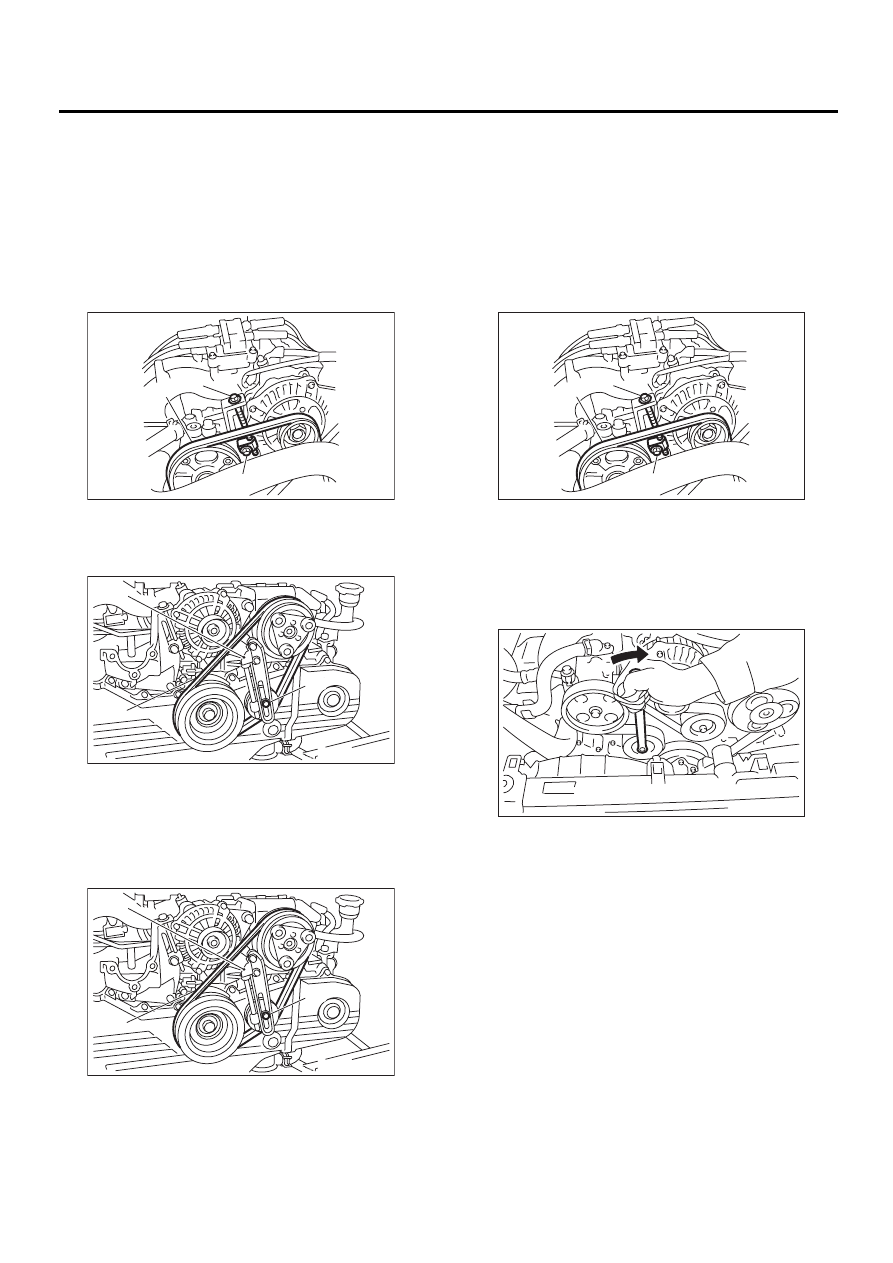
1. EXCEPT 3.0 L MODEL
1) Remove V-belt cover.
NOTE:
Wipe off any oil or water on the belt and pulley.
2) Loosen the lock bolt (A).
3) Loosen the slider bolt (B).
4) Remove the front side belt (C).
5) Loosen the lock nut (A).
6) Loosen the through-bolt (B).
7) Remove the rear side belt (C).
8) Install a new belt, and tighten the through-bolt so
as to obtain the specified belt tension.
9) Tighten the lock nut (A).
Tightening torque:
22.6 N·m (2.3 kgf-m, 16.6 ft-lb)
10) Tighten the through-bolt (B).
Tightening torque:
8 N·m (0.8 kgf-m, 5.8 ft-lb)
11) Install a new belt, and tighten the slider bolt so
as to obtain the specified belt tension.
12) Tighten the lock bolt (A).
13) Tighten the slider bolt (B).
Tightening torque:
Lock bolt:
25 N·m (2.5 kgf-m, 18 ft-lb)
Slider-bolt:
8 N·m (0.8 kgf-m, 5.8 ft-lb)
14) Install V-belt cover.
2. 3.0 L MODEL
1) Fit the tool to the belt tensioner mounting bolt.
2) Turn the tool clockwise, and loosen the V-belt to
remove.
PM-00116
( A )
( B )
( C )
PM-00117
( A )
( B )
( C )
PM-00117
( A )
( B )
( C )
PM-00116
( A )
( B )
( C )
PM-00118
Нет комментариевНе стесняйтесь поделиться с нами вашим ценным мнением.
Текст