Subaru Legacy III (2000-2003 year). Service manual — part 652
FS-20
FRONT SUSPENSION
FRONT STRUT
F: DISPOSAL
CAUTION:
• Do not disassemble the strut damper or place
it into a fire.
• Drill a hole before disposal of strut.
• Before handling gas filled struts, be sure to
wear goggles to protect eyes from gas, oil and/
or filings.
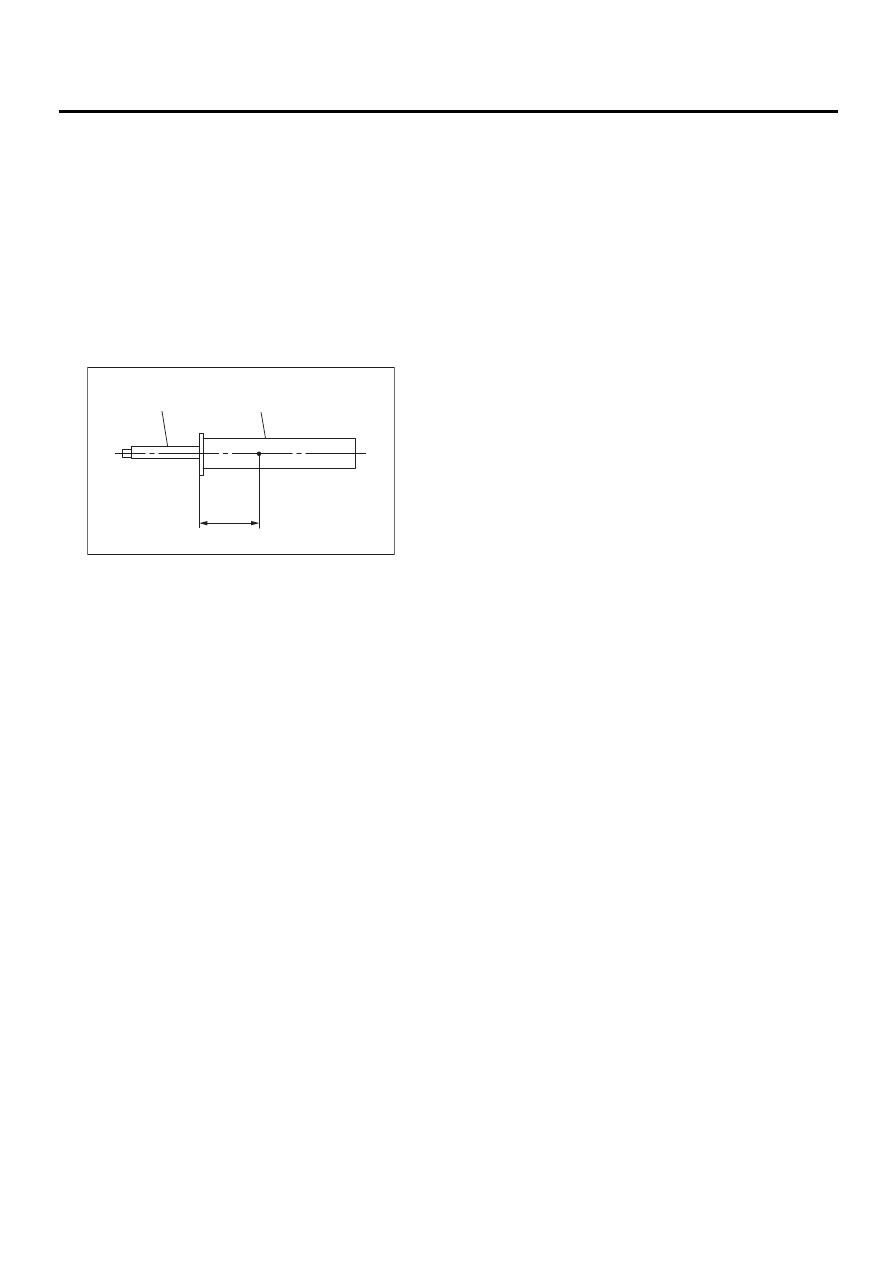
1) Place the gas filled strut (A) on a flat and level
surface with piston rod (B) fully extended.
2) Using a 2 to 3 mm (0.08 to 0.12 in) dia. drill,
make a hole in area shown in the figure.
FS-00072
40 mm
(1.57 in)
( A )
( B )
FS-21
FRONT SUSPENSION
FRONT STABILIZER
6. Front Stabilizer
A: REMOVAL
1) Jack-up the front part of the vehicle and support
it with safety stand (rigid racks).
2) Remove jack-up plate from lower part of cross-
member.
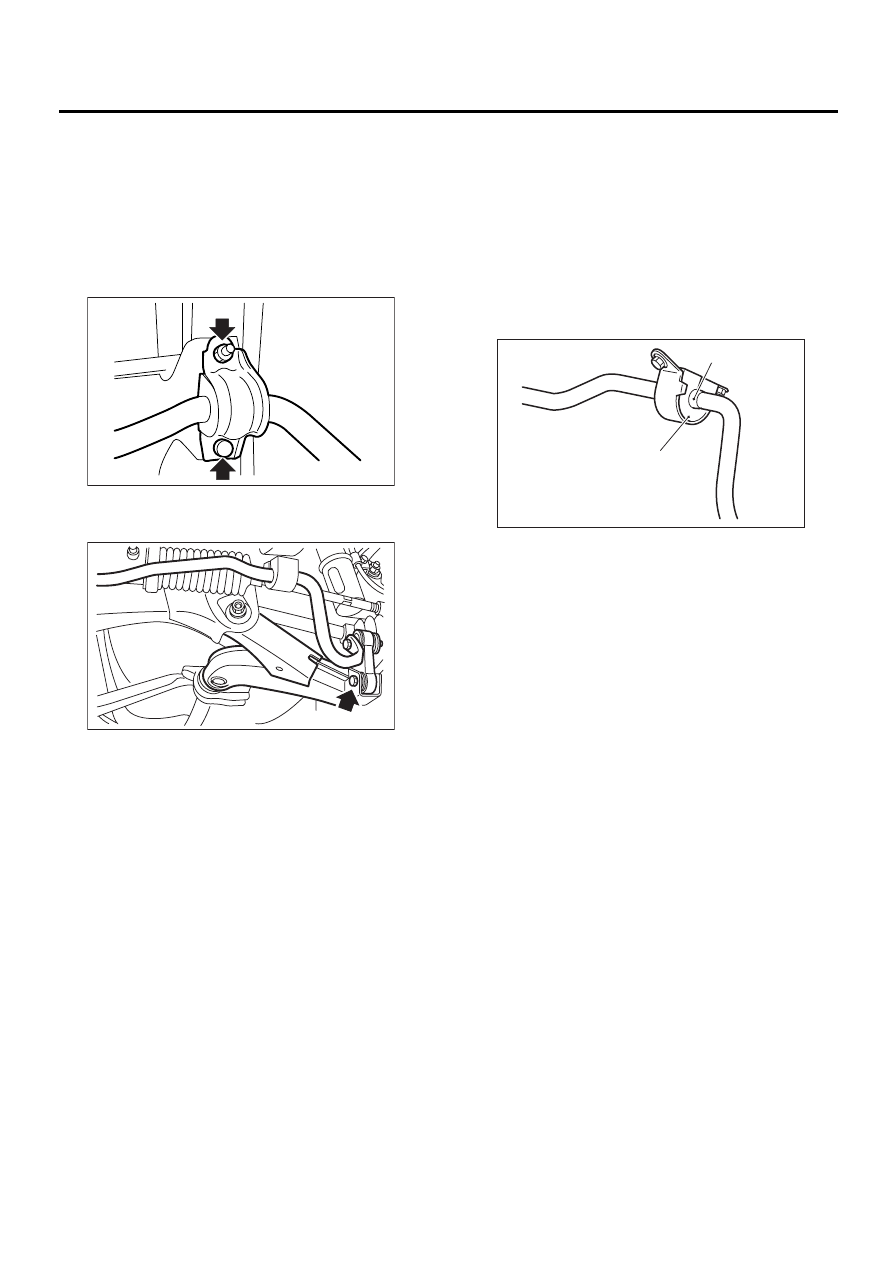
3) Remove bolts which secure stabilizer to cross-
member.
4) Remove bolts which secure stabilizer link to front
transverse link.
B: INSTALLATION
CAUTION:
Discard old self-locking nut and replace with a
new one.
1) Install in the reverse order of removal.
NOTE:
• Install bushing (on front crossmember side) while
aligning it with paint mark on stabilizer.
• Ensure that bushing and stabilizer have the
same identification colors when installing.
2) Always tighten rubber bushing location when
wheels are in full contact with the ground and ve-
hicle is at curb weight.
Tightening torque:
Jack-up plate to crossmember:
70 N·m (7.1 kgf-m, 51 ft-lb)
Stabilizer link to front transverse link:
30 N·m (3.1 kgf-m, 22 ft-lb)
Stabilizer to crossmember:
25 N·m (2.5 kgf-m, 18.1 ft-lb)
C: INSPECTION
1) Check bushing for cracks, fatigue or damage.
2) Check stabilizer link for deformities, cracks, or
damage, and bushing for protrusions from the hole
of stabilizer link.
FS-00049
FS-00070
(1) Mark stamped on stabilizer
(2) Bushing identification color
FS-00050
( 1 )
( 2 )
FS-22
FRONT SUSPENSION
FRONT CROSSMEMBER
7. Front Crossmember
A: REMOVAL
1) Set vehicle on a lift.
2) Disconnect ground cable from battery.
3) Lift-up vehicle and remove front tires and
wheels.
4) Remove both stabilizer and jack-up plate.
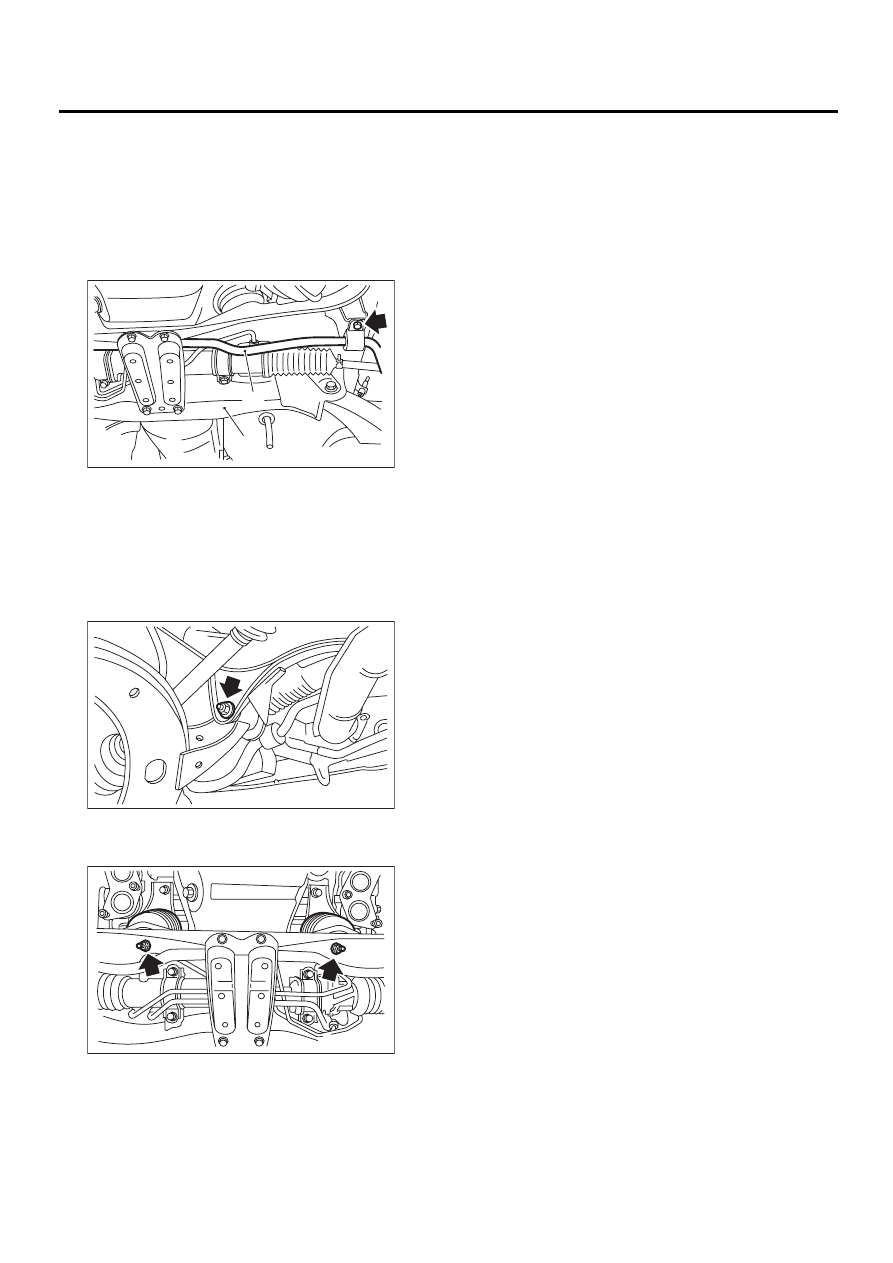
5) Disconnect tie-rod end from housing.
6) Remove front exhaust pipe.
7) Remove front transverse link from front cross-
member and body.
8) Remove nuts attaching engine mount cushion
rubber to crossmember.
9) Remove steering universal joint. <Ref. to PS-
25, REMOVAL, Universal Joint.>
10) Disconnect power steering pipe from steering
gear box.
11) Lift engine by approx. 10 mm (0.39 in) by using
chain block.
12) Support crossmember with a jack, remove nuts
securing crossmember to body and gradually low-
er crossmember along with steering gearbox.
CAUTION:
When removing crossmember downward, be
careful that tie-rod end does not interfere with
SFJ boot.
B: INSTALLATION
1) Install in the reverse order of removal.
CAUTION:
Always tighten rubber bushing when wheels
are in full contact with the ground and vehicle
is at curb weight.
Tightening torque:
Transverse link bushing to crossmember:
125 N·m (12.5 kgf-m, 90 ft-lb)
Stabilizer to bushing:
25 N·m (2.5 kgf-m, 18.1 ft-lb)
Tie-rod end to housing:
27.0 N·m (2.75 kgf-m, 19.9 ft-lb)
Front cushion rubber to crossmember:
74 N·m (7.5 kgf-m, 54.2 ft-lb)
Universal joint to pinion shaft:
24 N·m (2.4 kgf-m, 17.4 ft-lb)
Crossmember to body:
100 N·m (10.2 kgf-m, 74 ft-lb)
2) Purge air from power steering system.
NOTE:
Check wheel alignment and adjust if necessary.
C: INSPECTION
Check crossmember for wear, damage and cracks,
and correct or replace if defective.
(1) Front stabilizer
(2) Front crossmember
FS-00051
( 1 )
( 2 )
FS-00069
FS-00064
FS-23
FRONT SUSPENSION
FRONT SUPPORT ARM
8. Front Support Arm
A: REMOVAL
1) Set the vehicle on the lift.
2) Lift-up the vehicle.
3) Remove the under cover.
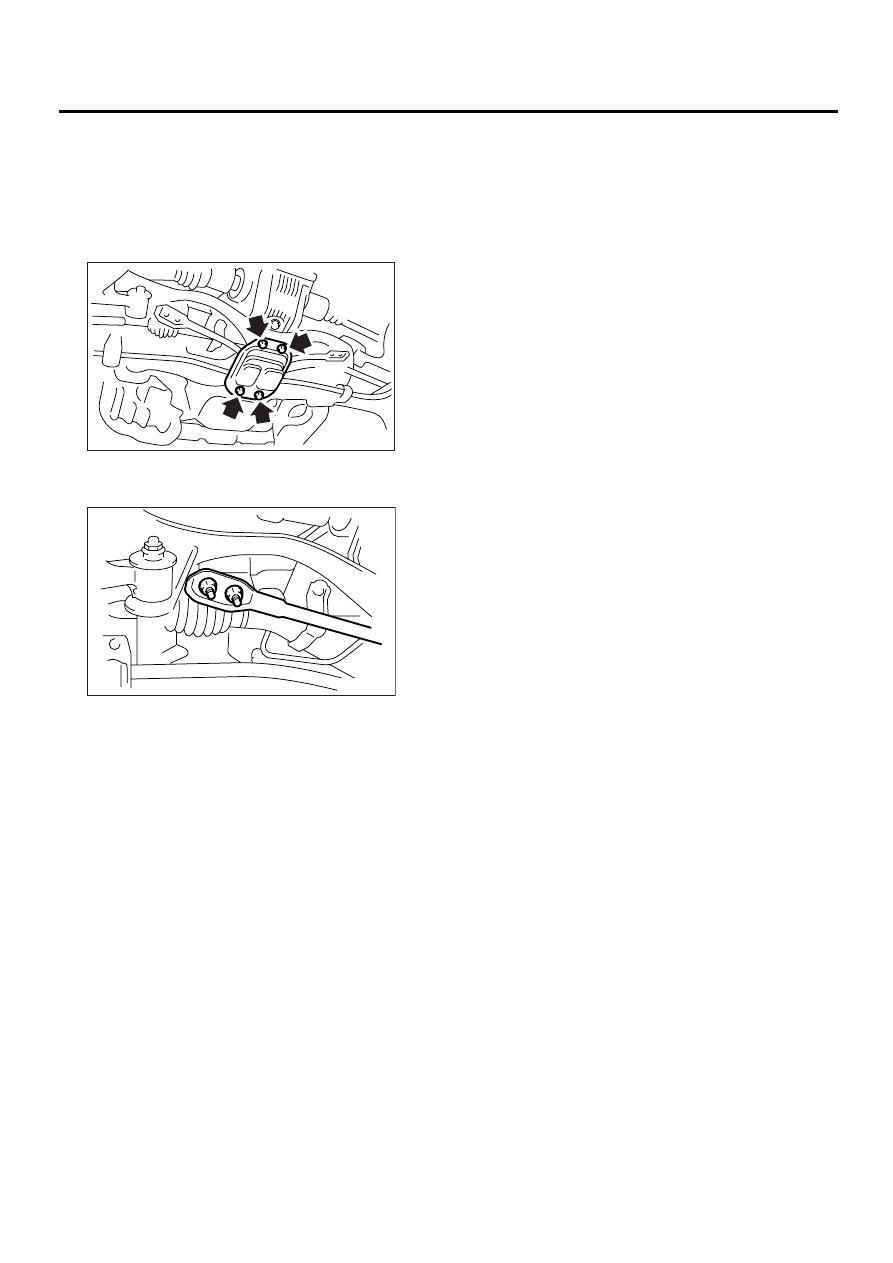
4) Remove the four bolts and jack-up plate.
5) Remove the two nuts at both ends of the arm re-
spectively.
B: INSTALLATION
Install in the reverse order of removal.
Tightening torque:
Front support arm to crossmember:
30 N·m (3.1 kgf-m, 22.1 ft-lb)
Jack-up plate to crossmember:
70 N·m (7.1 kgf-m, 51.6 ft-lb)
C: INSPECTION
Check the front support arm for wear, damage and
cracks, and correct or replace if defective.
FS-00075
FS-00076
Нет комментариевНе стесняйтесь поделиться с нами вашим ценным мнением.
Текст