Subaru BRZ (2012 year). Service manual — part 31
PM-53
Fuel Filter
PERIODIC MAINTENANCE SERVICES
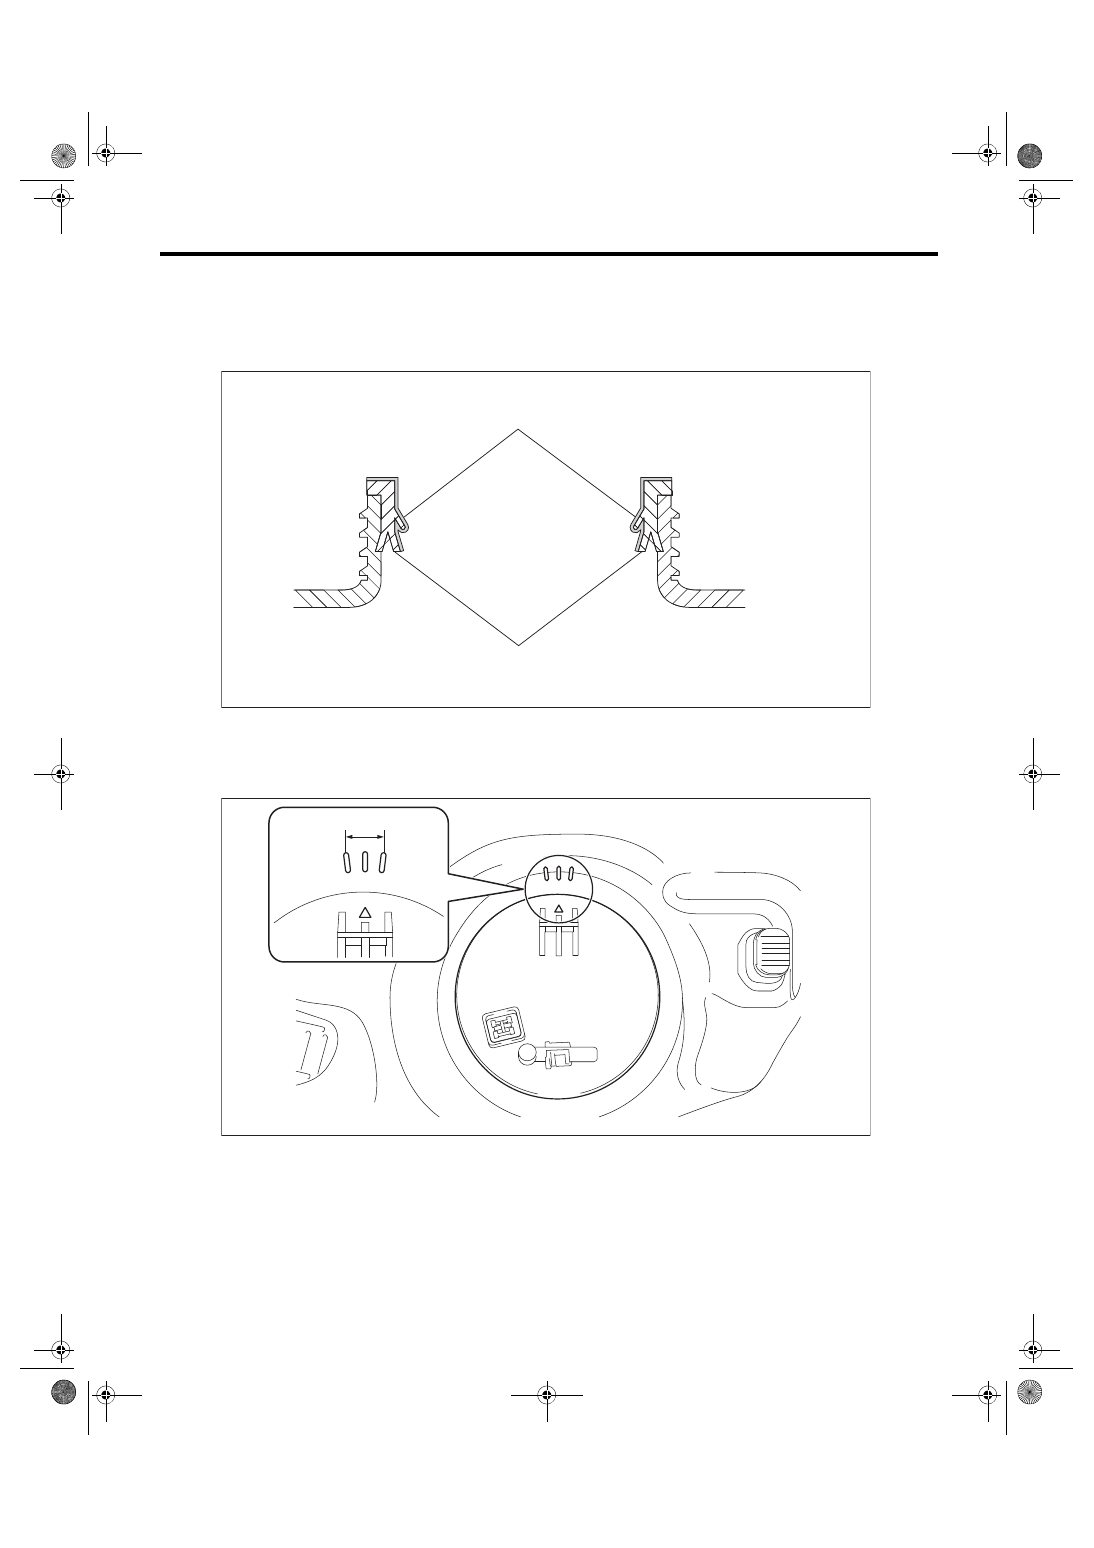
52) Apply gasoline to the gasket.
CAUTION:
• When applying gasoline to the gasket, apply it to the area as shown in the figure.
• Be careful not to spill gasoline on the screw section of the fuel tank.
• Make sure the sealing portion is free from fuel or foreign matter.
53) Set the fuel pump within the installation position range marks on the fuel tank.
54) Install a new sheet ring and fuel pump gauge retainer, and temporarily tighten the fuel pump gauge re-
tainer.
(A) Areas of gasoline application
(B) Gasket
(A) Installation position range mark
PM-00713
(A)
(B)
PM-00714
(A)
PM-54
Fuel Filter
PERIODIC MAINTENANCE SERVICES
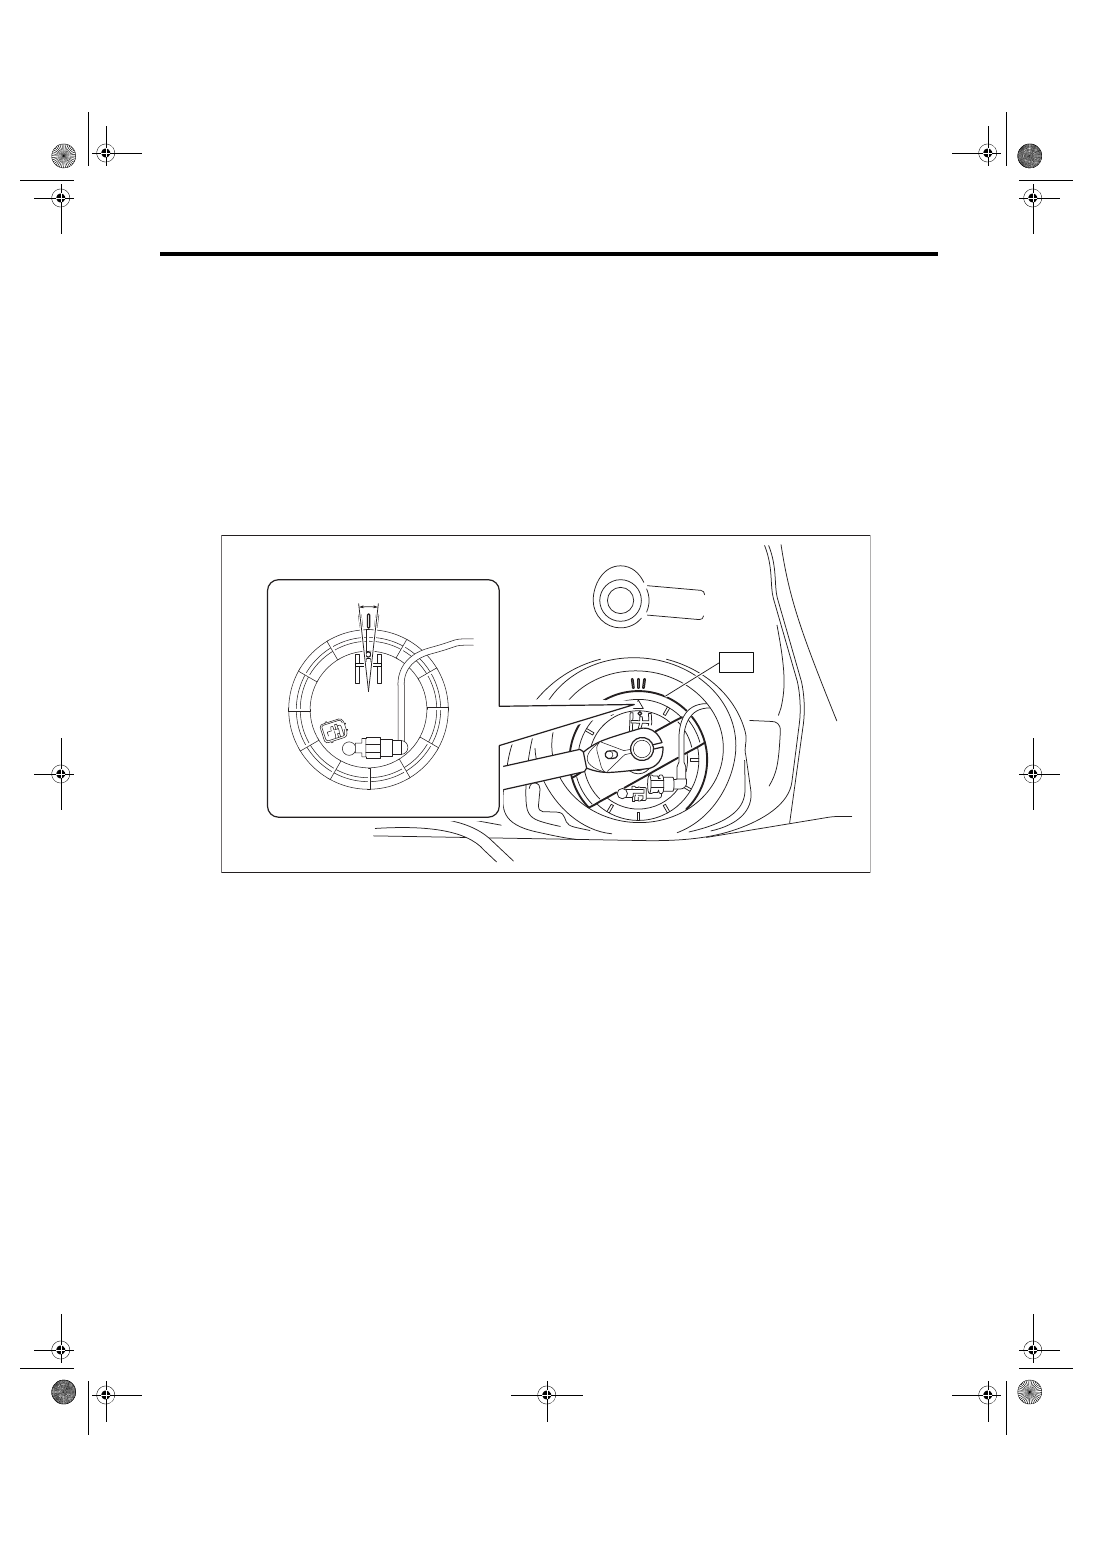
55) Tighten the fuel pump gauge retainer using the ST.
CAUTION:
• Do not use any tool other than the ST.
• Be careful not to damage the tube with the ST.
• Before setting the ST, move the tube to a position outside the ST.
• Make sure that the position mark on the fuel pump is located within the installation position range
mark on the fuel tank as shown in the figure.
• After tightening to the specified torque, check the torque by retightening to the specified torque.
NOTE:
Securely set the ST notch onto the rib part of the fuel pump gauge retainer.
ST 42099CA000 ST FUEL PUMP
Tightening torque:
85 N·m (8.7 kgf-m, 62.7 ft-lb)
56) Connect the fuel pump tube connector.
57) Install the fuel pump tube to the fuel tank.
58) Connect the fuel pump connector.
59) Connect the ground cable to battery.
60) Apply fuel pressure and check that there are no leaks in the fuel system using the Subaru Select Monitor.
61) Install rear floor service hole cover No. 2 using new butyl tape.
62) Install the separator-type rear seat cushion assembly LH.
B: INSPECTION
If the filter is clogged, or if the replacement interval has been reached, replace it.
PM-00715
ST
PM-55
Air Cleaner Element
PERIODIC MAINTENANCE SERVICES
9. Air Cleaner Element
A: INSPECTION
1) Check that the air cleaner element has no deformation, cracks or other damages.
2) Check the air cleaner element for excessive dirt.
B: REPLACEMENT
CAUTION:
Do not place an excessive load on the air cleaner case with grasping with your hands in order to pre-
vent damaging the plastic bracket.
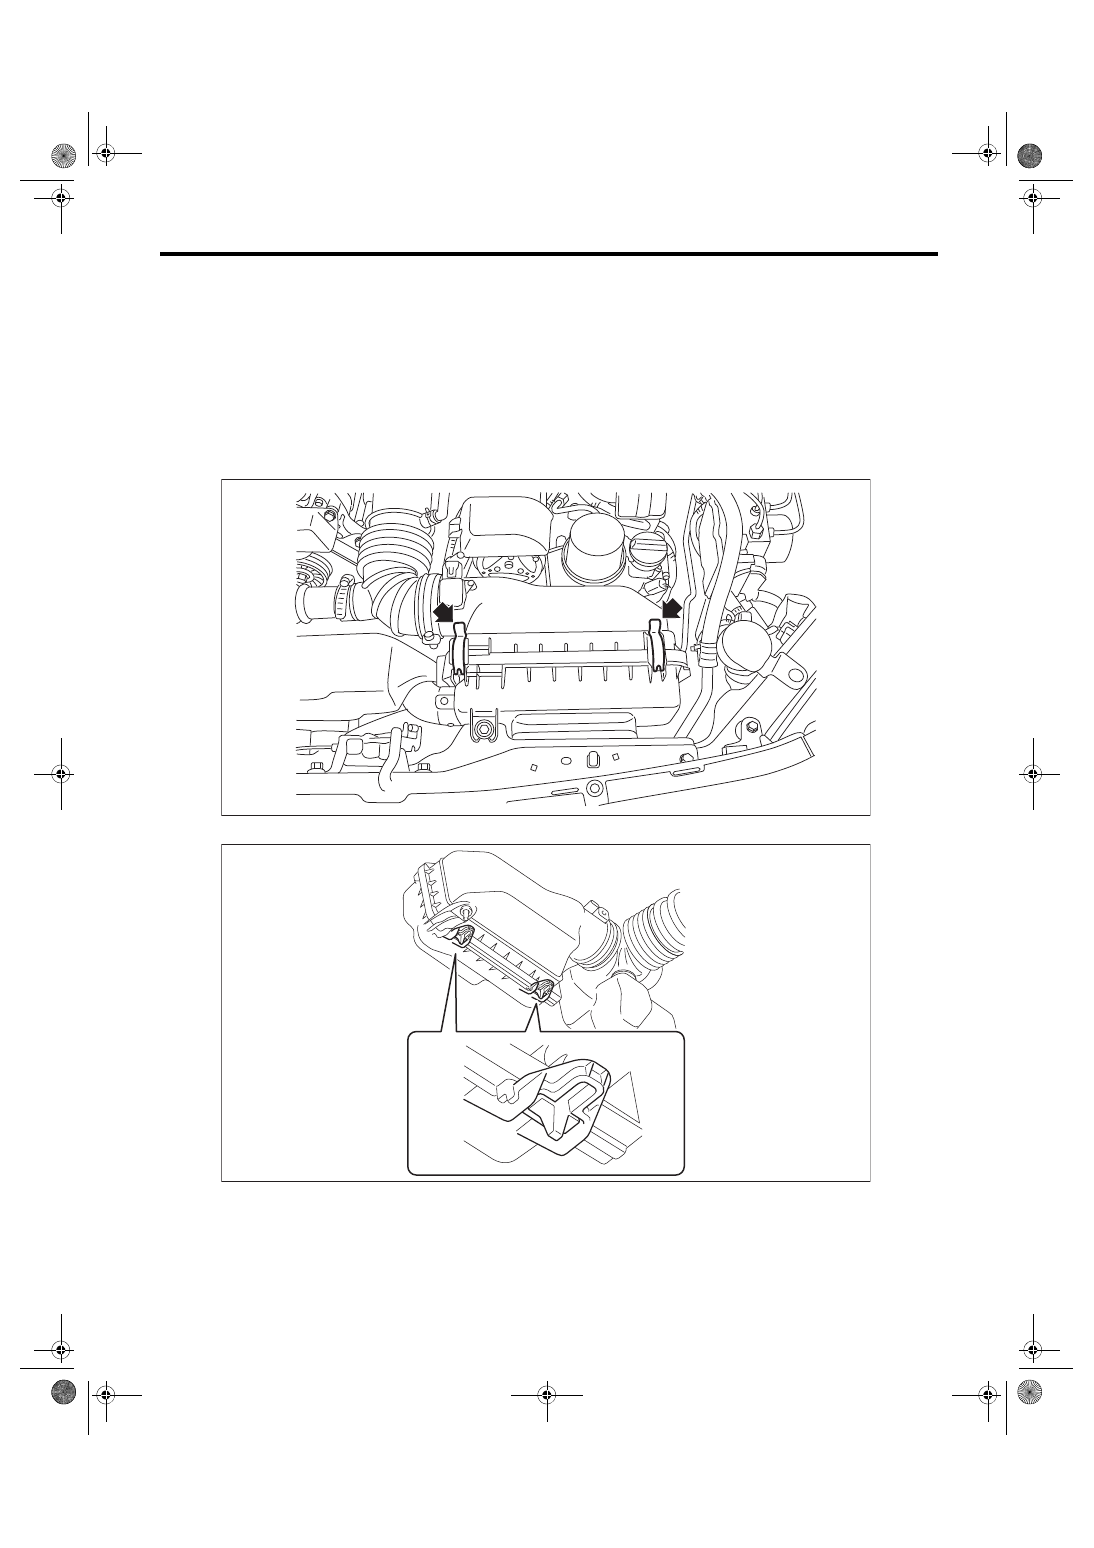
1) Remove the two clips from the air cleaner case (front).
2) Lift up the air cleaner case (rear), and release the two tabs fit into the air cleaner case (front).
PM-00596
PM-00677
PM-56
Air Cleaner Element
PERIODIC MAINTENANCE SERVICES
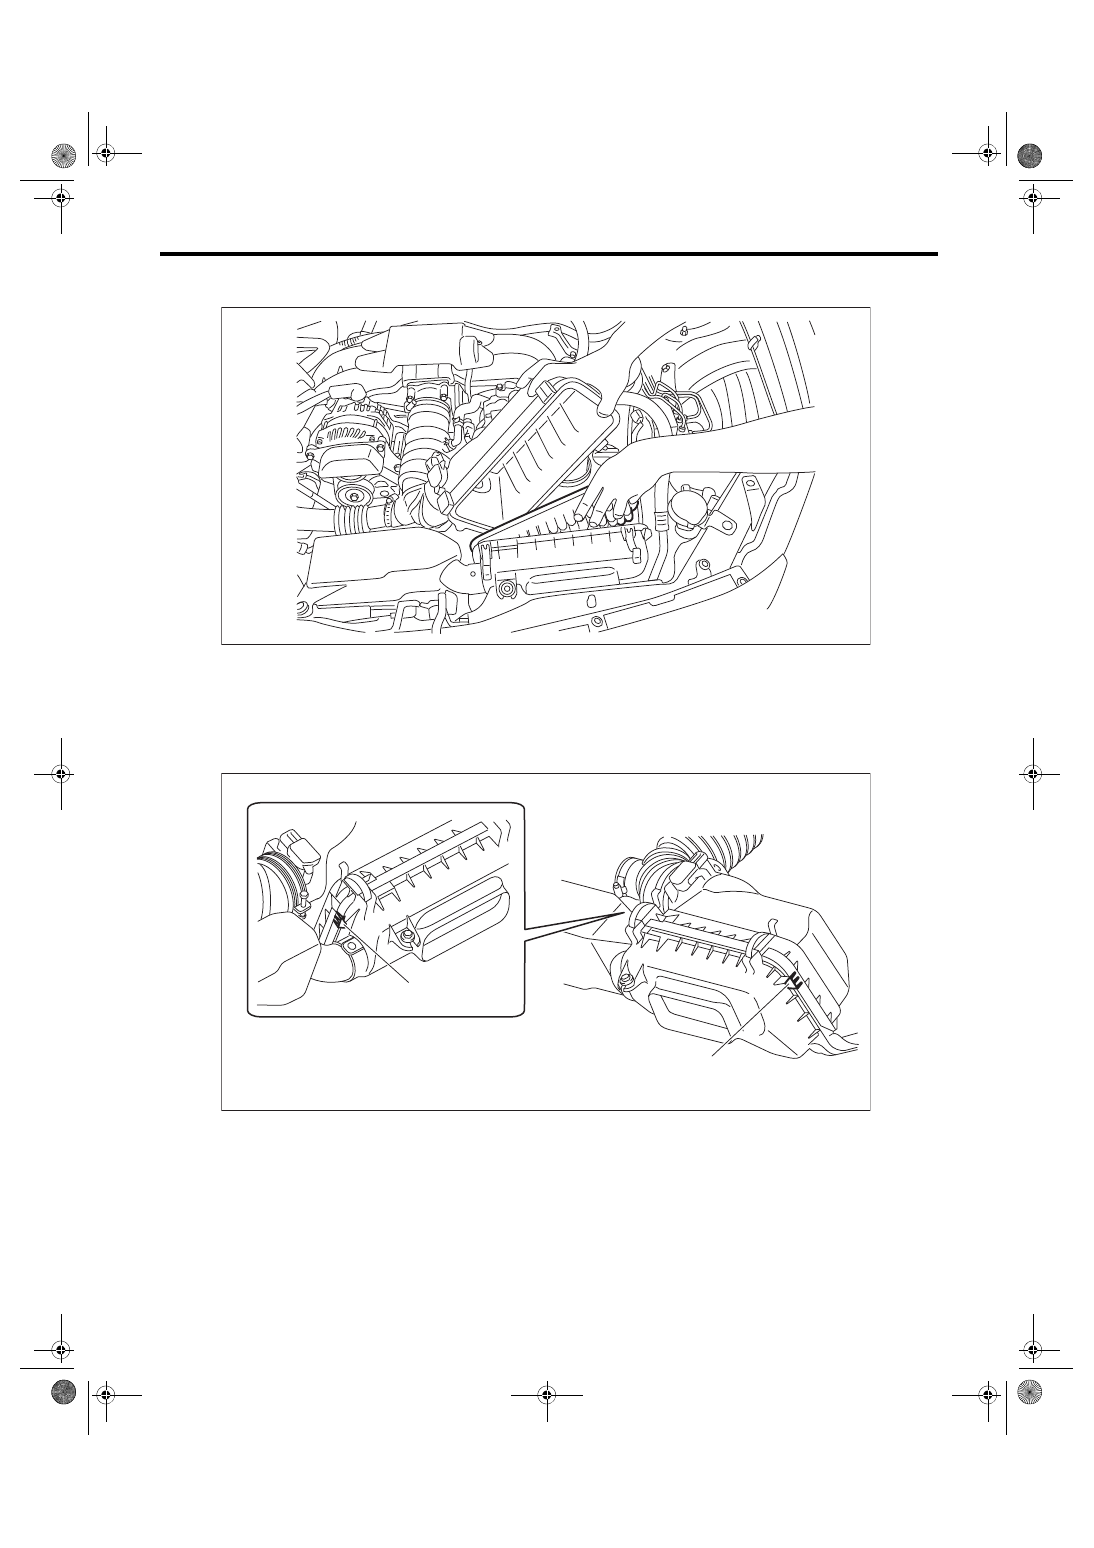
3) Raise the air cleaner case (rear) at an angle as shown in the figure, and remove the air cleaner filter ele-
ment.
4) Raise the air cleaner case (rear) at an angle, and install the air cleaner filter element.
5) Connect the two tabs of the air cleaner case (rear) to the air cleaner case (front).
6) Install the two clips.
CAUTION:
• Check that protrusions for left/right alignment on the air cleaner cases are not riding up.
• Make sure that the two tabs on the bottom of the air cleaner case are securely connected.
(A) Protrusions for alignment
PM-00597
PM-00678
(A)
(A)
Нет комментариевНе стесняйтесь поделиться с нами вашим ценным мнением.
Текст