Subaru Forester (2019). Instruction — part 27
(221,1)
!
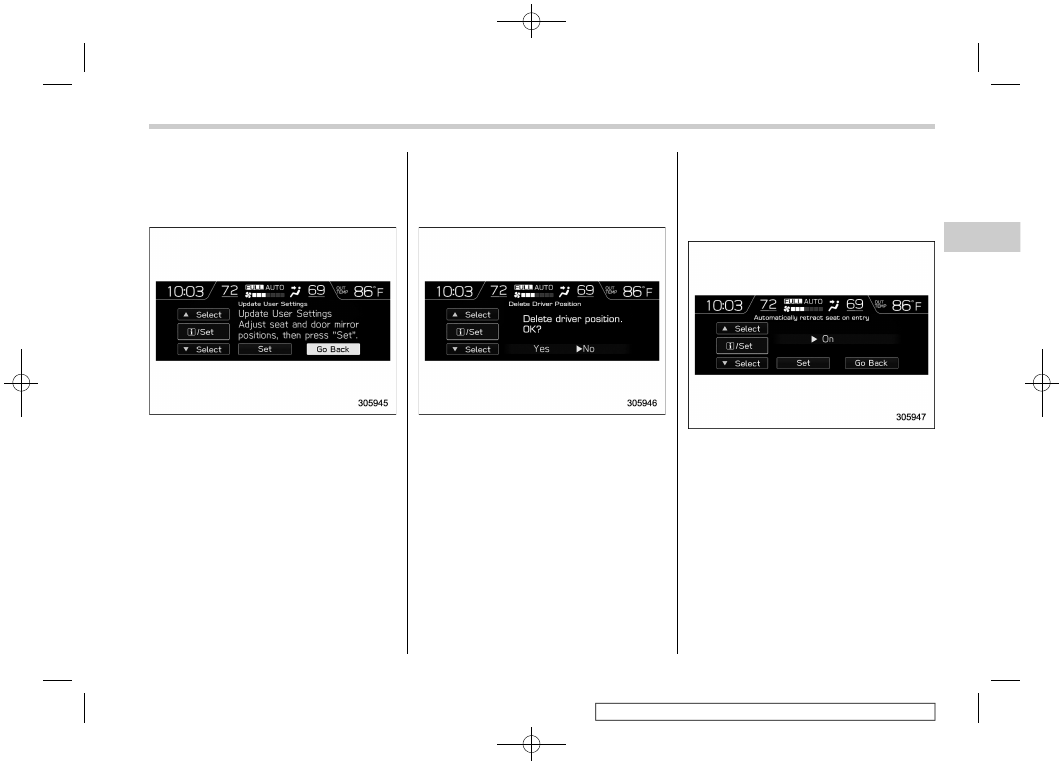
Update User Settings
1. Select “Update User Settings” from the
2nd menu in the settings screen. Refer to
“Setting screen” FP212.
2. Select “Set” to re-register the driver
position. Select “Go Back” to return to the
previous screen.
!
Delete Driver Position
1. Select “Delete Driver Position” from the
2nd menu in the settings screen. Refer to
“Setting screen” FP212.
2. Select “Yes” to delete the driver posi-
tion. Select “No” to return to the previous
screen.
!
Automatically retract seat on
entry setting
1. Select “Automatically retract seat on
entry” from the 2nd menu in the settings
screen. Refer to “Setting screen” FP212.
2. Select “On” or “Off” to turn the auto
entry/exit function on or off by using the
control switches.
3. Select “Set” to exit settings. Select “Go
Back” to return to the previous screen.
– CONTINUED –
Multi-function display (color LCD)
219
3
Instruments
and
controls
-------------------------------------------------------------------------------------------------------------------------------------------------------------
(222,1)
!
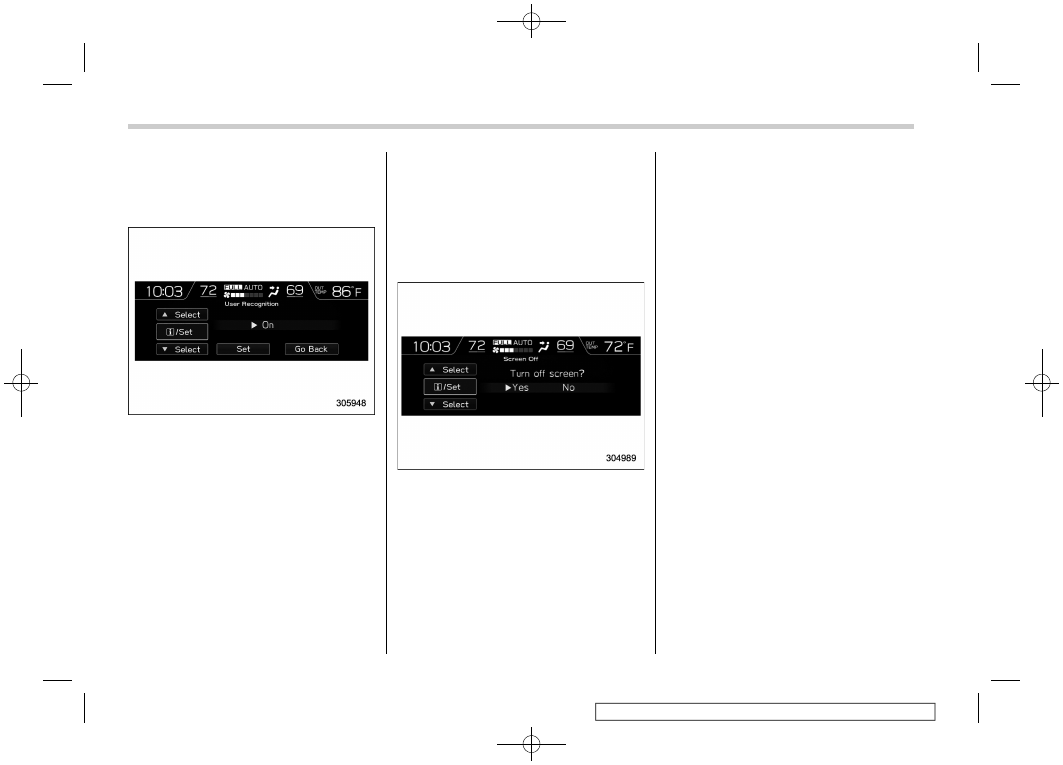
User Recognition settings
1. Select “User Recognition” from the 2nd
menu in the settings screen. Refer to
“Setting screen” FP212.
2. Select “On” or “Off” to turn the User
Recognition settings on or off by using the
control switches.
3. Select “Set” to exit settings. Select “Go
Back” to return to the previous screen.
!
Display/Beep settings
You can set the display settings and
volume settings.
!
Screen OFF setting
1. Select “Screen Off” from the 2nd menu
in setting screen. Refer to “Setting screen”
FP212.
2. Select “Yes” to turn off the screen.
Select “No” to return to the previous
screen.
Restoring the screen
When the INFO button is operated after
the ignition switch is turned to the “ON” or
“ACC” position, the screen will be restored.
The screen will be restored with the basic
screen that was displayed when the
screen was turned off.
NOTE
While the screen is off, the screen
switches to the climate control screen
only when the climate control system is
operated.
Multi-function display (color LCD)
220
-------------------------------------------------------------------------------------------------------------------------------------------------------------
(223,1)
!
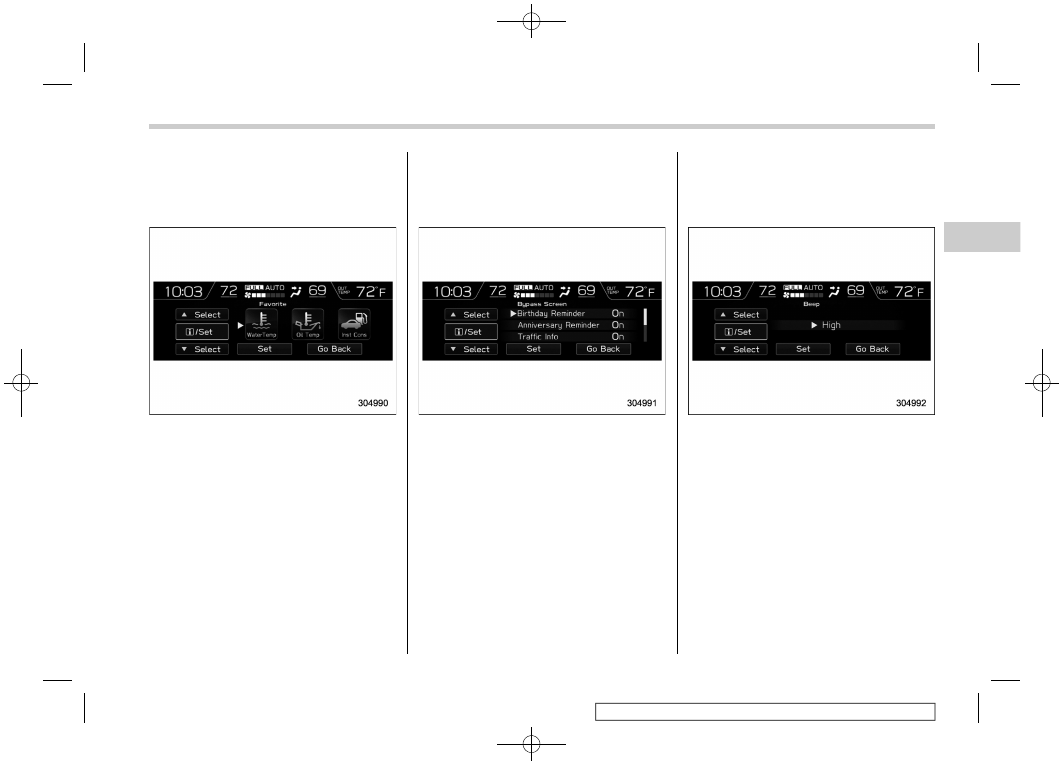
Favorite setting
1. Select the “Favorite” from the 2nd
menu in setting screen. Refer to “Setting
screen” FP212.
2. Set the desired items by using the
control switches. For details about items,
refer to “Favorite screen” FP209.
3. Select “Set” to exit settings. Select “Go
Back” to return to the previous screen
without applying the setting changes.
NOTE
.
You can display a maximum of the 3
items.
.
The same item cannot be selected
for the left, center or right location.
.
Weather information for 3 hours
later or 6 hours later can be displayed.
!
Bypass screen setting
1. Select “Bypass Screen” from the 2nd
menu in the setting screen. Refer to
“Setting screen” FP212.
2. Select “On” or “Off” to turn the display
of items on or off by using the control
switches.
3. Select “Set” to exit settings. Select “Go
Back” to return to the previous screen
without applying the setting changes.
NOTE
Traffic information setting is only dis-
played for the audio unit with SiriusXM
satellite radio.
!
Beep setting
1. Select “Beep” from the 2nd menu in the
setting screen. Refer to “Setting screen”
FP212.
2. Set the beep volume by using the
control switches.
3. Select “Set” to exit settings. Select “Go
Back” to return to the previous screen
without applying the setting changes.
– CONTINUED –
Multi-function display (color LCD)
221
3
Instruments
and
controls
-------------------------------------------------------------------------------------------------------------------------------------------------------------
(224,1)
!
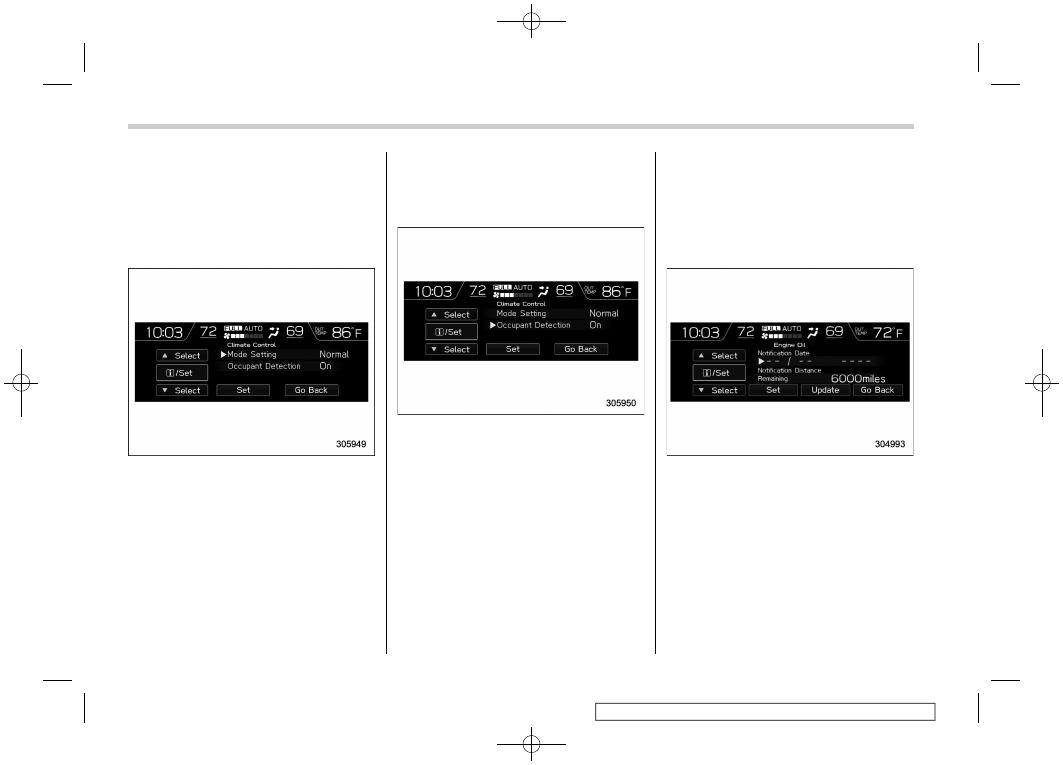
Climate Control settings
You can set the climate control settings.
!
Mode setting
1. Select “Mode Setting” from the 2nd
menu in the setting screen. Refer to
“Setting screen” FP212.
2. Select “Normal”, “Mild”, “Power” or
“ECO” by using the control switches. For
details about “Mode setting”, refer to
“Automatic climate control customization”
FP262.
3. Select “Set” to exit settings. Select “Go
Back” to return to the previous screen
without applying the setting changes.
!
Occupant detection settings
1. Select “Occupant Detection” from the
2nd menu in the setting screen. Refer to
“Setting screen” FP212.
2. Select on or off to turn the occupant
detection on or off by using the control
switches.
3. Select “Set” to exit settings. Select “Go
Back” to return to the previous screen
without applying the setting changes.
!
Maintenance settings
You can set maintenance reminders.
!
Engine oil setting
1. Select “Engine Oil” from the 2nd menu
in the setting screen. Refer to “Setting
screen” FP212.
2. Set the date and distance of the
reminder by using the control switches.
3. Select “Set” to exit settings. Select
“Update” to change the notification dis-
tance to the default value. Select “Go
Back” to return to the previous screen
without applying the setting changes.
Multi-function display (color LCD)
222
-------------------------------------------------------------------------------------------------------------------------------------------------------------
(225,1)
NOTE
.
The reminder will be displayed by
either date or distance in accordance
with the setting.
.
Even when either “Day” or “Dis-
tance” are displayed as “_ _” a pop-up
screen will appear.
.
The reminder will be displayed until
either of the following conditions is
satisfied.
– The period of time passed after
the registered notification date is 15
days or more.
– The total distance driven after the
registered notification distance is
approximately 311 miles (500 km) or
more.
!
Oil filter setting
The setting procedure is the same as
“Engine oil setting” FP222, but select the
“Oil Filter” item in step 1.
!
Tires setting
The setting procedure is the same as
“Engine oil setting” FP222, but select the
“Tires” item in step 1.
!
Maintenance schedule setting
The setting procedure is the same as
“Engine oil setting” FP222, but select the
“Maintenance Schedule” item in step 1.
!
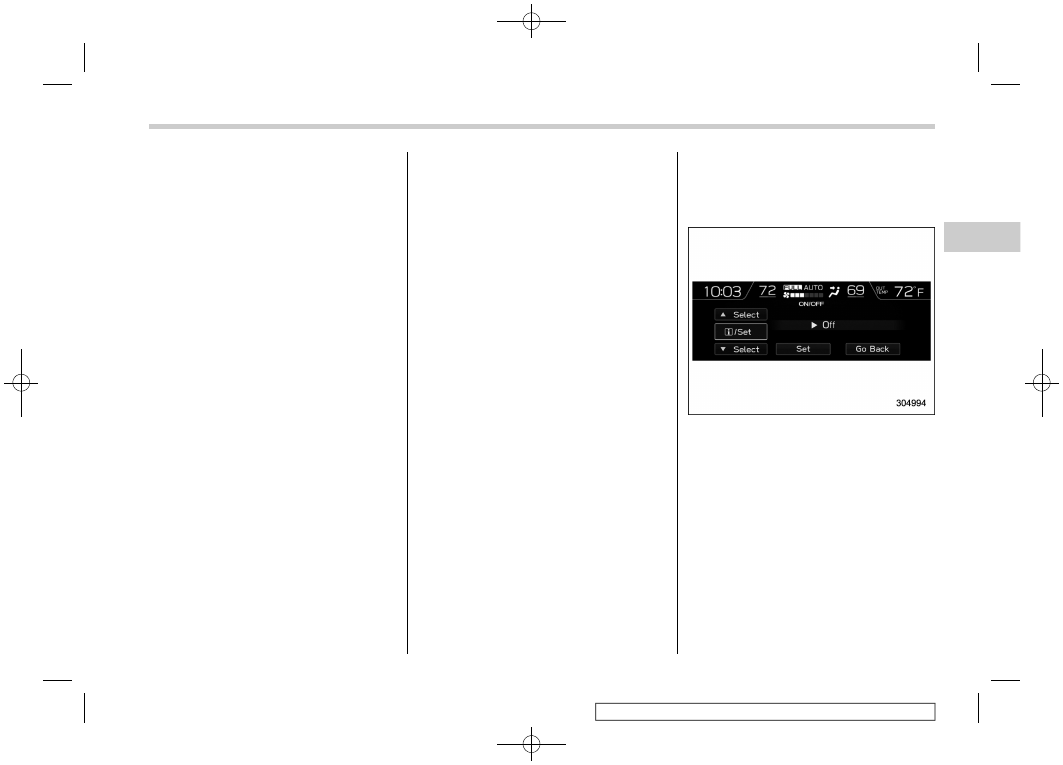
On/Off setting
1. Select “On/Off” from the 2nd menu on
the setting screen. Refer to “Setting
screen” FP212.
2. Select “On” or “Off” to turn the opening
screen on or off by using the control
switches.
3. Select “Set” to exit settings. Select “Go
Back” to return to the previous screen
without applying the setting changes.
– CONTINUED –
Multi-function display (color LCD)
223
3
Instruments
and
controls
-------------------------------------------------------------------------------------------------------------------------------------------------------------

(226,1)
!
Clear setting
1. Select “Clear All Settings” from the 2nd
menu on the setting screen. Refer to
“Setting screen” FP212.
2. Select “Yes” or “No” by using the
control switches.
!
Initialize
You can initialize the items that have been
set to your preference.
1. Select “Initialize” from the 2nd menu on
the setting screen. Refer to “Setting
screen” FP212.
2. Select “Yes” or “No” by using the
control switches.
NOTE
You cannot initialize the items if the
Driver Monitoring System is not oper-
ated.
&
How to get the source code
using the open source
Free/Open Source Software Information
This product contains Free/Open Source
Software (FOSS).
The license information and/or the source
code of such FOSS can be found at the
following URL.
http://www.globaldenso.com/en/open-
source/ivi/subaru/
Multi-function display (color LCD)
224
-------------------------------------------------------------------------------------------------------------------------------------------------------------
(227,1)
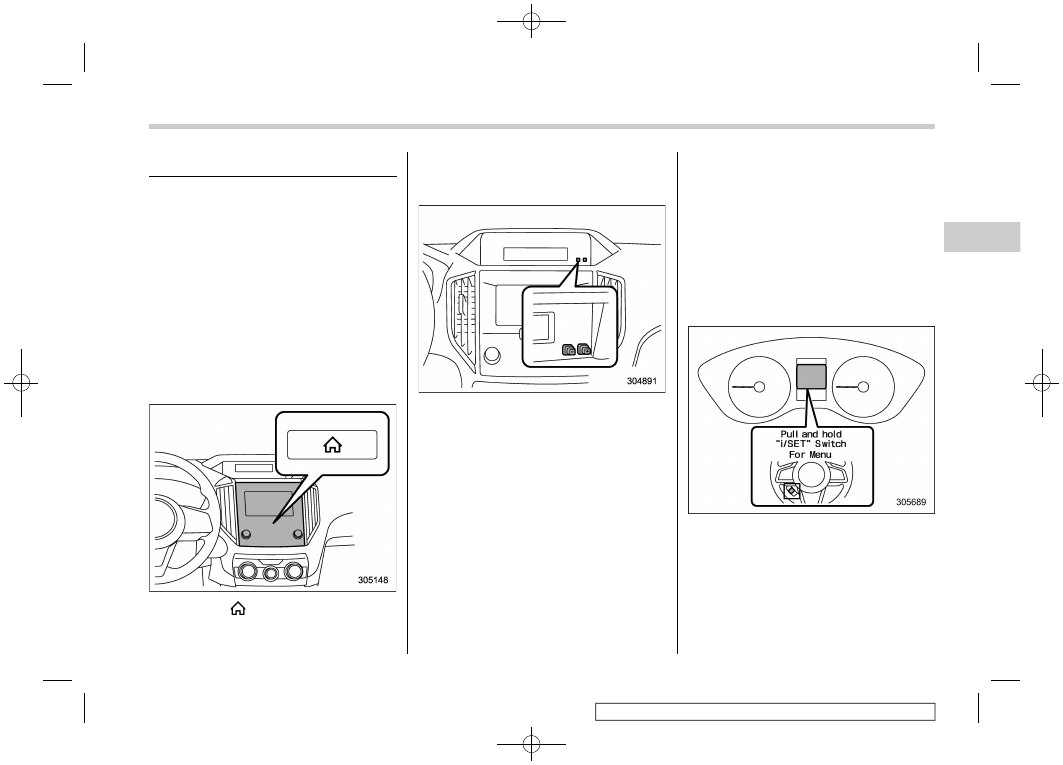
3-10. Clock
For models with a SUBARU genuine
navigation and/or audio system, the clock
can be adjusted using either auto mode or
instruction mode.
.
Auto mode: automatic clock adjustment
.
Instruction mode: instruction clock adjust-
ment
&
Setting the clock instructionly
!
Type A multi-function display (black
and white)
1. Turn the ignition switch to “ON”.
2. Press the
button.
3. Select “Settings”.
4. Select “Vehicle”.
5. Select “Clock adjustment” and then
select “Instruction”.
6. Press the “+” button or the “−” button
beside the clock.
!
Setting 12-hour or 24-hour dis-
play
The clock can be set to 12-hour or 24-hour
display. Perform the following procedure to
switch the display format.
1. Turn the ignition switch in the “LOCK”/
“OFF” position.
2. Press and hold the “−” button located
near the clock display for approximately 5
seconds. The clock display will then start
to flash.
3. While the clock display is flashing,
press and hold the “+” button for approxi-
mately 2 seconds. The clock format will
then change.
4. The clock display will continue to flash
for approximately 3 seconds to indicate
that the clock display has been changed.
!
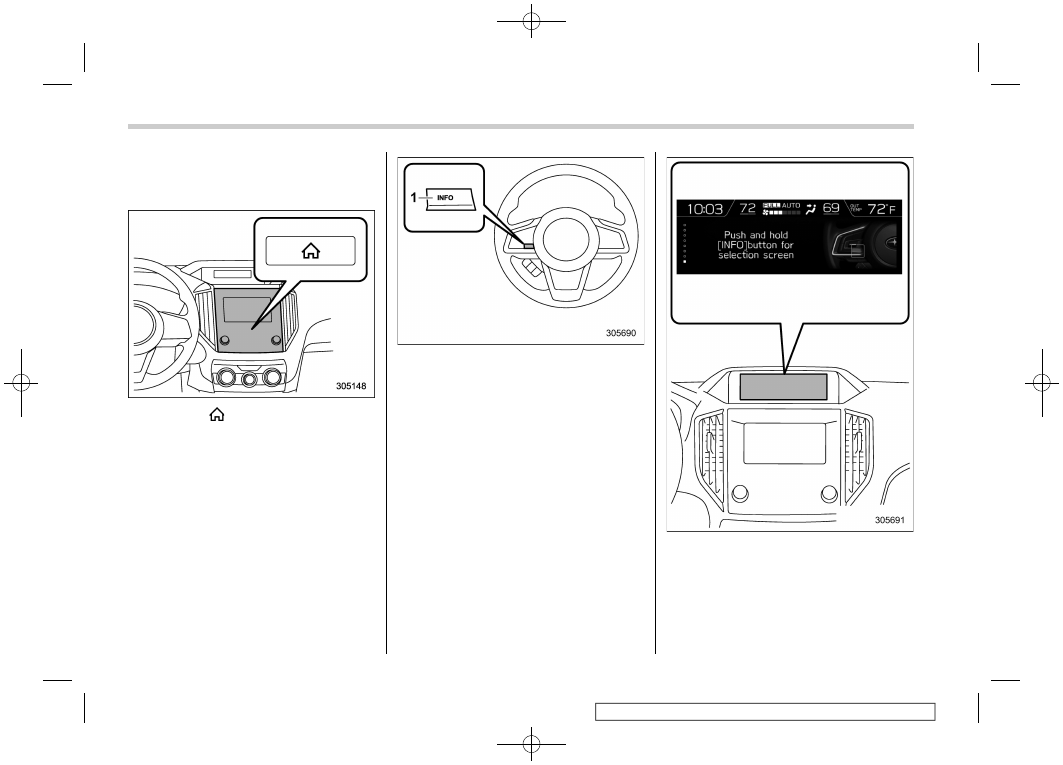
Type B multi-function display (color
LCD)
NOTE
When the combination meter display
(color LCD) is displaying the menu
screen entering screen, the system will
not move to the selection screen even if
the “INFO” button is pressed and held.
Before adjusting the clock, be sure to
change the combination meter display
– CONTINUED –
Clock
225
3
Instruments
and
controls
-------------------------------------------------------------------------------------------------------------------------------------------------------------
(228,1)
(color LCD) to a screen other than the
menu screen entering screen.
1. Turn the ignition switch to “ON”.
2. Press the
button.
3. Select “Settings”.
4. Select “Vehicle”.
5. Select “Clock adjustment” and then
select “Instruction”.
1)
“INFO” button
6. Press the “INFO” button on the steer-
ing wheel to display the guidance screen.
7. While displaying the guidance screen,
press and hold the “INFO” button on the
steering wheel. The screen goes to the
selection screen.
Clock
226
-------------------------------------------------------------------------------------------------------------------------------------------------------------
Нет комментариевНе стесняйтесь поделиться с нами вашим ценным мнением.
Текст