Opel Frontera UBS. Service manual — part 1780
8J–8
EXTERIOR/INTERIOR TRIM
632RW001
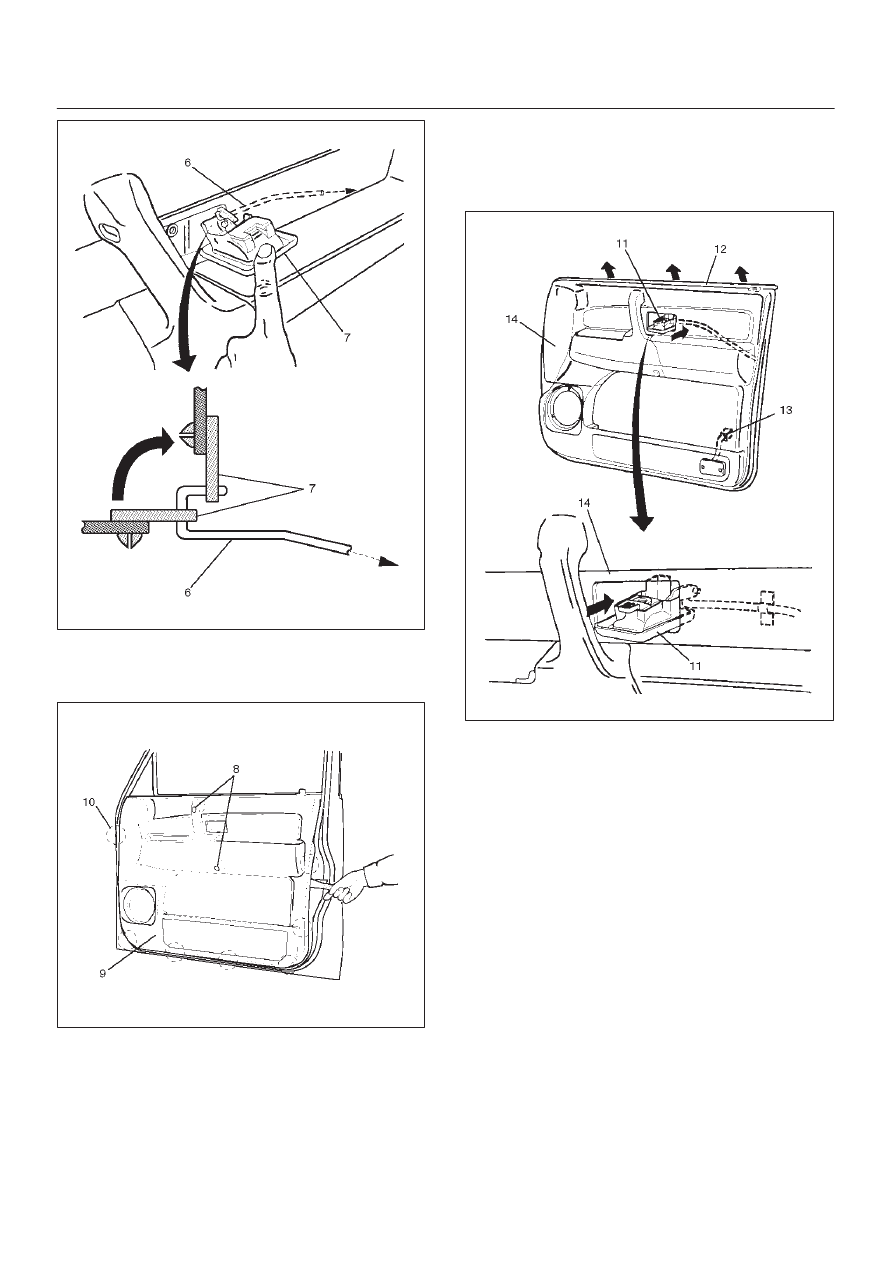
8. Remove the door trim panel(9).
D
Remove two fixing screws(8) in order to take off
seven clips(10) from the door panel.
635RS007
D
Disconnect the courtesy light connector(13) to lift
the door trim panel(14) and unlock the engagement
of the waist seal(12) section. Then, pass the inside
handle(11) through the mounting hole of the trim
panel, and detach the trim panel.
632RS015
9. Remove the inside handle.
EXTERIOR/INTERIOR TRIM
8J–9
Installation
To install, follow the removal steps in the reverse order,
noting the following point.
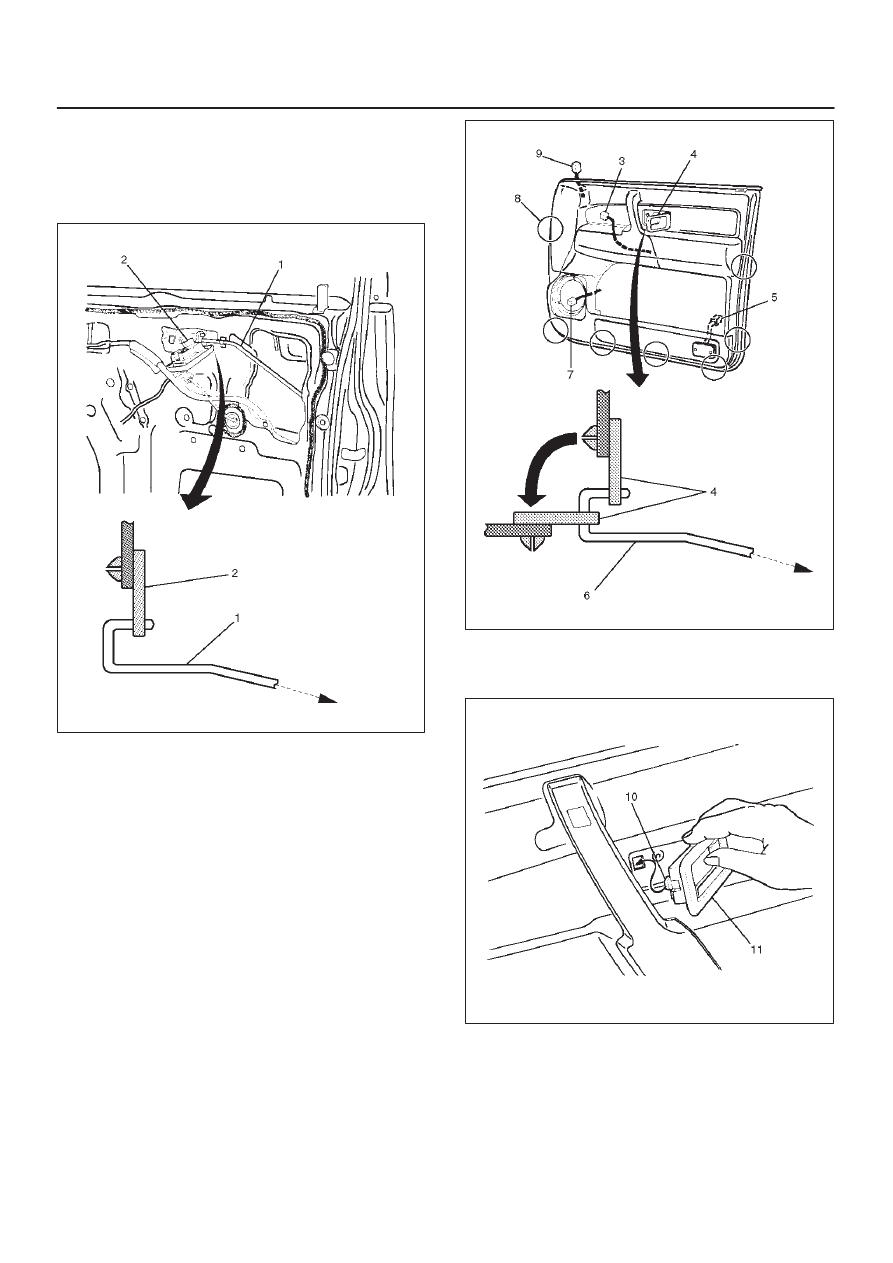
1. When installing the inside handle(2), assemble it
temporarily to the inside handle link(1).
632RS014
2. Pass the inside handle(4) through the mounting hole
of the trim panel and assemble the trim panel.
Engage seven clips(8) into the door panel. Also,
connect the courtesy light connector(5) and leave the
connectors of the speaker(7), tweeter(9) and power
window(3) drawn out to their prescribed positions, so
that they will not be caught.
Then, put the inside handle(4) to the normal position
of the inside handle link(6).
632RW006
3. Fit the claw(10) of the inside handle(11) securely into
the hole of the door panel and fix the inside handle
with the screw.
632RW007
8J–10
EXTERIOR/INTERIOR TRIM
Rear Door Trim Panel
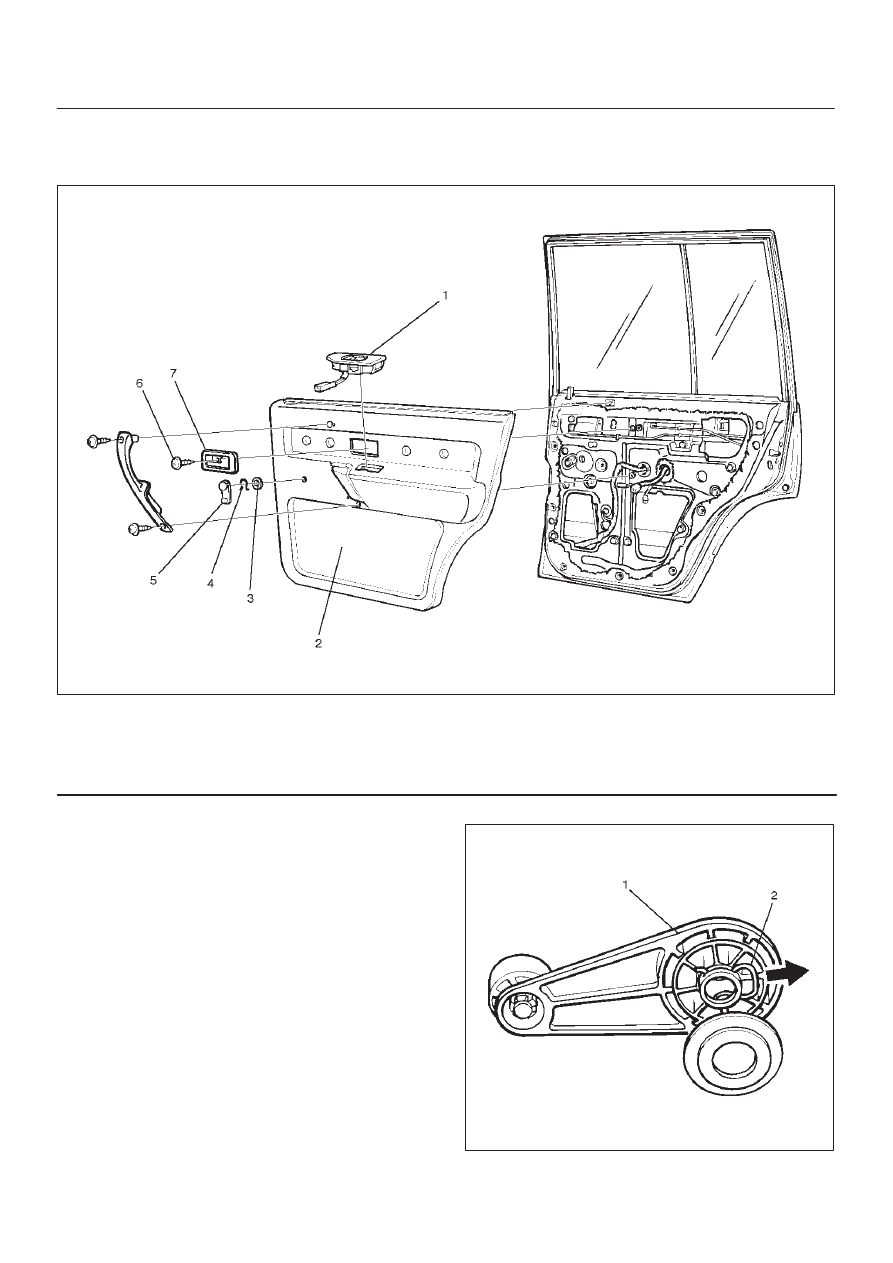
Rear Door Trim Panel and Associated Parts
655RW006
Legend
(1) Power Window Switch
(2) Door Trim Panel
(3) Washer
(4) Clip
(5) Regulator Handle
(6) Inside Handle Fixing Screw
(7) Inside Handle
Removal
1. Disconnect the battery ground cable.
2. Remove the regulator handle(1).
D
Pull the hook(2) out and remove the regulator
handle.
631RW002
EXTERIOR/INTERIOR TRIM
8J–11
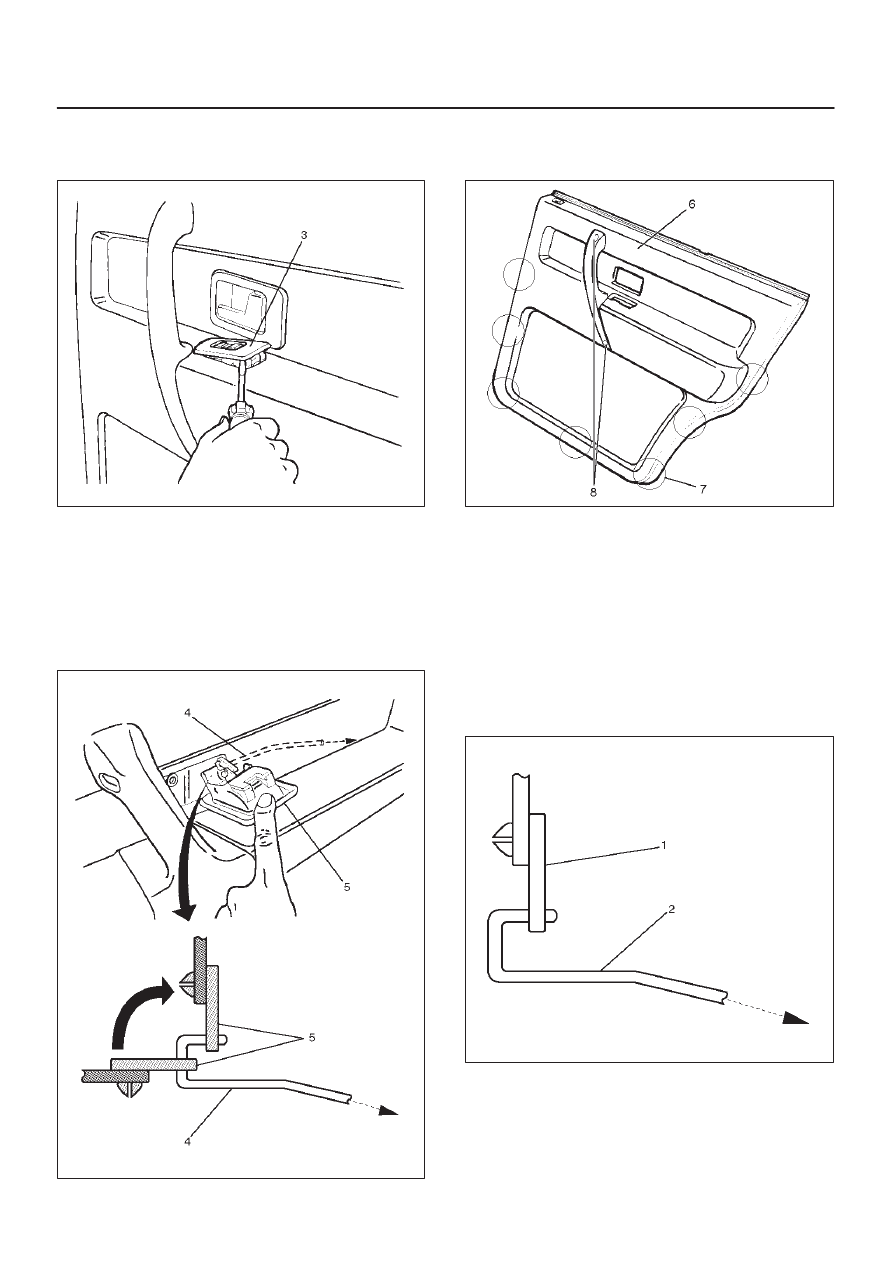
3. Remove the power window switch(3).
D
Pry the power window switch out and disconnect
the switch connector.
825RS084
4. Remove the inside handle fixing screw.
D
Remove the screw that fixes the inside handle(5),
slide the inside handle to the position illustrated,
and leave it there for the moment.
CAUTION: Take care not to impose excessive force
on the inside handle link(4), lest this link be
elongated, which could make it impossible to
operate the door with the inside handle.
632RW002
5. Remove the door trim panel(6).
D
Remove two fixing screws(8) to take off seven
clips(7) from the door panel.
655RW007
D
Lift the trim panel and unlock the engagement of the
waist seal section. Then, pass the inside lever
through the mounting hole of the trim panel, and
detach the trim panel.
6. Remove the inside handle.
Installation
To install, follow the removal steps in the reverse order,
noting the following point.
1. When installing the inside handle(1), assemble
temporarily to the inside handle link(2).
652RS006
Нет комментариевНе стесняйтесь поделиться с нами вашим ценным мнением.
Текст