Opel Frontera UBS. Service manual — part 1474
7A–138
AUTOMATIC TRANSMISSION (AW30-40LE)
248RY00033
248RY00034
248RY00002
248RY00062
Important operations
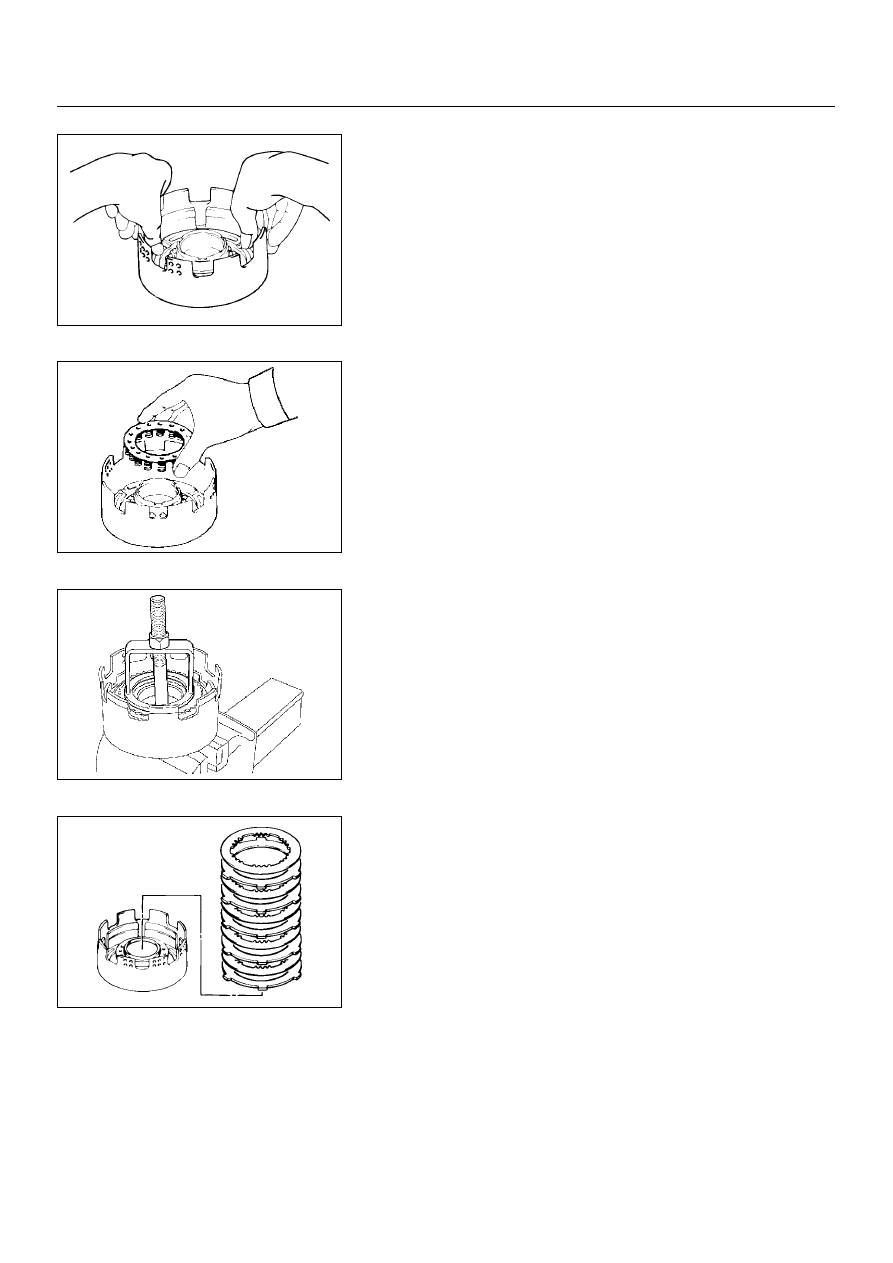
1. O-ring
Coat new O-rings with ATF and install them on the direct
clutch piston.
2. Direct clutch piston
Install direct clutch piston to direct clutch drum.
Being careful not to damage the O-rings, press in the direct
clutch piston into the clutch drum, using both hands.
3. Piston return spring
Install piston return spring.
4. Snap ring
Compress piston return spring and install snap ring in
groove.
Place special tool and a suitable ring on the spring retainer,
and compress the return spring.
Install the snap ring with snap ring pliers. Be sure the end
gap of the snap ring is not aligned with the spring retainer
claw.
Spring compressor: 5-8840-0254-0 (J-25048)
5. Disc and plate
Install plates and discs.
Install in order: P– D– P– D– P– D– P– D– P– D
P: Plate, D: Disc
AUTOMATIC TRANSMISSION (AW30-40LE)
7A–139
248RY00035
248RY00036
248RY00029
248RY00061
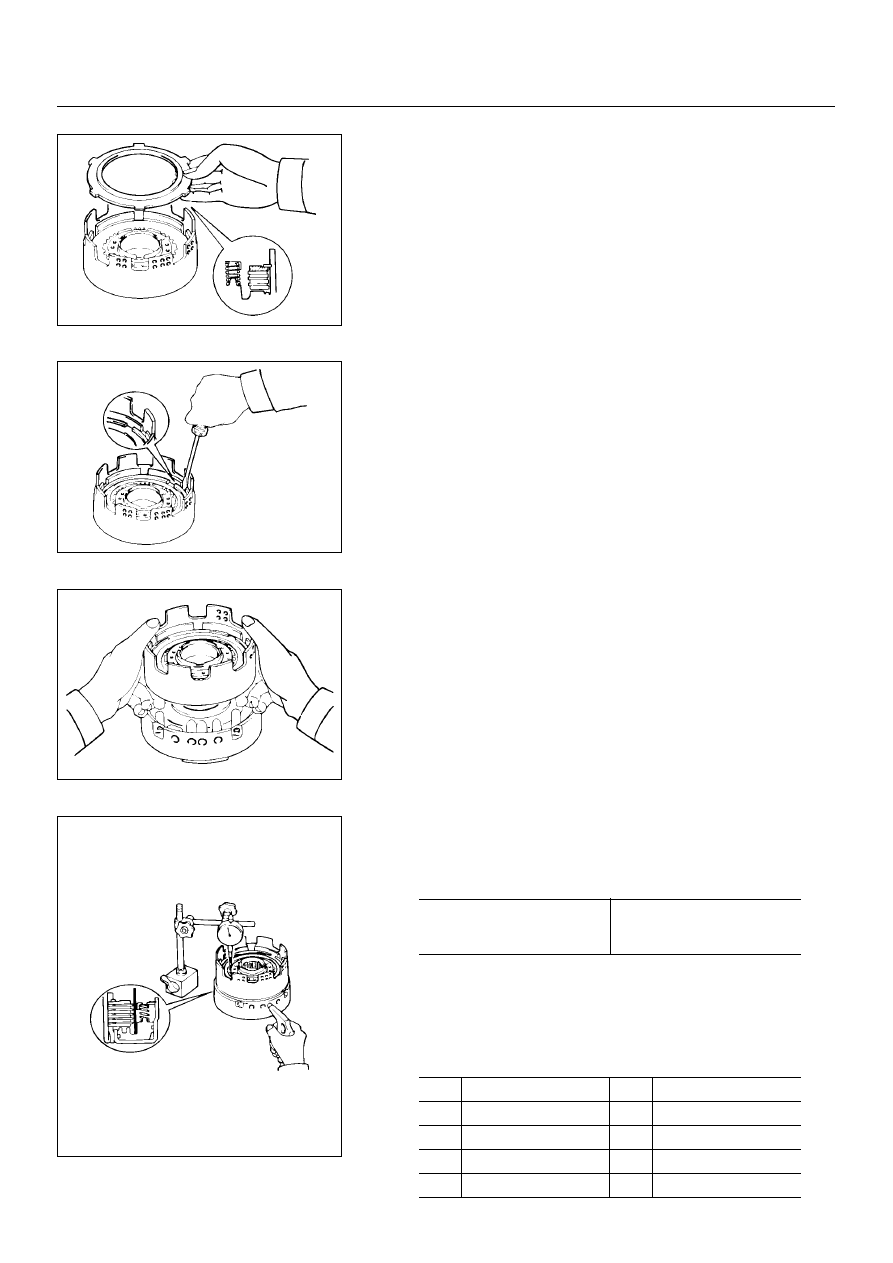
6. Flange
Install the flange, with the flat side facing downward.
7. Snap ring
Install the snap ring with a screwdriver. Be sure the end
gap of the snap ring is not aligned with the cutout portion of
the direct clutch drum.
Check piston stroke of direct clutch (C-2)
Place the direct clutch assembly onto the OD support
assembly.
Using a dial indicator, measure the direct clutch piston
stroke by applying and releasing compressed air (4– 8 kg/
cm
2
, 57– 114 psi or 392– 785 kPa) as shown.
If the piston stroke is not within specification, replace the
discs and recheck the piston stroke.
If the piston stroke is non standard, select another flange.
There are eight flanges.
mm (in.)
Piston stroke
1.6– 1.9
(0.0630– 0.0748)
mm (in.)
No.
Flange thickness
No.
Flange thickness
33
3.3 (0.130)
37
3.7 (0.146)
34
3.4 (0.134)
38
3.8 (0.150)
35
3.5 (0.138)
39
3.9 (0.154)
36
3.6 (0.142)
40
4.0 (0.158)
7A–140
AUTOMATIC TRANSMISSION (AW30-40LE)
248RY00037
248RY00038
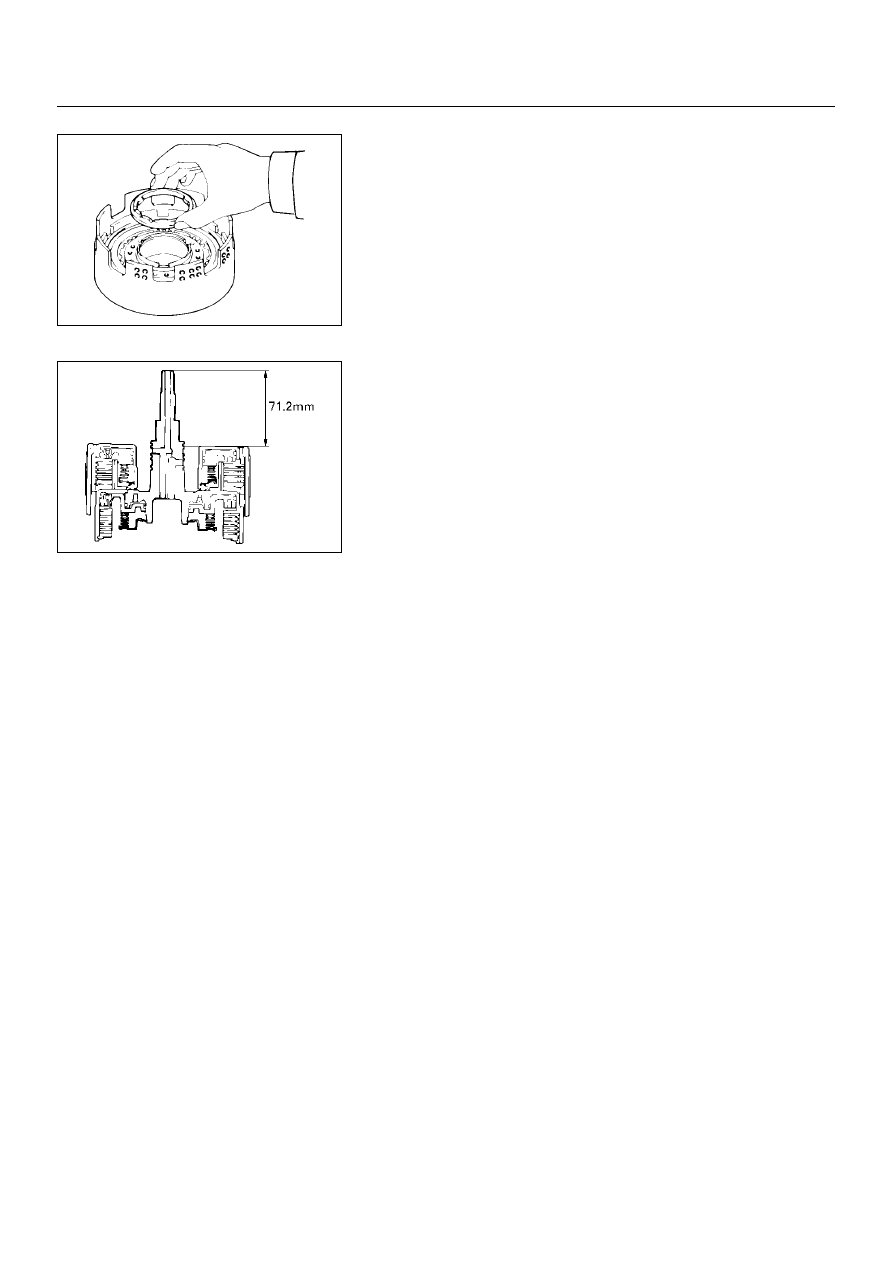
8. Clutch drum thrust washer (plastic)
Coat the thrust washer with petroleum jelly and install it onto
the direct clutch.
NOTE:
Make sure that the lugs fit into the cutout portions on the
direct clutch.
Install direct clutch assembly
Align the flukes of discs in the direct clutch.
Install the direct clutch assembly onto the forward clutch
assembly.
Check that the distance from the direct clutch end to the
forward clutch end is 71.2 mm (2.803 in.).
AUTOMATIC TRANSMISSION (AW30-40LE)
7A–141
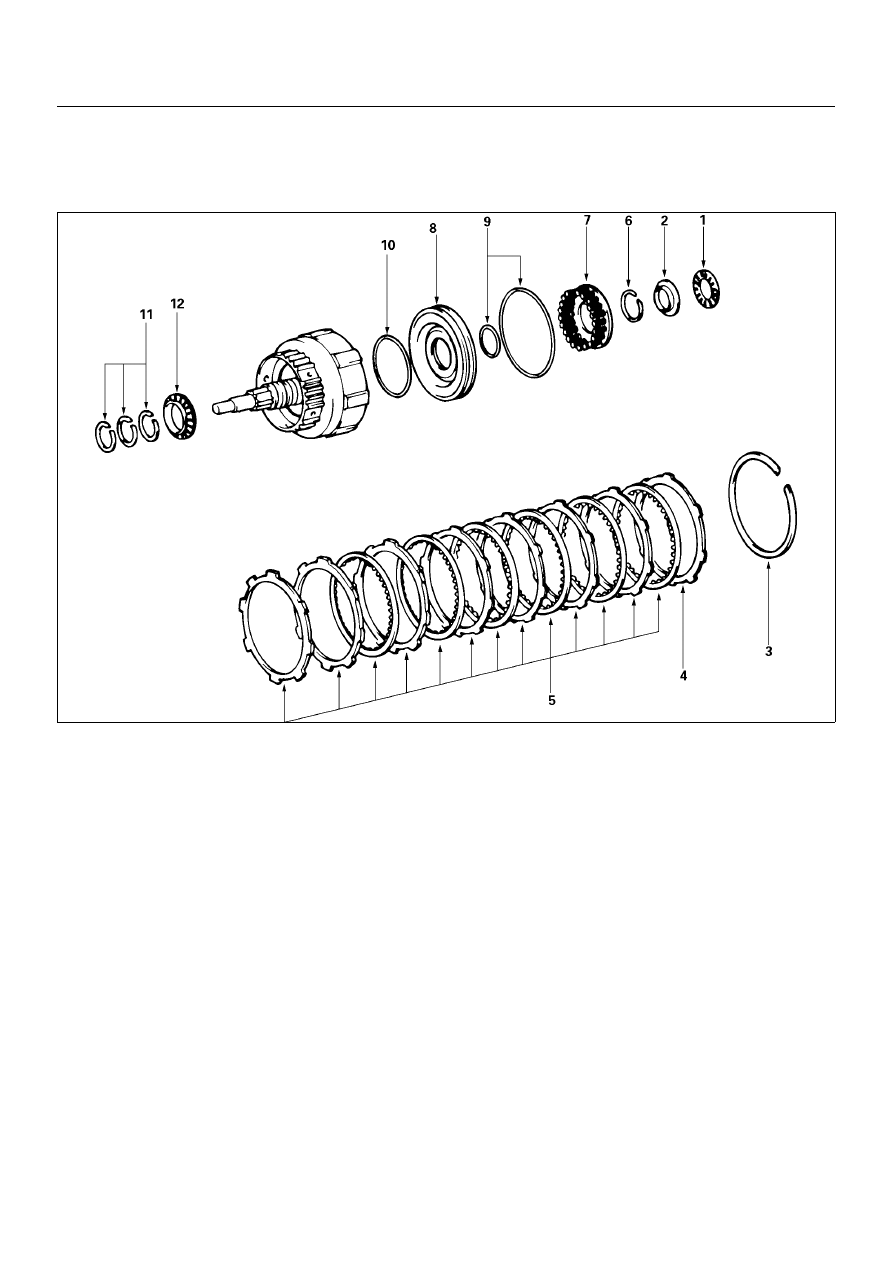
FORWARD CLUTCH ASSEMBLY (C-1)
DISASSEMBLY
248RY00063
Disassembly steps
▲
1. Thrust bearing
2. Race
▲
3. Snap ring
4. Flange
5. Disc and plate
▲
6. Snap ring
7. Piston return spring
▲
8. Piston
9. O-ring
10. O-ring
11. Oil seal ring
12. Thrust bearing
Нет комментариевНе стесняйтесь поделиться с нами вашим ценным мнением.
Текст