Opel Frontera UBS. Service manual — part 232
5D – 6 PARKING BRAKES
GENERAL DESCRIPTION
Pulling up the parking brake lever by hand will set the parking brake. Once pulled up, the lever is held by
means of a ratchet type lock until it is released. The position of the lever is transmitted through
cable/lever systems to the rear wheels. These parts are designed to obtain sufficient braking force when
parking on slopes. When the parking brake is set, or when the ignition SW is in the “ON” position, the
brake warning light illuminates. The rear wheel parking brake is a duo-servo brake (mechanical inside
expansion type) built-in to rear disc brake. Parking brake adjustment is made through the adjusting hole
(bored through back plate). Parking brake lever stroke should be adjusted to 6 or 7 notches.
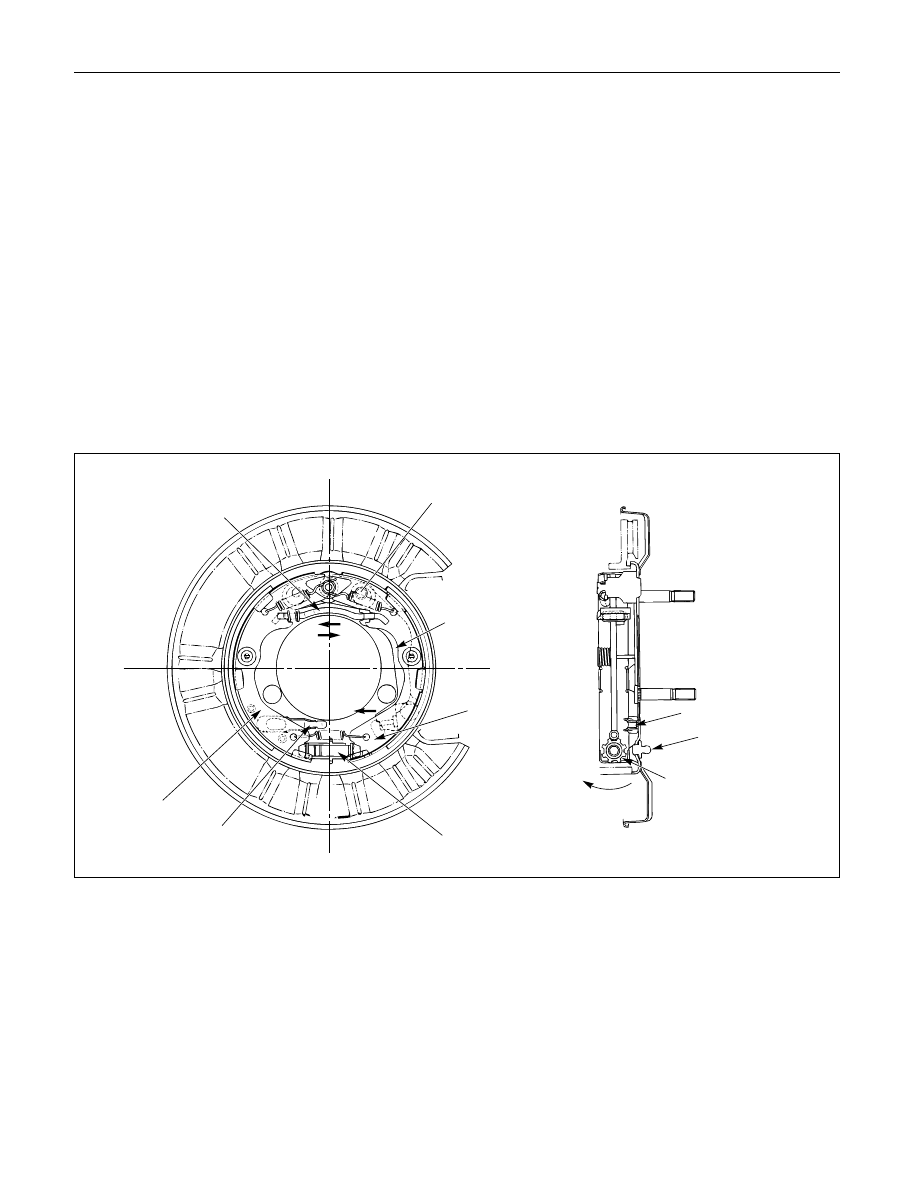
OPERATION
When pulled in the direction “A”, the parking lever presses the secondary shoe against the brake drum
using the lever/shoe joint “B” as a fulcrum and pushes the strut in the direction “C”. The strut, in turn,
presses the primary shoe against the brake drum. Counter force “D” to the primary shoe is transmitted
again to the secondary shoe through the fulcrum “B”. The secondary shoe contacts the drum, thereby
producing braking effect. Clearance which may result from worn parking brake shoe lining can be
adjusted by turning the adjusting screw
Parking lever
Strut
Primary shoe
Parking cable guide
Adjusting screw notch
Secondary shoe
D
C
A
Fulcrum B
Parking brake cable guide
Adjusting hole plug
Adjusting screw notch
Shoe expanding
direction
PARKING BRAKES 5D – 7
Adjusting nut
Equalizer
ON-VEHICLE SERVICE
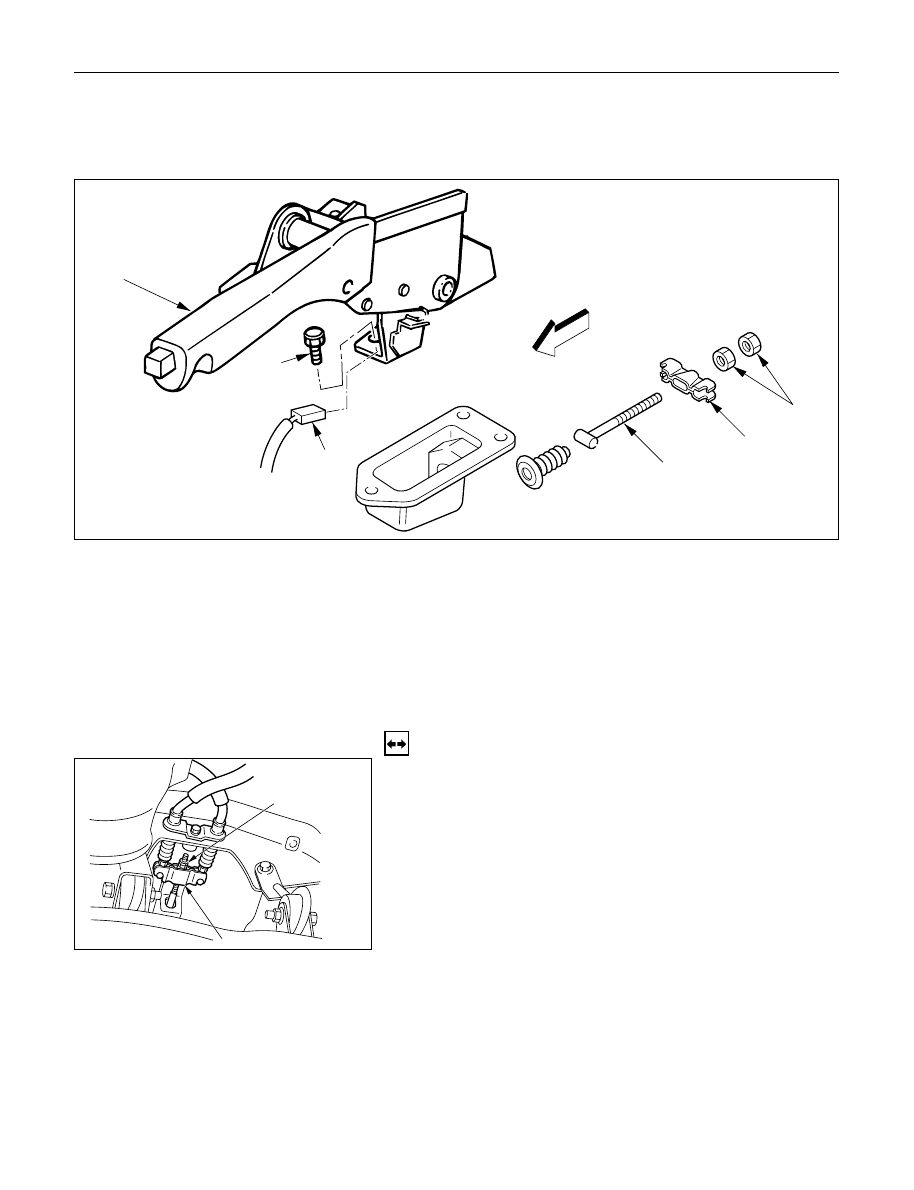
PARKING BRAKE LEVER REPLACEMENT
3
5
1
2
4
6
Removal Steps
1.
Ajusting nut
2.
Equalizer
3.
Bolt
4.
Switch connector
5.
Parking brake lever
6.
Parking brake front cable
Installation Steps
To install, follow the removal steps in the
reverse order.
REMOVAL
1. Ajusting Nut
2. Equalizer
3. Bolt
Remove the center console as described in Body
and Accessories section.
Then remove the fixing bolt.
4. Switch Connector
5. Parking Brake Lever
6. Parking Brake Front Cable
331RW007
331RW008
5D – 8 PARKING BRAKES
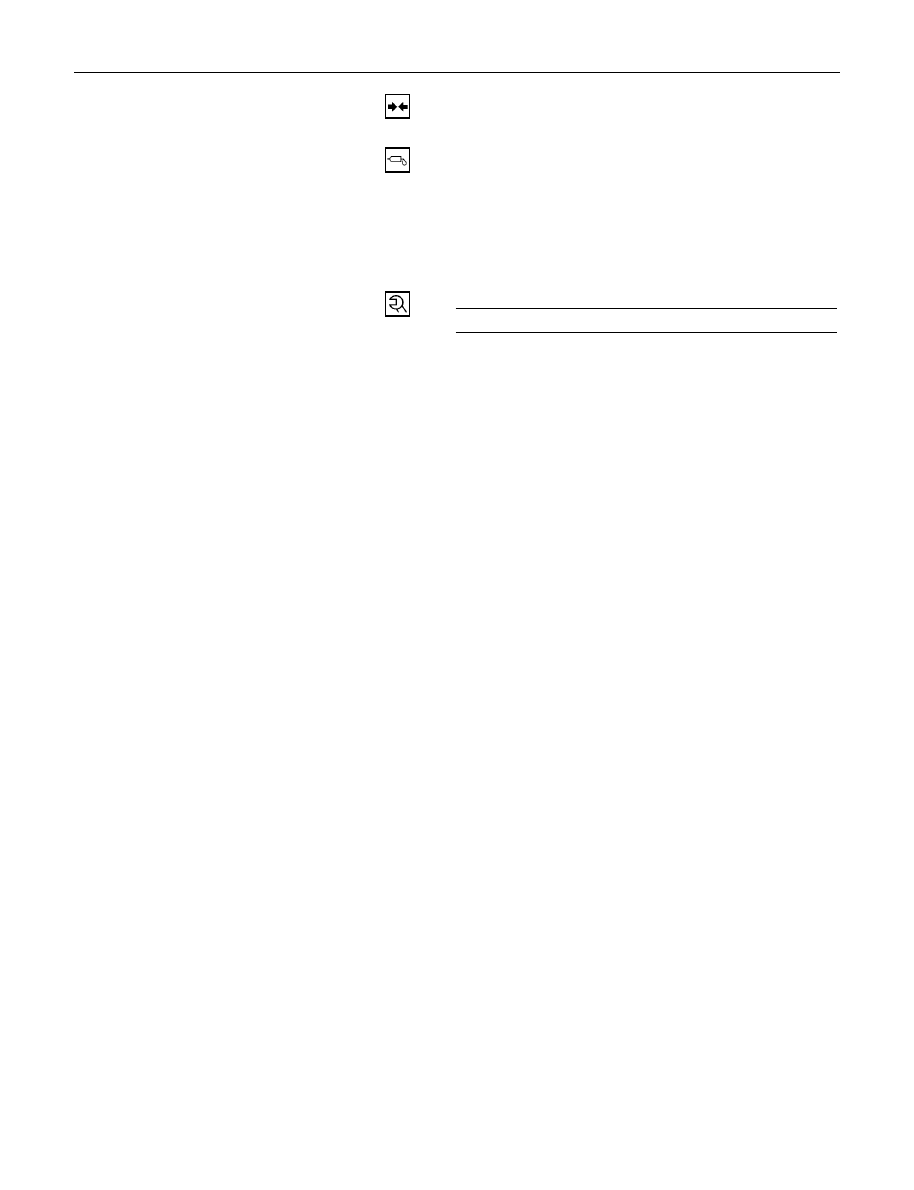
INSTALLATION
6. Parking Brake Front Cable
5. Parking Brake Lever
•
Apply grease (BESCO L-2 or equivalent) to front
cable contact point.
4. Switch Connector
3. Bolt
•
Tighten the parking brake lever fixing bolt to the
specified torque.
Bolt Torque
N·m (kg·m / lb·ft)
15 (1.5 / 11)
•
Install the center console.
2. Equalizer
1. Adjusting Nut
PARKING BRAKES 5D – 9
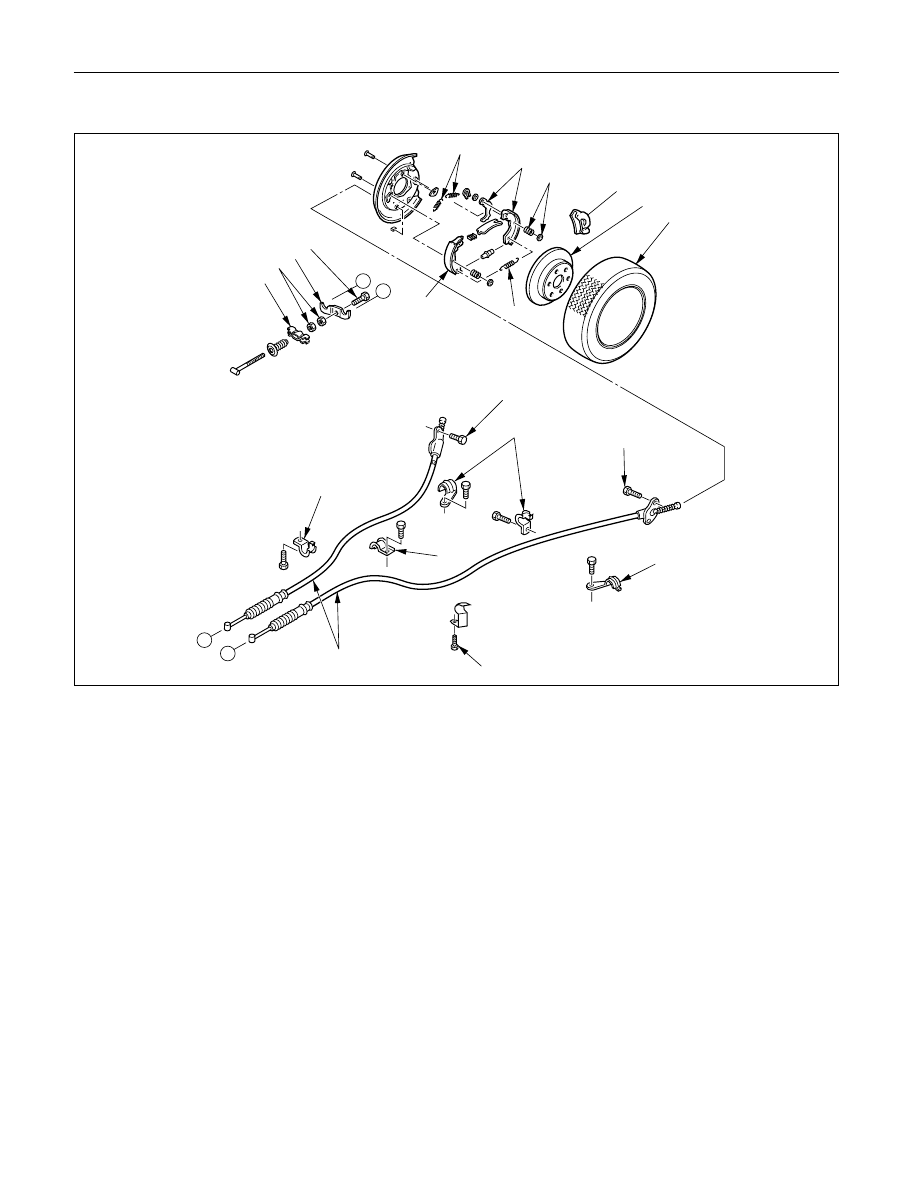
PARKING BRAKE CABLE
5
7
4
2
3
1
6
7
12
15
13
14
A
B
10
8
9
10
11
16
9
8
A
B
Removal Steps
1.
Rear wheels
2.
Caliper assembly
3.
Rotor (Drum)
4.
Holding spring
5.
Return spring; upper
6.
Return spring; lower
7.
Shoe assembly
8.
Cable fixing bolt
9.
Clip
10. Clip
11. Clip
12. Adjust nut
13. Equalizer
14. Bolt
15. Retaining plate
16. Parking brake cable
Installation Steps
To install, follow the removal steps in the
reverse order.
331RW009
Нет комментариевНе стесняйтесь поделиться с нами вашим ценным мнением.
Текст