Opel Frontera UBS. Service manual — part 187
4D2–4
TRANSFER CASE (TOD)
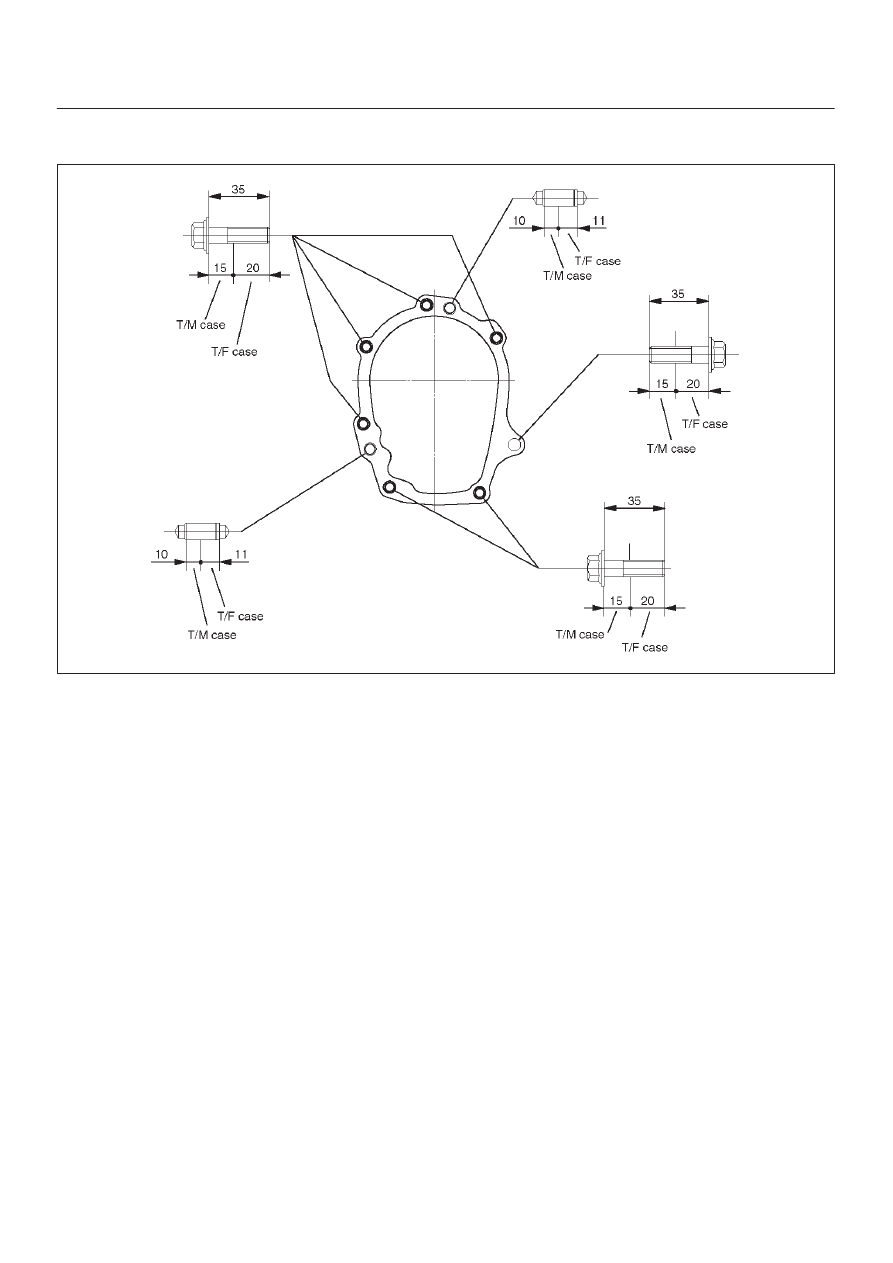
3. Tighten the transfer case bolts (see the figure below).
Torque : 46 N·m (4.7 kg·m/34 lb ft)
261RW004–1
4. Tighten the propeller shaft bolts.
Torque : 63 N·m (6.4 kg·m/46 lb ft)

4D2–5
TRANSFER CASE (TOD)
Transfer Rear Oil Seal
Transfer Rear Oil Seal and Associated Parts
261RW005
Legend
(1) Oil Seal
(2) End Nut and Rear Companion Flange
Removal
1. Remove the rear propeller shaft from the transfer
case.
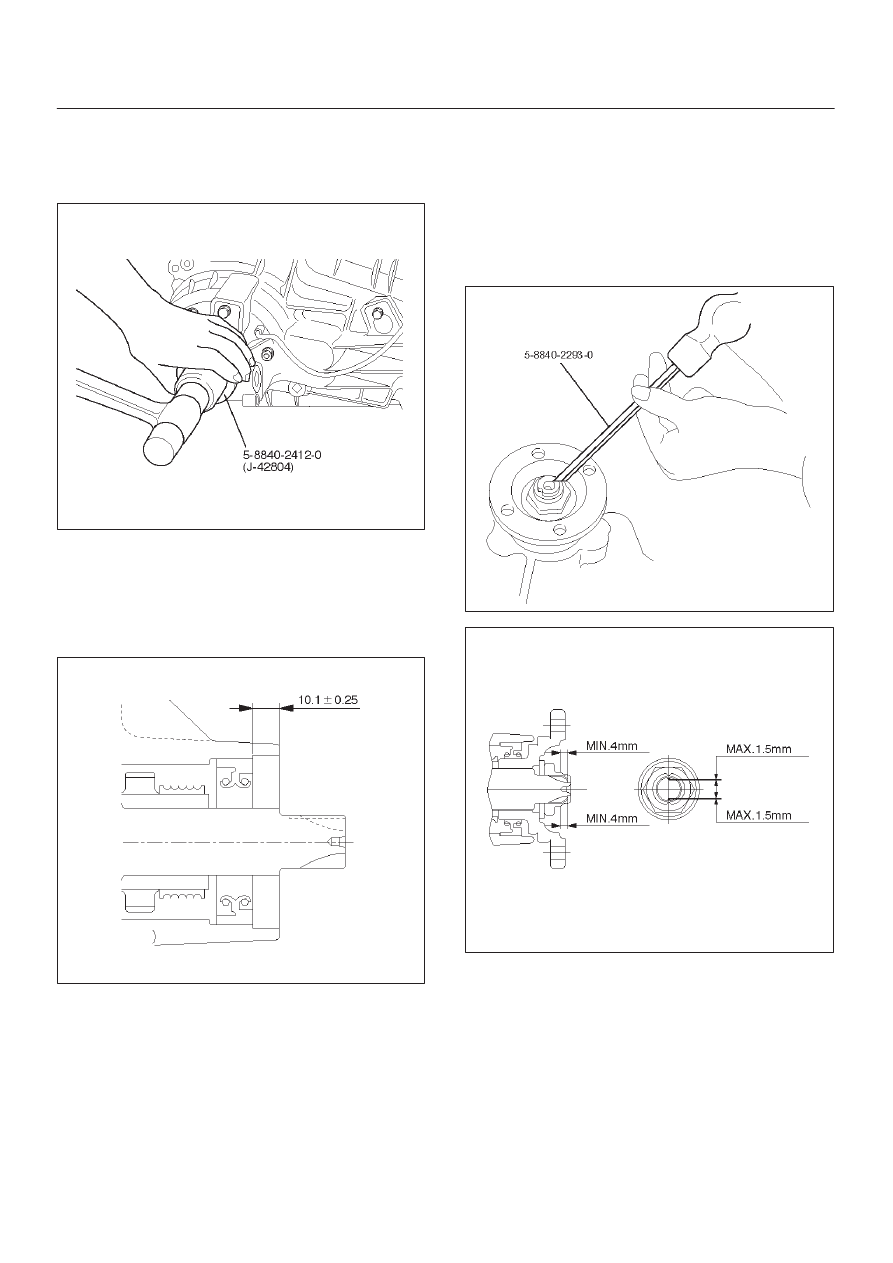
2. Using the flange holder 5-8840-0133-0 (J-8614-11),
remove the end nut.
3. Using the universal puller, remove the rear
companion flange, washer and O-ring.
4. Remove the oil seal from the transfer rear case.
Installation
1. Apply engine oil to the oil seal outer surfaces. Fill the
oil seal lip with grease (Besco L2).
261RW006
Legend
(1) Inside
(2) Outside
4D2–6
TRANSFER CASE (TOD)
2. Using the oil seal installer 5-8840-2412-0 (J-42804),
install the oil seal.
NOTE: When installing the oil seal, pay attention to the
direction.
261RW051
Rear Output Shaft Oil Seal
Distance between the transfer case end and oil seal.
NOTE: When installing the oil seal to the specified
dimension, be careful not to damage it.
Distance : 9.85 — 10.35mm (0.39 — 0.41 in)
A04RW004
3. Mount the rear companion flange, O-ring , washer,
and nut to the transfer case in this order.
4. Using the flange holder 5-8840-0133-0 (J-8614-11),
install a new end nut.
Torque : 167 N·m (17 kg·m /123 lb ft)
5. Using the punch 5-8840-2293-0 (J-39209), stake the
end nut at two spots.
NOTE: Check the staked end nut is free from cracks.
266RW028
260RW007
6. Install the rear propeller shaft to the transfer case and
tighten to the specified torque.
Torque : 63 N·m (6.4 kg·m /46 lb ft)
4D2–7
TRANSFER CASE (TOD)
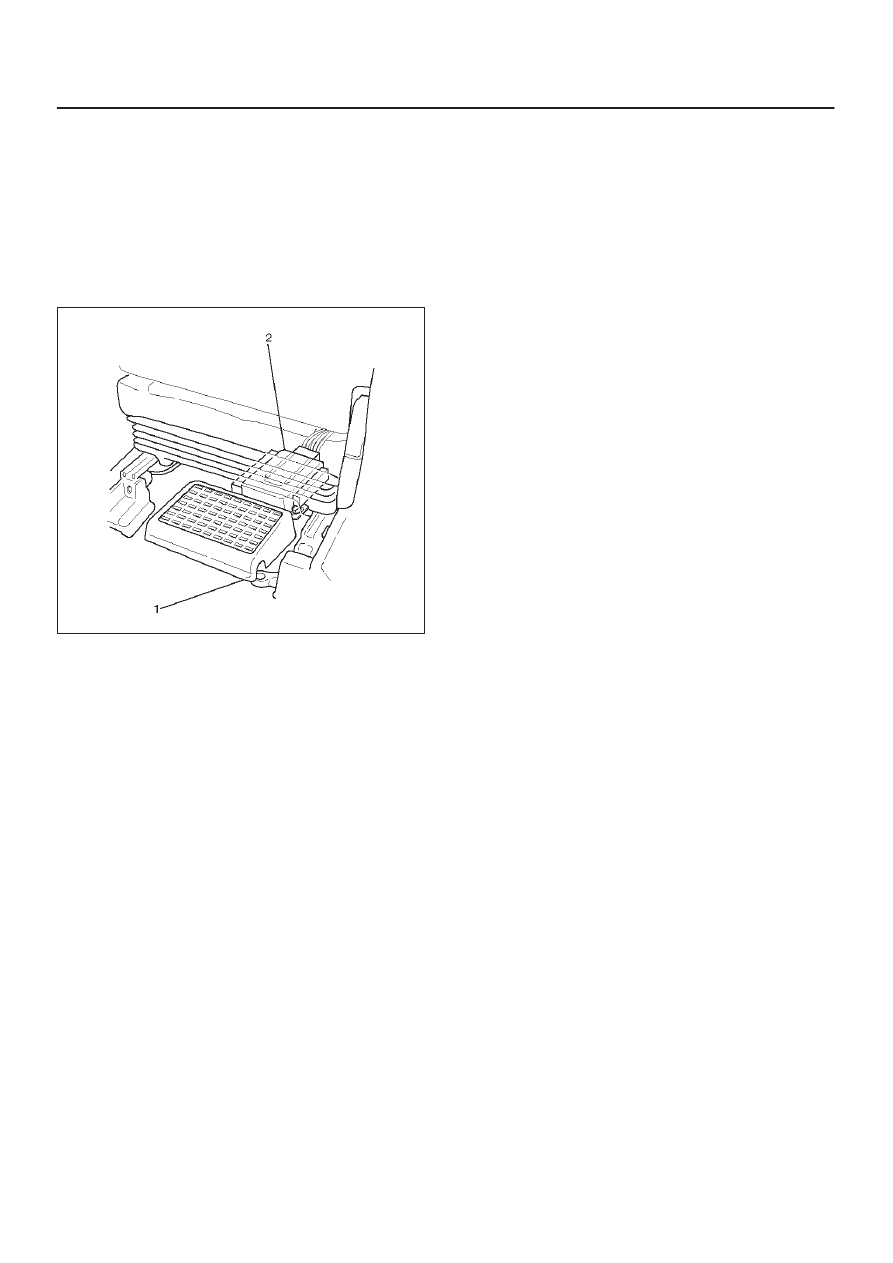
TOD ECU
Removal
1. Disconnect the ground cable.
2. Move the right-hand seat forward and remove the
second seat foot rest (1).
3. Disconnect the connector from the ECU (2).
4. Remove the bolts and detach the ECU (2) from the
bracket.
F07RW021
Installation
1. Perform the removal step in reverse order.
Нет комментариевНе стесняйтесь поделиться с нами вашим ценным мнением.
Текст